Repotting an orchid is a bit more challenging than dealing with other plants since more steps are involved. Read our article to learn how to move an orchid plant to a new container successfully.
Orchids are particularly sensitive to bacteria and fungi due to their delicate roots, which makes their repotting difficult. The trick is to be gentle so as not to damage the roots or leaves. This guide teaches you the supplies and step-by-step instructions for repotting an orchid plant the right way. It also describes the common signs that repotting is necessary, tips for managing transplant shock, and more useful info.
Why should I repot an orchid plant?
Here are common reasons and signs that an orchid plant needs a new pot:
- The orchid plant is store-bought: Orchids are typically stored in containers filled with sphagnum moss in shops. Sphagnum moss absorbs and retains water, making the plant susceptible to root rot. So it’s best to repot new orchids you bought from the store or received as a gift as soon as they bloom.
- Overgrown orchid plant: Your orchid will continue to grow throughout its life when tended to properly. So, if you notice it started growing over the edge of the pot, it’s time to relocate it to a bigger container.
- Overgrown roots: Roots continue growing throughout the orchid plant’s life. As they take up more space in the pot, the roots will eventually push out the orchid above the pot’s rim. An orchid popping out of its container must be moved to a new home.
- Compacted potting mix: As the orchid’s roots grow, they eventually compact the soil inside the pot, suffocating the plant. Check the soil and, if its consistency resembles that of coffee grounds, it’s time to repot your orchid plant.
- Root rot: A side effect of the compacted potting mix is the disappearance of air pockets, resulting in poor ventilation and encouraging root rot.
- Depleted soil: The orchid plant eventually uses up the potting mix’s entire nutrients. Even if the plant doesn’t need a new pot, you must replenish its soil every 1-2 years.
- Salt-like mineral deposits: Depleted or improperly fertilized soil gains white salt-like mineral deposits that are toxic to your orchid. To fix this problem, you must change the soil and avoid overfertilization.
Supplies for repotting an orchid plant
- A new pot 1-2 in (2-5 cm) bigger than the current one. It should have a drainage hole.
- Porous material, such as gravel, stones, or coarse sand, to improve drainage.
- Wire mesh to line the bottom of the pot and prevent the soil and porous material from seeping out.
- Fresh potting mix for orchids or soil alternatives like coconut fiber, cocoa husks, or wood charcoal.
- A large bucket or bowl to prepare the potting mix.
- Boiling-hot water to prepare the potting mix.
- Garden shears to remove any sick, damaged, or rotten roots. They are also handy for pruning.
- Gardening gloves to keep your hands clean while manipulating the orchid’s rootball.
- A trowel or a knife (optional) to help dislodge a root-bound orchid from its old pot.
- A sterilizing solution, such as bleach and alcohol-based solutions, to clean the tools and any old, reusable pots.
How do I repot an orchid plant?
Follow these step-by-step instructions for successfully repotting an orchid plant:
- Check for repotting signs: Only repot an orchid that shows signs it needs a new home or new potting mix since repotting affects that plant’s growth cycle.
- Choose the right time: The best time to repot an orchid is after its flowers have bloomed and before new growth starts. Compared to other houseplants, seasons don’t influence the orchid’s repotting schedule.
- Sterilize all tools: Since orchids are sensitive to bacteria and diseases, you must sterilize the tools and any old pots you are reusing. Soak everything in a water and bleach solution.
- Soak the orchid: The roots of dried orchid roots snap off easily. So it’s best to soak the whole plant, including the pot, in warm water for about 5 minutes. Soaking makes the roots more malleable and helps loosen them up.
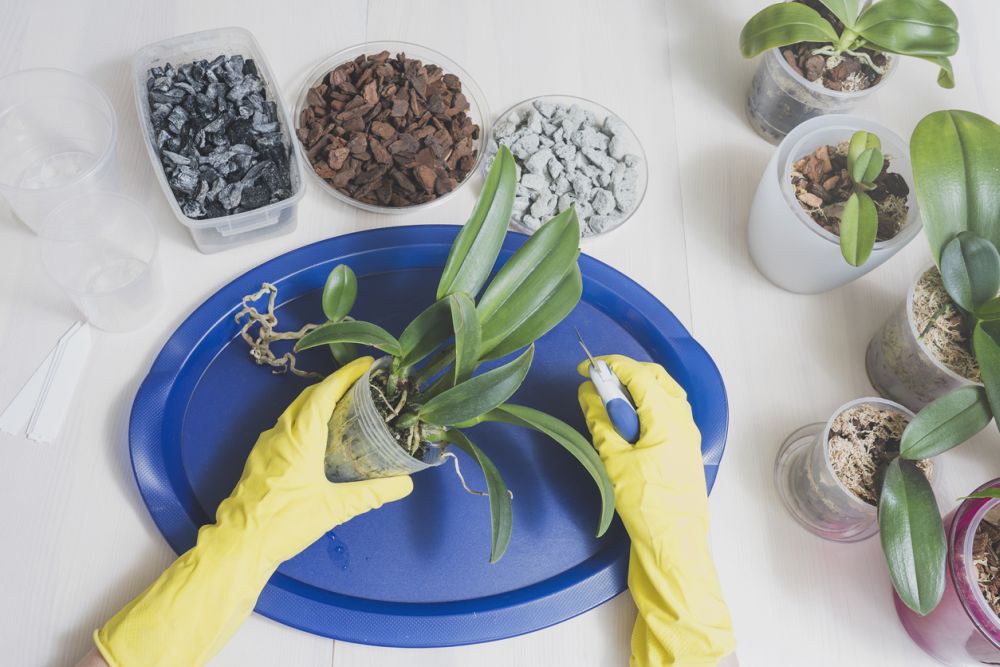
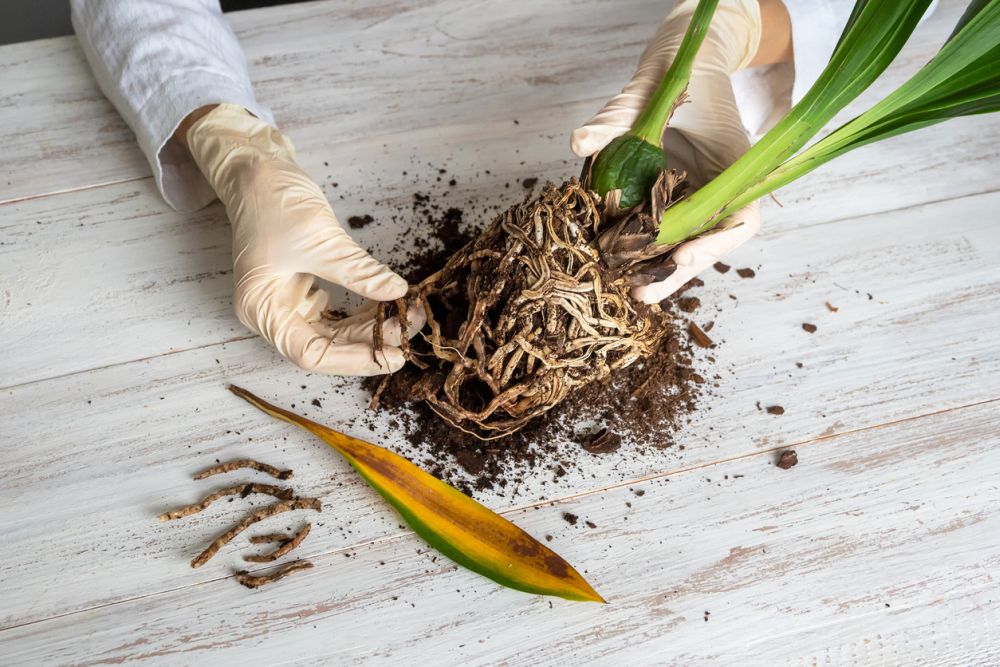
- Remove the orchid from its current pot: Use your fingers to gently loosen each root to easily remove the orchid from its pot. If it won’t budge, run a sterilized trowel or a knife along the pot’s inside.
- Soak the roots: An over-dry or brittle rootball should be soaked in room-temperature water for a few minutes to help soften it up.
- Cut the roots: Remove any black, damaged, or soggy roots with sterilized garden shears. Avoid cutting healthy white roots.
- Rinse the rootball: Hold the rootball under a stream of room-temperature water to gently remove any clinging soil.
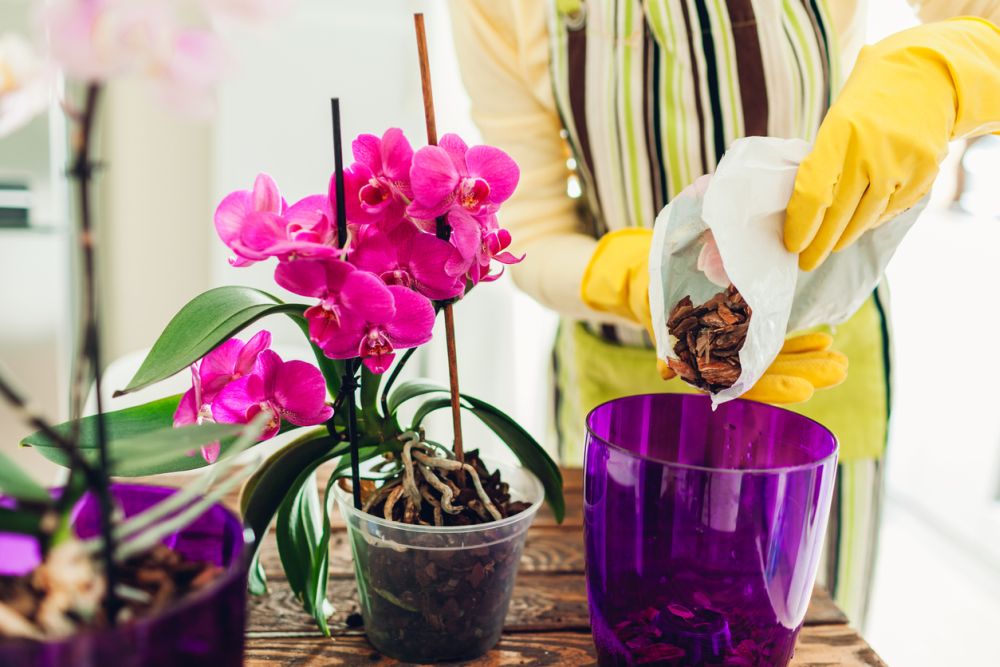
- Prepare the new soil mix: Place the potting mix inside a bucket or a large bowl and cover it with boiling water. Let the mixture cool down to room temperature and drain it.
- Prepare the new pot: Lay the wire mesh at the bottom of the new pot and cover it with a layer of porous material. Next, fill the pot with a third of the soil mix; the orchid’s new growth should be at the same level as the pot’s rim.
- Add the orchid to the new pot: Keep the plant vertically and fill the empty spaces with the remaining potting mix. Use your fingers to gently press the mix against the roots and fill empty spaces. Finally, stake the orchid so that it stands upright on its own.
Tips for managing orchid plant transplant shock
Compared to other houseplants, orchids don’t normally go through transplant shock. So the plants don’t need special care after repotting. If you notice signs of transplant shock, such as yellowing, soft, or falling leaves, here is what you can do:
- Avoid watering it right away: Wait for about 1-2 weeks before watering your orchid plant to force its root system to grow inside its new pot.
- Mist your orchid plant: To avoid complete dehydration, constantly mist the orchid plant until watering it.
- Avoid too much light: Orchids do best in partial shade, so avoid placing them in too much light, whether it’s direct or indirect sunlight.
Other than these tips, it’s best to care for your orchid plants as normal.
FAQs
Discover more helpful information about repotting orchid plants:
Do orchids need bigger pots as they grow?
Yes, orchids need bigger pots to continue growing. It’s best to use a pot slightly larger than the current one. Oversized pots will force the plant to focus on expanding the root system instead of blooms.
Should orchid roots be exposed?
Yes, the aerial roots that grow upward should be exposed. Avoid pruning or covering them with soil.
Do you trim orchid roots when repotting?
Yes, you must trim sick, damaged, rotten, or dead roots while repotting orchid plants, but not the healthy ones.
Why is my orchid dying after repotting?
Root rot is the leading cause of a dying orchid plant after repotting. Root rot may be caused by poor soil, overly compacted soil, a lack of drainage holes, or not draining the potting mix properly before repotting the plant.
Closing thoughts
Transplanting an orchid plant into a new container requires more steps than repotting other plants. Remember to sterilize any tools and pots that come in contact with your plant to avoid spreading bacteria and fungi. With a bit of care and attention, your orchid will thank you by blooming with beautiful flowers.
The post How to Repot an Orchid Plant Safely, Without Killing It appeared first on DIYs.com.