In my basic latch hook finishing tutorial, I walk you through a quick and dirty method for binding, designed to be a quick start guide for small projects. In this tutorial, we are going more in-depth, covering how to use whip stitch to bind latch hook projects that have already been hooked and bound.
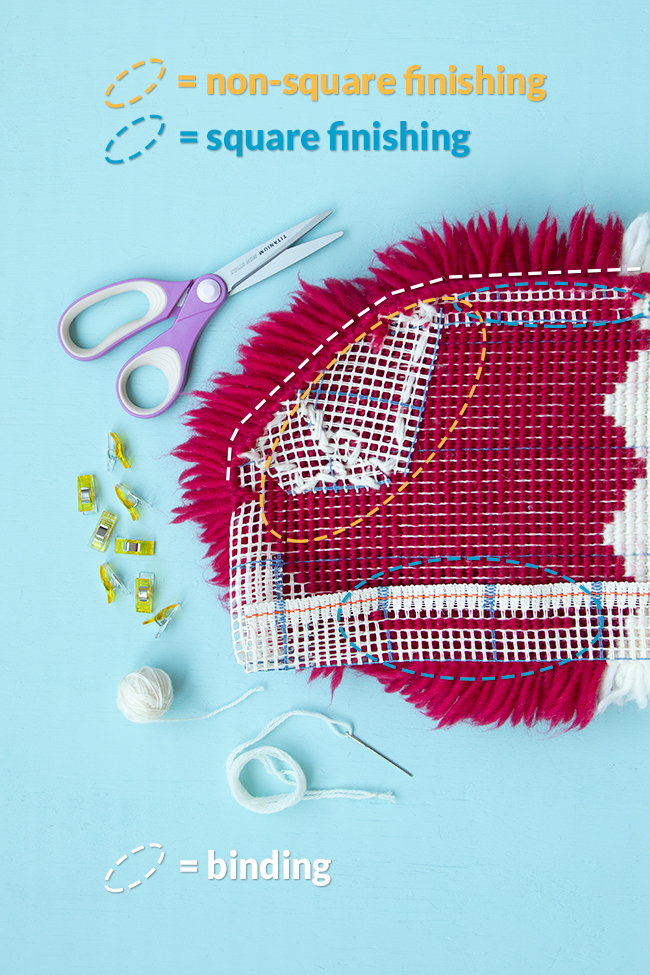
Up to this point, you will have hooked your entire rug and finished it using the appropriate method. If you don’t know what that means, see my tutorials on square latch hook finishing, non-square latch hook finishing, and finishing small nooks and crannies in latch hook. There’s even a handy vocabulary reference guide for latch hooking terms. To save you some clicking, here’s the graphic that shows the difference between finishing styles and binding in a latch hook project:
On Binding Latch Hook Projects with Stitching
Why no applied binding?
Especially if you’re a quilter, you may be wondering, where’s the bias tape for binding at? In my rug-making work, I don’t prefer to use an applied binding. An applied binding involves sewing or gluing or otherwise attaching something around the raw, folded-back edge of rug canvas to conceal and reinforce it, as well as prop up stitches. I don’t use applied bindings because I think using whip stitch or blanket stitch does the job and achieves a more flexible edge that I like the look of. Simple as that!
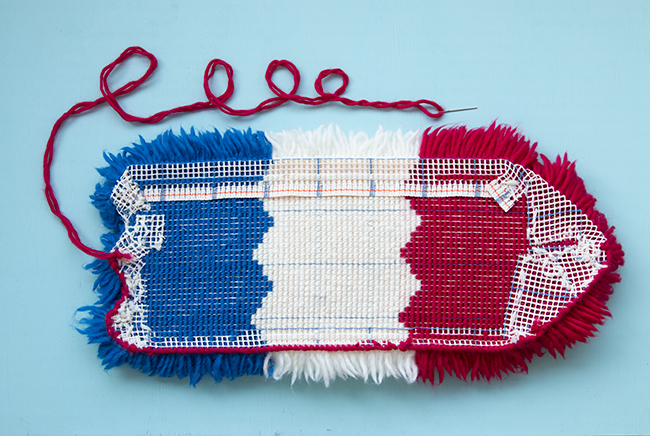
How to Bind Latch Hook Projects with Whip Stitch
If you’ve ever used whip stitch for embroidery or other hand stitching (as in sewing) projects, you’ll already be familiar with whip stitch and how versatile it is.
SUPPLIES
hooked & finished latch hook project in need of binding
scissors
tapestry (yarn) needle
yarn of your choosing
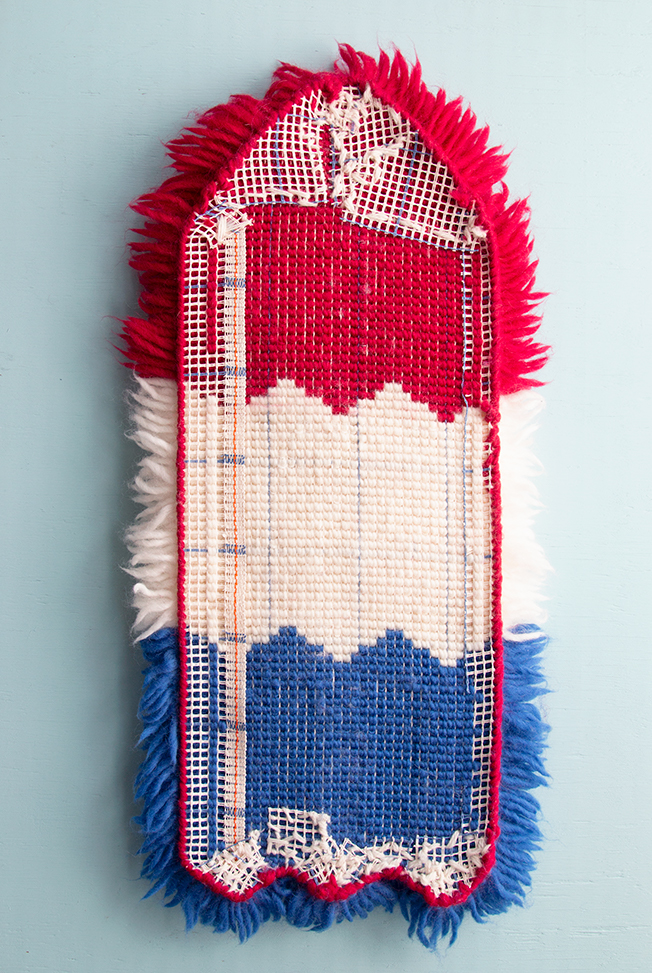
Once your latch hook project has been hooked and finished, you’re ready to bind it. To prepare, thread your tapestry needle with a couple yards of yarn, double it up, and tie the two ends together. Attach the knotted end of your yarn to the back of your canvas with another knot at the intersection of two strands of rug canvas.
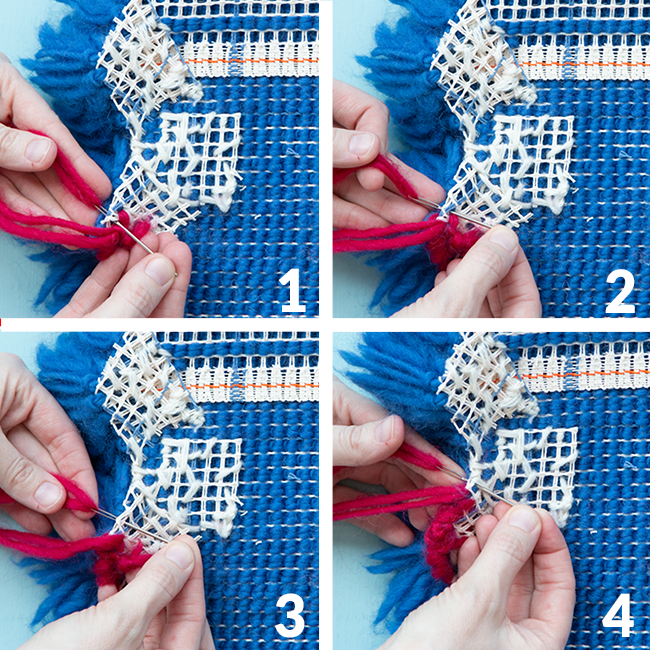
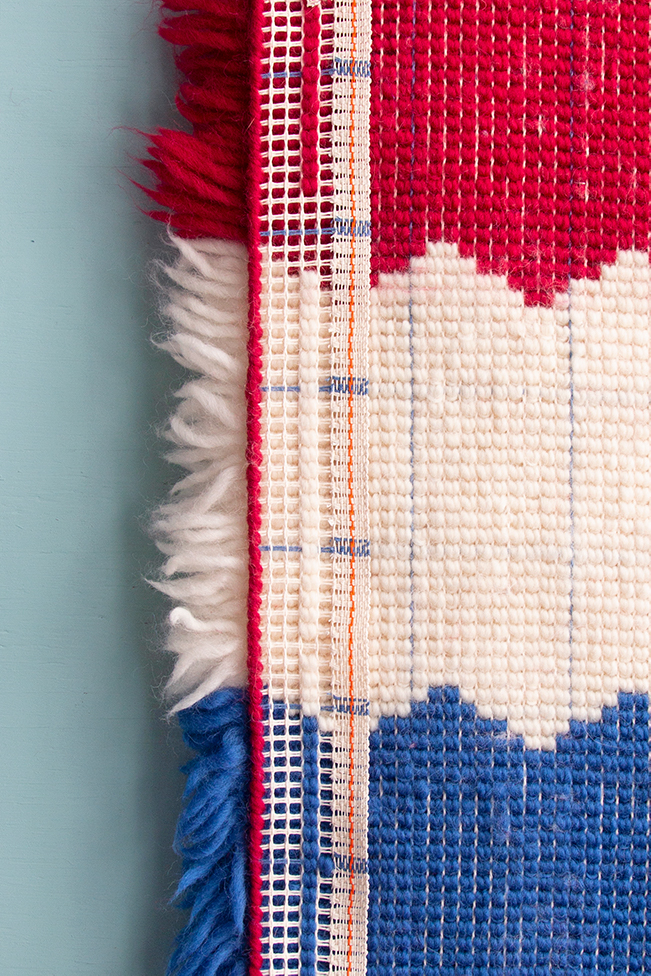
Inserting the tip of the needle from the outside toward the inside (left to right as pictured in 1-4), bring the needle through both layers of canvas and draw tail through. Continuing to work in the same direction, insert the needle a short distance from the previous stitch and draw tail through. Repeat this process to continue binding your edge, finishing with a knot, and rethreading your needle to introduce more yarn as needed.
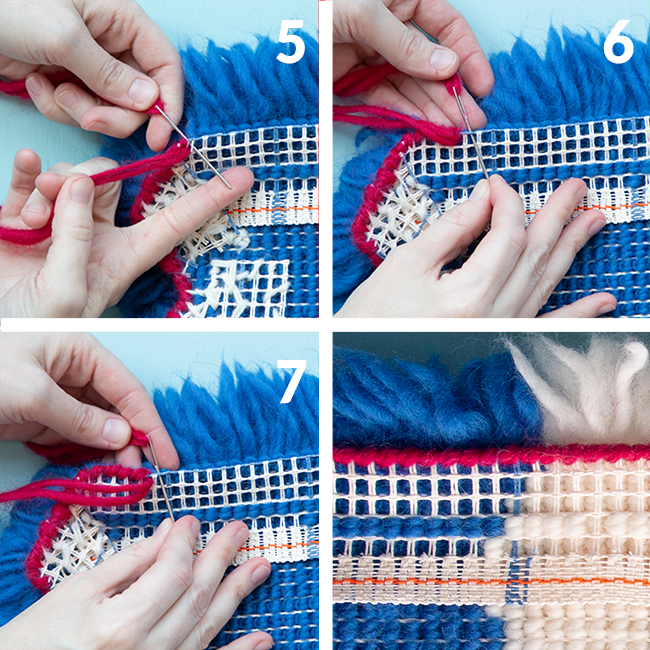
The edge pictured in images 1-4 is not a square edge. If you’re working on a square edge (images 5-7), you have the opportunity to stitch a perfectly spaced whip stitch edge thanks to the grid of the rug canvas. When you reach a square edge, ensure that you’re always stitching in the same direction, but always inserting your needle under the next available square of canvas along the edge as shown. You’ll notice that you can hardly tell images 5-7 apart – that’s the idea! 🙂