I have yet to meet a hooker who enjoys weaving ends of a crochet project.
That is the most dreadful thing if you ask me. I would rather work several rows in a difficult stitch than weave those tails. But in all these years of crocheting, I’ve urged myself to weave them in – or more accurately – to work those tails over as I go.
And the difference has been more than rewarding. I now finish a project with scarcely any tails at all.
So this is how I do it. The project in the pictures is a granny triangle, so it involves insertion of several colors, which means many yarn additions, hence more tails.
I am no friend of short tails, so my beginning and ending tails are always long. That way I can ensure I have the tail nicely tucked in and covered. This being said, I can assure you that I have never had a tail become loose and ruin my project.
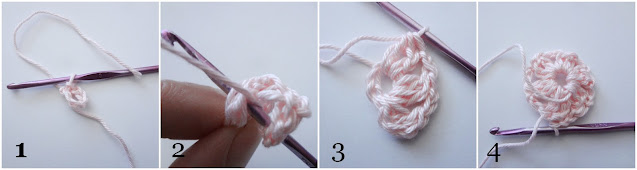
When I join foundation chains to make a ring, and because I am working in the round, I always place the tail on the left (1) – behind the crochet work, and I immediately start working the tail over as I go (2-4). If I use the same color of yarn in the second round, I continue working it over until there is no tail left.
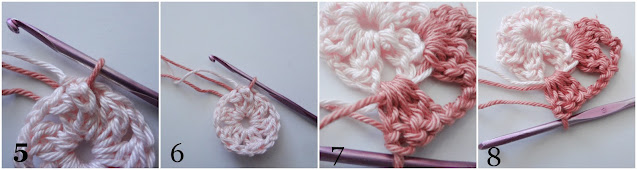
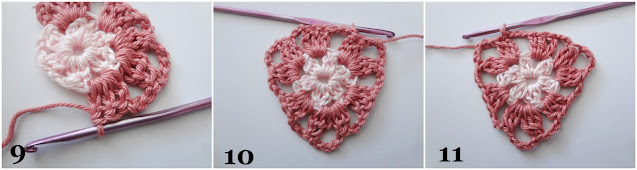
I end previous round with a long tail. When inserting new color of yarn, I never do it in the stitch where I ended. I usually go a stitch or two back and insert the yarn there (5-6). That way I can get a good and strong hold over (now) 2 tails. After a couple of stitches working these tails, I tie both in a knot (7), and continue working them over for a couple of stitches more (8). Then I either cut the first tail or it runs off (9). In pictures 10 (back) and 11 (front) you can see that it was worth working those tails because there are none except for the last one.
I use a tapestry needle to work the last tail (12). I insert the threaded needle through the middle of the stitch that comes first (13), then guide the needle downwards at the back of the work, slide it through several stitches (14), I tie it into 2 knots at this point, then I slide it through several stitches more (15) and then I cut off the excess. Very easy, clean and neat job, if you ask me.

Back Front

What about you? How do you work your tails? Will you share in the comments please?
Related Posts

I förra veckan var jag på pressvisning i Gustavsberg Porslinsfabrik....

Une piscine harmonieusement intégrée dans le décor de votre jardin...

Once used as a rural schoolhouse during the Second Spanish...
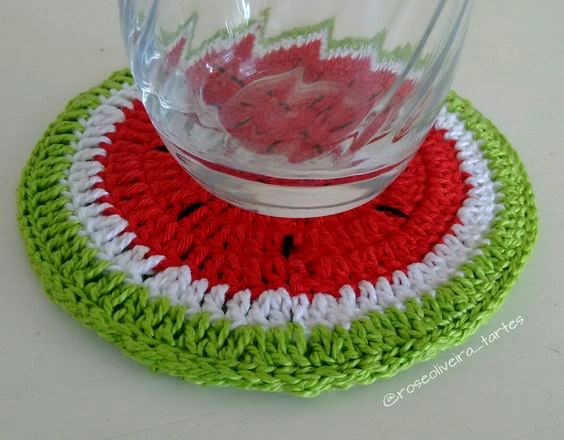
Bom dia gente querida!
Hoje quero mostrar esses porta copos fofos...

There are many things we love about winter, but perhaps...

Photos : Maxime Brouillet
En cette période si particulière de confinement...