This post contains some affiliate links. If you make a purchase, Brown Paper Bag may earn an affiliate commission. Learn more here.
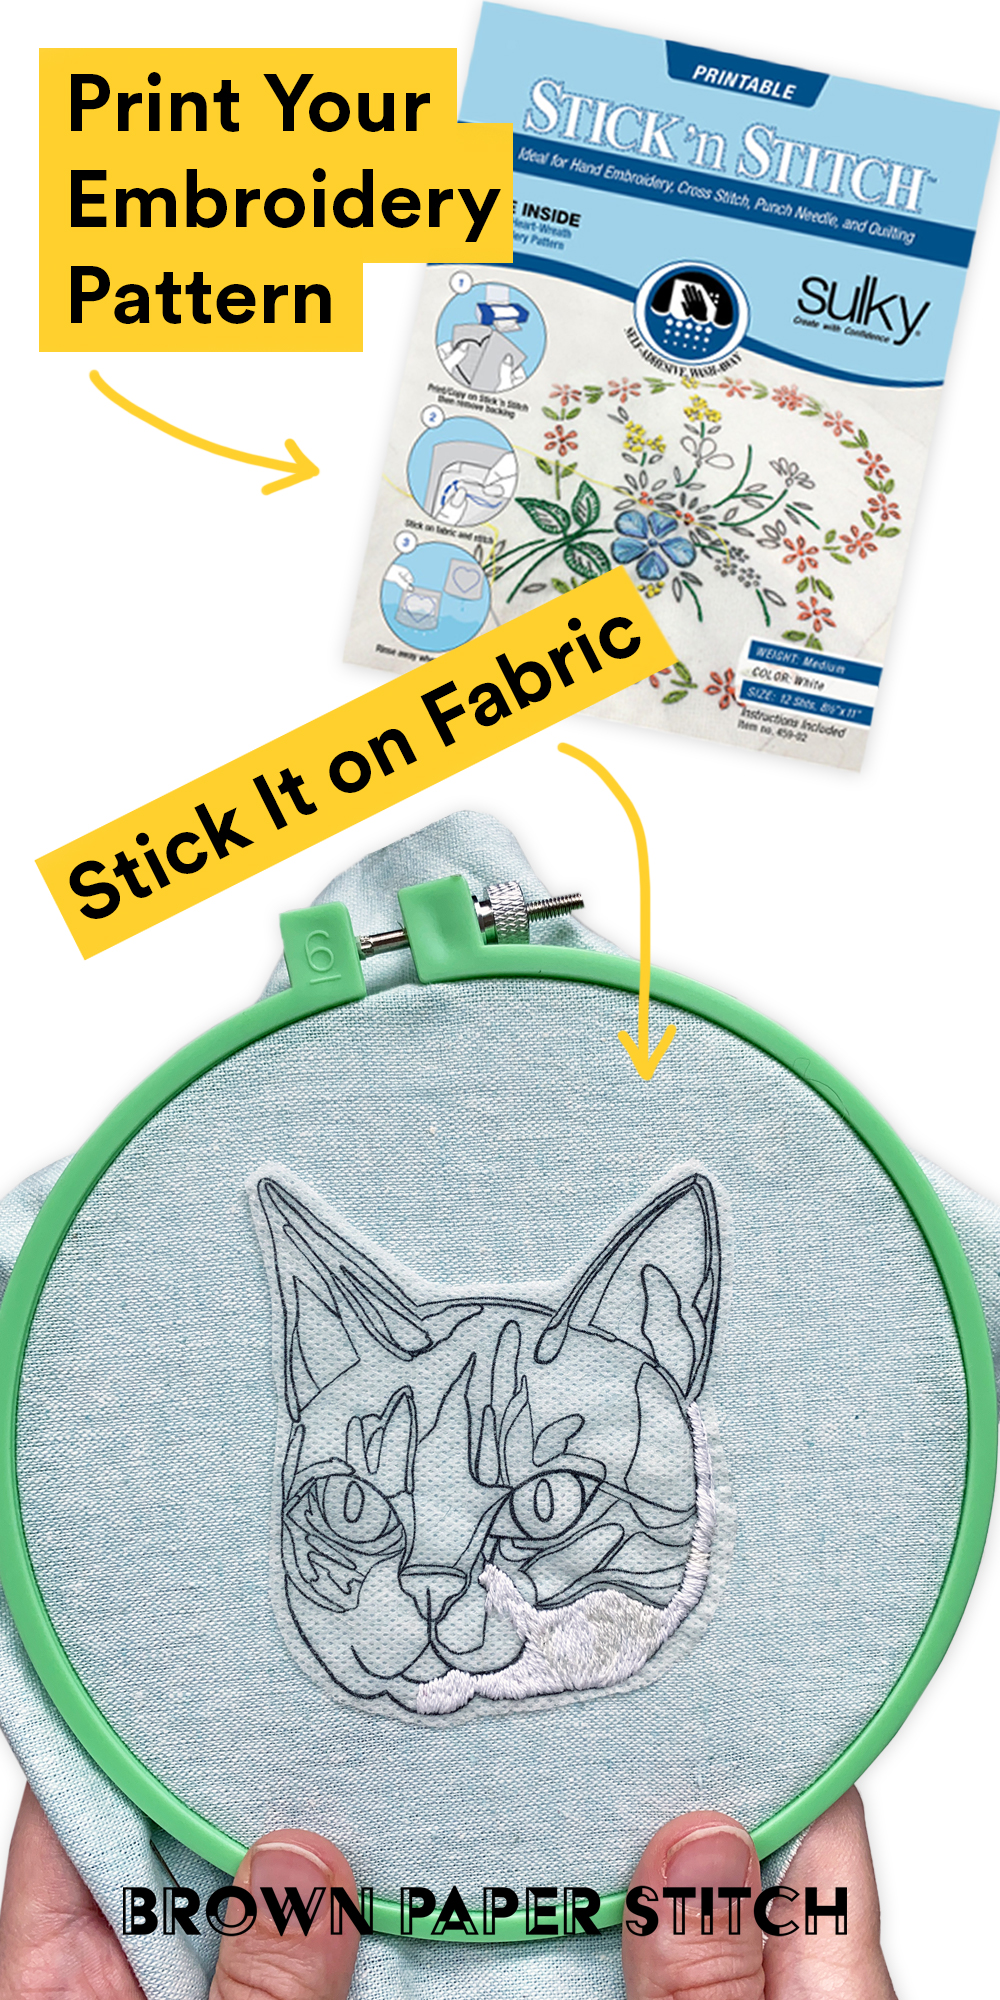
There are many ways to transfer an embroidery pattern onto a piece of fabric. My preferred method? Using a handy stick-and-stitch stabilizer to print a design on my printer and then adhere it to the fabric. Once I’m done, I simply wash the excess pattern away with warm water, and it leaves no trace that it was ever there.
So many people don’t know about this method, and to be honest, I didn’t either—at first. I noticed embroiderers using it a couple of years after I started my stitching. And it was only once I began creating custom pet embroidery—in which I was drawing a sketch for a client—that I considered using it. The big advantage is that you can create a pattern, or use a downloaded one, and just print it without having to transfer using a pen. This is especially helpful for designs with a lot of details!
To use this type of stabilizer:
I use Sulky’s Stick N Stitch stabilizer and print my patterns in a laser printer. I cut out the designs with a standard pair of scissors and press it on. Once all of my stitching is done, I run it under warm water to remove the stabilizer and let it dry as normal.
Things to know before you use stick and stitch stabilizer:
Overall, stick and stitch stabilizer is, by far, my preferred method of transferring an embroidery pattern. But, throughout the time I’ve been working with it, I’ve realized it has its quirks. Here are a couple of things you should know.
- The stabilizer works best with light-colored fabrics. You’ll have an easier time seeing the lines of your design. With dark or black fabrics, you’ll have to strain to see your marks.
- The oils on your fingers can affect the stabilizer. The more you touch the stick and stitch stabilizer, the more you’ll degrade it. Once you’re happy with the placement of the pattern, try not to touch the design unless you’re stitching into it. Repeatedly handling a design can make it harder to see.
- Stick and stitch stabilizer will “shift” if you’re not careful. This is an easy problem to prevent. To stop the stabilizer from moving on your fabric, add a few stitches to each corner of your design.
- Stabilizer is like a glue. Once you’ve washed away the stabilizer, it will make your stitches appear a bit less “fuzzy” as the stabilizer is like a glue that locks them into place. If you’re embroidering on clothing, this is a great advantage, as it means your stitching will hold up to washings.
The post How to Use Stick and Stitch Stabilizer To Transfer and Embroider a Pattern With Ease appeared first on Brown Paper Bag.