I love trying fun new ways to decorate for every season, and in winter there are so many options for the holidays and also because you are indoors more during the cooler months. I don’t know about you, but being inside more puts my focus on how my home is looking. I start to notice the curtains that no longer look so good or the boring tabletop arrangement, or that I really should water my plants more regularly! Today, I want to show you a really fun and clever little craft idea for your holiday decor that will take you maybe 10 minutes or less!
My friend shown above.
This idea can be found in the Scandinavian-inspired decorating story in, , and it can be made with cupcake cases or small candy cases in any color or pattern. To keep it very simple, we went with white. You can use white ones and paint the rims in metallic gold if you like, or inside of each case, place a colored dot, or a circular photo of a family member (like your kids). I like – they’d be perfect for this project if you want a more traditional, festive look in red and white.
Here are a few simple instructions on how to make this easy little tree for your wall.
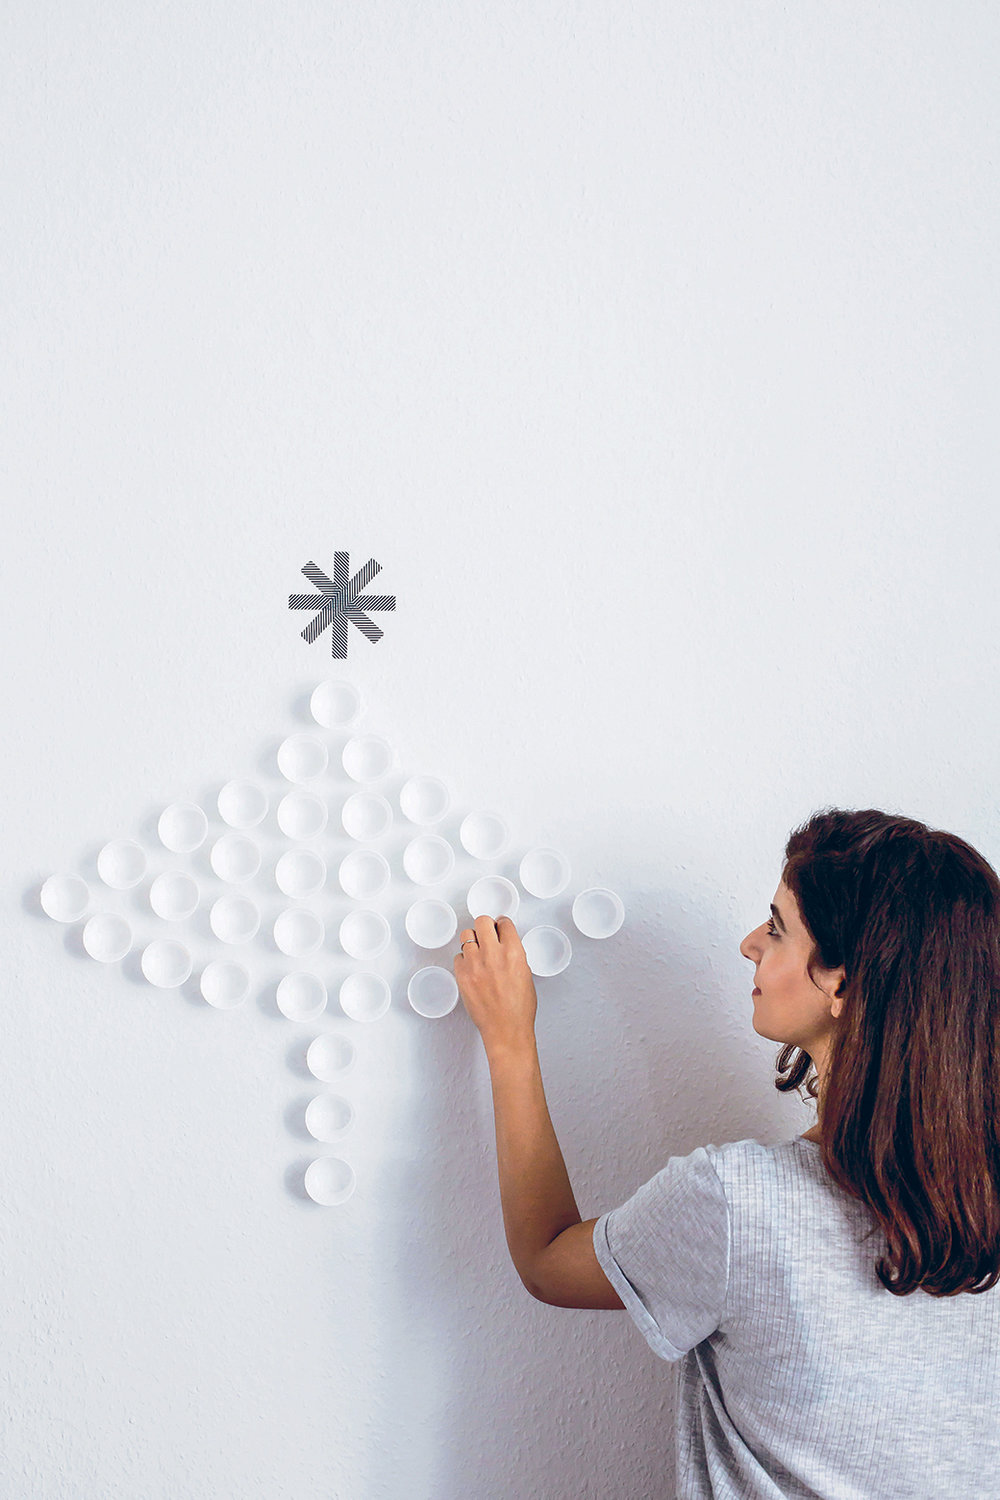
DIY CUPCAKE CASES WALL DECORATION
Tools: You will need approximately 34 cupcake cases, double-sided tape, 1 long dark string, washi tape for the star.
STEP ONE: Start with the top case and stick to the wall using double-sided tape. Drop a dark string below it using a piece of tape to use as a guide to keep your rows straight as you work. Cupcake cases should go on each side of the string, for instance.
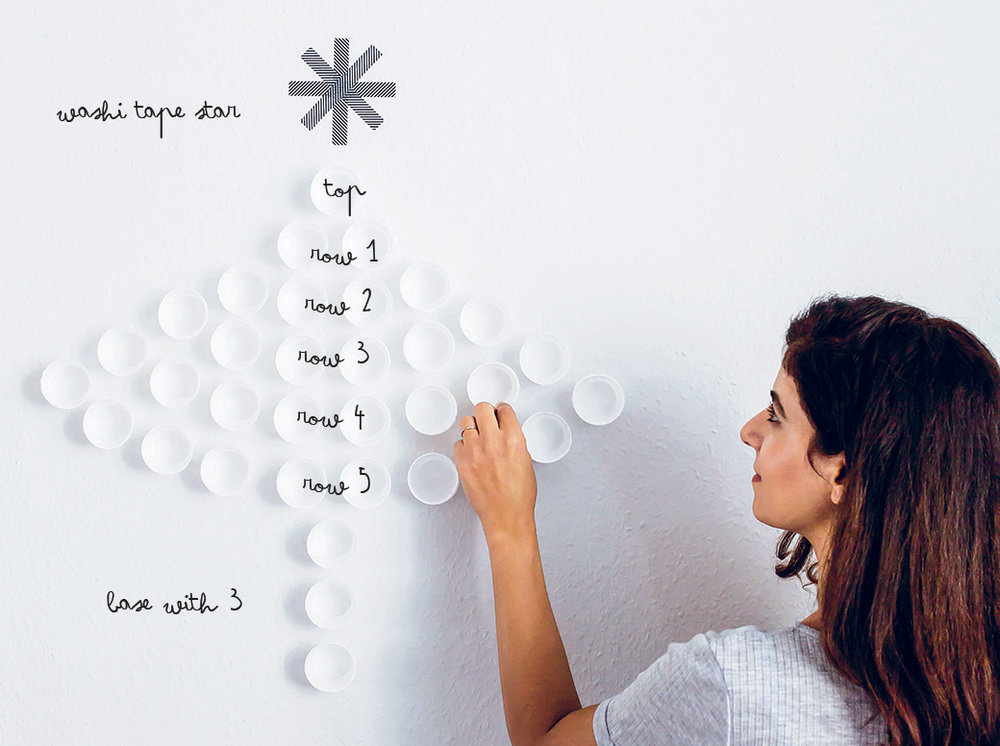
STEP TWO: Beneath the single top case, you should begin to create rows using double-sided tape, cases and space them evenly from one to the next. I started by using the string in the center and put cupcake cases to the left and then to the right, of the string, to keep them neat and even.
To create rows like mine, here is the recipe: Top case, row 1: 2 cases, row 2: 4 cases, row 3: 6 cases, row 4: 8 cases, row 5: 10 cases.
STEP THREE: Once all of your cases are in place, remove the string you’d used as a guide. Now add your tree base using 3 cases.
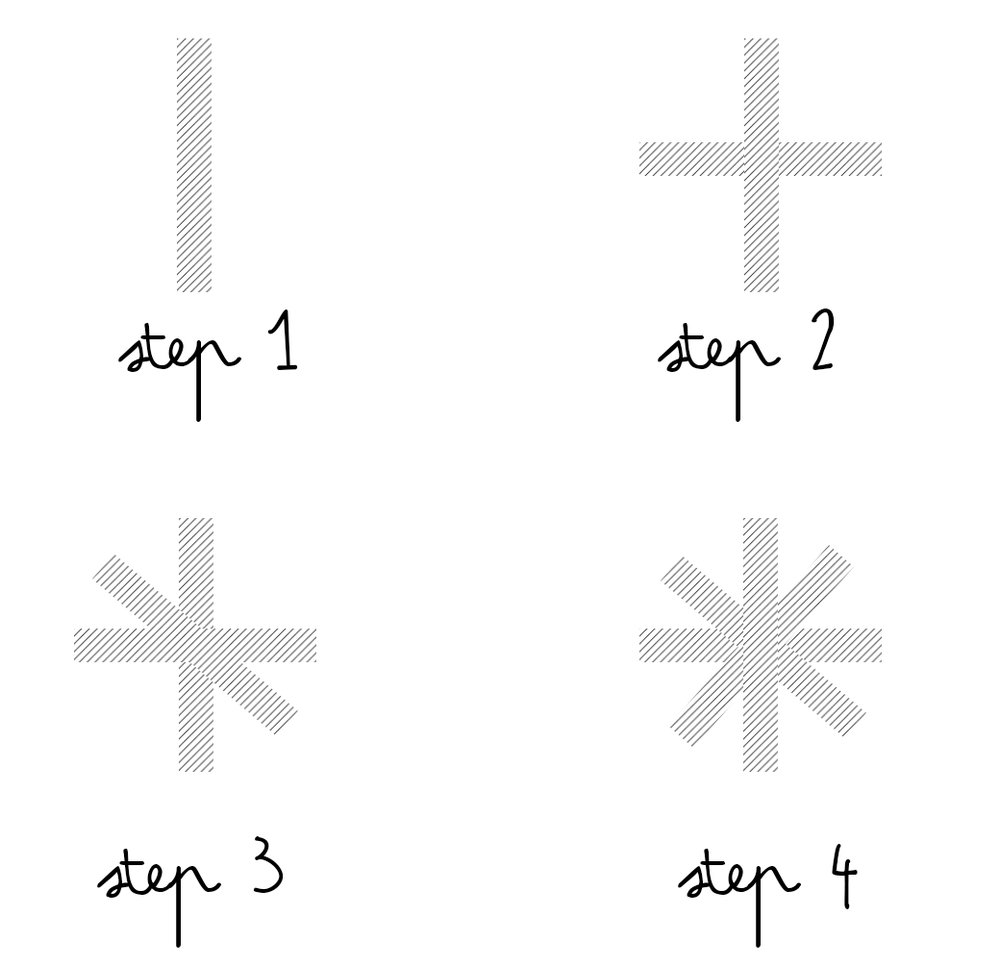
STEP FOUR: Finish with a washi tape star. Cut 4 strips of equal length and hang from the side of the table. Directly above the top case, place the first strip of tape. You will be making a cross shape. Next, place another piece of tape over the first one to create a cross. Next, tape your 3rd piece of tape and place it on a diagonal to create an “X” on top of the cross shape along with the final piece of tape. Now you have your star.

, Available in English, German, French and Italian and available where all fine books are sold.
Decorate For a Party is available in , and and of course in and also . It also available in Australia via and .
Love,
Holly
(Photos and Text: Holly Becker)


