Oversized, ribbed and ridiculously cosy, the Amalfi Sweater is the modern crochet sweater of your dreams! Learn how to crochet a sweater with knit-look ribbing by following the step-by-step video tutorial and free pattern below!

This post may contain affiliate links, view our disclosure policy for details.
Thank you to WeCrochet for providing the yarn for this free crochet sweater pattern! As always all thoughts and opinions are 100% my own ?
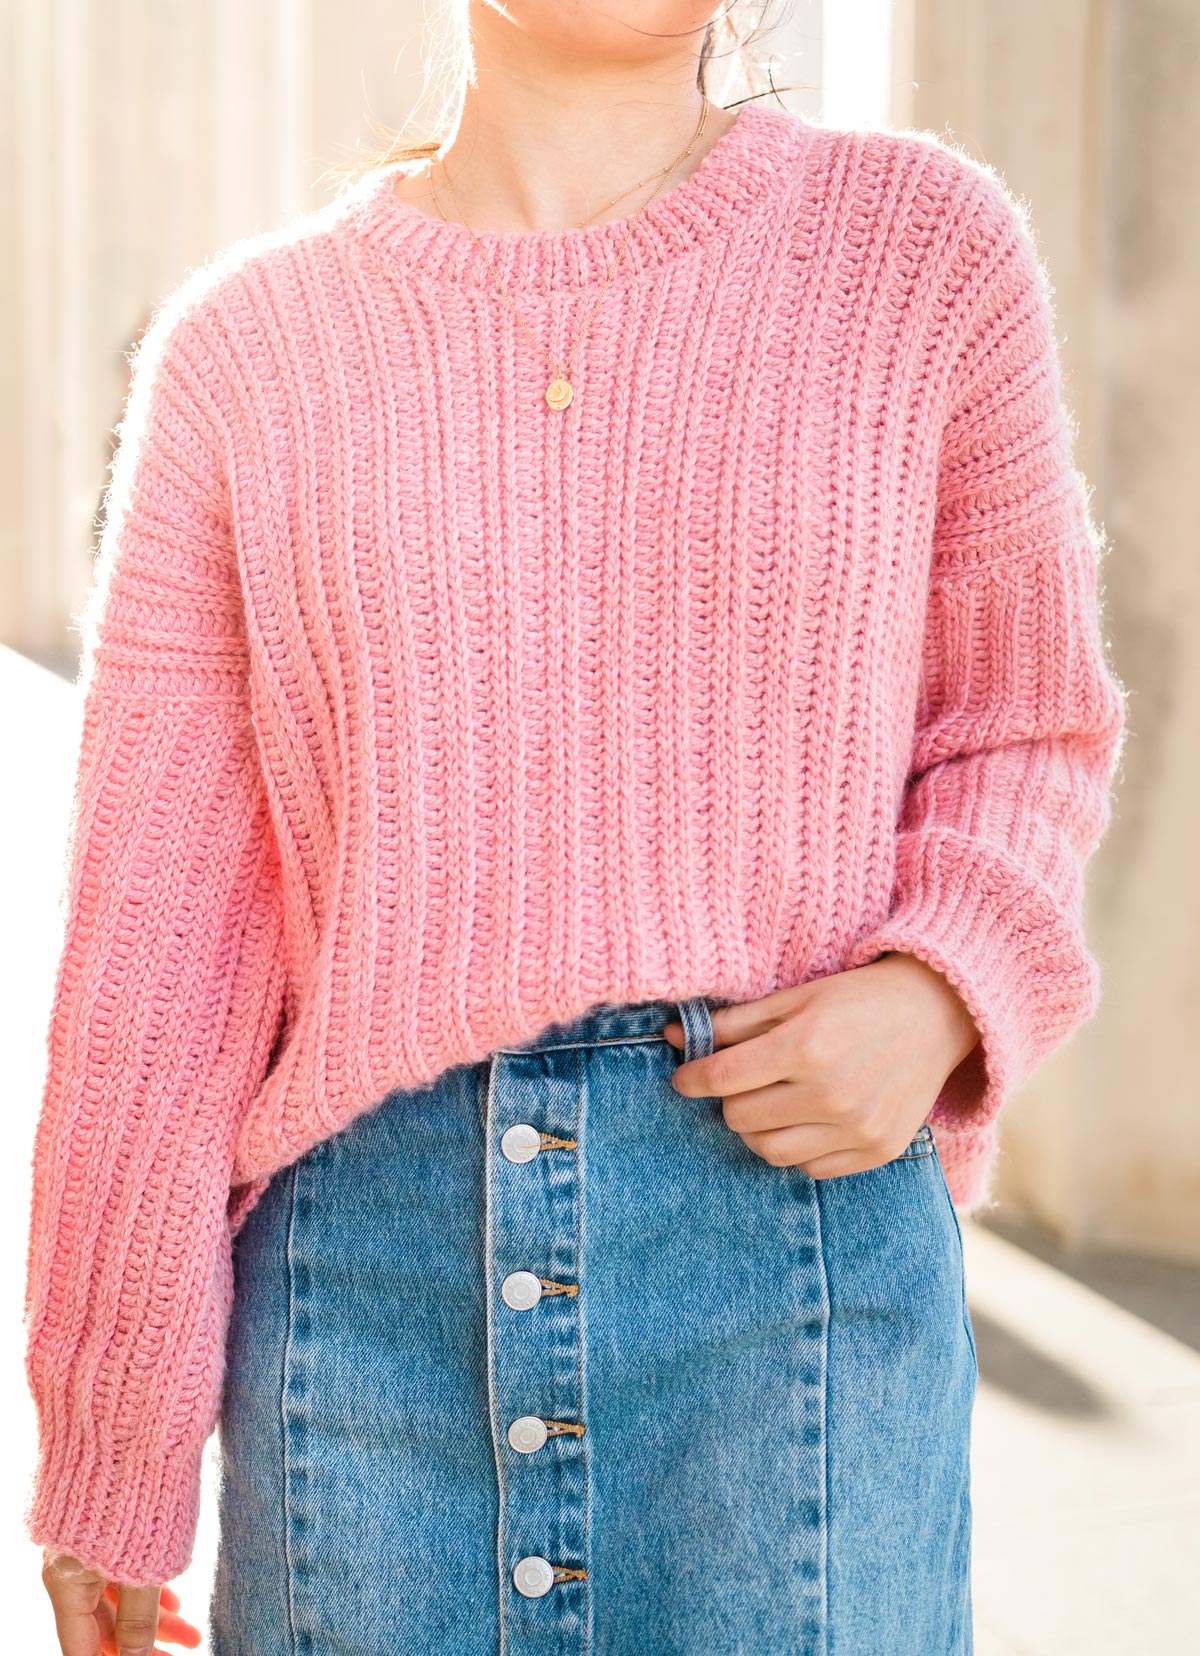
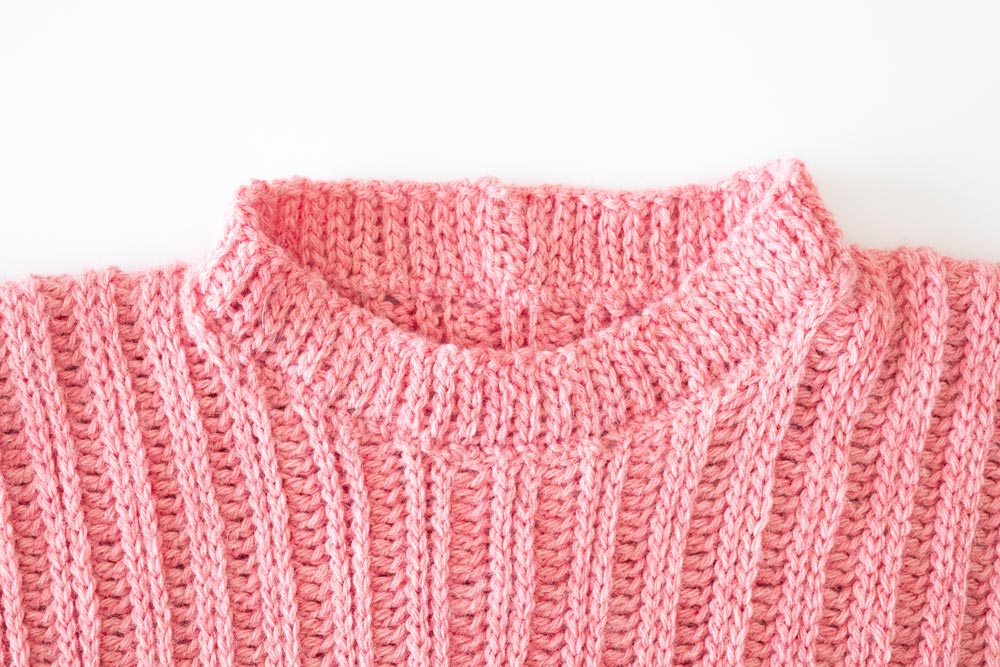
The Amalfi Sweater is everything you’d want a modern crochet pullover to be ? This easy crochet sweater features loosely cuffed sleeves, an oversized body and a ribbed round neck while simple beginner stitches (slip stitches and double crochet) combine to create a chunky ribbed effect that looks like knit!
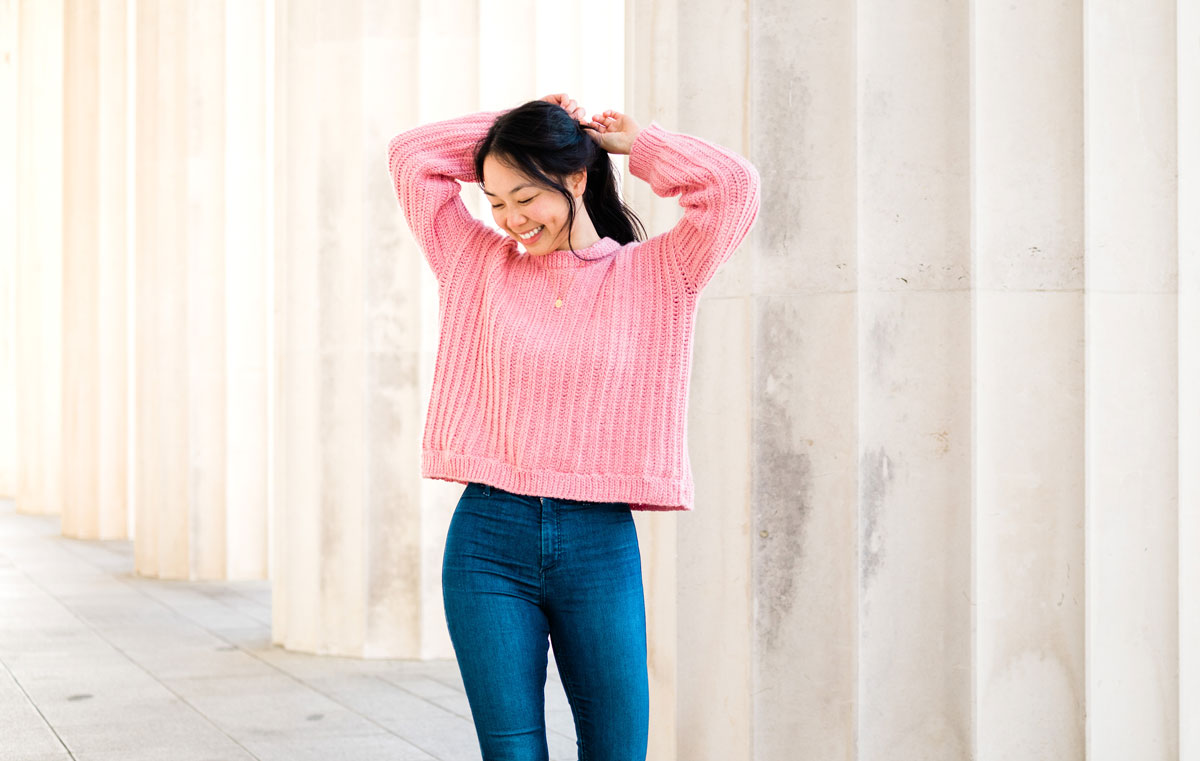
When I posted a sneak peek of this stitch variation on Instagram, I got so many comments, questions, dms asking for a tutorial for this stitch and you’ll be amazed that it’s so simple, you don’t even need a separate stitch tutorial.
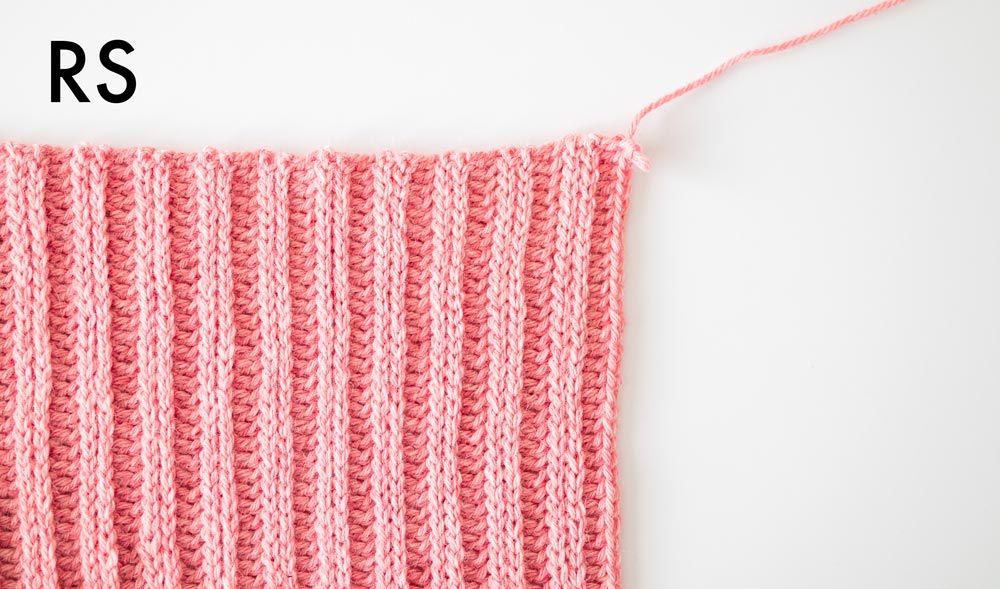
The vast majority of this pattern is made up of two ‘base rows’ – one consisting of back loop slip stitches and the other uses back loop double crochets – that’s it! We’ll alternate between these two stitches to crochet this knit-look ribbing which makes up the majority of the sweater. After a couple of repeats, this crochet ribbing stitch will become mindless!
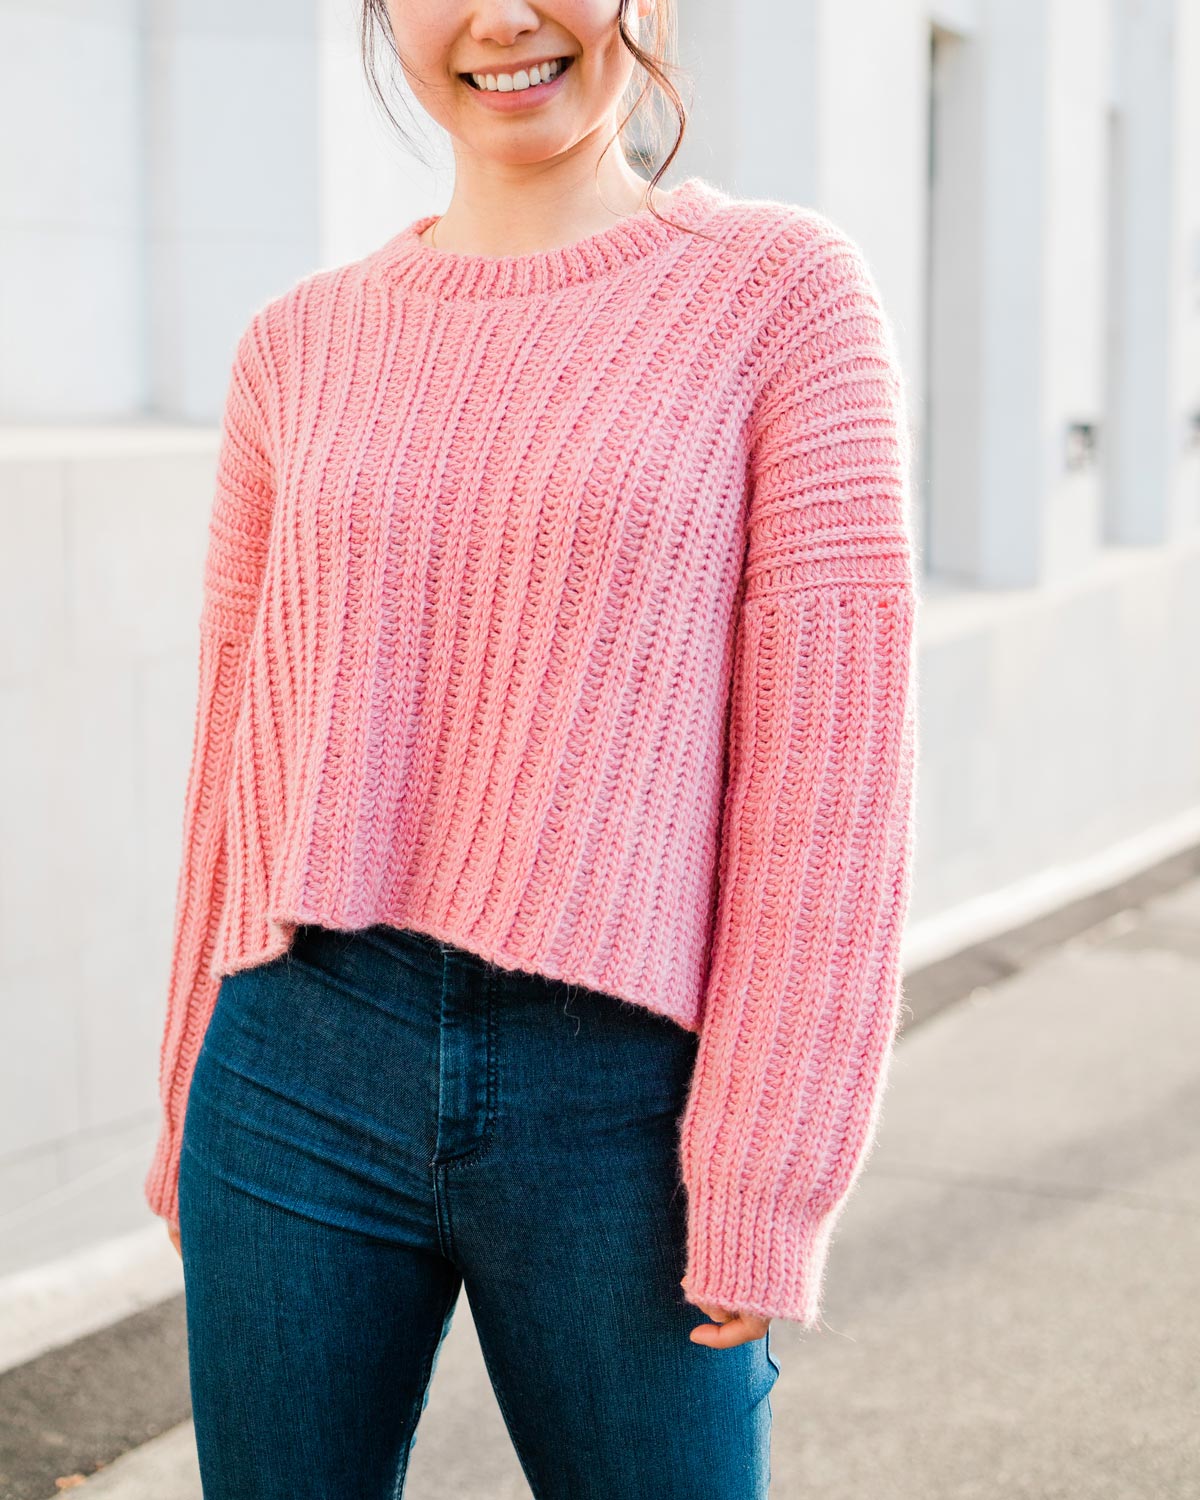
The Amalfi Ribbed Sweater is worked lengthways (meaning that the foundation chain runs the length of the sweater not the width) so the KEY to getting a sweater that sits nicely on the body is to pick a yarn that has good drape and to make sure that you match the gauge in the pattern.
To make sure that your sweater turns out the right size (and to maintain gauge throughout) the number 1 tip is to keep your slip stitches loose and relaxed. This makes working back into the slip stitches in the next row really easy and you’ll be able to crochet so much faster ?
Construction
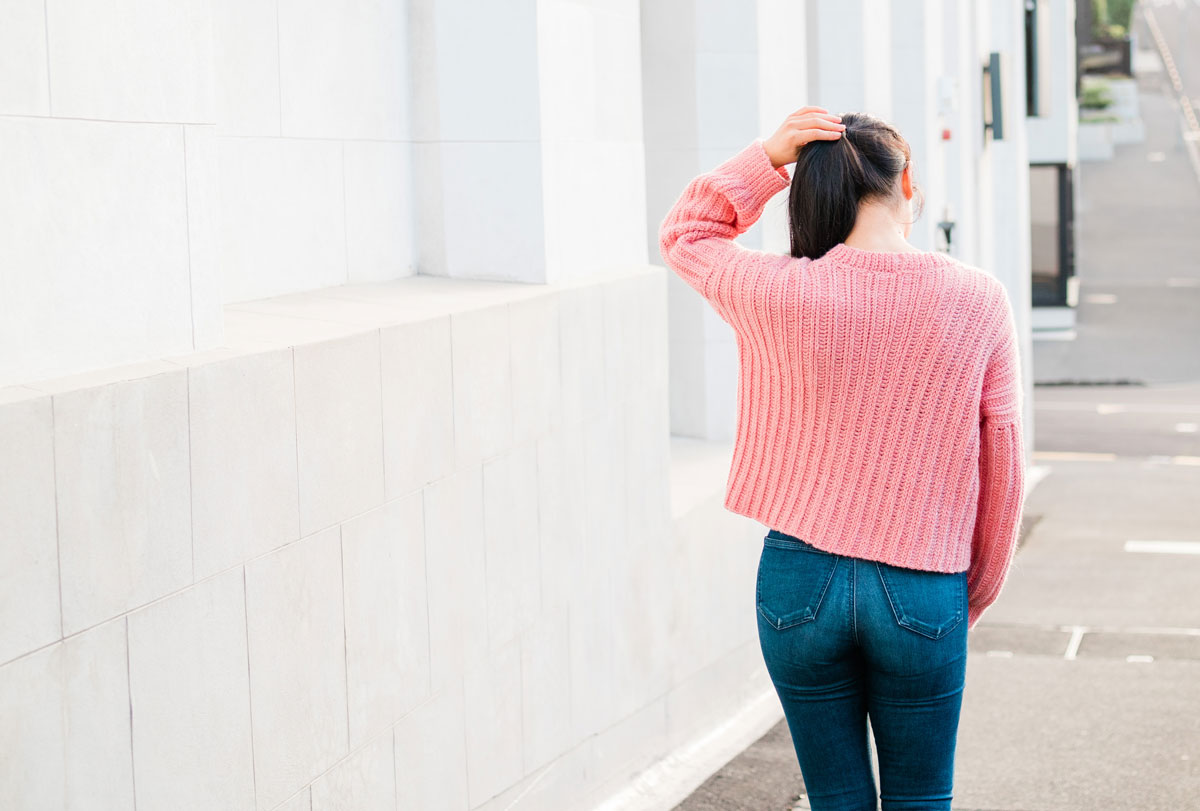
This ribbed sweater is crocheted in 4 panels – front, back and 2 sleeves and then the body and neckline ribbing are crocheted separately and sewn onto the sweater.
The sleeves and back panel all follow a simple 4 row repeat while the front panel has a few rows of shaping that will create the round neck. Since this crochet pullover is worked lengthways the neckline shaping will form ‘corners/bumps’ that look like steps (similar to the construction of the Sagebrush Tank Top) instead of forming a smooth ‘U’ shape.
It might seem a bit strange and look a bit funny but trust me! Once we sew on the neckline ribbing you won’t be able to see the bumps as they’ll be hidden on the inside of the sweater and you shouldn’t be able to feel them either ?
You’ll also notice in the photos some photos have the hemline ribbing while others don’t – I just wanted to show you how the sweater can look so different with or without the ribbing! Without the slip stitch ribbing, the Amalfi sweater is more cropped and the raw edge gives a more casual vibe. With the slip stitch ribbing, I think the sweater looks more ‘finished’ and cozy. It’s completely up to you to decide if you want to add the ribbing or not. ?
Looking for more free crochet patterns?
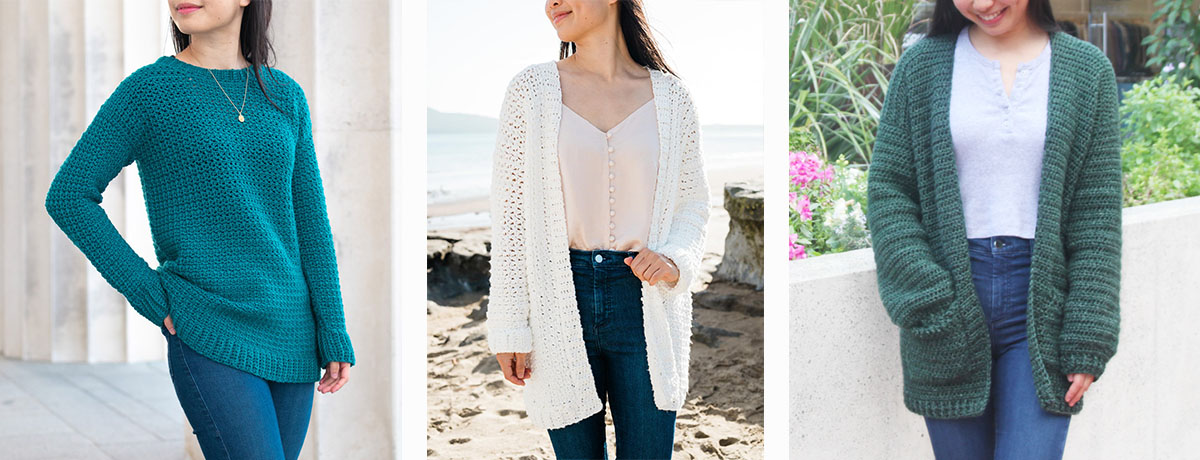
1. Weekend Snuggle Sweater / 2. In The Clouds Cardigan / 3. Briar Pocket Cardigan
Design Inspiration
The inspiration behind the Amalfi Sweater was simple – to create a ribbed sweater for fall that was super wearable and easy to layer! With crochet, we normally finished garments and hats off with back loop half double rochet ribbing or front and back post double crochet ribbing. While I absolutely love both of them, they both have very distinct looks and construction that didn’t quite match up with the look I was trying to create.
Back Loop Half Double Crochet is one of my all-time favourite stitches (For more projects with back loop HDC see the 1 Hour Beanie or Skylar Crop Top) and I love the modern knit-like look of it. However, with BLO HDC the stitch height is always the same so you can’t control the thickness of the ‘ribs’.
On the other hand, Front and Back Post Double Crochets (For projects that use post stitches check out the Brooklyn Sweater or Briar Cardigan!) can be worked widthways and you can create lots of different ribbing thicknesses and patterns! But post stitches can quickly become chunky (and use up a lot of yarn!) which isn’t ideal if you want to tuck in your sweater.
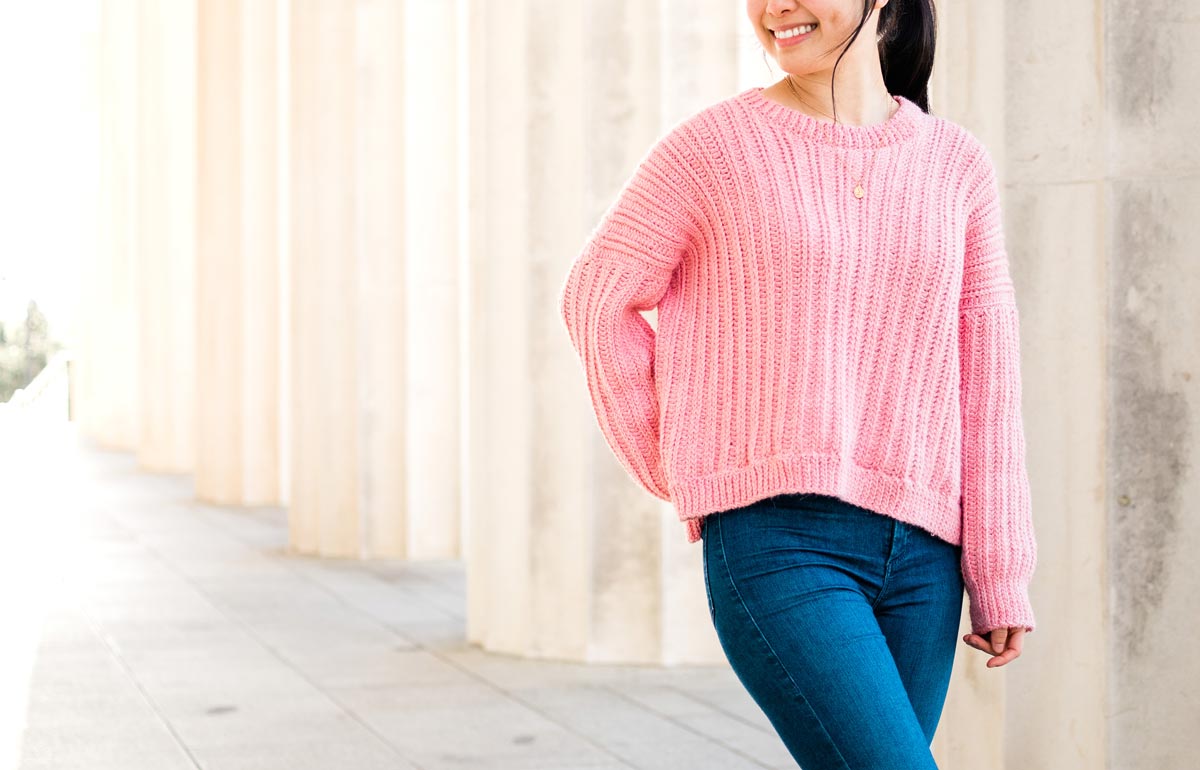
So, I put this idea on the back burner and until I discovered this combination of double crochets and slip stitches ? The thick chunky ribs along with the boxy, oversized body and sleeves give off all the fall sweater vibes and I think this will be a sweater you can wear year after year – it will never go out of style!
This bright coral pink shade of this sweater is quite different to my normal colour palette but I just fell in love with this yarn. It reminds me of Italy in the summer – it will be so wonderful when it’s safe to travel again! On the Amalfi Coast, during golden hour the sun shines on all of the pink bougainvillea and it’s like they are glowing from within. Normally I find naming patterns quite difficult but this name just popped to mind!
Yarn
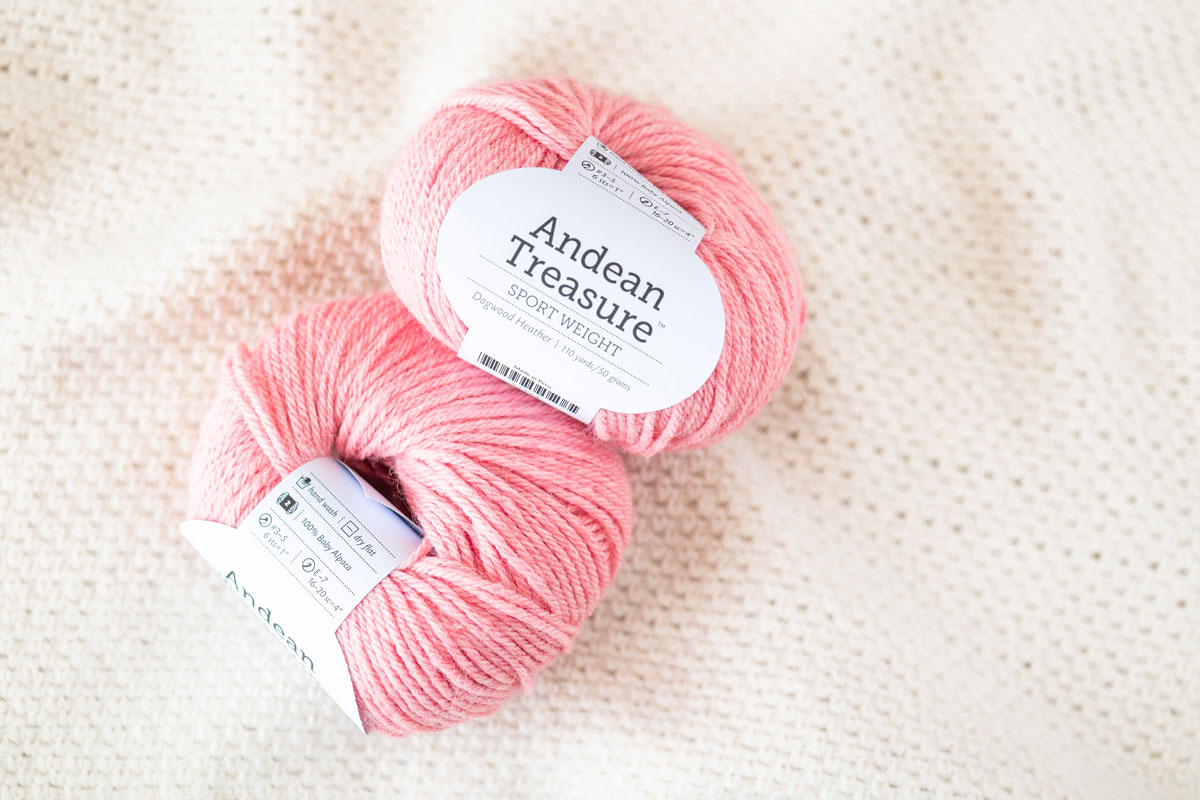
The Amalfi Ribbed Sweater uses WeCrochet’s Andean Treasure which is a luscious 100% Baby Alpaca yarn that is so incredibly SOFT. It also has a loose-ish twist and is very squishy so it has incredible drape. There are over 20 shades and every colour is heathered meaning that the base coloured is mixed with another neutral yarn which creates subtle speckled effect in the yarn. The shade used in the sample sweater is Dogwood Heather which is a gorgeous blend of peach, pink, salmon and white!
However, this has the be the hardest colour I’ve ever photographed! You’ll notice in some photos it looks pinker while in others the sweater looks more coral and you might be wondering which is more accurate to real life but the answer is both!
This shade is one of those colours that looks different depending on what you’re wearing with it and weather. I’d say in person the colour looks more muted (it’s definitely still a bright, not a pastel shade though!) but once the sun shines on the yarn it looks more neon and bold like in the photos.
Also, Andean Heather is classified as a sport/fine(2) yarn but in my opinion it’s a lot thicker than a typical sport yarn. In fact, it’s thicker than WeCrochet’s Alpaca Cloud (used with the Aria Button cardigan) which is classified as a DK/Light (3)!
I’d say that Andean Heather is a thick DK yarn or very thin Worsted yarn. So if you’re looking for substitutes look for a DK yarn and make sure that you crochet a gauge swatch before you start your project!
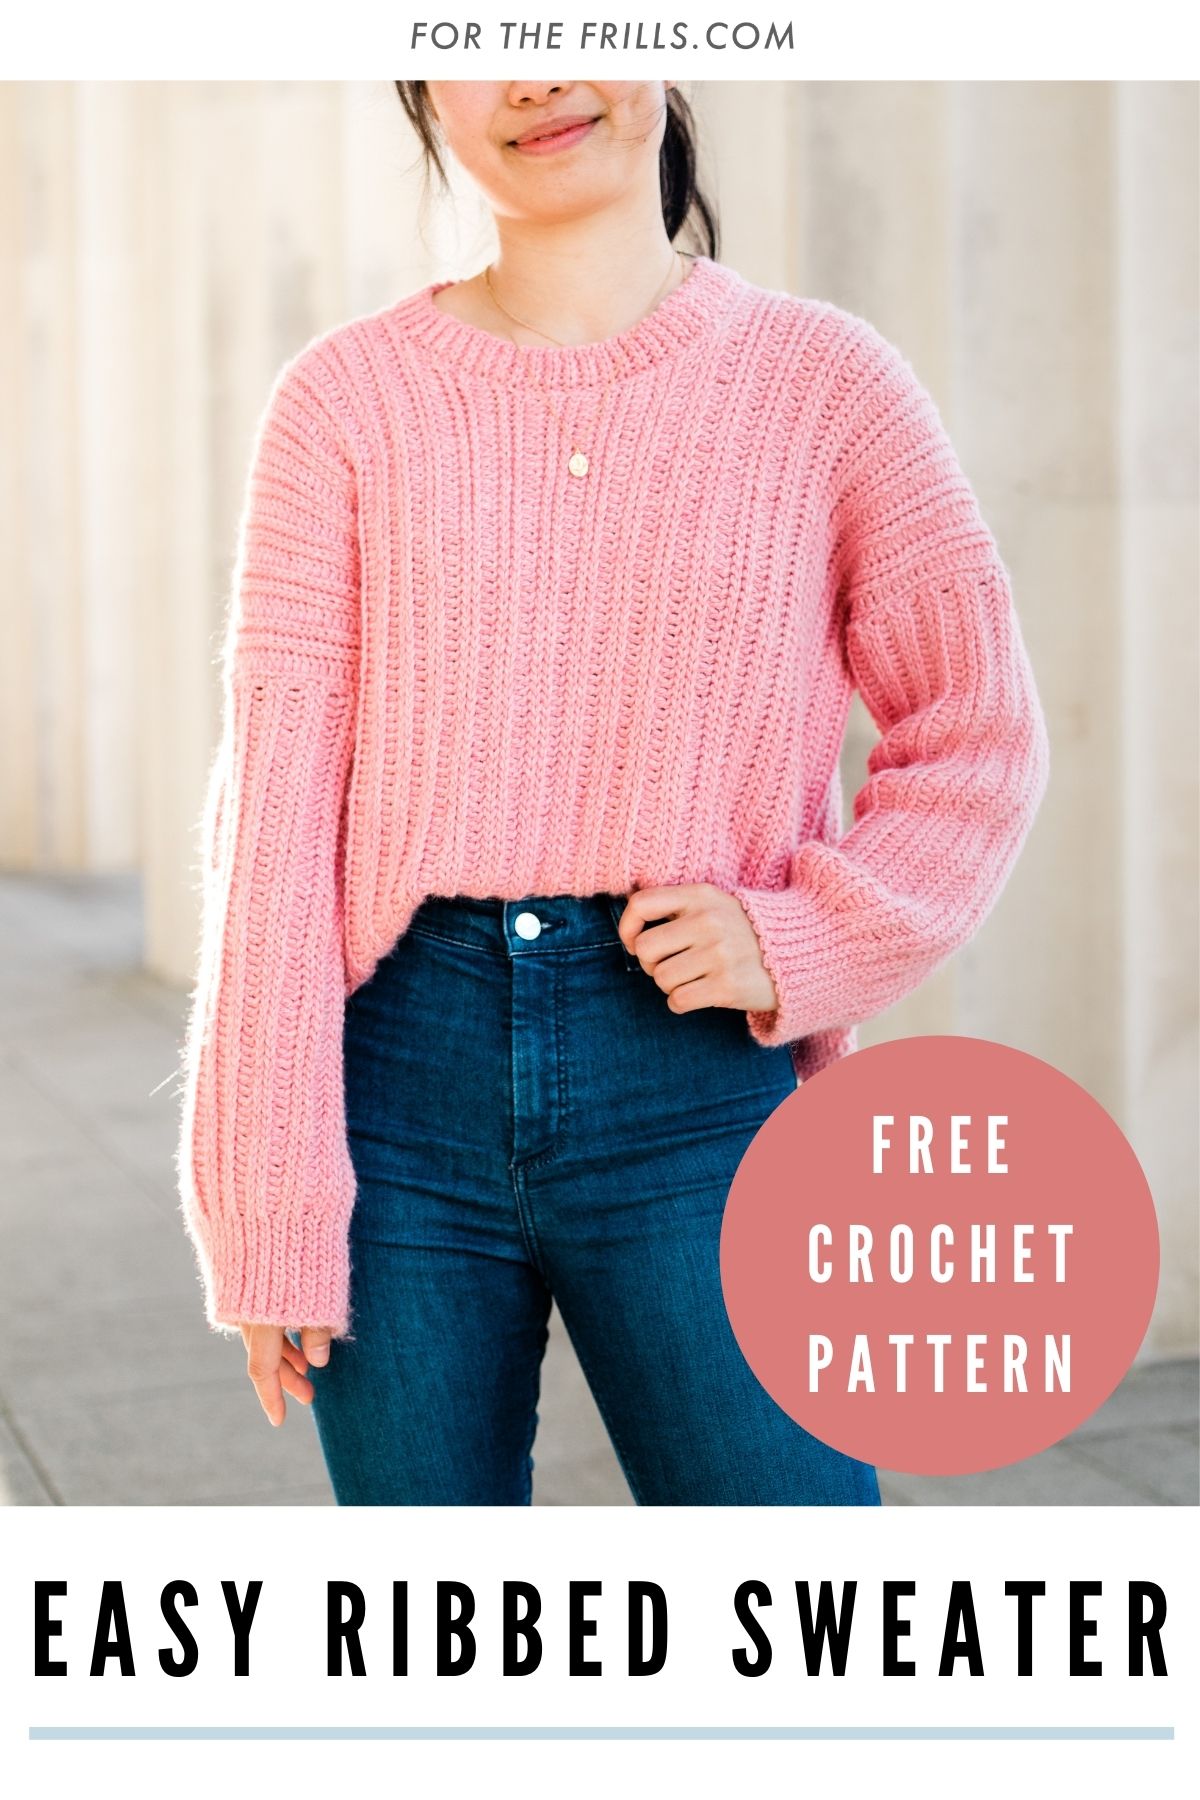
Pin me for later!
Video Tutorial
Ad-free, printable version of the Amalfi Sweater!
Add the Amalfi Sweater to your Ravelry queue!
*Sample is a size small shown on a 5’3” model with a 32” bust.
*The sizing guide follows size XS(S, M, L, XL)(2XL, 3XL, 4XL, 5XL). E.g. “Ch 78(78, 82, 82, 86)(86, 90, 90, 94) means Ch 78 for XS, Ch 78 for Small, Ch 82 for Medium, Ch 82 for Large, Ch 86 for XL, Ch 86 for 2XL, Ch 90 for 3XL, Ch 90 for 4XL and Ch 94 for 5XL.” If there is only one number, it applies to all sizes.
*”DC 10” means DC into the next 10 stitches.
*The turning chains, ch 1 and ch 2 do NOT count as a stitch.
*Total stitches are indicated between < >.
*This pattern uses US crochet terms.
*The sample sweater uses WeCrochet Andean Treasure which is classified as a Sport/Fine(2) yarn. However, if you want to substitute this yarn, it’s closer to a thick DK/Light(3) or a very thin Worsted/Medium(4).
*The majority of this crochet sweater follows a 4-row repeat comprising of 2 different types of rows which are referred to as BASE DC row and BASE SL ST row.
*The sleeves, back and front panels are worked from side to side, so the foundation chain runs the length of the sleeve/sweater. To make your sweater shorter/longer, remove/add chains just keep in mind you’ll require less/more yarn.
*All pieces are sewn together with the RS on the inside and the WS facing outwards.
*Yarn amounts and measurements include the sweater + hemline ribbing.
LEVEL: Easy
Materials
Yarn – WeCrochet Andean Treasure – Sport / Fine (2), 100m/50g, 110yds/1.75oz, 100% Baby Alpaca, Dogwood Heather
approx. 535(585, 635, 695, 765)(820, 900, 960, 1005)g
Stitches & Abbreviations
Ch = Chain
Sl st = Slip Stitch
DC = Double Crochet
BLO = Back Loop
St(s) = Stitch(es)
Rep = Repeat
Sk = Skip
RS = Right Side
WS = Wrong Side
Measurements
*Measurements taken from the garment lying flat. This sweater is oversized and VERY stretchy. Choose your normal t-shirt size for an oversized fit (as pictured). If you are in between sizes, size down.
*Sweater width will stretch out by 3-5cm / 1-2” after being worn a few times.
Measurements cm:
To fit Bust: 71(81, 91, 101, 112)(122, 132, 142, 152)
Back Width: 48(52, 57, 61, 66)(70, 75, 79, 83)
Armhole: 15(16, 16, 18, 19)(20, 21, 23, 24)
Sleeve length: 38(39, 39, 40, 40)(42, 42, 43, 43)
Length(with ribbing): 51(51, 53, 53, 56)(56, 58, 58, 61)
Measurements inches:
To fit Bust: 28(32, 36, 40, 44)(48, 52, 56, 60)
Back Width: 19(20.5, 22.5, 24, 26)(27.5, 29.5, 31, 33)
Armhole: 6(6.5, 6.5, 7, 7.5)(8, 8.5, 9, 9.5)
Sleeve length: 15(15.5, 15.5, 16, 16)(16.5, 16.5, 17, 17)
Length(with ribbing): 20(20, 21, 21, 22)(22, 23, 23, 24)
GAUGE: 10cm/4” square = 16.5 stitches wide x 21 rows tall (5 DC rows + 16 sl sts rows) in Knit-Look Rib Stitch pattern
Knit-Look Rib Crochet Stitch Pattern
FOUNDATION CHAIN: Ch any number of stitches.
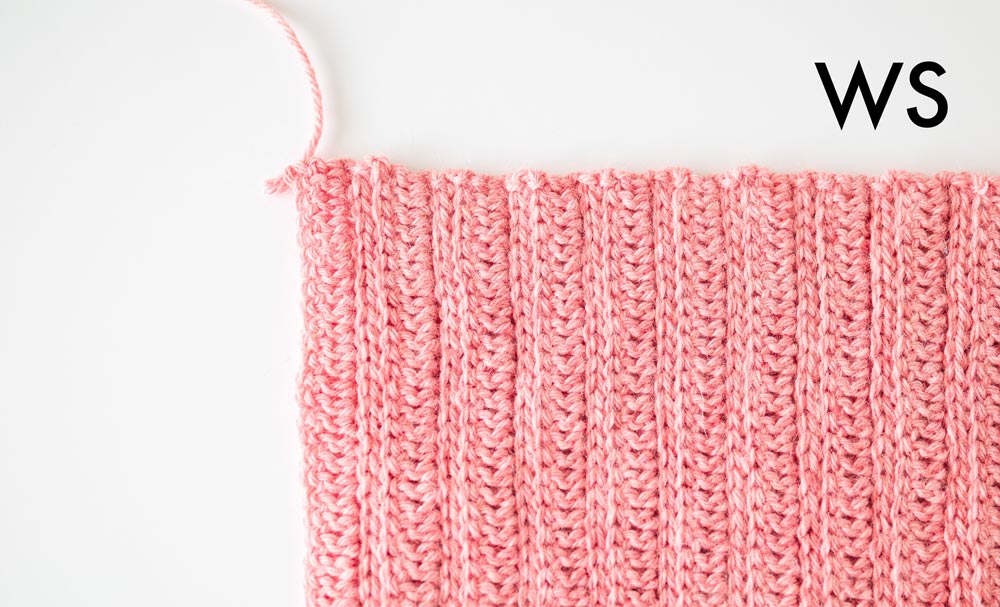
ROW 1(RS): DC into 3rd ch from hook, DC in each st until end, turn.
ROWS 2 – 4 (BASE SL ST ROW): Ch 1, BLO sl st across, sl st in last st, turn.
ROW 5 (BASE DC ROW): Ch 2, BLO DC across, DC in last st, turn.
Repeat ROWS 2 – 5 until you reach your desired length.
Amalfi Ribbed Sweater Crochet Pattern
Back Panel
FOUNDATION CHAIN: Ch 78(78, 82, 82, 86)(86, 90, 90, 94).
ROW 1 (RS): DC into 3rd ch from hook, DC in each st until end, turn.
<76(76, 80, 80, 84)(84, 88, 88, 92)>
ROWS 2 – 4 (BASE SL ST ROW): Ch 1, BLO sl st across, sl st in last st, turn.
<76(76, 80, 80, 84)(84, 88, 88, 92)>
ROW 5 (BASE DC ROW): Ch 2, BLO DC across, DC in last st, turn.
<76(76, 80, 80, 84)(84, 88, 88, 92)>
Repeat ROWS 2 – 5 until ROW 85(93, 101, 109, 117)(125, 133, 141, 149).<76(76, 80, 80, 84)(84, 88, 88, 92)>
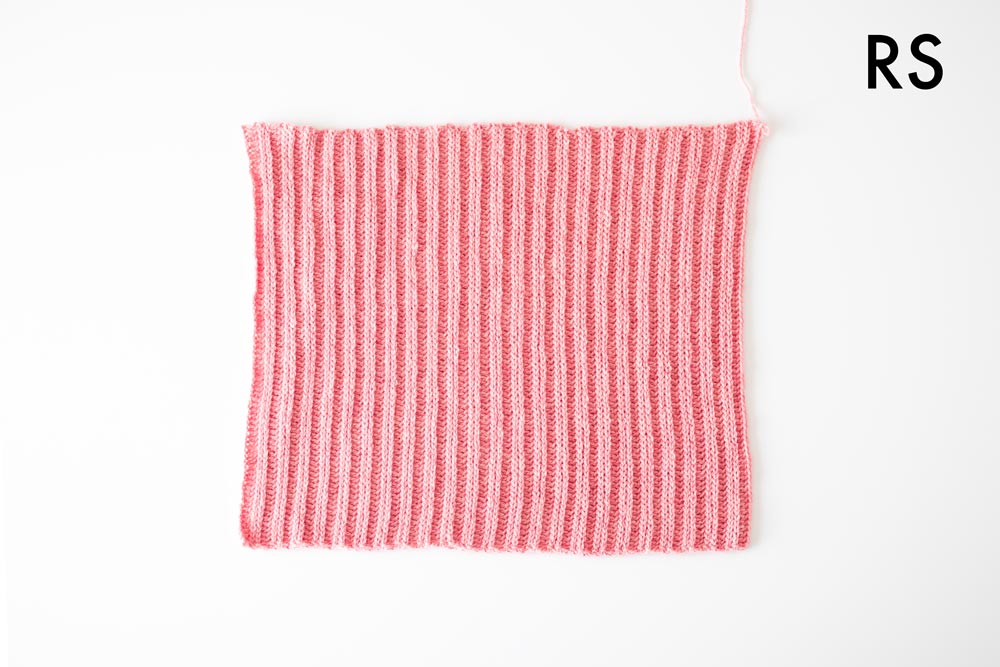
Fasten off.
Front Panel
FOUNDATION CHAIN: Ch 78(78, 82, 82, 86)(86, 90, 90, 94).
ROW 1 (RS): DC into 3rd ch from hook, DC in each st until end, turn.
<76(76, 80, 80, 84)(84, 88, 88, 92)>
ROWS 2 – 4: As BASE SL ST row.
ROW 5: As BASE DC row.
Repeat ROWS 2 – 5 until ROW 30(34, 38, 42, 46)(50, 54, 58, 62).
*Final row should be a BASE SL ST ROW.
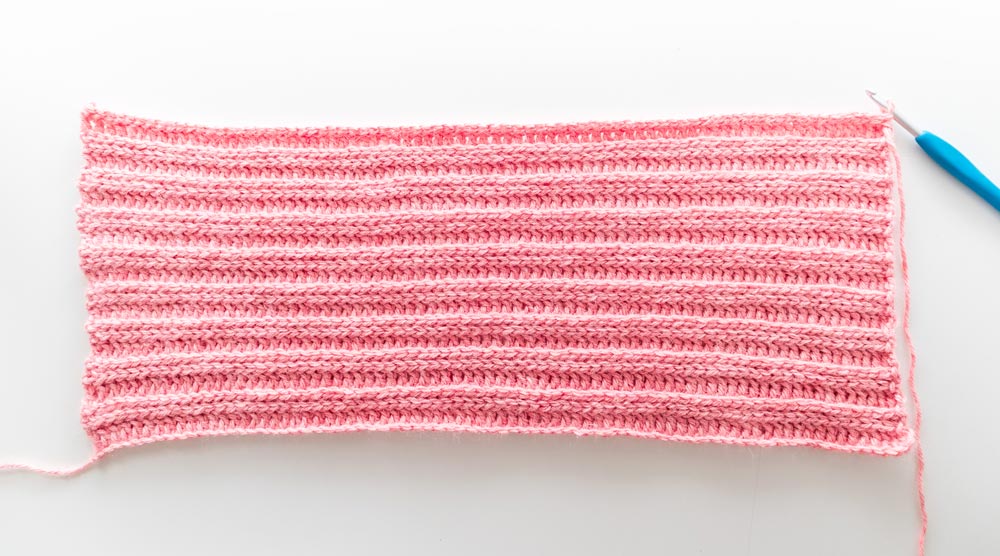
Don’t fasten off! Proceed directly to ‘NECKLINE SHAPING INSTRUCTIONS’.
NECKLINE SHAPING
*Decreasing and increasing the neckline will create ‘steps’ along the edge of the sweater. The corners will be hidden once we sew on the neckline ribbing.
NECKLINE DECREASE
ROW 1: Ch 1, BLO sl st until you have 9 sts left, turn.
<67(67, 71, 71, 75)(75, 79, 79, 83)>
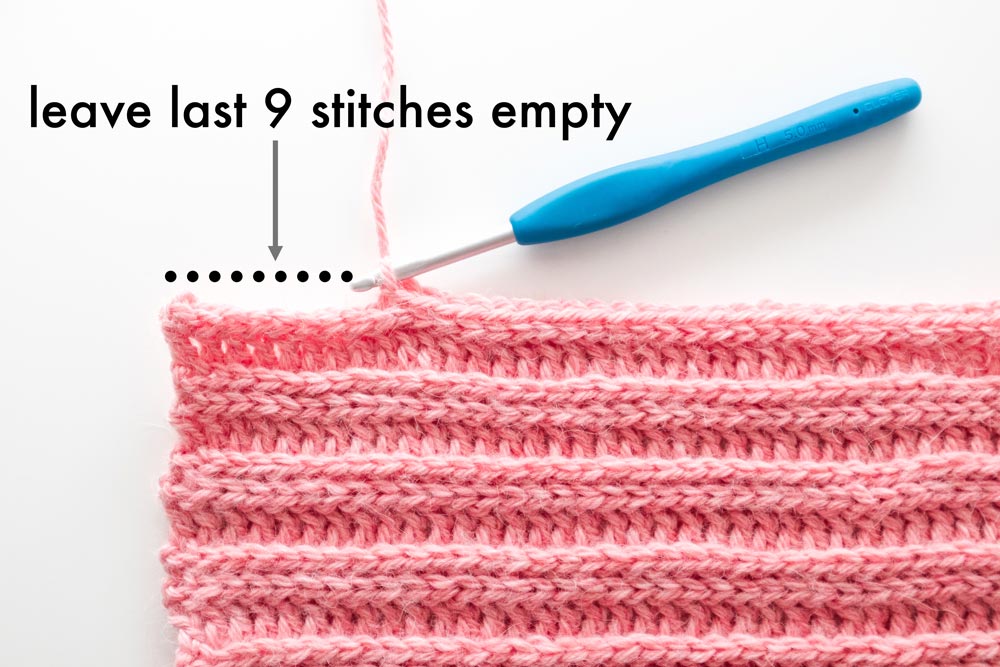
ROW 2: As BASE SL ST row.
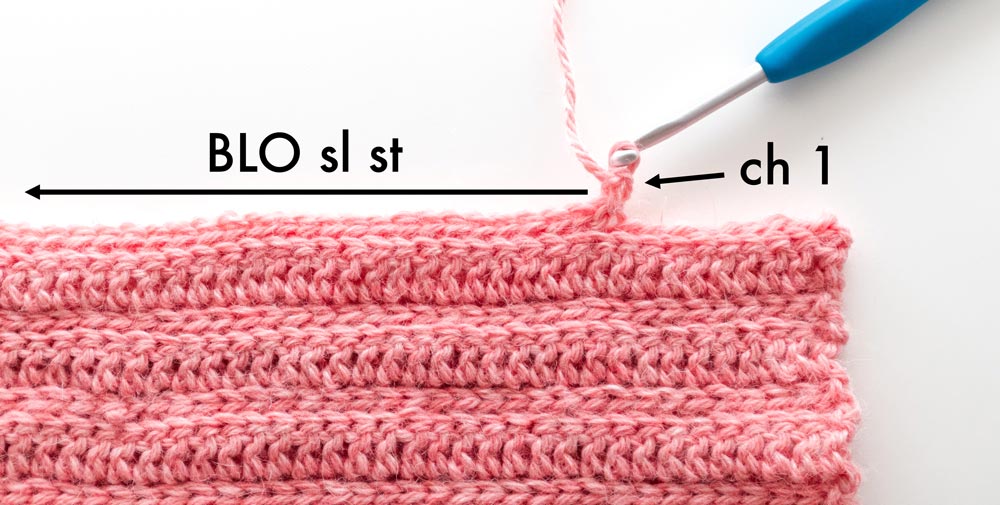
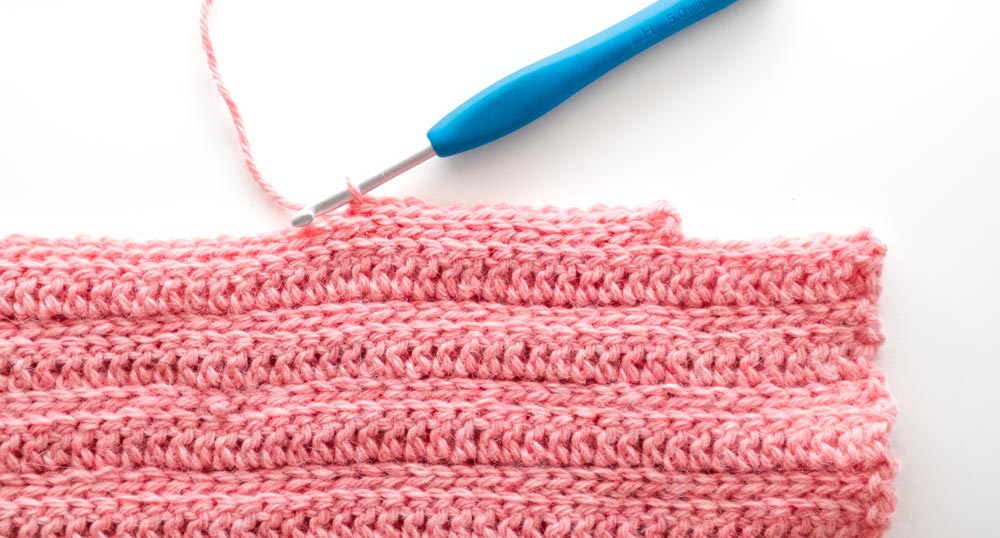
ROW 3: As BASE DC row.
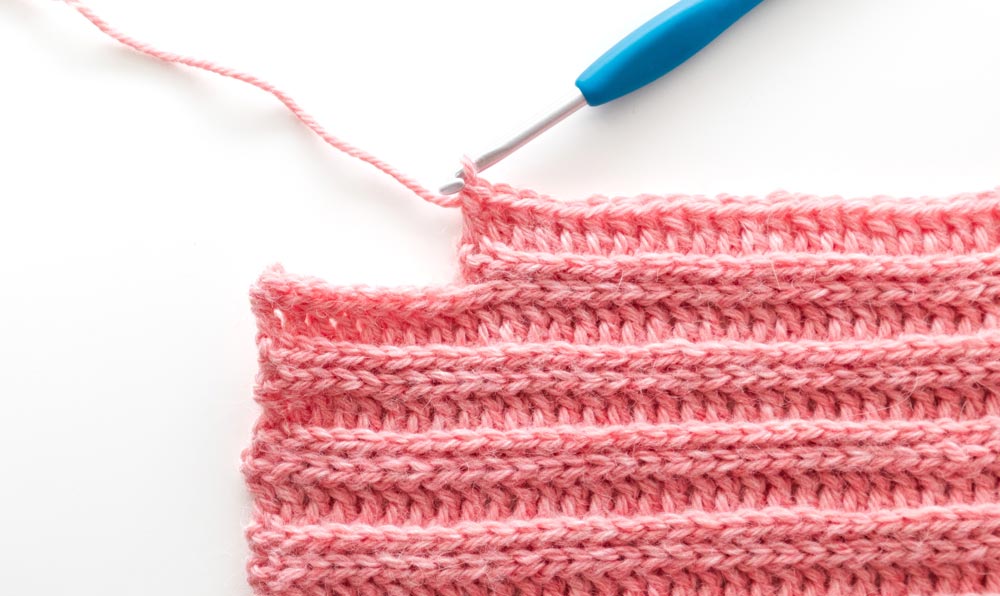
ROW 4: As BASE SL ST row.
ROW 5: Ch 1, BLO sl st until you have 3 sts left, turn.
<64(64, 68, 68, 72)(72, 76, 76, 80)>
ROW 6: As BASE SL ST row.
ROW 7: As BASE DC row.
ROW 8: As BASE SL ST row.
ROW 9: Ch 1, BLO sl st until you have 2 sts left, turn.
<62(62, 66, 66, 70)(70, 74, 74, 78)>
ROW 10: As BASE SL ST row.
ROW 11: As BASE DC row.
ROWS 12 – 14: As BASE SL ST row.
<62(62, 66, 66, 70)(70, 74, 74, 78)>
ROW 15: As BASE DC row.
<62(62, 66, 66, 70)(70, 74, 74, 78)>
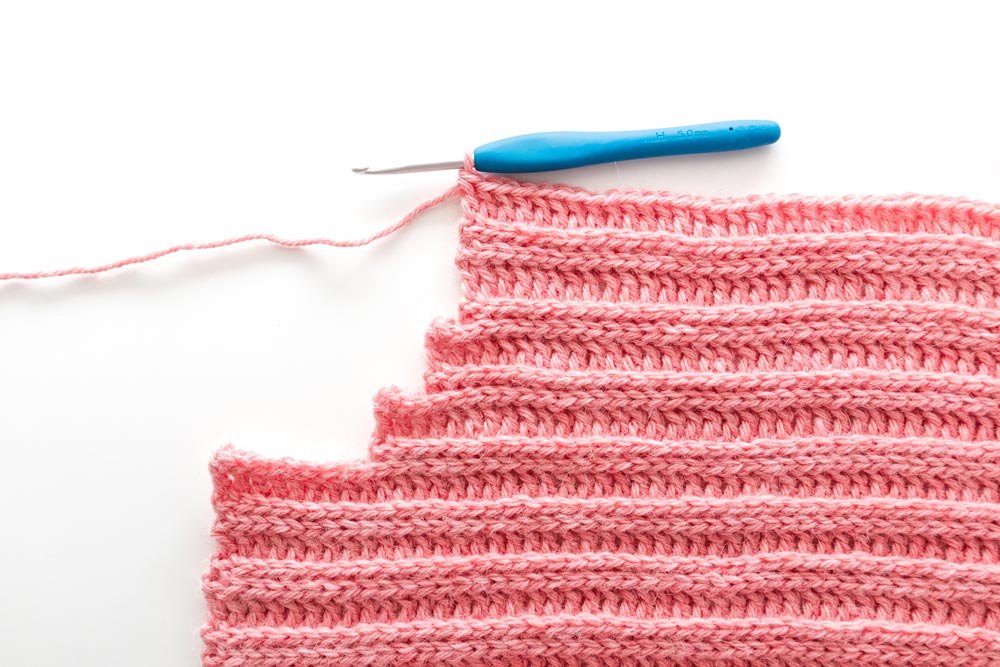
ROW 16: As BASE SL ST row.
<62(62, 66, 66, 70)(70, 74, 74, 78)>
NECKLINE INCREASE
ROW 17: Ch 1, BLO sl st across, sl st in last st, ch 3, turn.
<62(62, 66, 66, 70)(70, 74, 74, 78) + 3 chs>
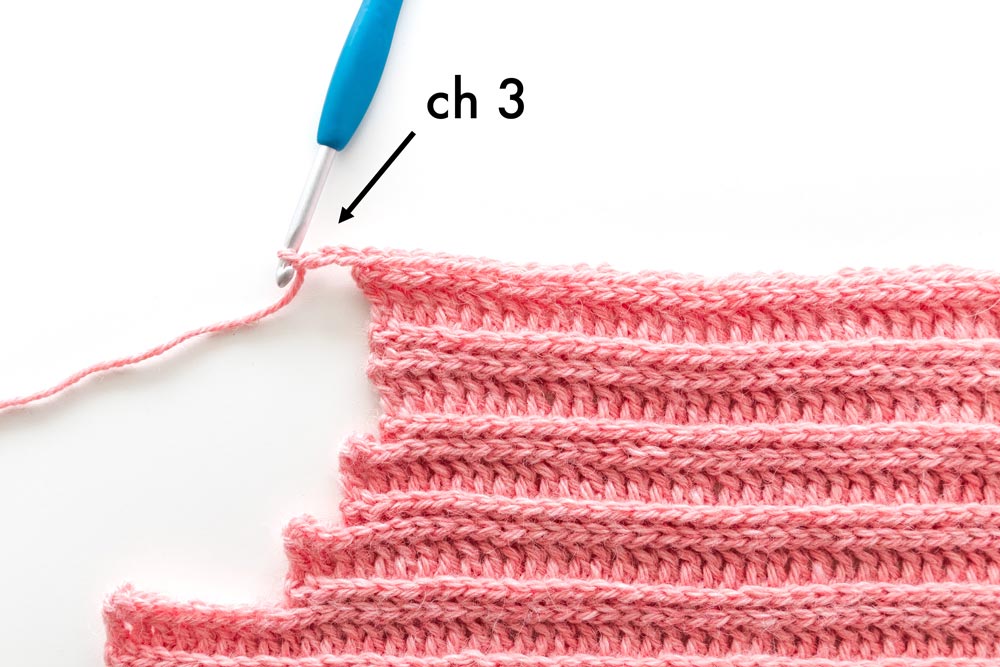
ROW 18: Sl st into 2nd ch from hook, sl st in next ch, BLO sl st in each st until last st, sl st in last st, turn.
<64(64, 68, 68, 72)(72, 76, 76, 80)>
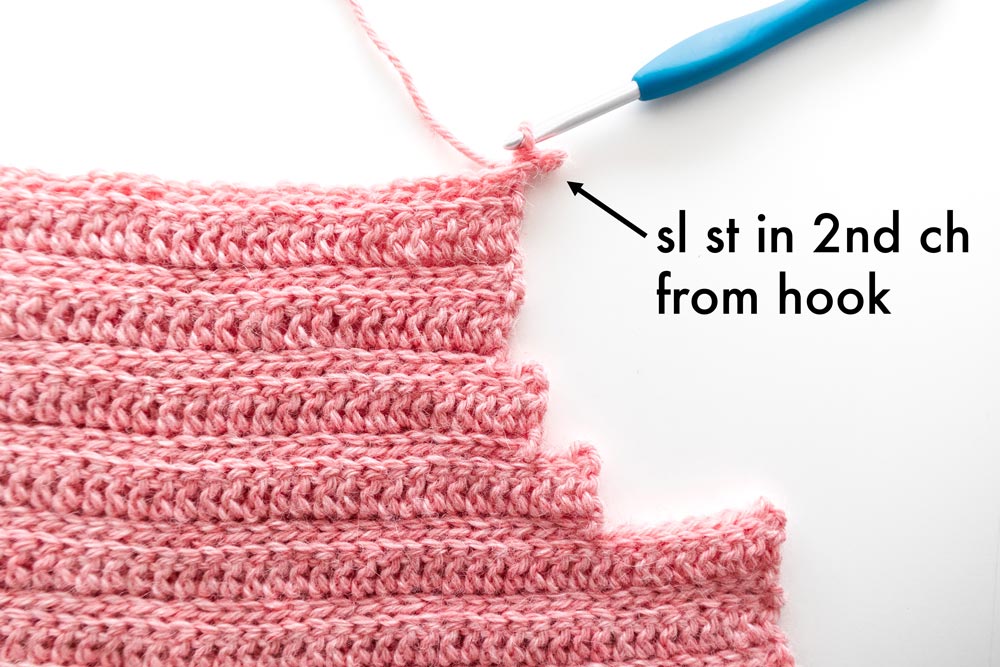
ROW 19: As BASE DC row.
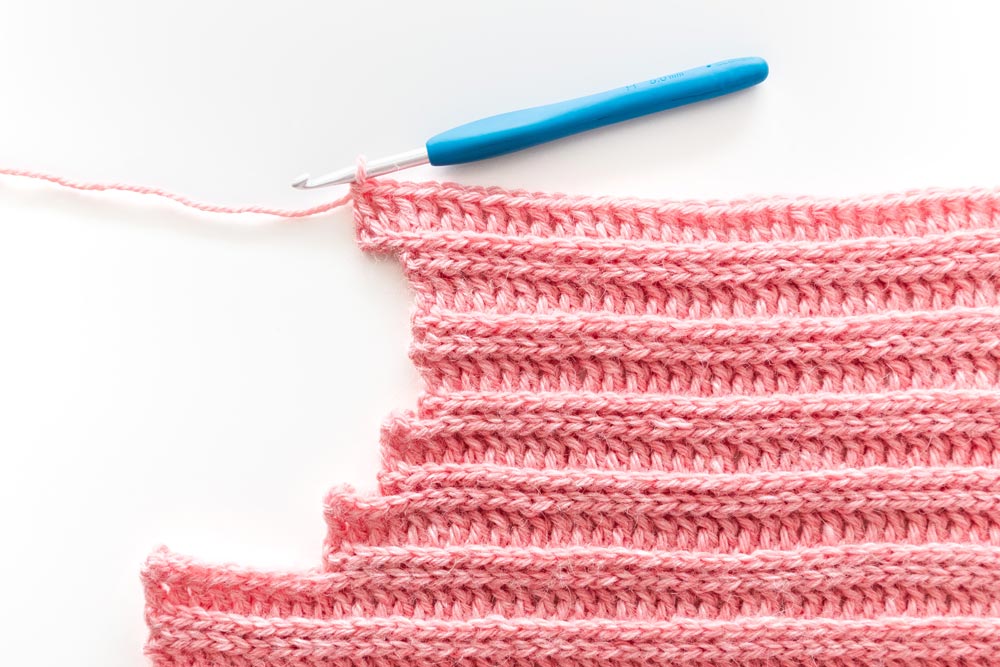
ROW 20: As BASE SL ST row.
ROW 21: Ch 1, BLO sl st across, sl st in last st, ch 4, turn.
<64(64, 68, 68, 72)(72, 76, 76, 80) + 4 chs>
ROW 22: Sl st into 2nd ch from hook, sl st in each ch, BLO sl st in each st until last st, sl st in last st, turn.
<67(67, 71, 71, 75)(75, 79, 79, 83)>
ROW 23: As BASE DC row.
ROW 24: As BASE SL ST row.
ROW 25: Ch 1, BLO sl st across, sl st in last st, ch 10, turn.
<67(67, 71, 71, 75)(75, 79, 79, 83) + 10 chs>
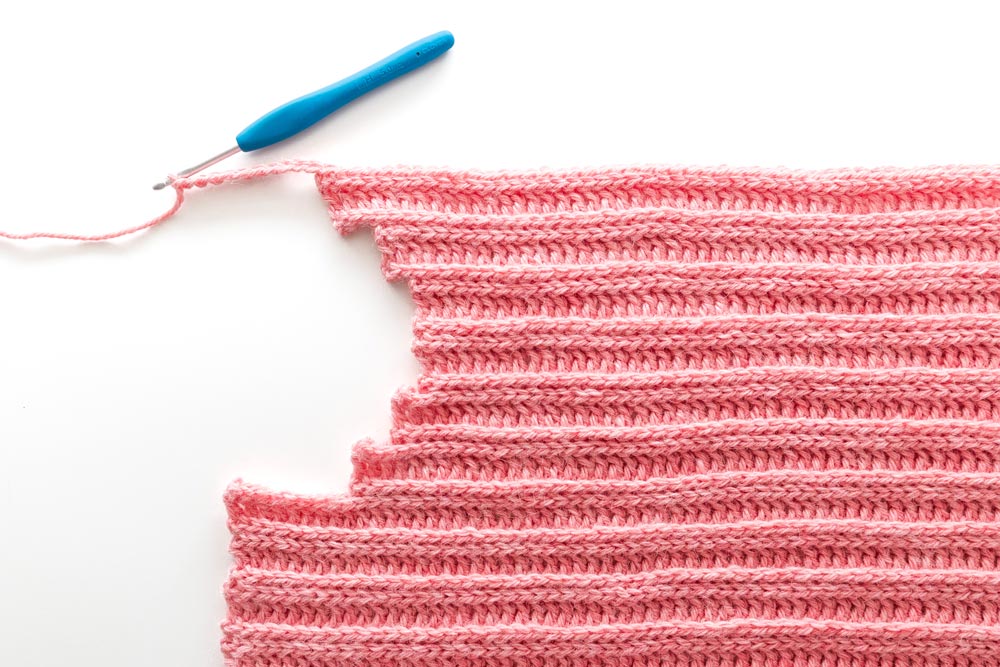
ROW 26: Sl st into 2nd ch from hook, sl st in each ch, BLO sl st in each st until last st, sl st in last st, turn.
<76(76, 80, 80, 84)(84, 88, 88, 92)>
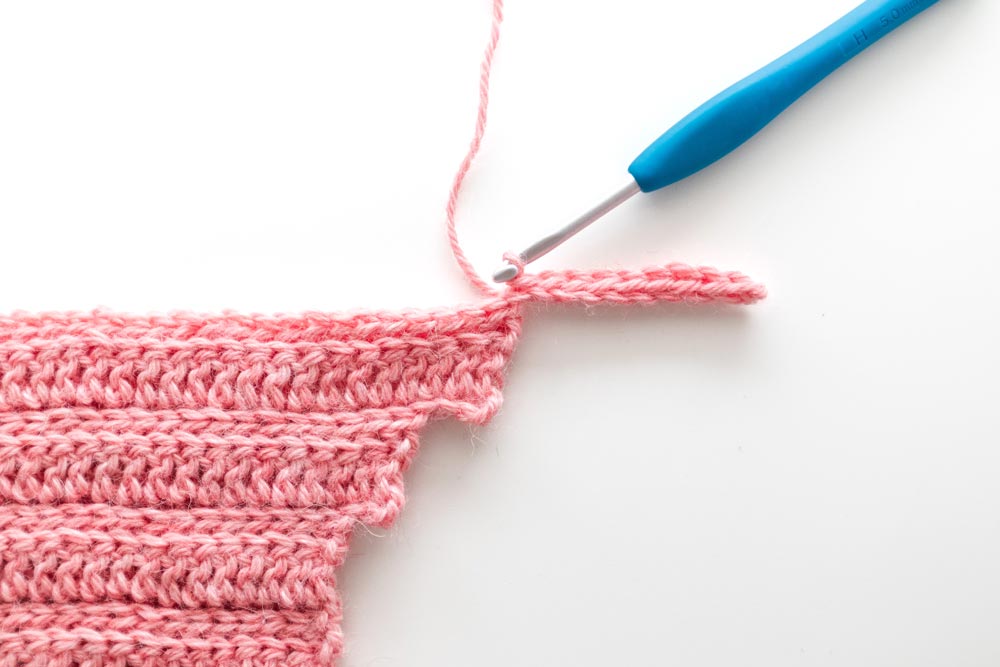
ROW 27: As BASE DC row.
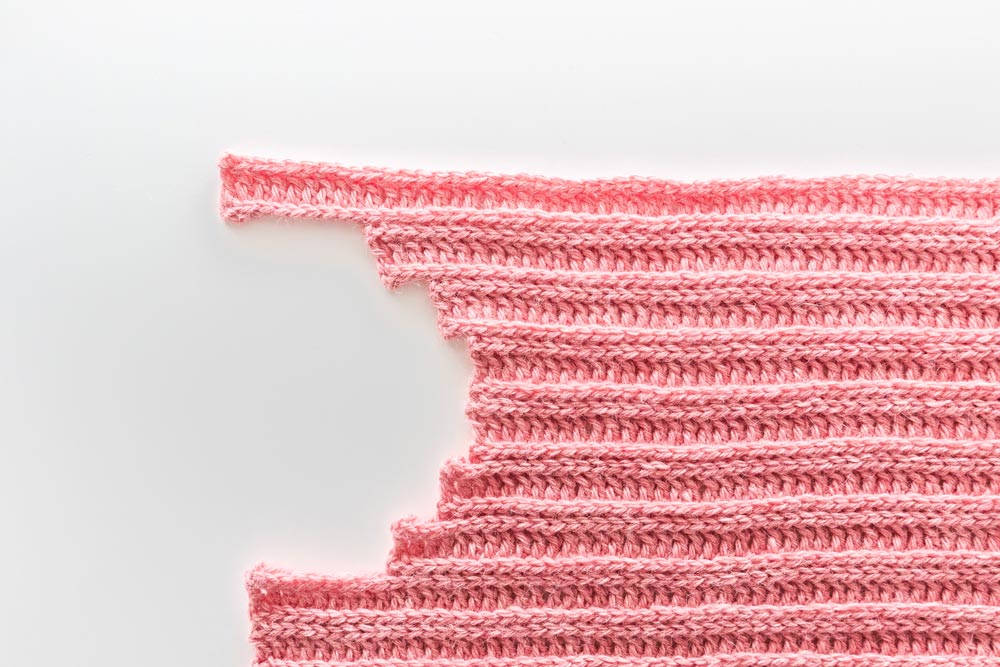
Don’t fasten off! Proceed to ‘FRONT PANEL CONTINUED’ instructions.
Front Panel Continued.
Repeat FRONT PANEL ROWS 2 – 5 until ROW 85(93, 101, 109, 117)(125, 133, 141, 149).
<76(76, 80, 80, 84)(84, 88, 88, 92)>
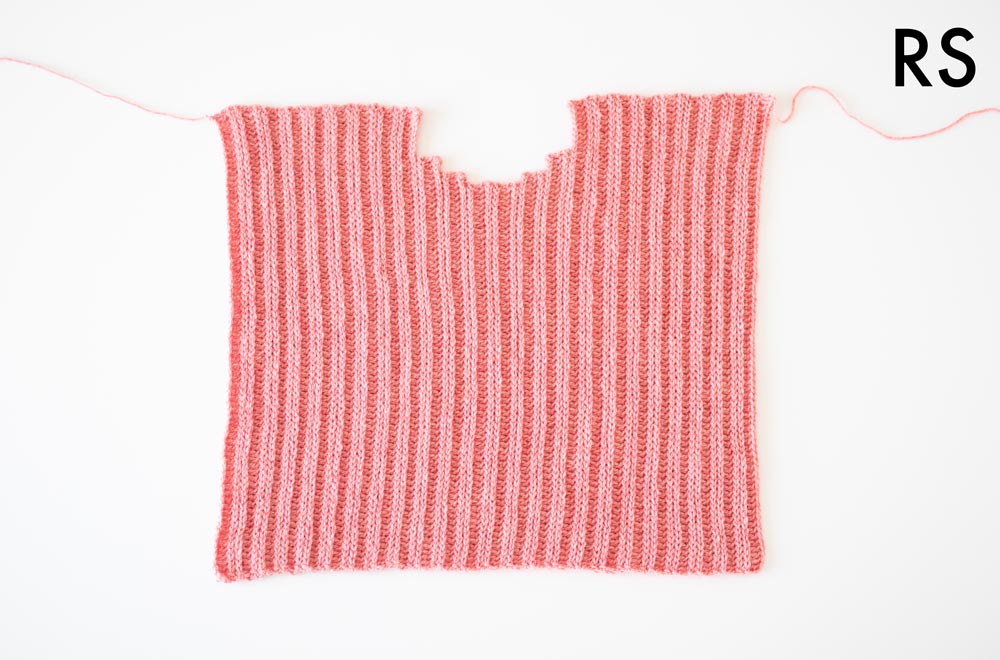
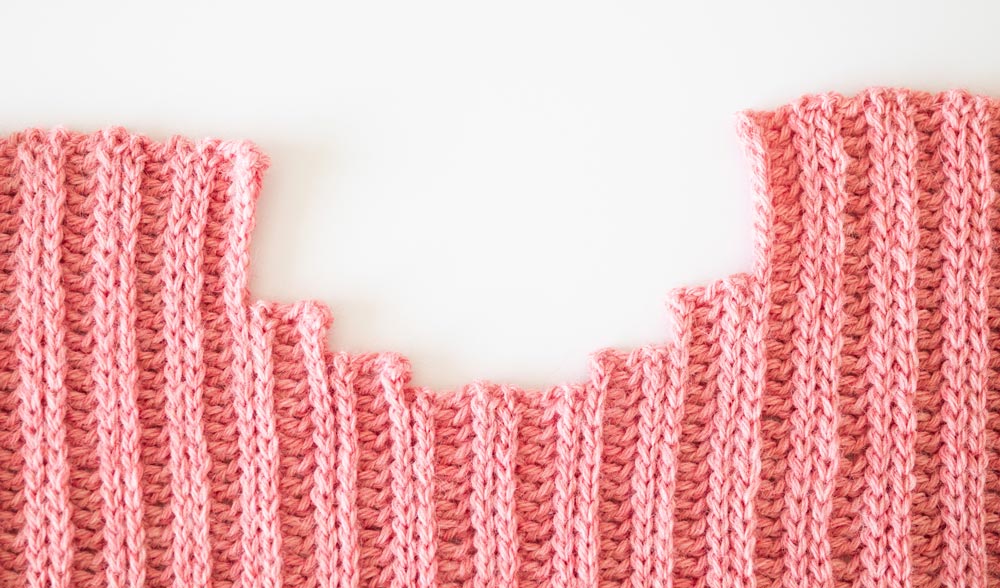
Fasten off.
Sleeves
*Make 2
FOUNDATION CHAIN: Ch 67(69, 69, 71, 71)(73, 73, 75, 75).
*The foundation chain runs the length of the sleeve, not the width.
ROW 1 (RS): Sl st into 2nd ch from hook, sl st 11, DC in each ch until end, turn.
<66(68, 68, 70, 70)(72, 72, 74, 74)>
ROWS 2 – 4: As BASE SL ST row.
<66(68, 68, 70, 70)(72, 72, 74, 74)>
ROW 5: Ch 1, BLO sl st 12, BLO DC across, DC in last st, turn.
<66(68, 68, 70, 70)(72, 72, 74, 74)>
Repeat ROWS 2 – 5 until ROW 53(57, 57, 61, 65)(69, 73, 77, 81).
<66(68, 68, 70, 70)(72, 72, 74, 74)>
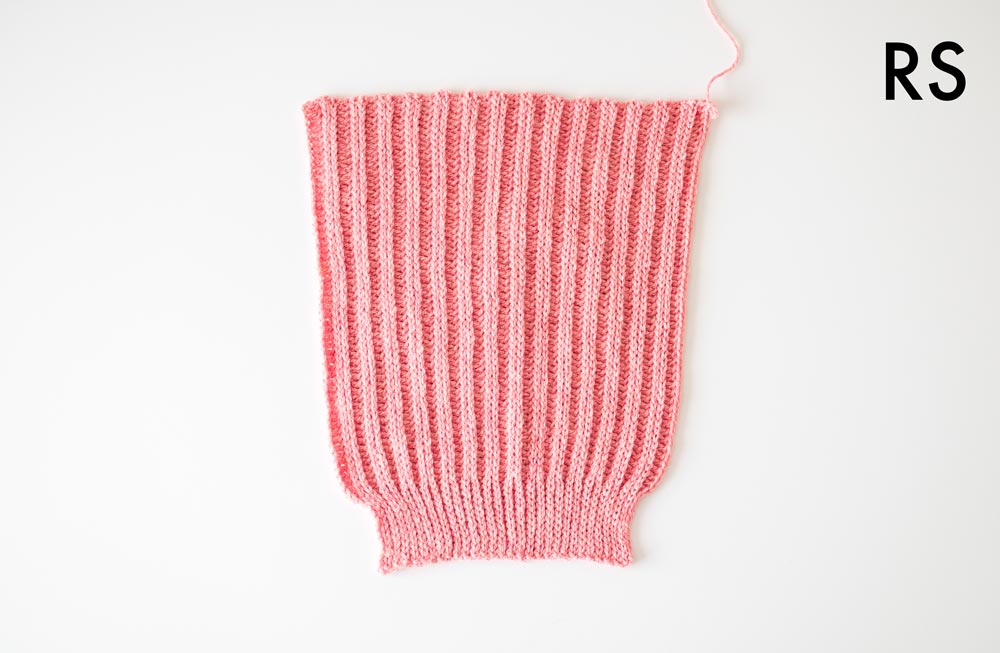
Fasten off.
Fold sleeve in half lengthways. Whip stitch the edges of the sleeve together.
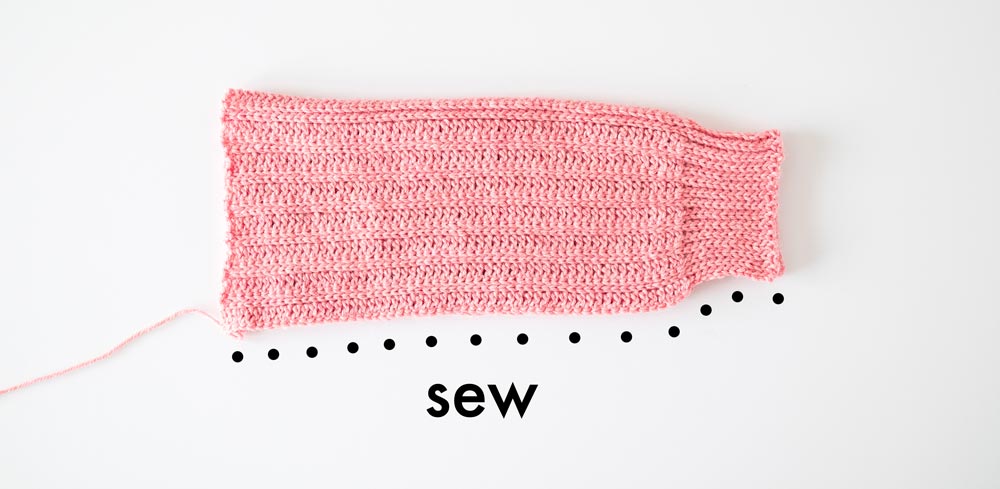
Assembly
Lay the front panel on top of the back panel.
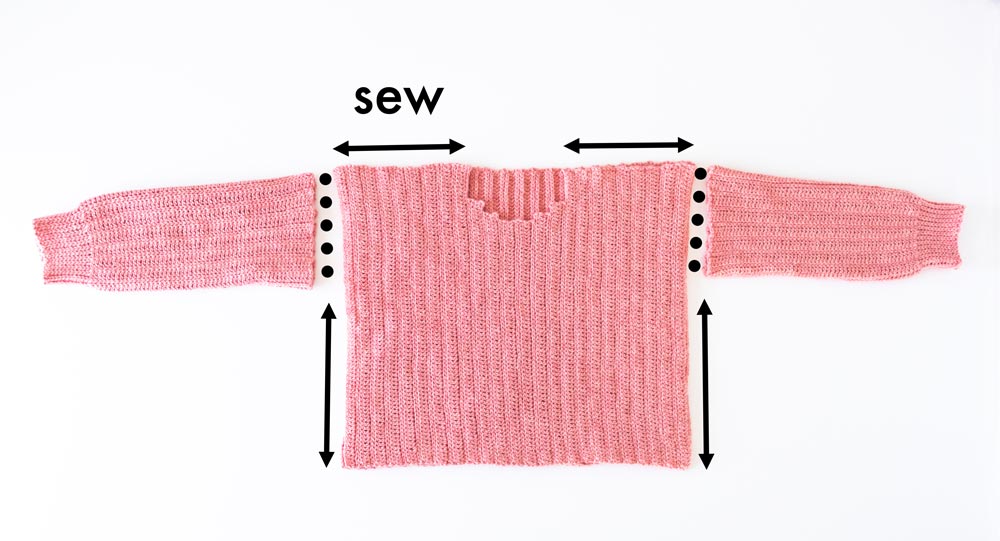
Whip stitch the shoulder seams together.
*For a neat finish and smooth seams, make sure that the ribbing matches on the RS of the sweater and place whip stitches into the centre of the DCs, rather than wrapping around the entire stitch.
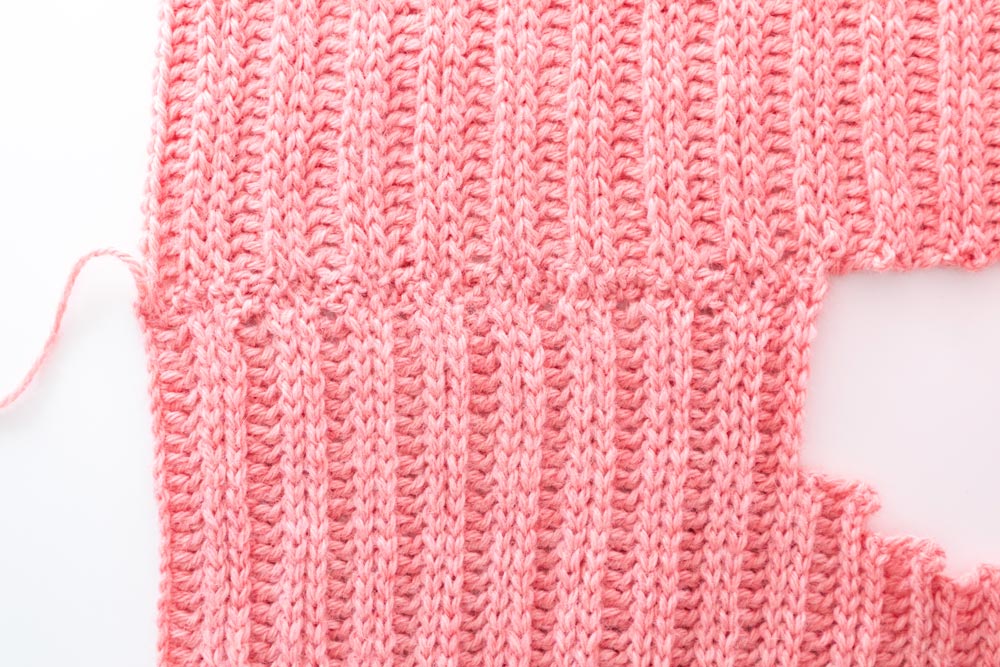
Whip stitch up the sides of body panels together, leaving a gap for the sleeves.
*When sewing along the body portion, I find that picking up the back loops of the stitches give a more ‘seamless’ look.
Whip stitch top of sleeves to arm holes.
Neckline Ribbing
FOUNDATION CHAIN: Ch 7.
*The foundation chain runs the length of the ribbing, not the width.
ROW 1: Sl st into 2nd ch from hook, sl st in each ch until end, turn.
<6>
ROW 2: Ch 1, BLO sl st across, sl st in last st, turn.
<6>
Repeat ROW 2 until ribbing can fit around the head opening (approx. 41cm / 16”).
*The ribbing is EXTREMELY stretchy so it’s better to crochet ribbing that is a bit smaller (approx. 1-2cm /0.5-1”) than the head opening. The ribbing will stretch to fit and lay flat after you’ve worn it a few times. If you have too much ribbing, the neckline will ruffle and not lay flat.
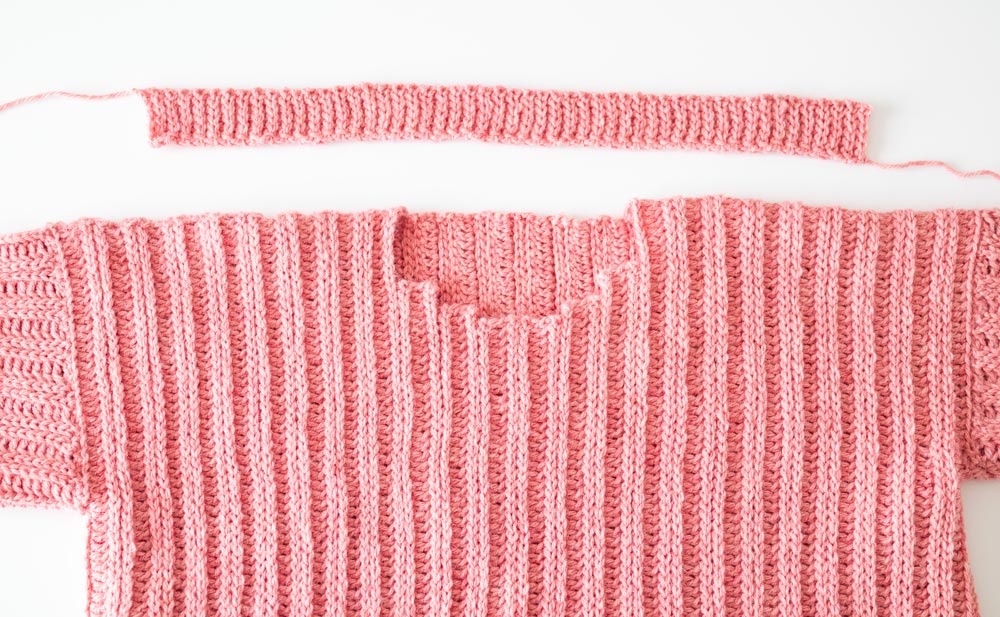
Fasten off.
Body Ribbing
FOUNDATION CHAIN: Ch 9.
*The foundation chain runs the length of the ribbing, not the width.
ROW 1: Sl st into 2nd ch from hook, sl st in each ch until end, turn.
<8>
ROW 2: Ch 1, BLO sl st across, sl st in last st, turn.
<8>
Repeat ROW 2 until ribbing equals the width of the back and front panel.
Fasten off.
Finishing
Pin neckline ribbing to neckline opening, focusing on creating a smooth curve / round neckline.
*The corners of the ‘steps’ will protrude from the edge of the ribbing, this is ok as we’ll sew over them.
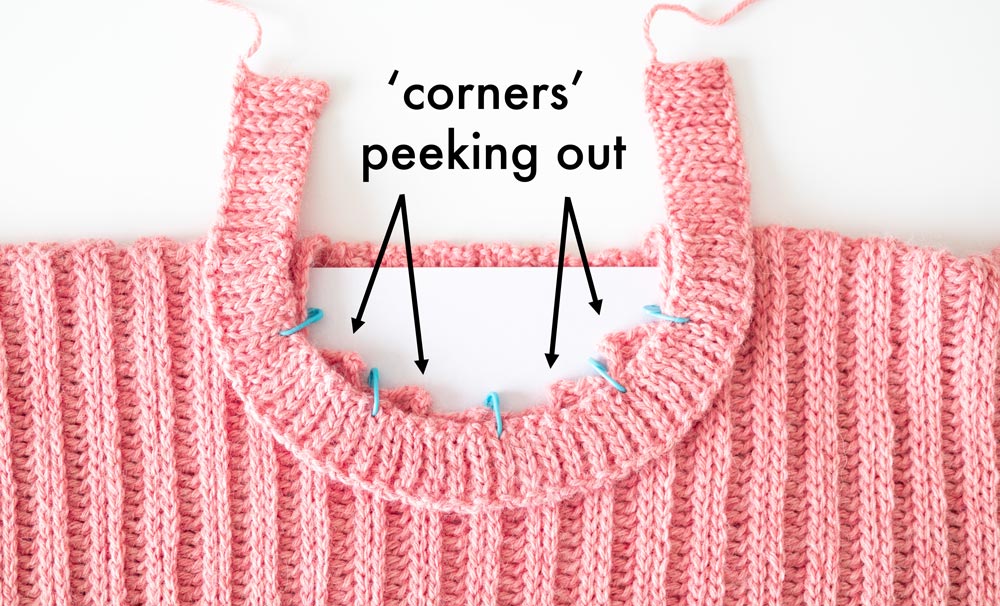
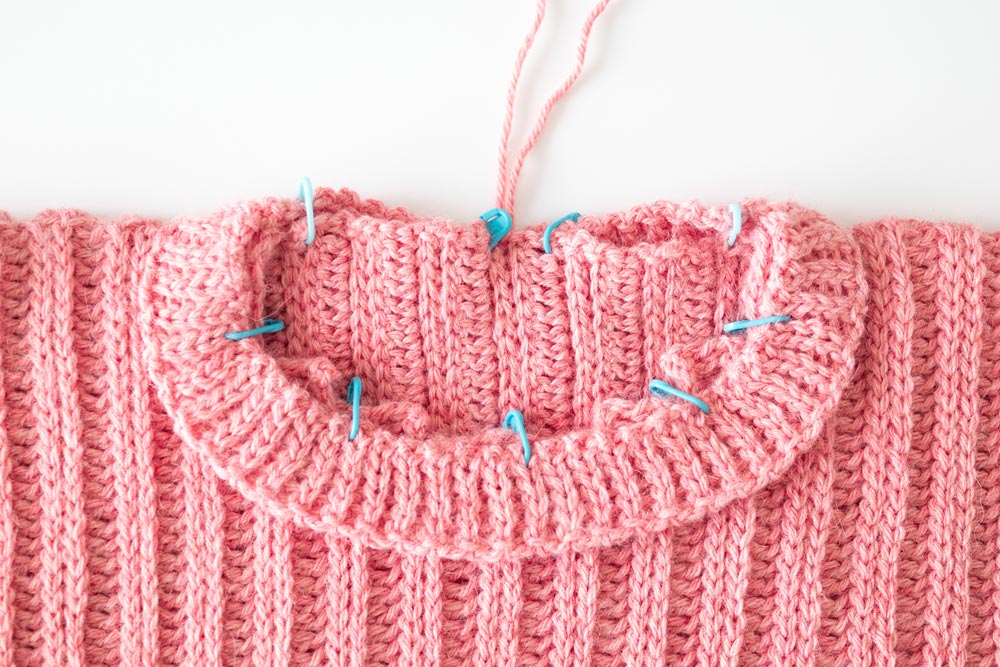
Whip stitch neckline ribbing to head opening, taking care to sew over the ‘corners’.
*After you’ve sewn over the corners they should resemble small ‘bumps’.
*The bumps will not be visible when wearing the sweater nor should you be able to feel them ?
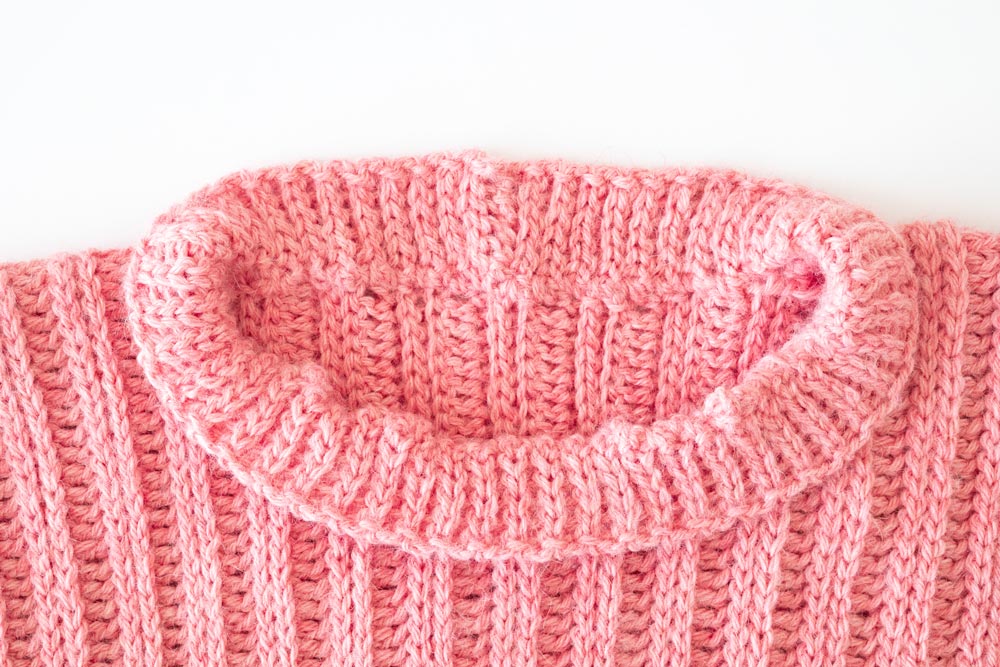
Sew edges of neckline ribbing together.

Whip stitch hemline ribbing to hem of body and sew the edges of the ribbing together.
Weave in all of your ends.
Voilà! You’ve finished your Amalfi Ribbed Sweater ?
The post Ribbed Crochet Sweater – free pattern appeared first on For The Frills.