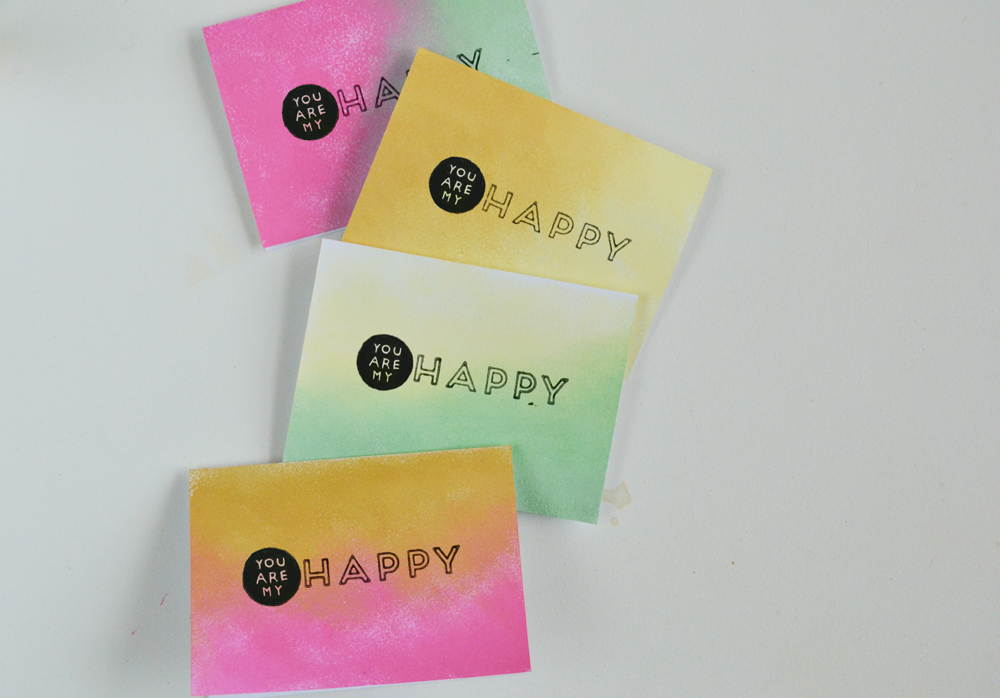
Creating a handmade greeting card is a great way to show your loved ones just how much you care. Use a blank greeting card to create your own ombre “thank you” or party invite with a little paint and your favorite stamp. You can even give them away just for fun, and let your kids take a stab at these with their favorite paints. Follow along with the tutorial!
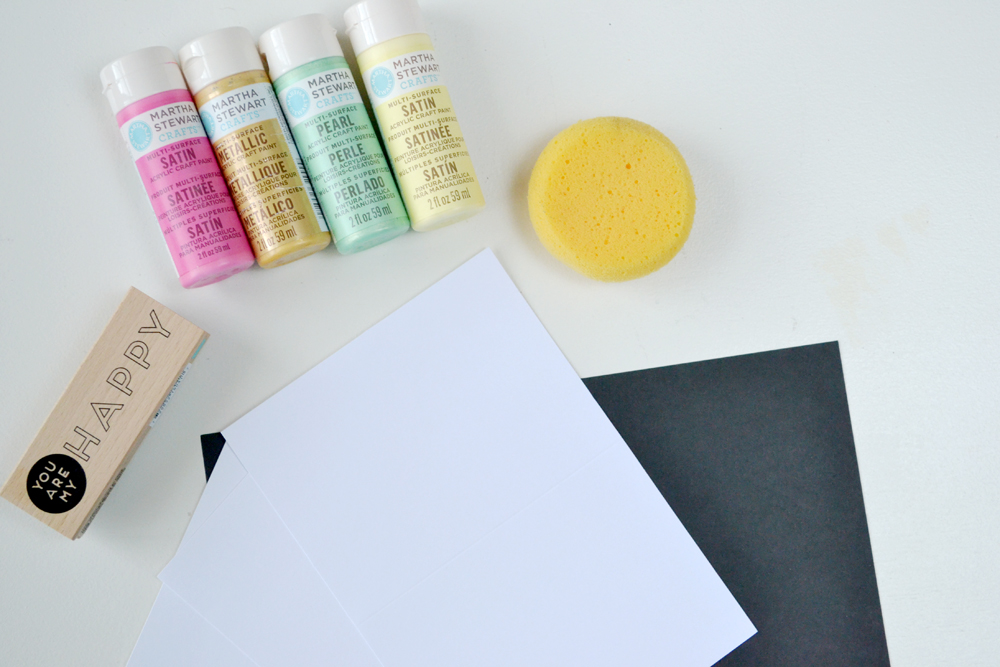
For this DIY, you’ll need:
- Blank greeting cards
- Acrylic paints
- Sponge paint brushes
- 8.5 x 11″ scrap paper
- Rubber Stamp
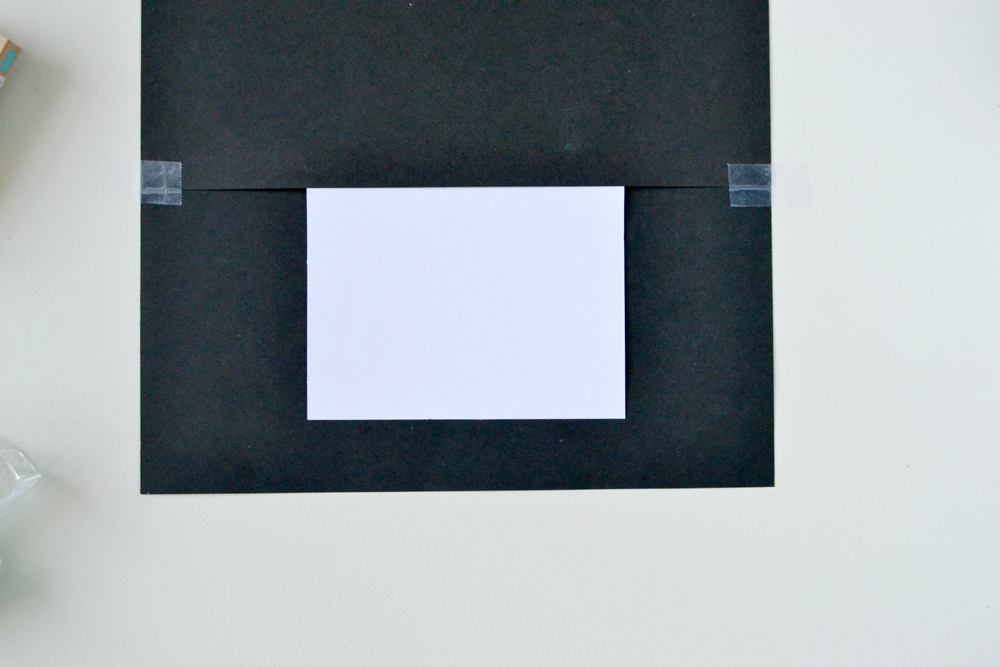
For these cards, I only painted one side of the front of the card so I needed to protect the other. Place the card on scrap paper, leaving a lot of space around the sides and cover the top half of the card with another piece of scrap paper. Tape it down on the sides to secure it while you are painting.
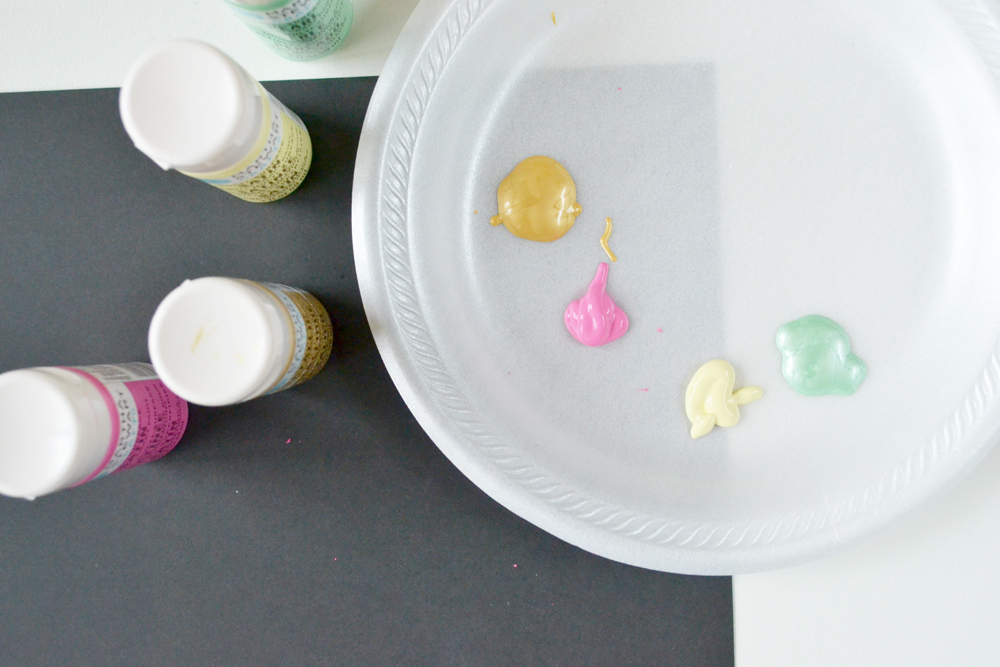
Choose a few of your favorite acrylic paints. I’ve chosen a mixture of matte, metallic and pearl paints to give the cards some variation and shine.
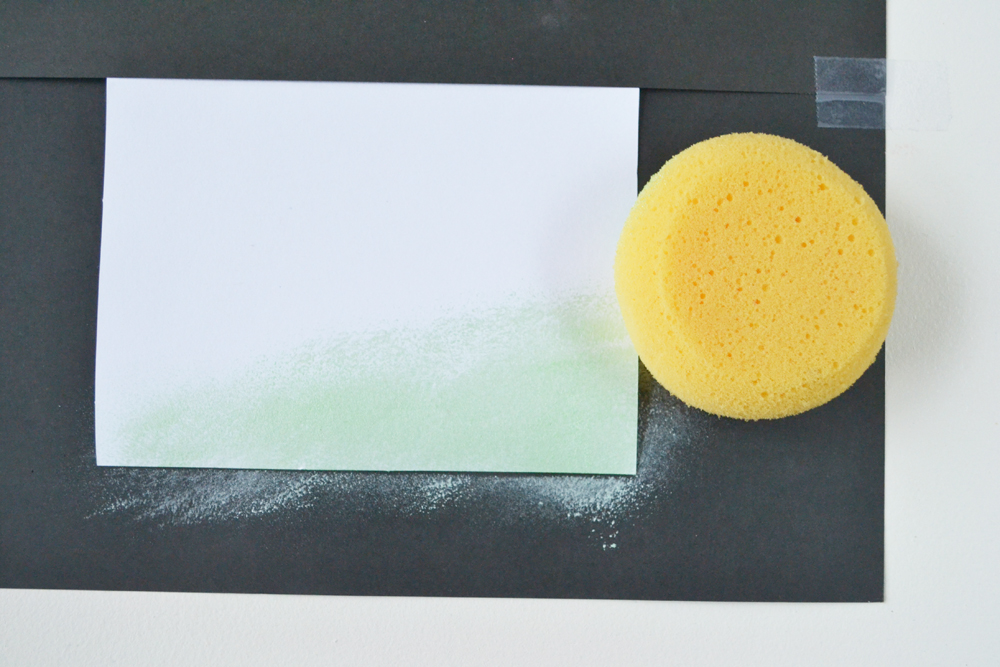
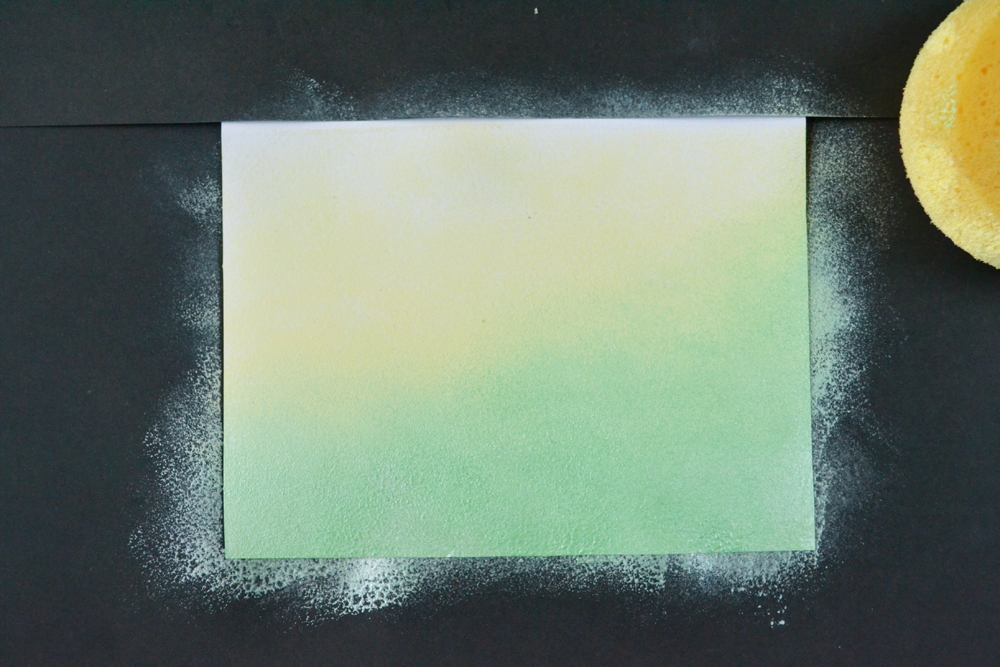
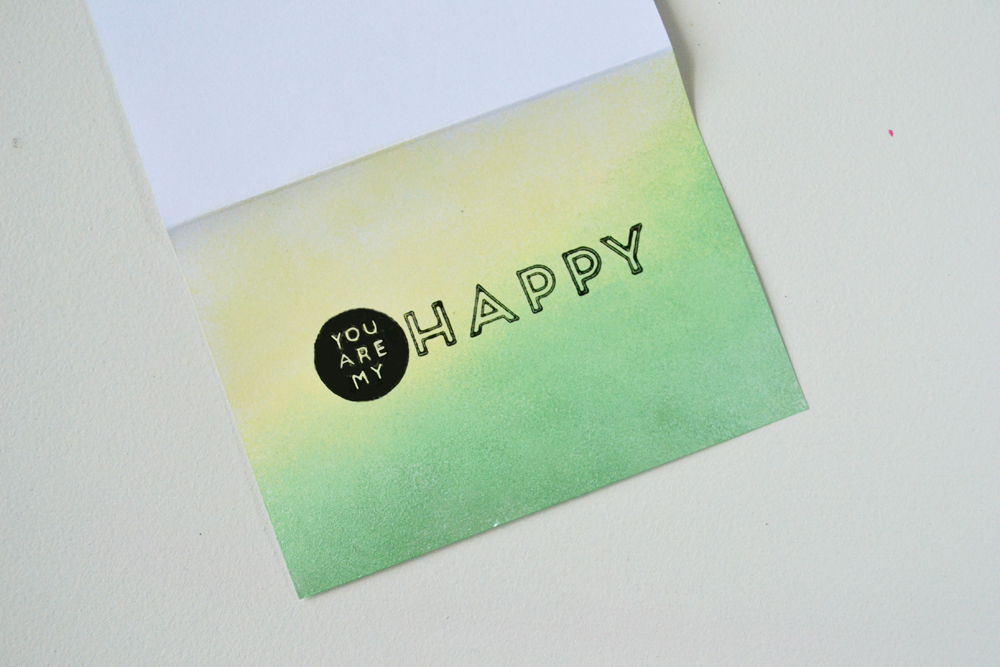
Before painting dampen your sponge brush and squeeze out any excess water. Too wet of a sponge will distort the paper, so be sure to ring all of the water out as much as possible. Using up and down patting motions, begin painting the card. There’s no right or wrong way to paint your card, though the ombre look starts with one color at the bottom and gradually changes to another color at the top. Be sure to pat up and down as you get to the top of the card so it doesn’t seep underneath the scrap paper. You should have a clean line at the top.
Once you are finished stamping, let the card dry for 20 to 30 minutes. It should be dry to the touch when complete.
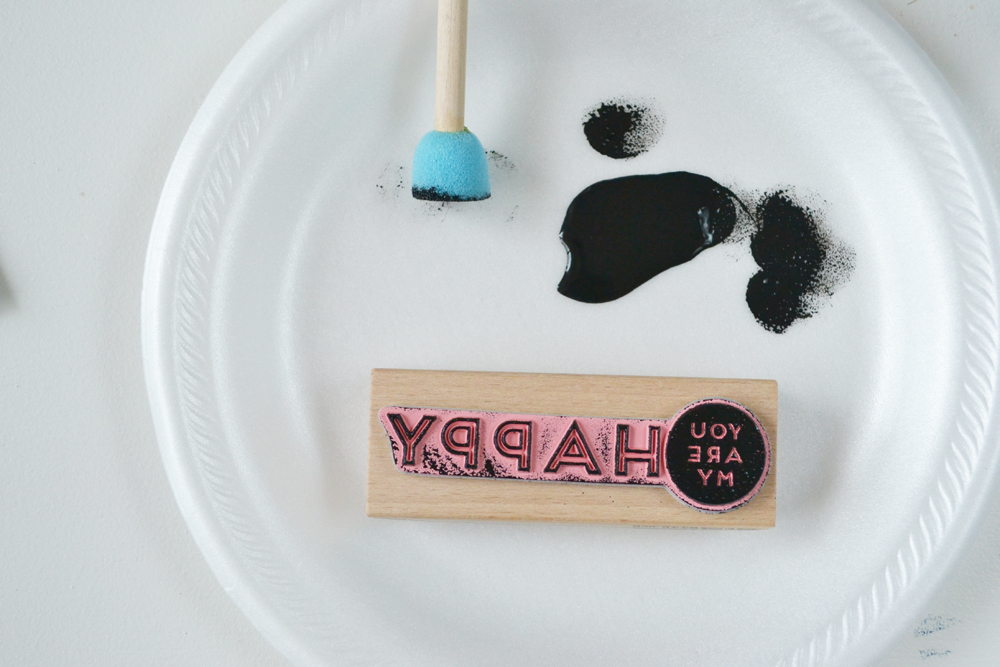
Using ink or paint, stamp the greeting card in the center. I prefer to use paint because it allows me to spread the color exactly where needed on the stamp so it doesn’t bleed.
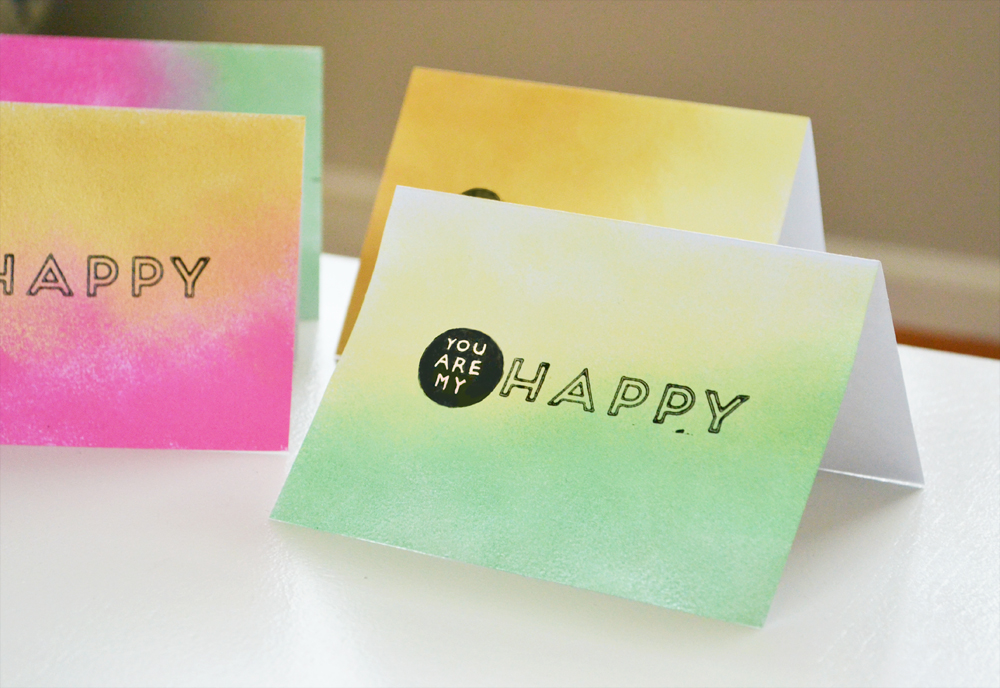
Again, let the ink dry before folding or inserting the greeting card in an envelope. Be sure to write something inside and sign! Create as many of these as you like to give away as invites or thank you cards. This method allows you to make your own range of unique greeting cards that are sure to pamper your loved ones.
The post Ombre Painted Greeting Cards appeared first on DIYs.com.