Repotting a ZZ plant helps create an optimal environment that promotes healthy root growth. Read on for step-by-step instructions on how to repot a ZZ plant without killing it.

A ZZ plant is popular thanks to its sleek green leaves. And it’s easy to care for. Once you have the ZZ plant in your possession, consider repotting it when it outgrows its pot or needs fresh potting mix. This guide walks you through the necessary supplies and instructions for repotting your ZZ plant. You will also learn the reasons for transferring the ZZ plan. Lastly, check out our tips and tricks for managing transplant shock after repotting and additional information about ZZ plants.
Why should I repot my ZZ plant?
The following are common reasons for repotting your ZZ plant:
- Multiple rhizomes: Most houseplants are easy to repot, thanks to a classic root structure. The ZZ plant stands out due to its atypical root structure consisting of small tubers known as rhizomes, which branch out from the stem. These rhizomes store water and nutrients, continue to grow along with the plant, and eventually separate into different segments to sprout new plants. Due to the many rhizomes, the ZZ plant will soon become overcrowded, so transferring it to a larger pot is essential for the plant to thrive.
- Overgrown roots: Roots popping out through the drainage holes show that your ZZ plant needs new soil and more space to grow. If any part of the plant’s rhizome is less than an inch away from the pot walls, it’s time to move it to a new pot.
- Tightly-wrapped roots: When facing limited space, a ZZ plant’s roots tend to wrap themselves tightly around the rhizomes, causing the plant to suffocate and hindering its growth. So it’s essential to repot the ZZ plant to a bigger container.
- Slowed growth: The roots absorb the soil as they grow, limiting the nutrients of the ZZ plant. When the plant can no longer feed properly, it doesn’t grow as fast as before. So you must switch the ZZ plant to a larger pot with room for more soil.
- Soil doesn’t retain water: A side-effect of roots that absorb the soil as they grow is that the soil can’t hold water anymore. Check by observing how fast the water seeps through the soil as you pour it. If it’s faster than usual, you must repot the ZZ plant to add a new potting mix.
- Sickly-looking ZZ plant: When the ZZ plant doesn’t have access to nutrients in the soil anymore, its leaves and stems will become sickly. Droopy stems and yellowish leaves are the easiest sign of nutrient deficiency. To fix this issue, repot the ZZ plant to add fresh, nutrient-rich soil.
- Infested soil: Overwatering and improper planting techniques lead to soil infestation, creating a breeding ground for fungi, mold, or pests like gnats. If you notice any pests or diseases in your ZZ plant, repot it to discard the infected soil and replace it with a healthy potting mix.
- Root rot: The rhizomes of a ZZ plant are bulbous, so the plant is prone to root rot when overwatering it. If you suspect root rot, it’s necessary to trim the bad roots, repot the ZZ plant, and add fresh soil.
- Soil becomes compacted: Watering slowly tamps the soil. In time, the soil becomes too compacted to allow the plant’s roots to absorb nutrients properly. In this case, repot the plant to loosen up the soil.
- Deformed or cracked pot: Overgrown roots may cause plastic pots to deform and terracotta or ceramic pots to crack. When this happens, changing the pot of the ZZ plant is a must.
- Depleted soil: In time, the ZZ plant uses up all nutrients from its potting soil, no matter how well you fertilize it. So even if your plant doesn’t show any of the signs mentioned so far, you still have to repot it eventually – once every 2 years.
Supplies for repotting a ZZ plant
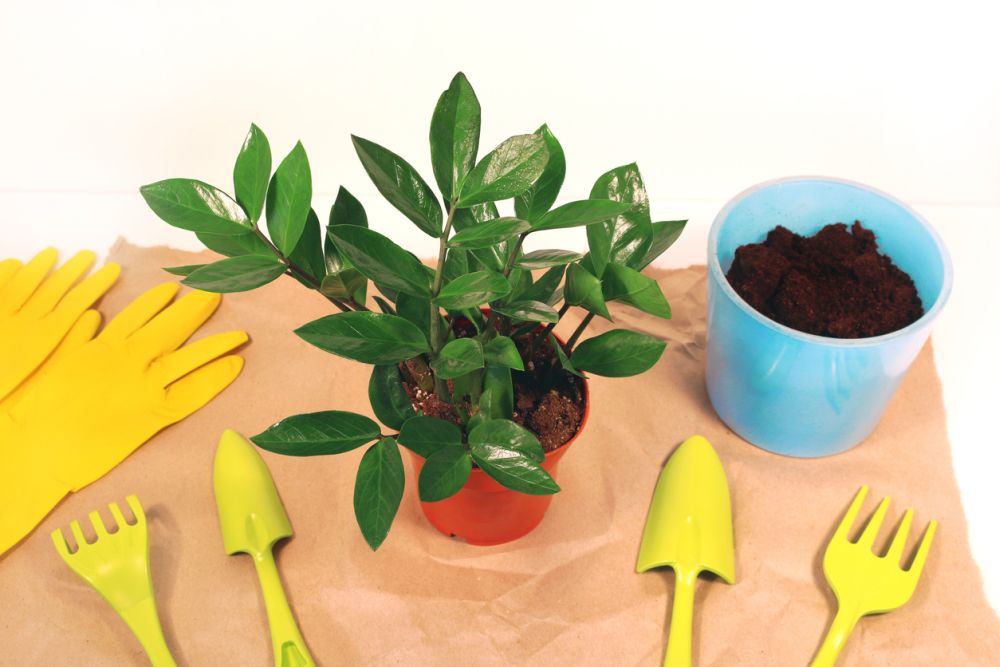
- Gardening gloves to protect your skin from the toxic sap.
- A pot that’s one or two sizes larger than the current one. It should have at least one drainage hole.
- Porous material to line the bottom of the pot for improving drainage. For example, use pebbles, gravel, or clay pellets.
- Fresh potting mix for ZZ plants. For instance, use regular potting soil mixed with cacti or succulent mix.
- A trowel or a knife to dislodge the ZZ plant from its pot.
- Tarp or newspaper to protect the working area from dirt.
- Sterilized snips or gardening scissors to trim away any excess roots.
How do I repot a ZZ plant?
Check out the step-by-step instructions for reporting a ZZ plant:
- Choose the right season: The best time to repot a ZZ plant is mid-spring or early summer. The warm weather and longer days help the ZZ plant develop its rhizomes and roots, making it easier to get over the transplant shock.
- Water the ZZ plant in advance: Thoroughly water your ZZ plant 2-3 days before repotting. It will help loosen up the soil and remove the plant from its container easier. Additionally, the rhizomes will have plenty of water to recover after repotting.
- Put on your gardening gloves: The sap of the ZZ plant is toxic since it contains calcium oxalate. Calcium oxalate irritates the skin, eyes, and any other soft tissue.
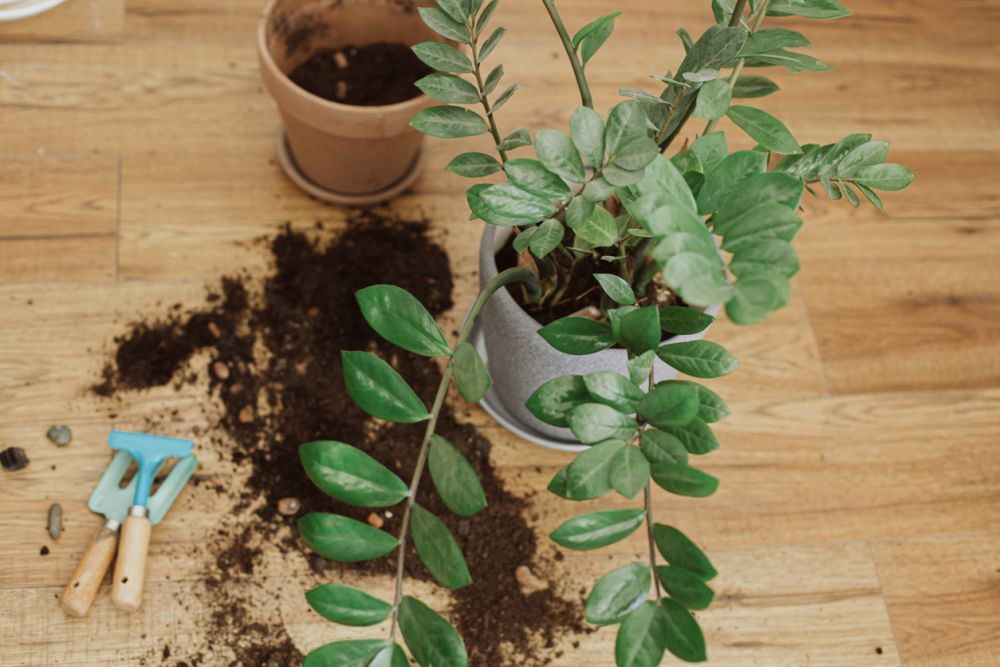
- Remove the ZZ plant from its pot: Grab the base of the ZZ plant with one hand, tip its pot to the side or turn it upside down, and let the plant slide out. For extra help, run a knife or a trowel along the pot’s edges and tap the bottom of the pot. Be gentle when handling the stem since it would take the ZZ plant years to regrow it.
- Check the rhizomes: You must separate the multiple rhizomes to prevent the ZZ plant from getting overcrowded. Either discard the extra rhizomes or use them to propagate the ZZ plant.
- Clean the roots: Examine the rhizomes and roots. They’re damaged if they are dark and mushy, so remove them from the ZZ plant using sterilized trimmers. Gently wash the healthy roots with water, using your fingers to remove clinging soil. If you wish to keep the ZZ plant to its current size, cut away from the healthy roots but not more than a quarter, or you risk killing the plant.
- Prepare the new pot: Add a layer of porous material to the bottom of the new pot. Then, add a 2-3-inch (5-8-cm) thick layer of fresh potting mix, leaving enough room for the roots to grow downward and outward without getting cramped up.
- Add the ZZ plant to the new pot: Place the ZZ plant in the new pot on top of the soil added earlier. Keep the stem an inch below the pot’s rim and surround it with fresh potting mix to fill the gaps around the roots. Continue adding soil until the rhizome is barely visible.
Tips for managing ZZ plant transplant shock
Your ZZ plant will experience transplant shock for a couple of weeks after repotting, which is normal. Here are some tips for mitigating the plant’s transplant shock so that it will recover faster:
- Watering: Maintains a regular watering schedule by watering the ZZ plant once every 2-3 weeks.
- Fertilizing: Avoid fertilizing the ZZ plant since the potting mix already has all the nutrients it needs. More nutrients are likely to stress the plant during the transplant shock.
- Lighting: Place the ZZ plant in an area with bright indirect sunlight, away from drafts.
- Temperature and humidity: Maintain a temperature of 60-75° F (16-25° C) and a humidity of 40-50%.
FAQs
Learn more helpful information about repotting ZZ plants:
Do ZZ plants need big pots?
No, ZZ plants don’t need big pots to thrive. For example, these plants will be happy in smaller containers. However, when the roots grow too big or when the rhizomes multiply, you must transfer the ZZ plants to new pots or keep them in the current ones, trim the roots, and separate the rhizomes.
Why is my ZZ plant dying after repotting?
There are many reasons for a dying ZZ plant after repotting, and the most common one is root rot. Root rot results from overwatering. Prevent this issue by watering your ZZ plant once every 2-3 weeks, and check that the top-inch soil is dry before watering again. A ZZ plant might look like it’s dying while going through transplant shock after repotting, such as drooping or falling stems, but it will soon recover with proper care.
What type of soil should I use for a ZZ plant?
ZZ plants require a well-draining potting mix, but they are not demanding. For example, combine regular potting soil mixed with cacti or succulent mix.
Closing thoughts
Now you know how to repot a ZZ plant successfully. Make sure to take extra care when handling this plant and check for any signs of disease or pests to treat them as early as possible. Lastly, don’t forget about water, light, temperature, and humidity levels, which are essential for keeping your ZZ plant alive and thriving.
The post How to Repot a ZZ Plant in 8 Easy Steps to Keep it Healthy and Thriving appeared first on DIYs.com.