.jpg)
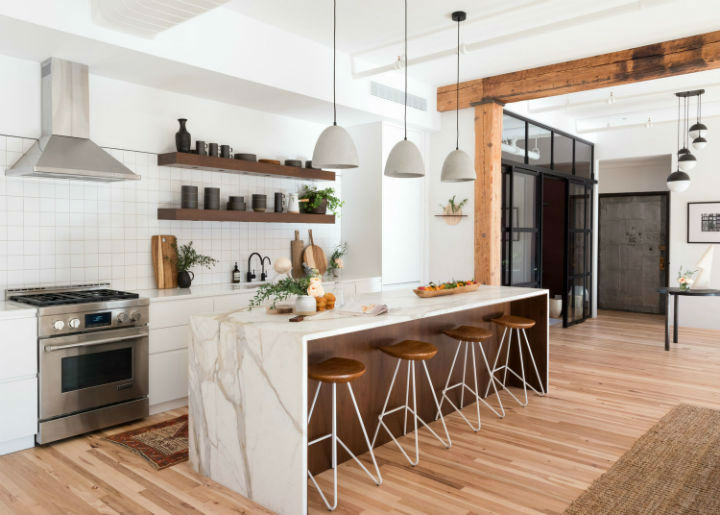
When designing our new kitchen, I knew I wanted this wall to be some sort of feature wall – not just plain old drywall with a coat of paint on it. I also knew I wasn’t going to do typical backsplash on it. Our old kitchen had beadboard wainscoting and when considering the different options, I liked the idea of including beadboard here, as a little reminder of our original kitchen. So today, we’re sharing how to install beadbeard – whether it’s a kitchen beadboard backsplash or a regular beadboard wall.
.jpg)
One of the frequent questions we’re asked, is if it’s hard to keep clean, especially behind the stove. I’ve never had any problems cleaning it (our old kitchen also had it behind the stove), and it’s super easy to just wipe down. We used satin finish with our paint and there’s no problems cleaning it. We’re also asked about the wood behind the sink, if it gets really wet from the sink. It does get some water on it, but we did coat those boards with polyurethane to provide extra protection as you’ll see in the tutorial. It’s been up over a year, and so far no issues!
.jpg)
Supplies:
- 1×6 pine beadboard
- mitre box
- nails & nail gun
- tape measure
- jigsaw
- drill (to start a hole in a board for the jigsaw blade)
- table saw
- primer stain blocker
- clear polyurethane
- primer + paint (we used Sherwin Williams Alabaster in satin finish)
- brush + roller
- silicone caulk, if you’re adding it above a countertop
- trim & baseboard, if desired
Watch the video below to see how we made it:
.jpg)
.jpg)
To see more of the kitchen, check out this post.
-Manda
The post How To Install Beadboard appeared first on The Merrythought.