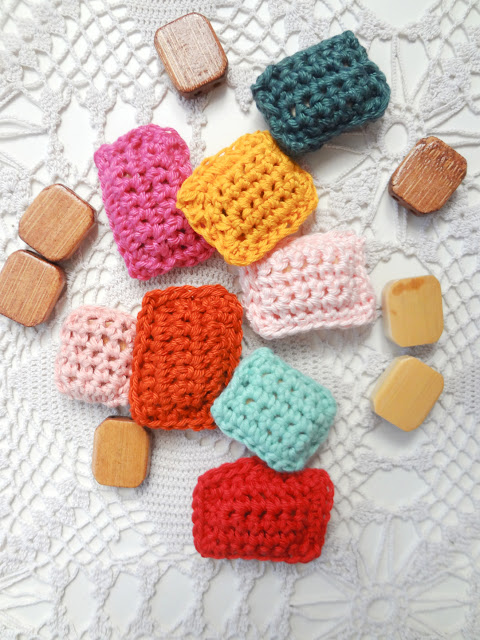
When I bought a wooden bead trivet, I knew I was going to use the beads for a necklace once it’s retired. And after many years of being useful, it was time for it to get a new life.
I cut off the string holding the beads together, and got myself a lovely collection of rectangular wooden beads.
My beads measure 2.5 x 2 cm (0.98 x 0.78) and the pattern that follows makes a nice case for them.
To cover them, I used sport yarn and a 3.00 mm hook.
Pattern:
Foundation and round 1: ch8 and starting from the 2nd st from hook, sc1 in all sts across (7). Ch1 (does not count as a stitch) and turn work.
Round 2-10: sc1 in all sts across (7). Ch 1 and turn work.
For my size of beads, the crochet strip is big enough to cover it.
Edging: with crochet work face up, fold ends together. make sure all the stitches (from both sides) are aligned and sl st through the stitches of both sides. At the end of the row, ch1 and sl st through the sides of it. When you sl st the last stitch, ch1.
We come at the part that is folded, so here, sl st surface crochet all the stitches. Ch1, insert the bead and sl st1 through the side stitches.
At the end of this side, ch1 and sl st in the very first stitch to end the round.
And that’s it!
To have a more spacious casing, instead of slip stitching, use single crochet stitches to do the edging. The difference will be quite noticeable.
For example, I used single crochet as edging for the yellow bead and it gives the bead ample room.
Whatever the size of the beads, just follow the pattern until the crochet strip is big enough to cover the whole bead and then proceed with the edging (either the slip stitch of the single crochet one).
Now, I am boiling some ideas of how to use these. Stay tuned 🙂


