One of the reasons many folks find it hard to create DIY welcome boards is that they can’t settle on a design, which is understandable since there are so many options out there.
If you’re one of those people, don’t worry! In this article, we’ll show you how to make a DIY wood board with the word “welcome” written on it. With our easy-to-follow steps, you’ll have your very own sign in no time!
You can place this welcome wood board right on your front door, hang it on a wall outside your house, overlooking the porch, or you can even place it in the main entrance hallway so guests can see it as soon as they enter.
Supplies for a DIY welcome board
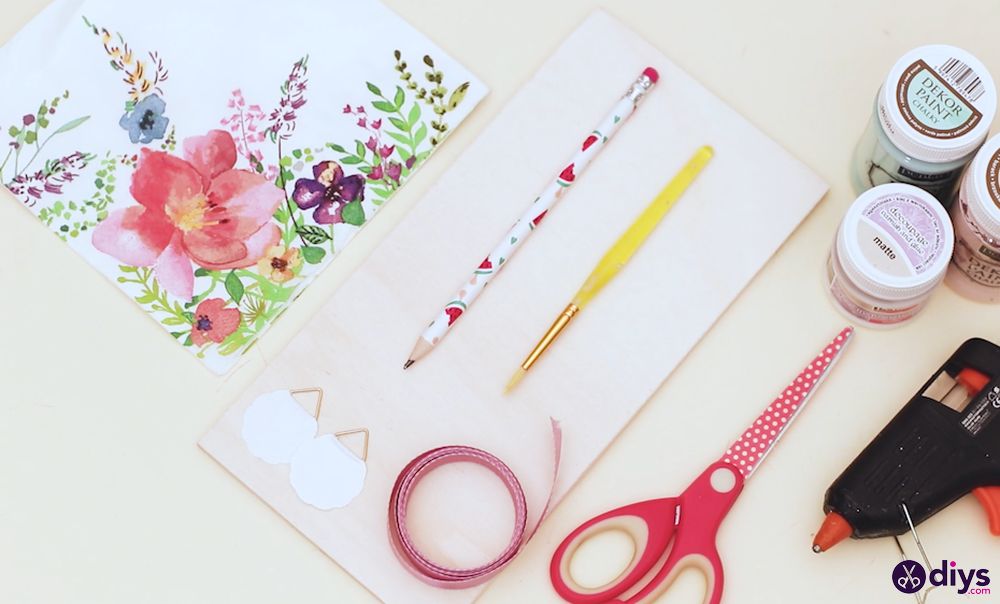
- Wood board: This will form the base of your welcome sign, and while thinner boards can be used, a thicker one will be sturdier and last longer.
- A carpenter’s pencil: A pencil will come in handy when sketching out the written message for your sign onto the wood. A regular pencil will also work, but a carpenter’s pencil is thicker and easier to see.
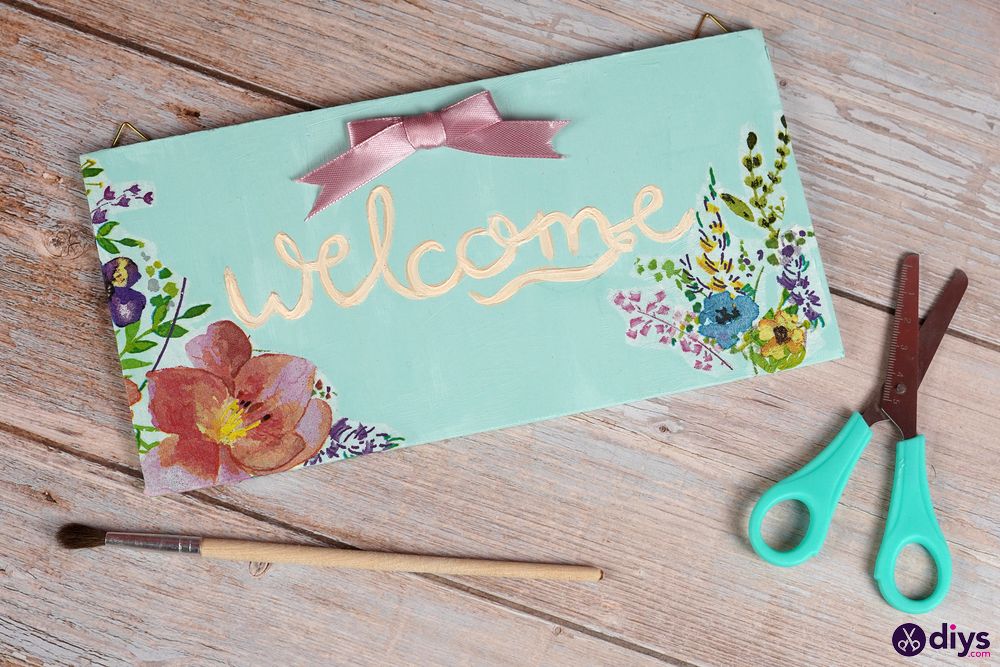
- Creme acrylic paint: We used creme acrylic paint to write the word “welcome” on our wood board, but you can use any color you’d like.
- Mint-green acrylic paint: We used green acrylic paint to fill out the background, but again, you can use any color you’d like. However, we recommend that the two acrylic paints you use are of contrasting colors for the best results.
- Paintbrush of different widths: You’ll need 2 paintbrushes for this project, one to write with and one to fill in the background. The brush size will depend on how big or small you want your welcome sign to be.
- Patterned napkins: As you’ll see in the steps below, we’ll use napkins with a floral pattern to make our sign’s background much more welcoming. The good news is that patterned napkins are easy to find these days.
- Decoupage glue: You’ll need to decoupage glue to stick the napkins to the wooden board. You’ll need decoupage glue and not regular old glue is that it is an all-in-one adhesive, sealant, and protective coat. This makes it perfect if you want a long-lasting wooden board.
- Pink silk ribbon: A nice pink ribbon bow will adorn our welcome sign and make it look extra polished. You can find this at any craft store or even some supermarkets.
- A pair of tailor’s scissors: You’ll use the scissors to cut the ribbon’s ends after making the bow, so a pair of tailor’s scissors will help you get a clean cut.
- Hot glue gun: You’ll need the glue gun to stick the silk ribbon to the top part of your wooden sign.
- Small adhesive plate hangers: This welcome sign will end up mounted on a wall, and the easiest way to do that is by using small adhesive plate hangers since they’re harder to spot once you stick them to the backside of the wood board.
How do I make a simple welcome wooden board?
Follow the steps below to make a welcome sign using the supplies mentioned above.
-
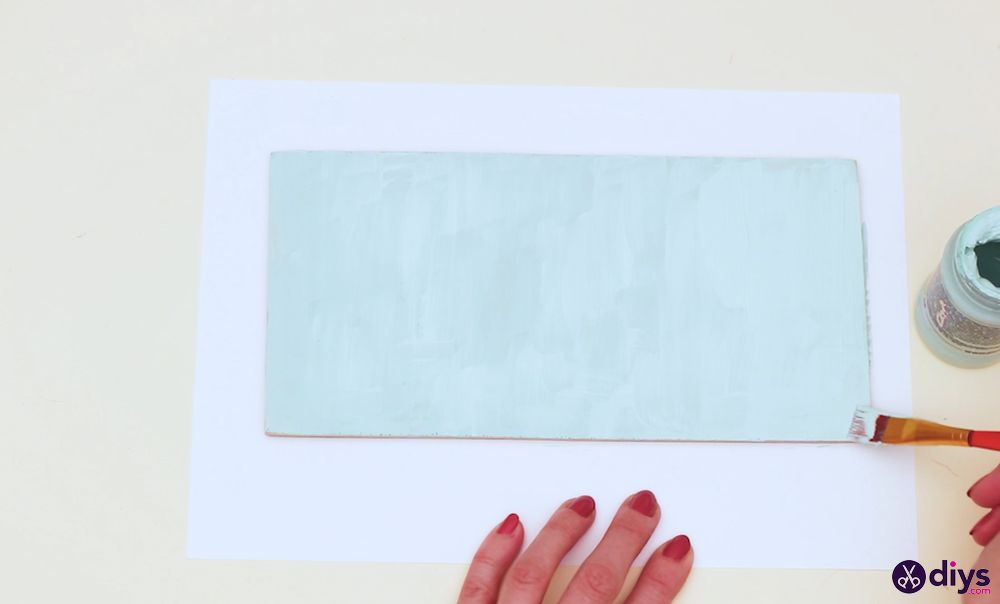
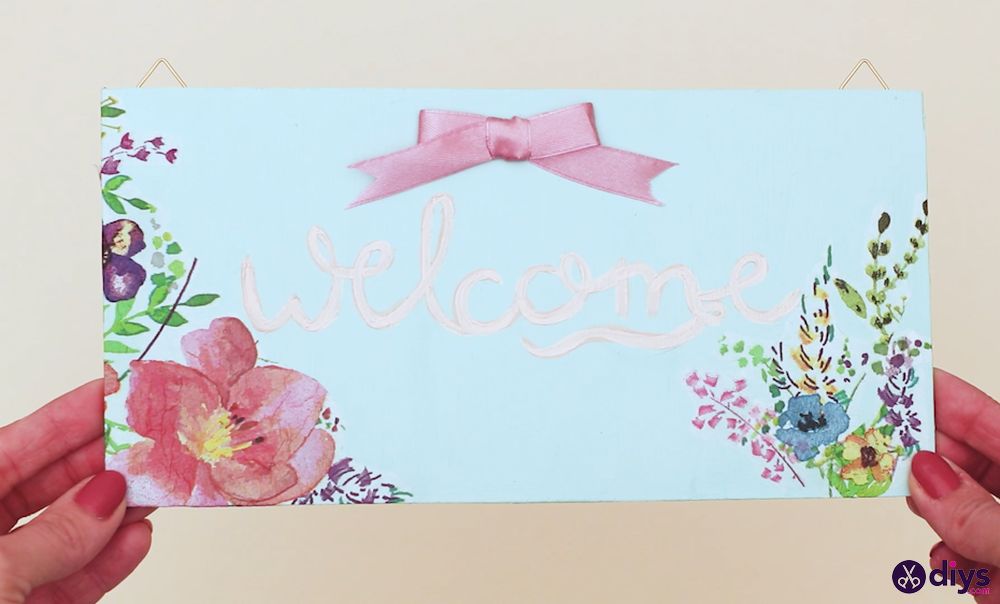
Paint the board: Start by applying an even layer of green paint to the wooden board using your widest paintbrush. Once that’s done, set the board aside and let the paint dry completely.
-
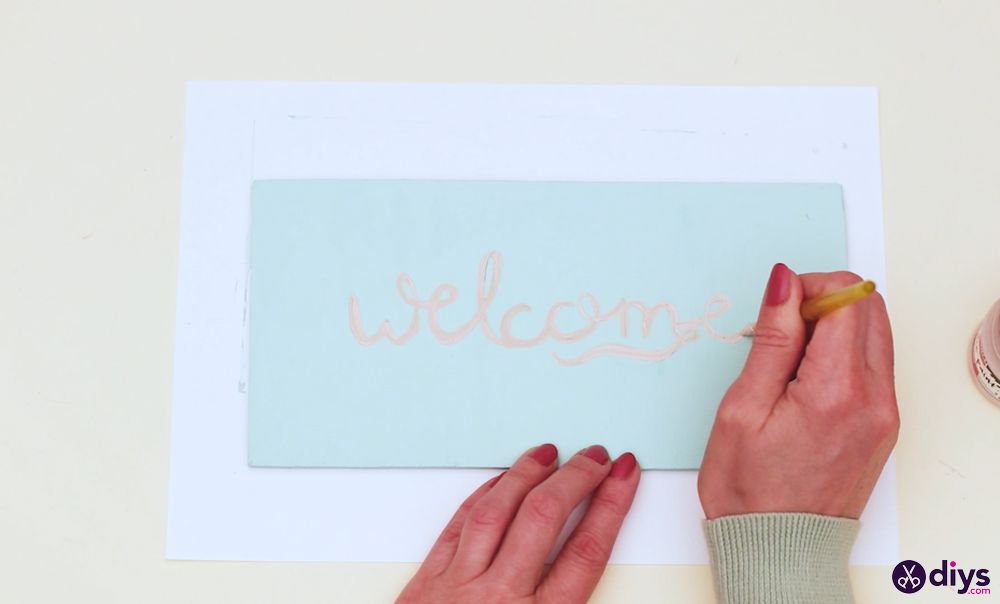
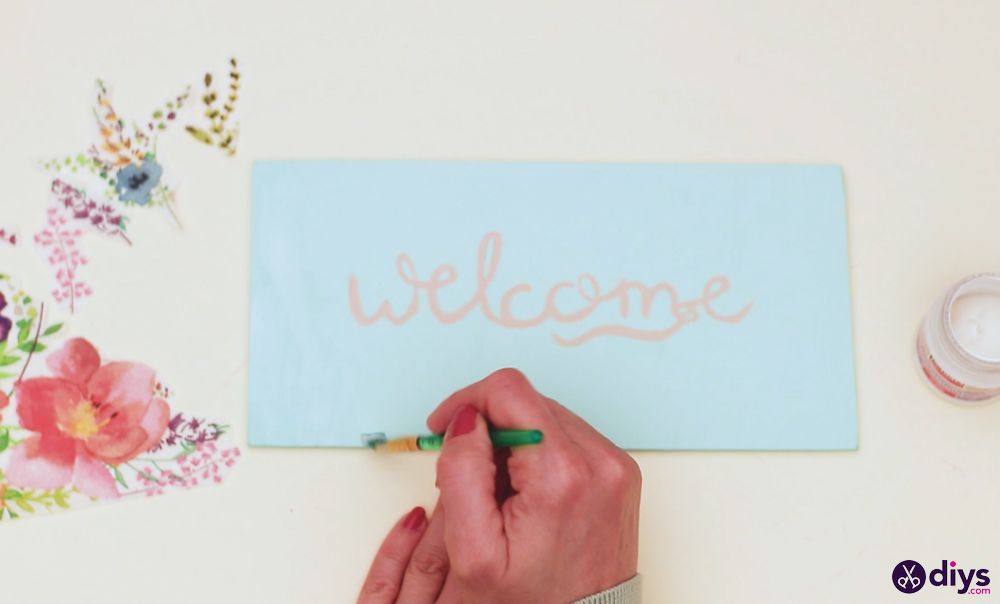
Paint the wording: Now, it’s time to sketch the word “welcome” onto the wood using a pencil or carpenter’s pencil. Paint over the pencil marks with creme-colored paint. To achieve the best results, use a smaller paintbrush.

-
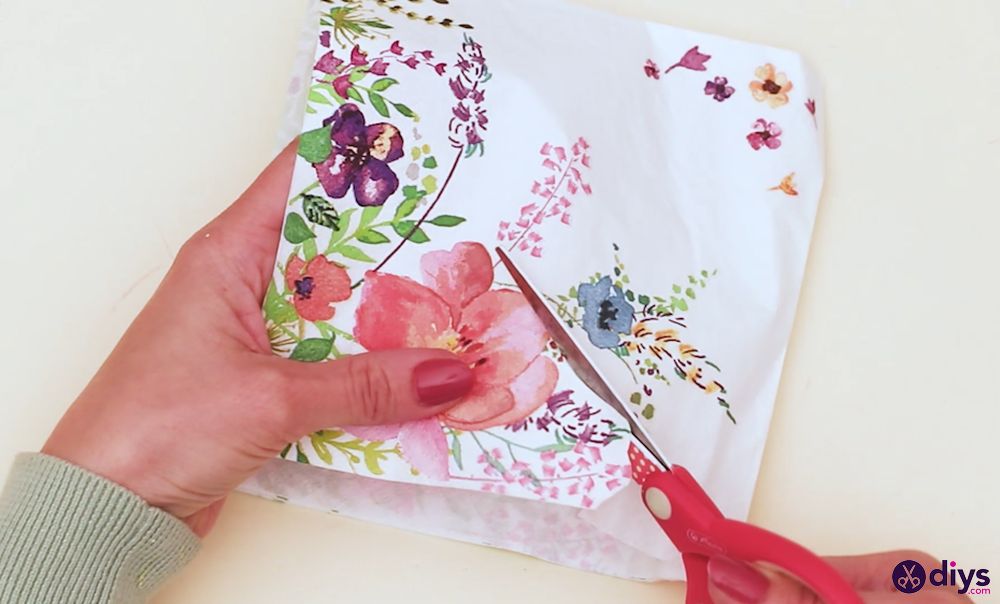
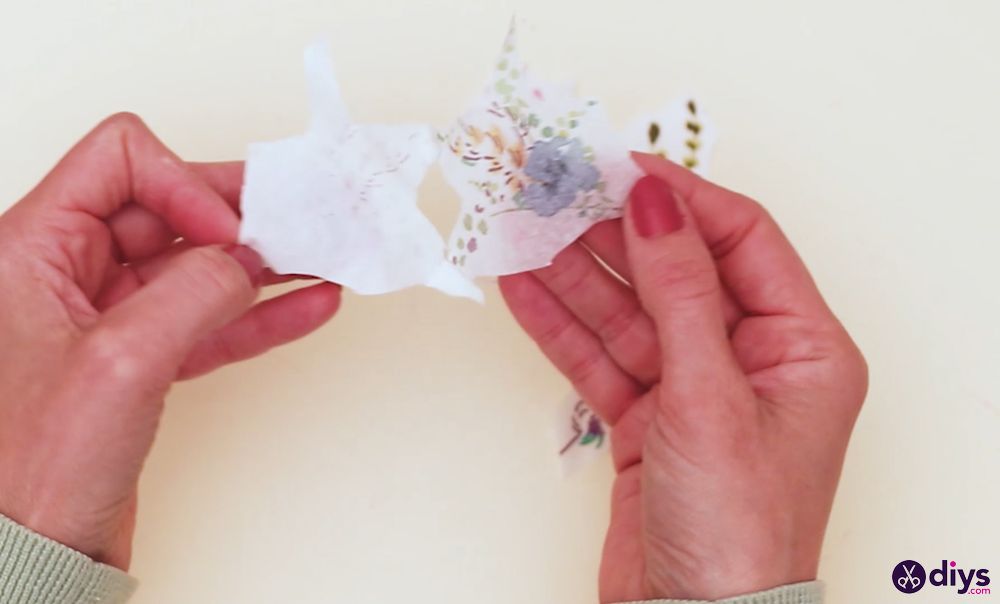
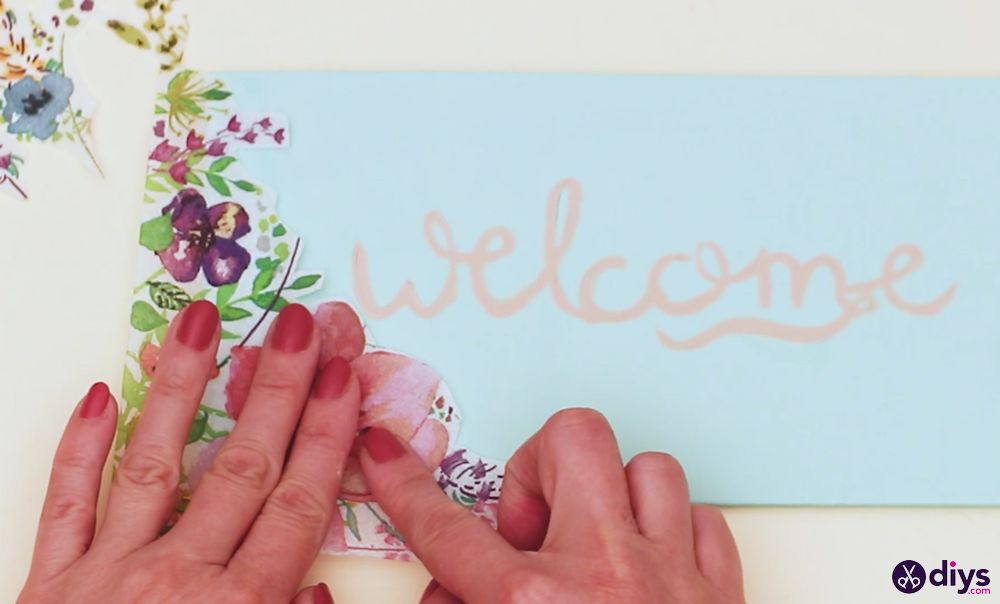
Prepare the floral imprints: Make cutouts out of the napkins using scissors, and separate the layers of the napkins, so you’re just left with the top layer. By doing this, the white parts of the napkins will turn almost completely transparent when you glue them down, and the floral patterns will look almost as if they were painted directly onto the wood.
-
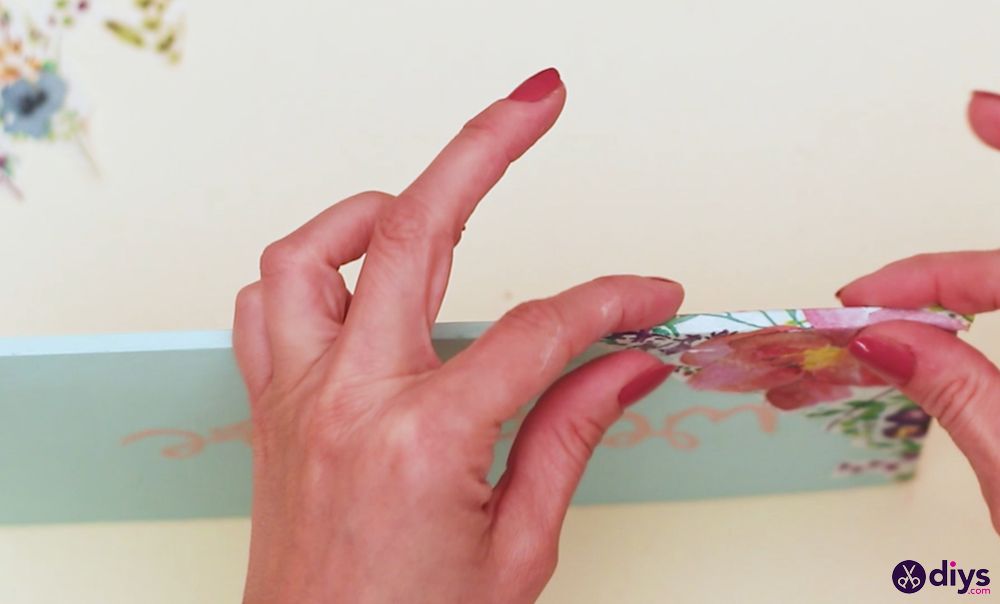
Make the floral imprints: Attach the napkins to the wood by applying an even layer of decoupage glue to the entire surface. Place the napkin on top of the glue and smooth it with your fingers, while wrapping them along the edges of your wooden board. Apply another layer of decoupage glue on top of the napkins and allow them enough time to dry completely.
-
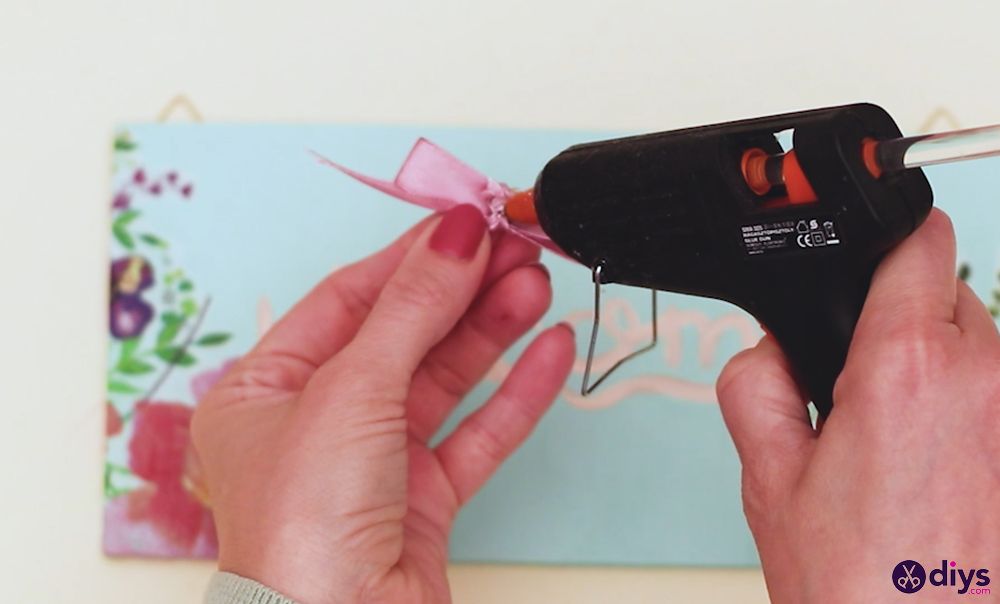
Prepare the silk ribbon: Start adding the finishing touches to your welcome sign by cutting a length of silk ribbon. Make a small bow out of the pink ribbon, cut off any excess ribbon, and make the small V-cuts on the ends of the ribbon to give it a sparrow-tail look.


-
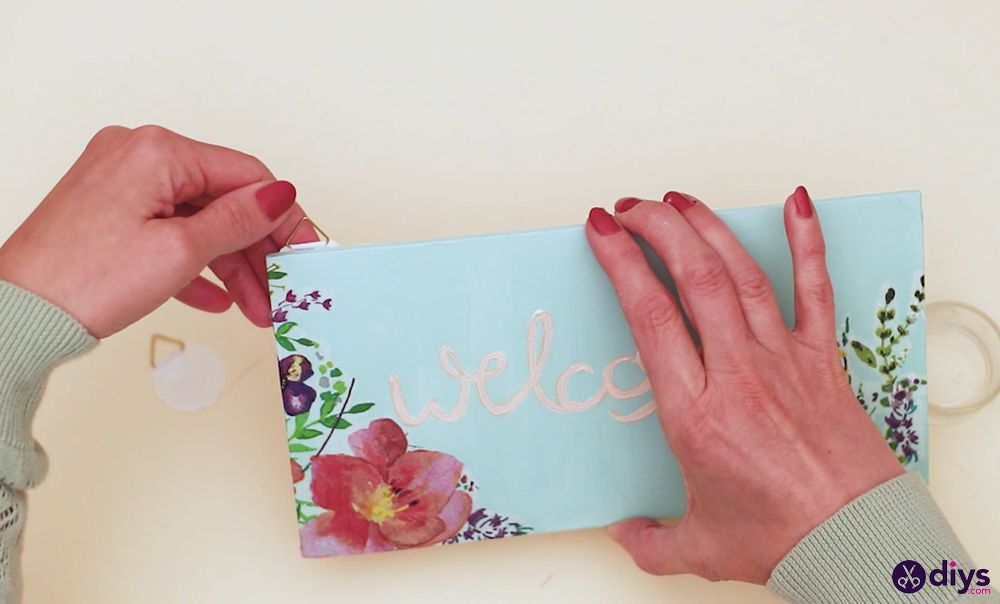
Add finishing touches: Add the small adhesive plate hangers to the back of the wood board to easily mount it on a wall. Use the hot glue gun to stick the silk ribbon on the top part of your sign. And that’s it!
Video tutorial
Some of you may find it easier to follow a video tutorial instead of looking at illustrations and reading instructions. Here’s a great video tutorial on how to make your own welcome board; it’s less than 3 minutes long, yet it covers all of the necessary steps:
How do I make my welcome sign suitable for outdoor use?
To make your welcome sign suitable for outdoor use, it’s important to ensure that it can withstand harsh weather. Here are some tips:
- Use an outdoor-friendly sealant and paint: Sealant and paint specially designed for outdoor use ensures that your sign will face the sun, rain, and wind without fading or peeling.
- Use weather-resistant materials: Weather-resistant materials such as PVC or composite wood are chemically treated to withstand the elements, so you won’t have to worry about using outdoor-friendly sealant and paint.
- Add a protective layer: If you want to be extra safe, you can add a layer of clear polyurethane over the top of your sign to protect it from the elements. An extra layer, such as polyurethane coating can greatly increase your door sign’s life expectancy.
Closing thoughts
Making a welcome sign is a fun and easy DIY project that anyone can do. So, if you’re looking for a quick and easy way to add a personal touch to your home, try it.
And, if you need some inspiration, be sure to check out these amazing DIY welcome sign ideas.
Have you ever made a welcome sign? What tips would you add? Let us know in the comments below!
The post How to Craft a DIY Welcome Wood Board in 6 Easy Steps appeared first on DIYs.com.