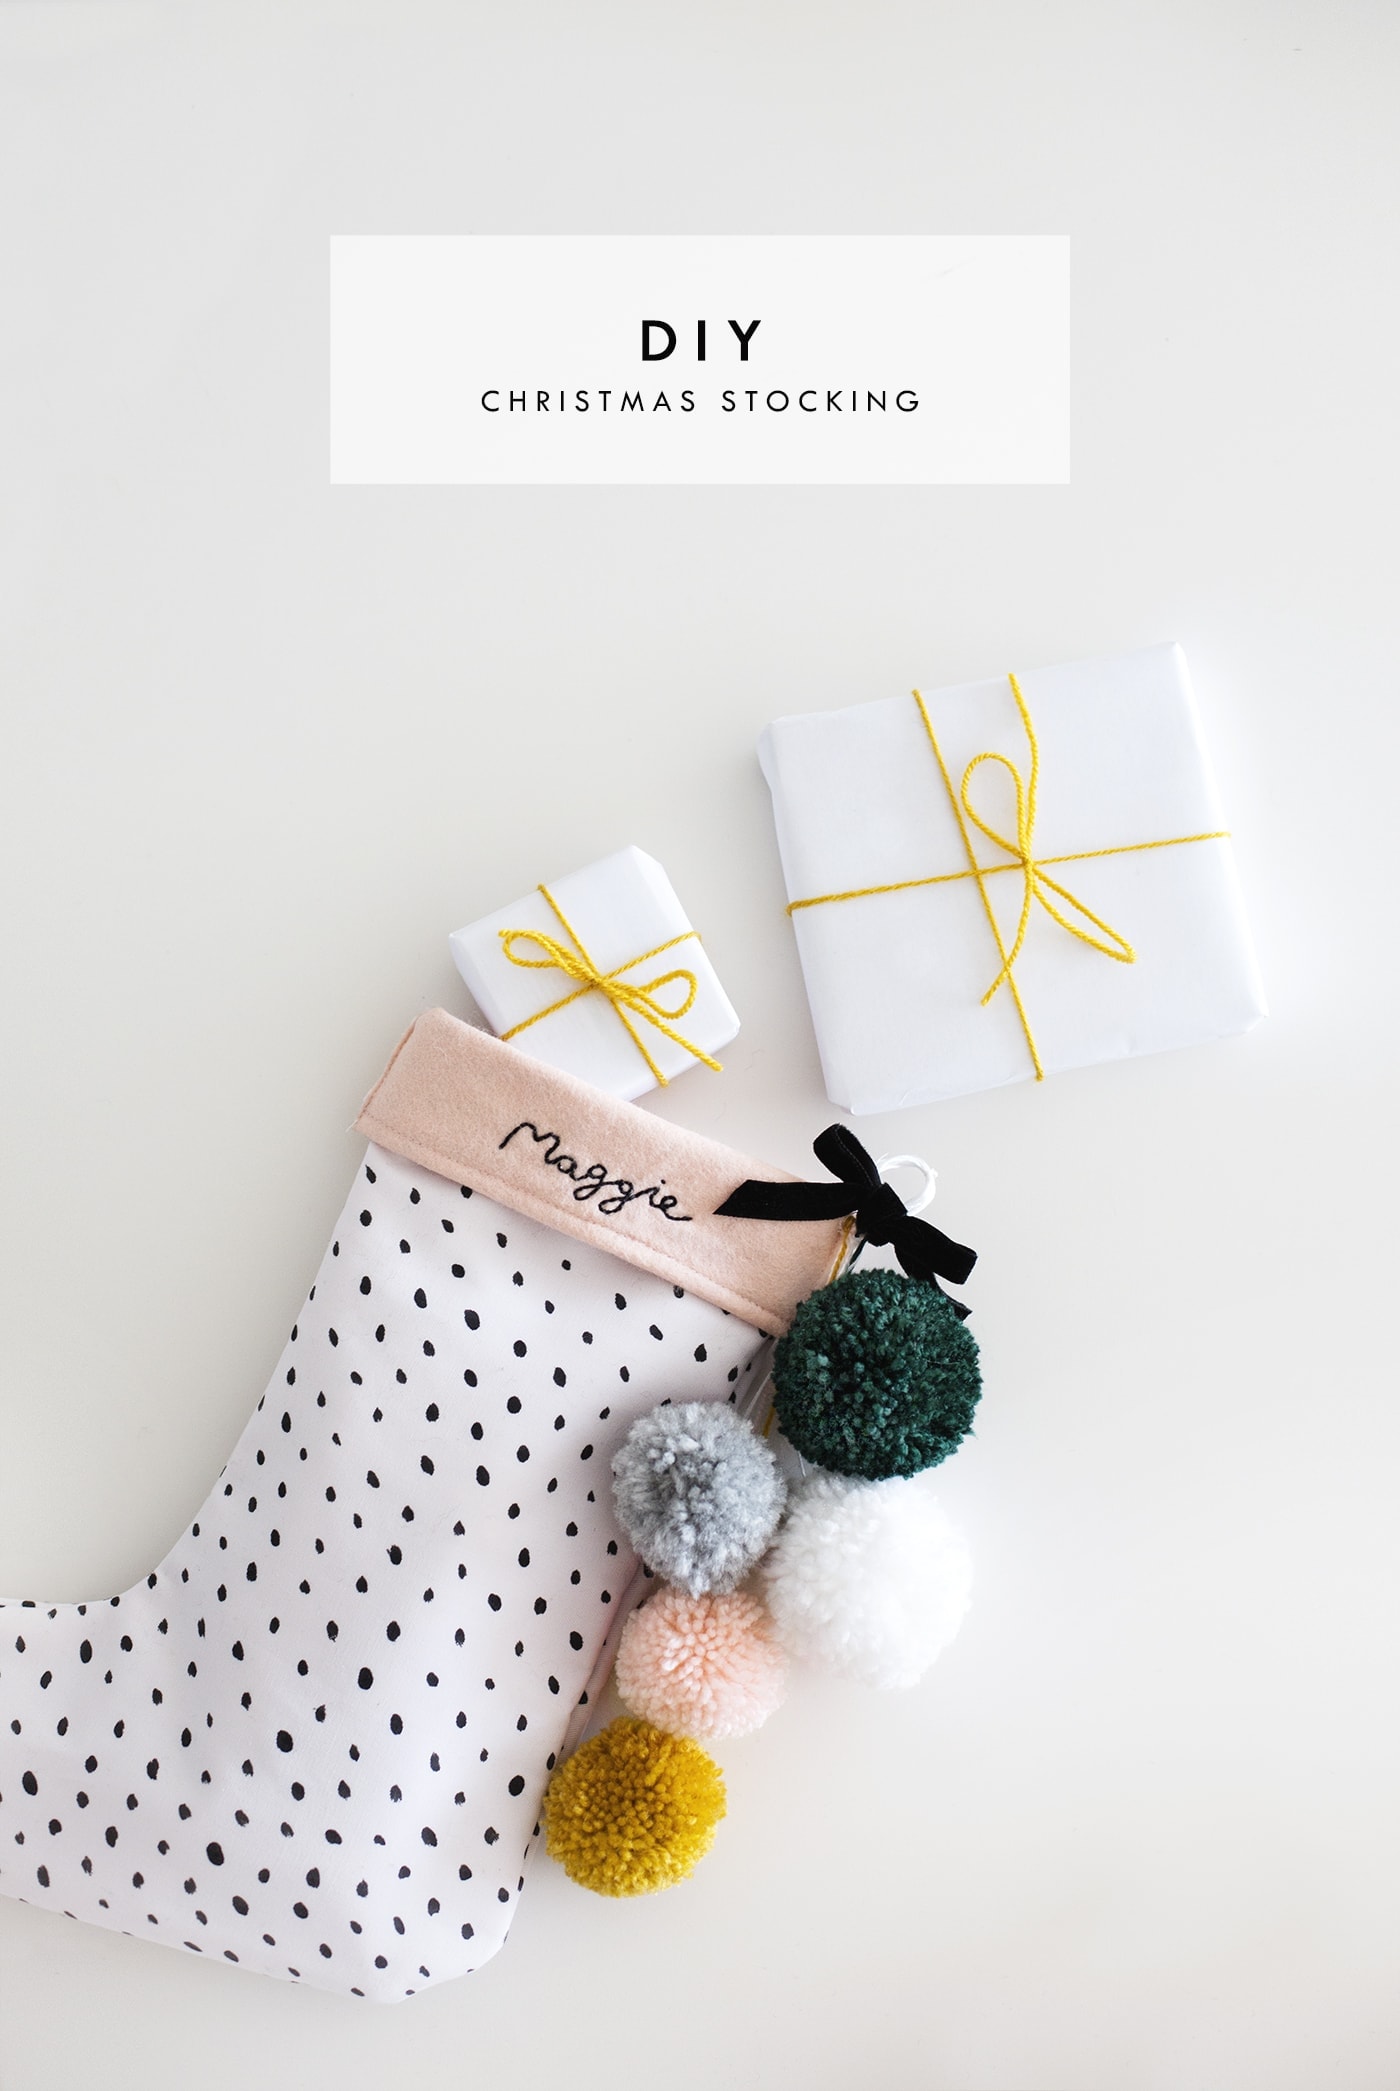

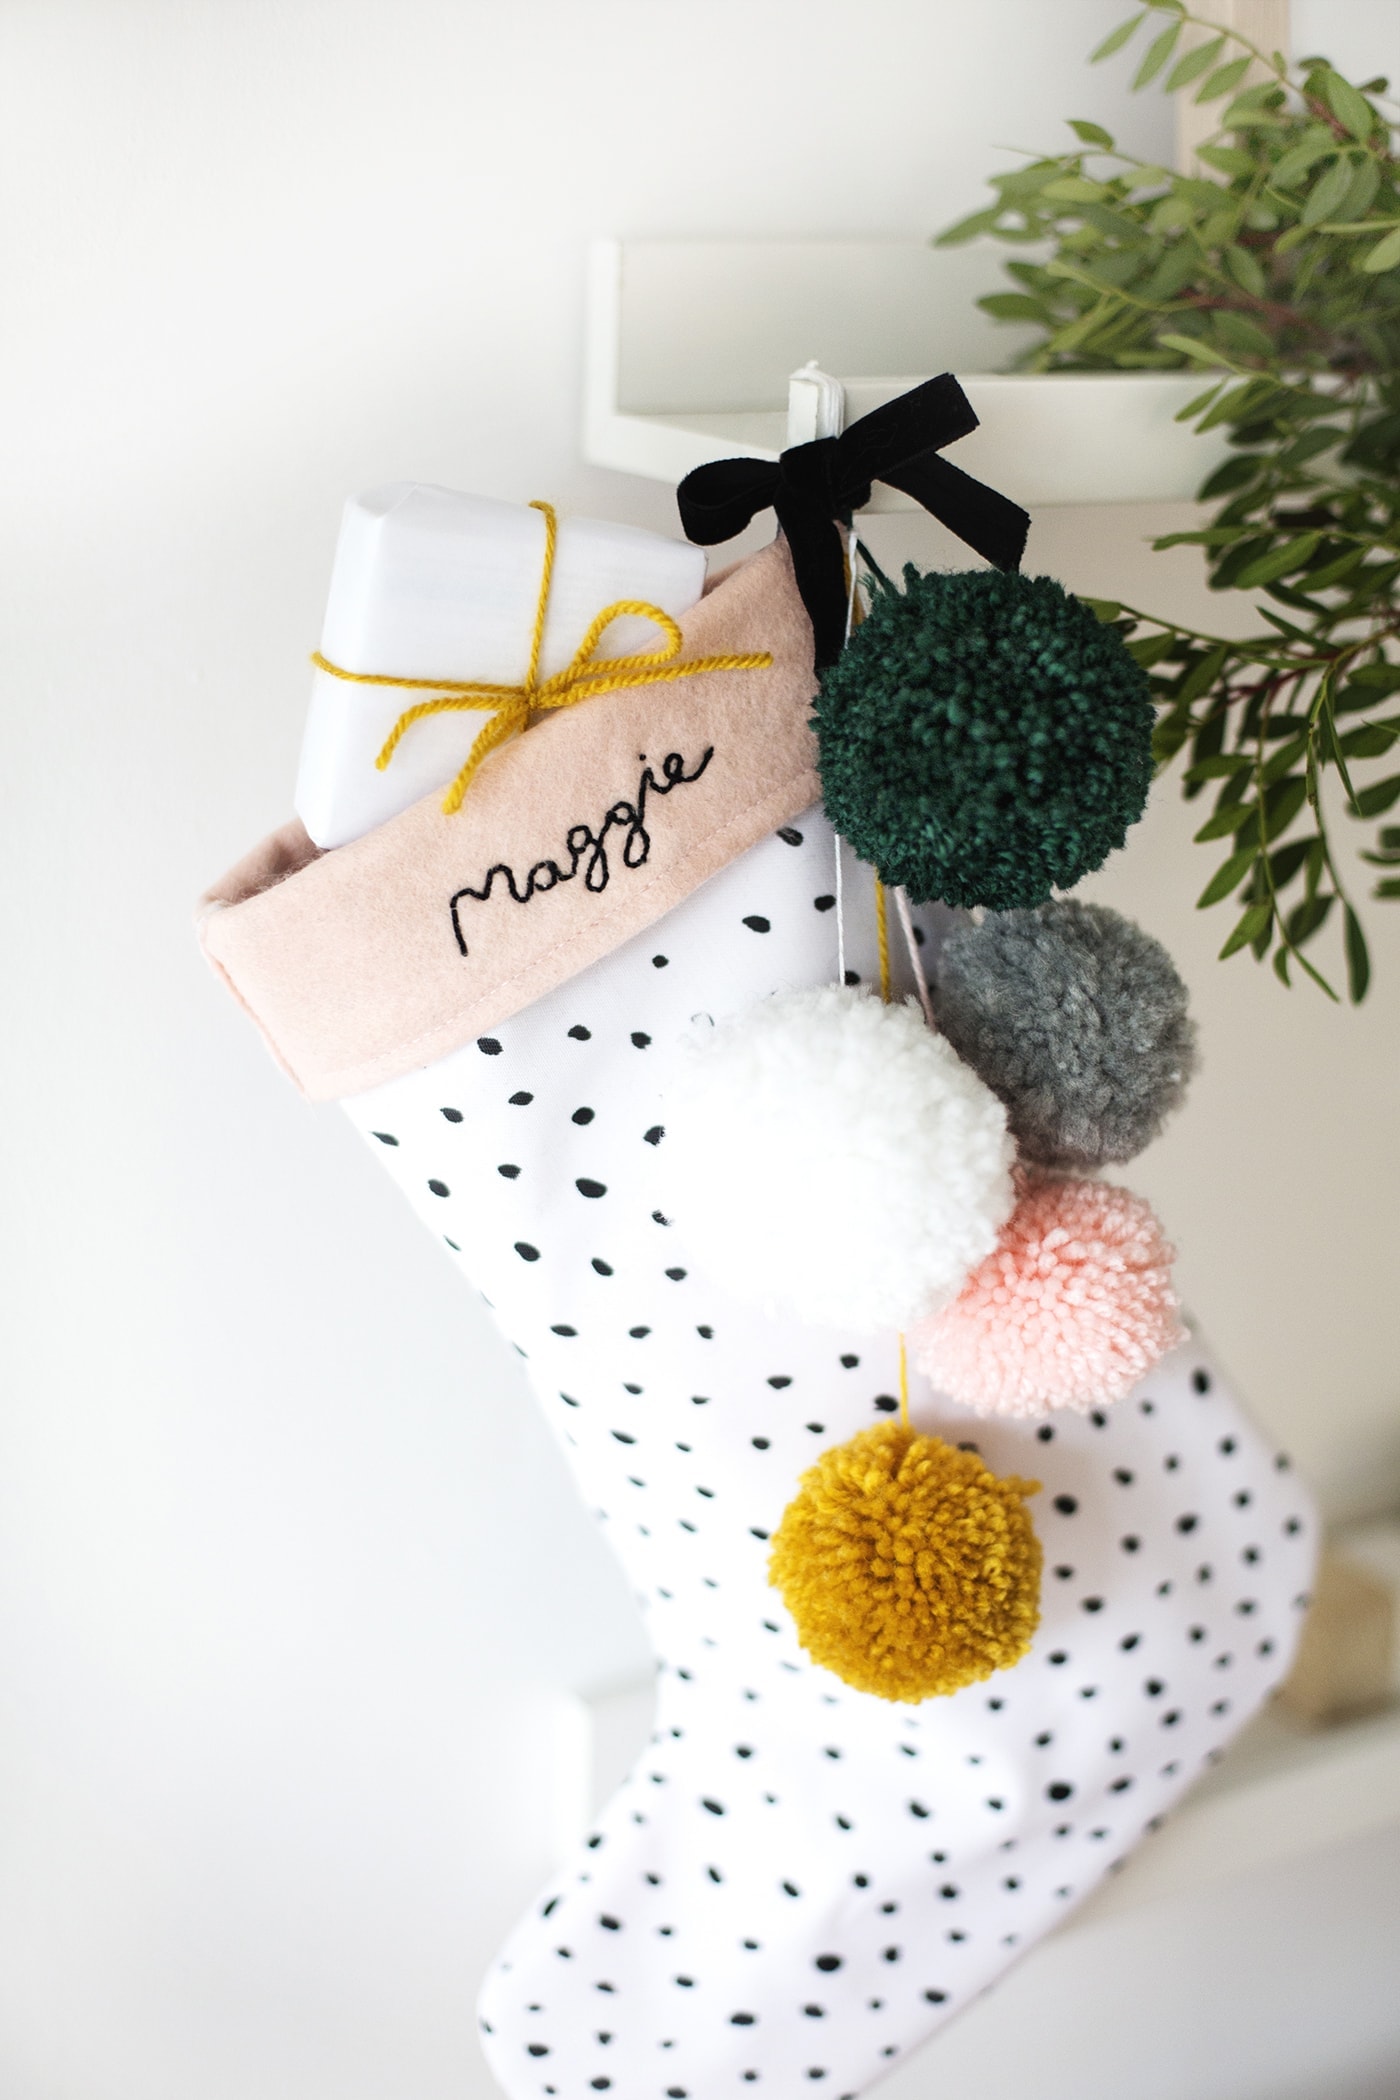
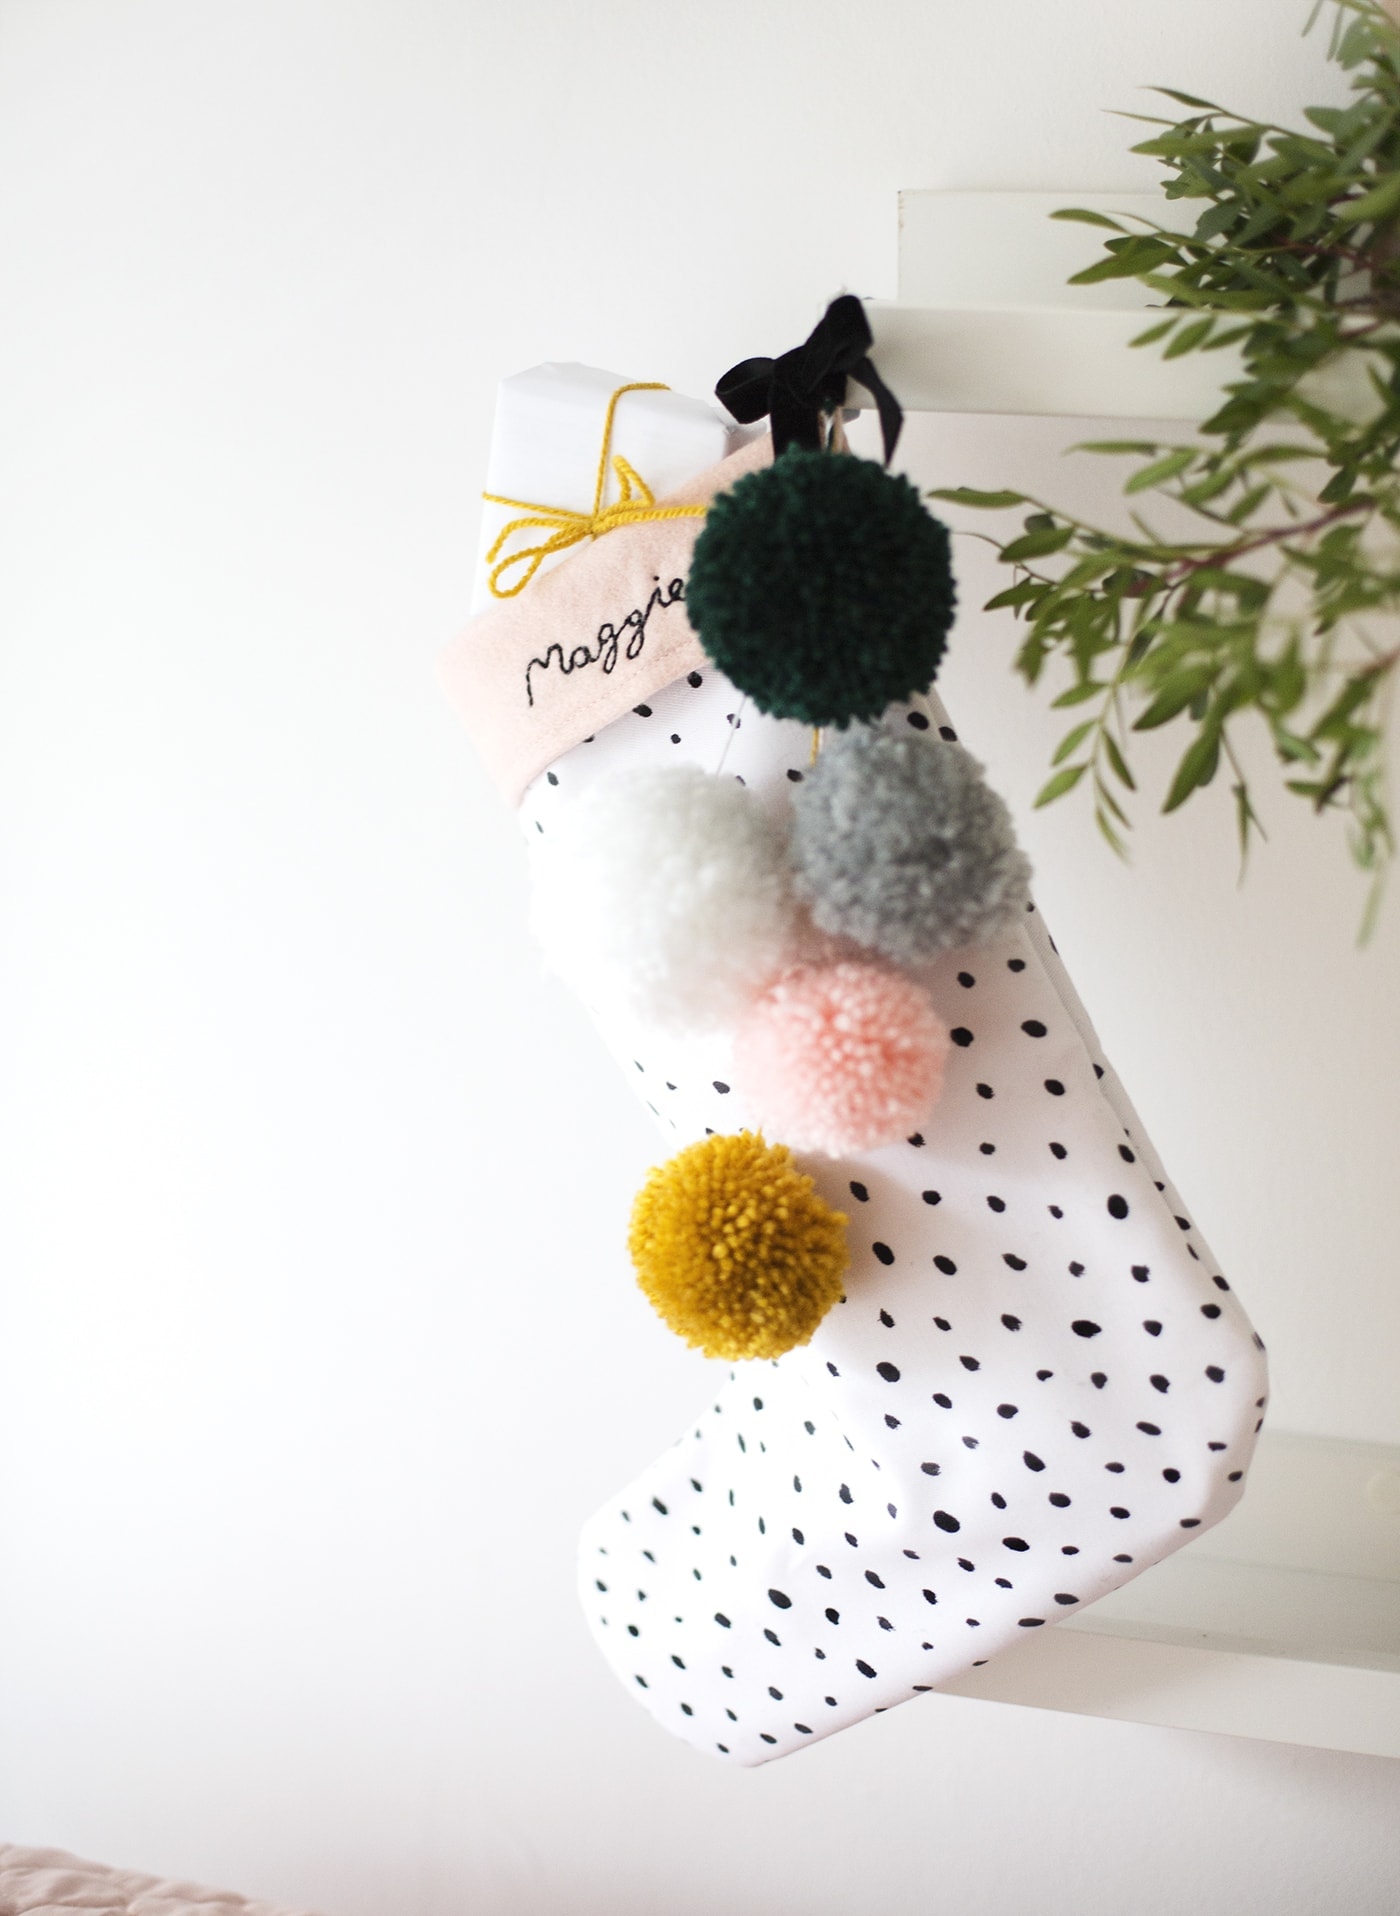
That time of year is upon us and this Christmas we are no longer two but three! It’s Maggie’s first Christmas and while she ain’t going to remember a single thing, I still want to make it special and start new traditions. One of those has to be her very own stocking to fill. I remember being very protective over the stocking my mum made me whilst growing up. Oh the glee each time we got them out each Christmas Eve! It was the very same one each year, right through my childhood, with my name glitter glued on the front if i remember rightly. It has to be said it was enormous, in fact it was probably bigger than me for the first few years of using it.
Here’s a simple DIY stocking idea that’s my modern take on my old personalised stocking that will always have a place in my heart. It even includes a bit of colour which is bold for me but why not, it’s Christmas after all eh?!

 Materials
- Black Fabric Paint
- Paintbrush
- White cotton fabric
- Pink Felt
- Pencil
- Embroidery needle
- Black embroidery thread
- White embroidery thread
- Scissors
- Sewing machine
- White machine thread
- 3x fine wool (varied colours)
- Pins
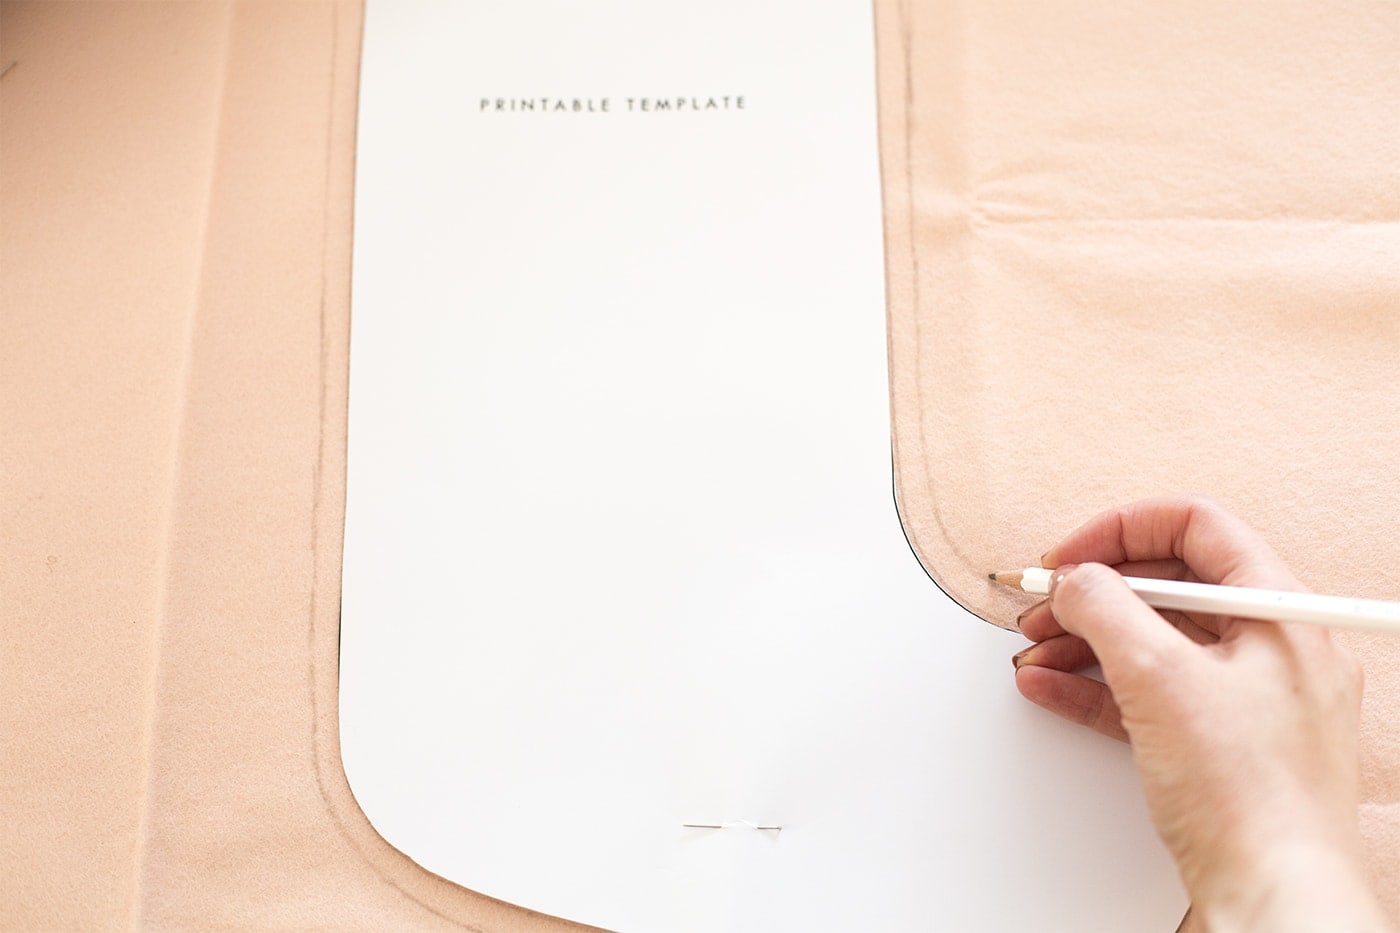 First of all print your free printable stockings template and cut this out and place it on top of two layers of felt, pinning into place and draw around the stocking shape, 1cm wider all the way around.
 Now cut both layers out.
 Now do the same on your white fabric, doubling up the material again and pinning flat.
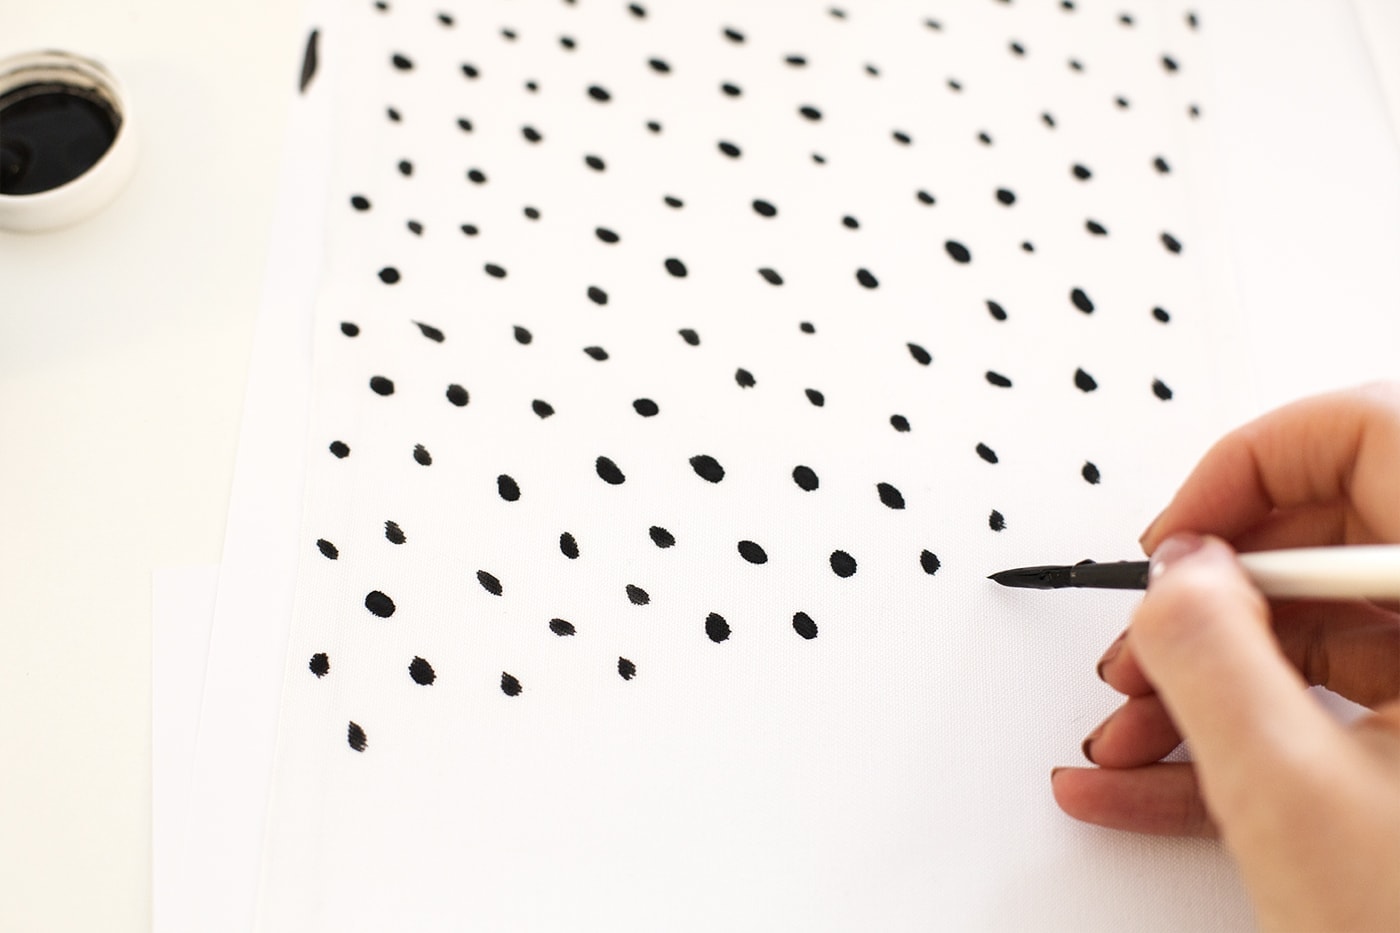 Take the two white pieces of fabric and lay them flat, separately, making sure that the two stocking shapes are facing opposite ways as you want the pattern you’ll create, to be on the outside, all the way around. now grab your brysh and black fabric paint and dab the loaded brush on to create a dash pattern. No need to be too uniform, as long as hey cover the space semi evenly.
 Once dry, trim a little off the top of the white fabric and then place the white pieces on top of the felt pieces, with the pattern facing upwards and place a pin in the middle to hold. Fold the excess felt at the top over the patterned material and pin in place.
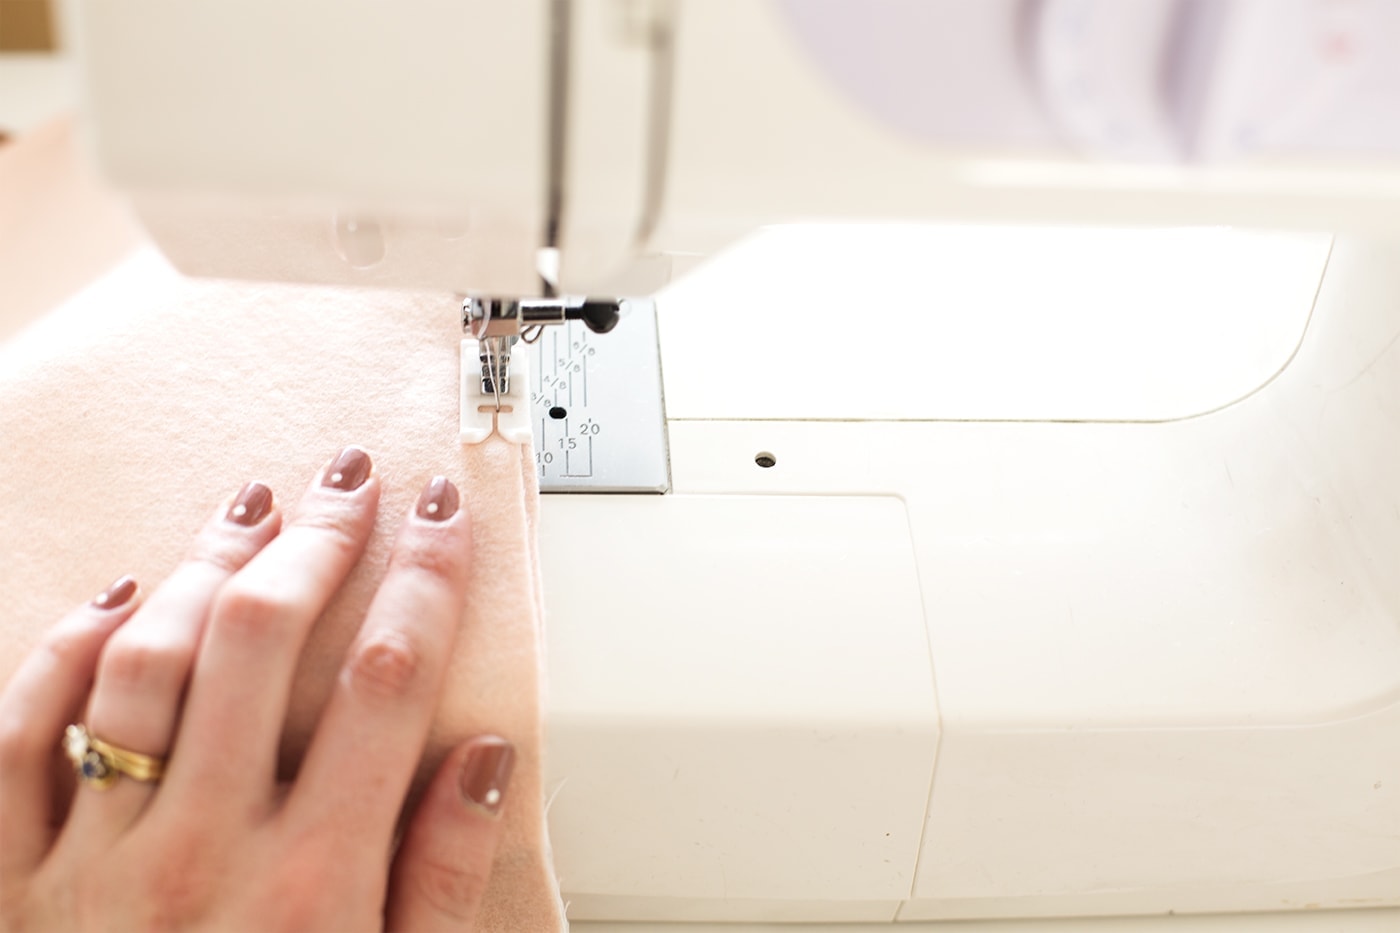
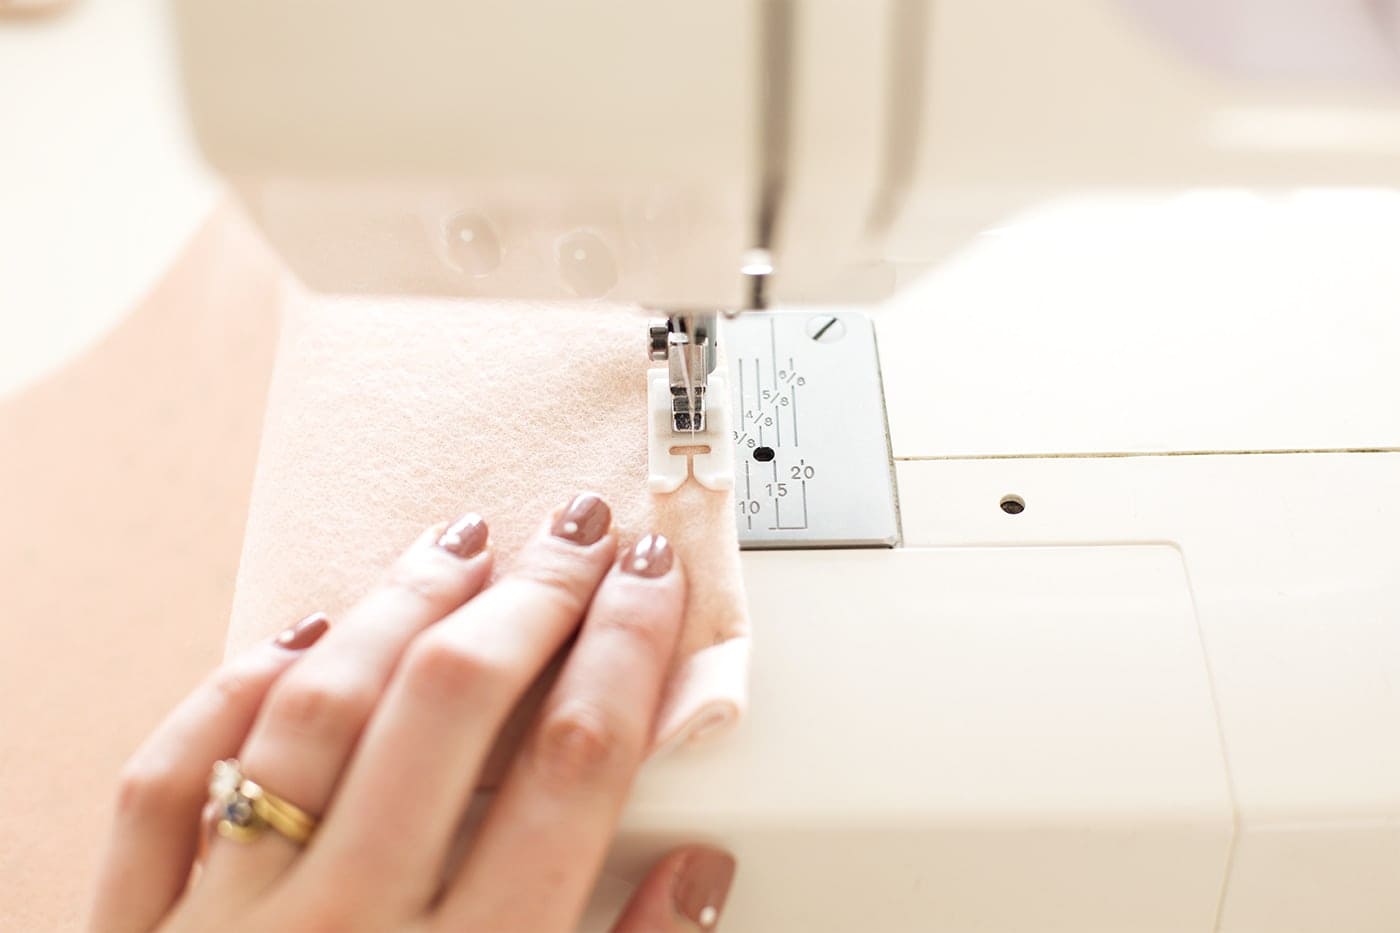 Turn each stocking shape over to the felt side and sew along that pinned, top edge to secure.
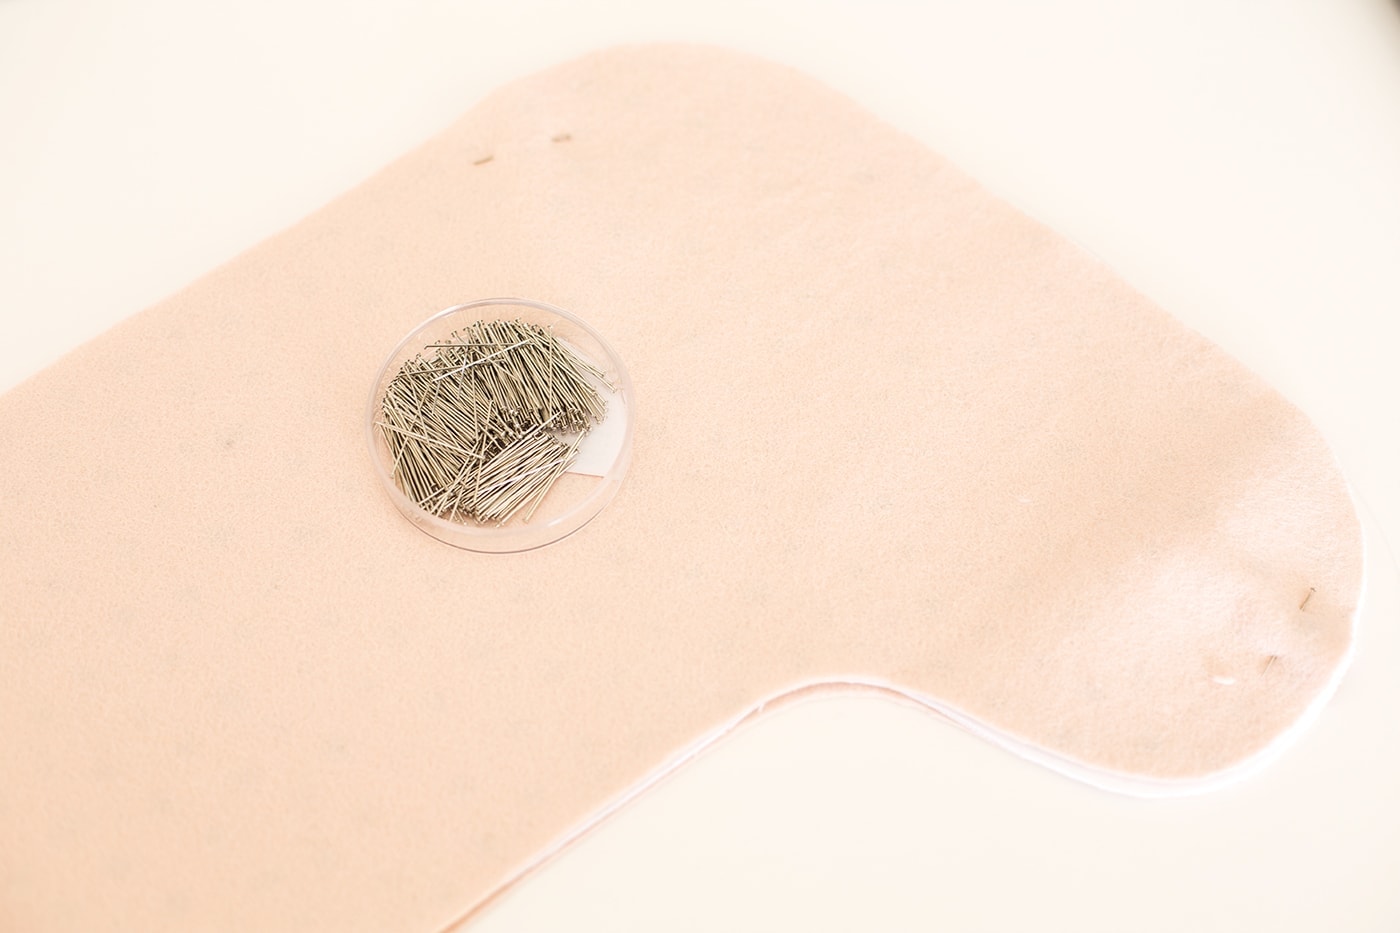 Remove those pins and then put the two stocking pieces together with the felt facing outwards and pin in place so you have four layers all together.
 Stitch all the way around the outside of the stocking a little in from the edge.
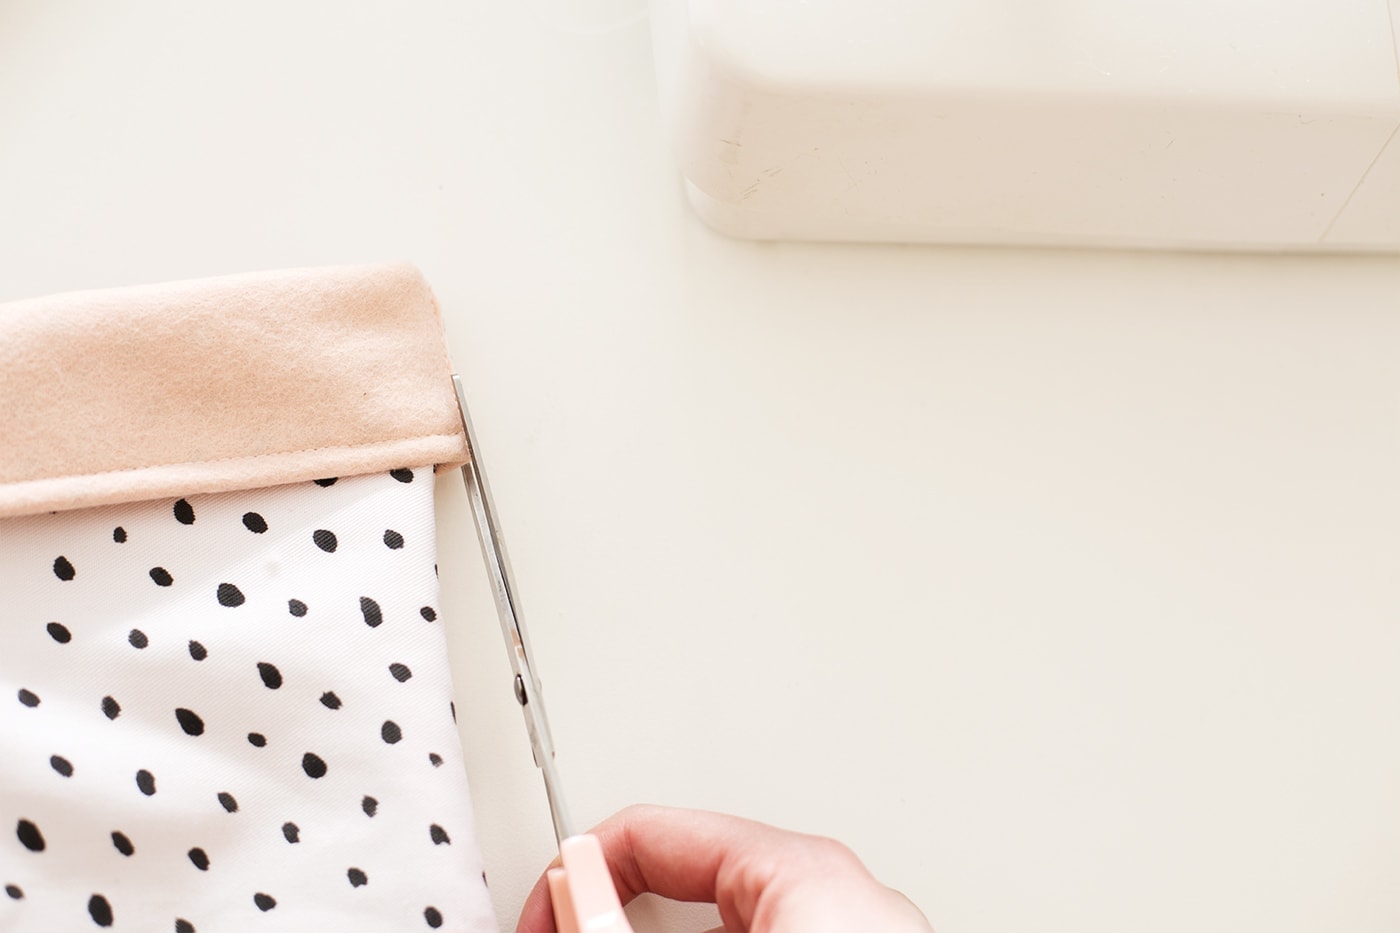 Once finished, cut slits around the bend of the two and heal and then turn inside out so that the pattern is now on the outside. Fold over the top of the stocking so you have a pink, felt lip.
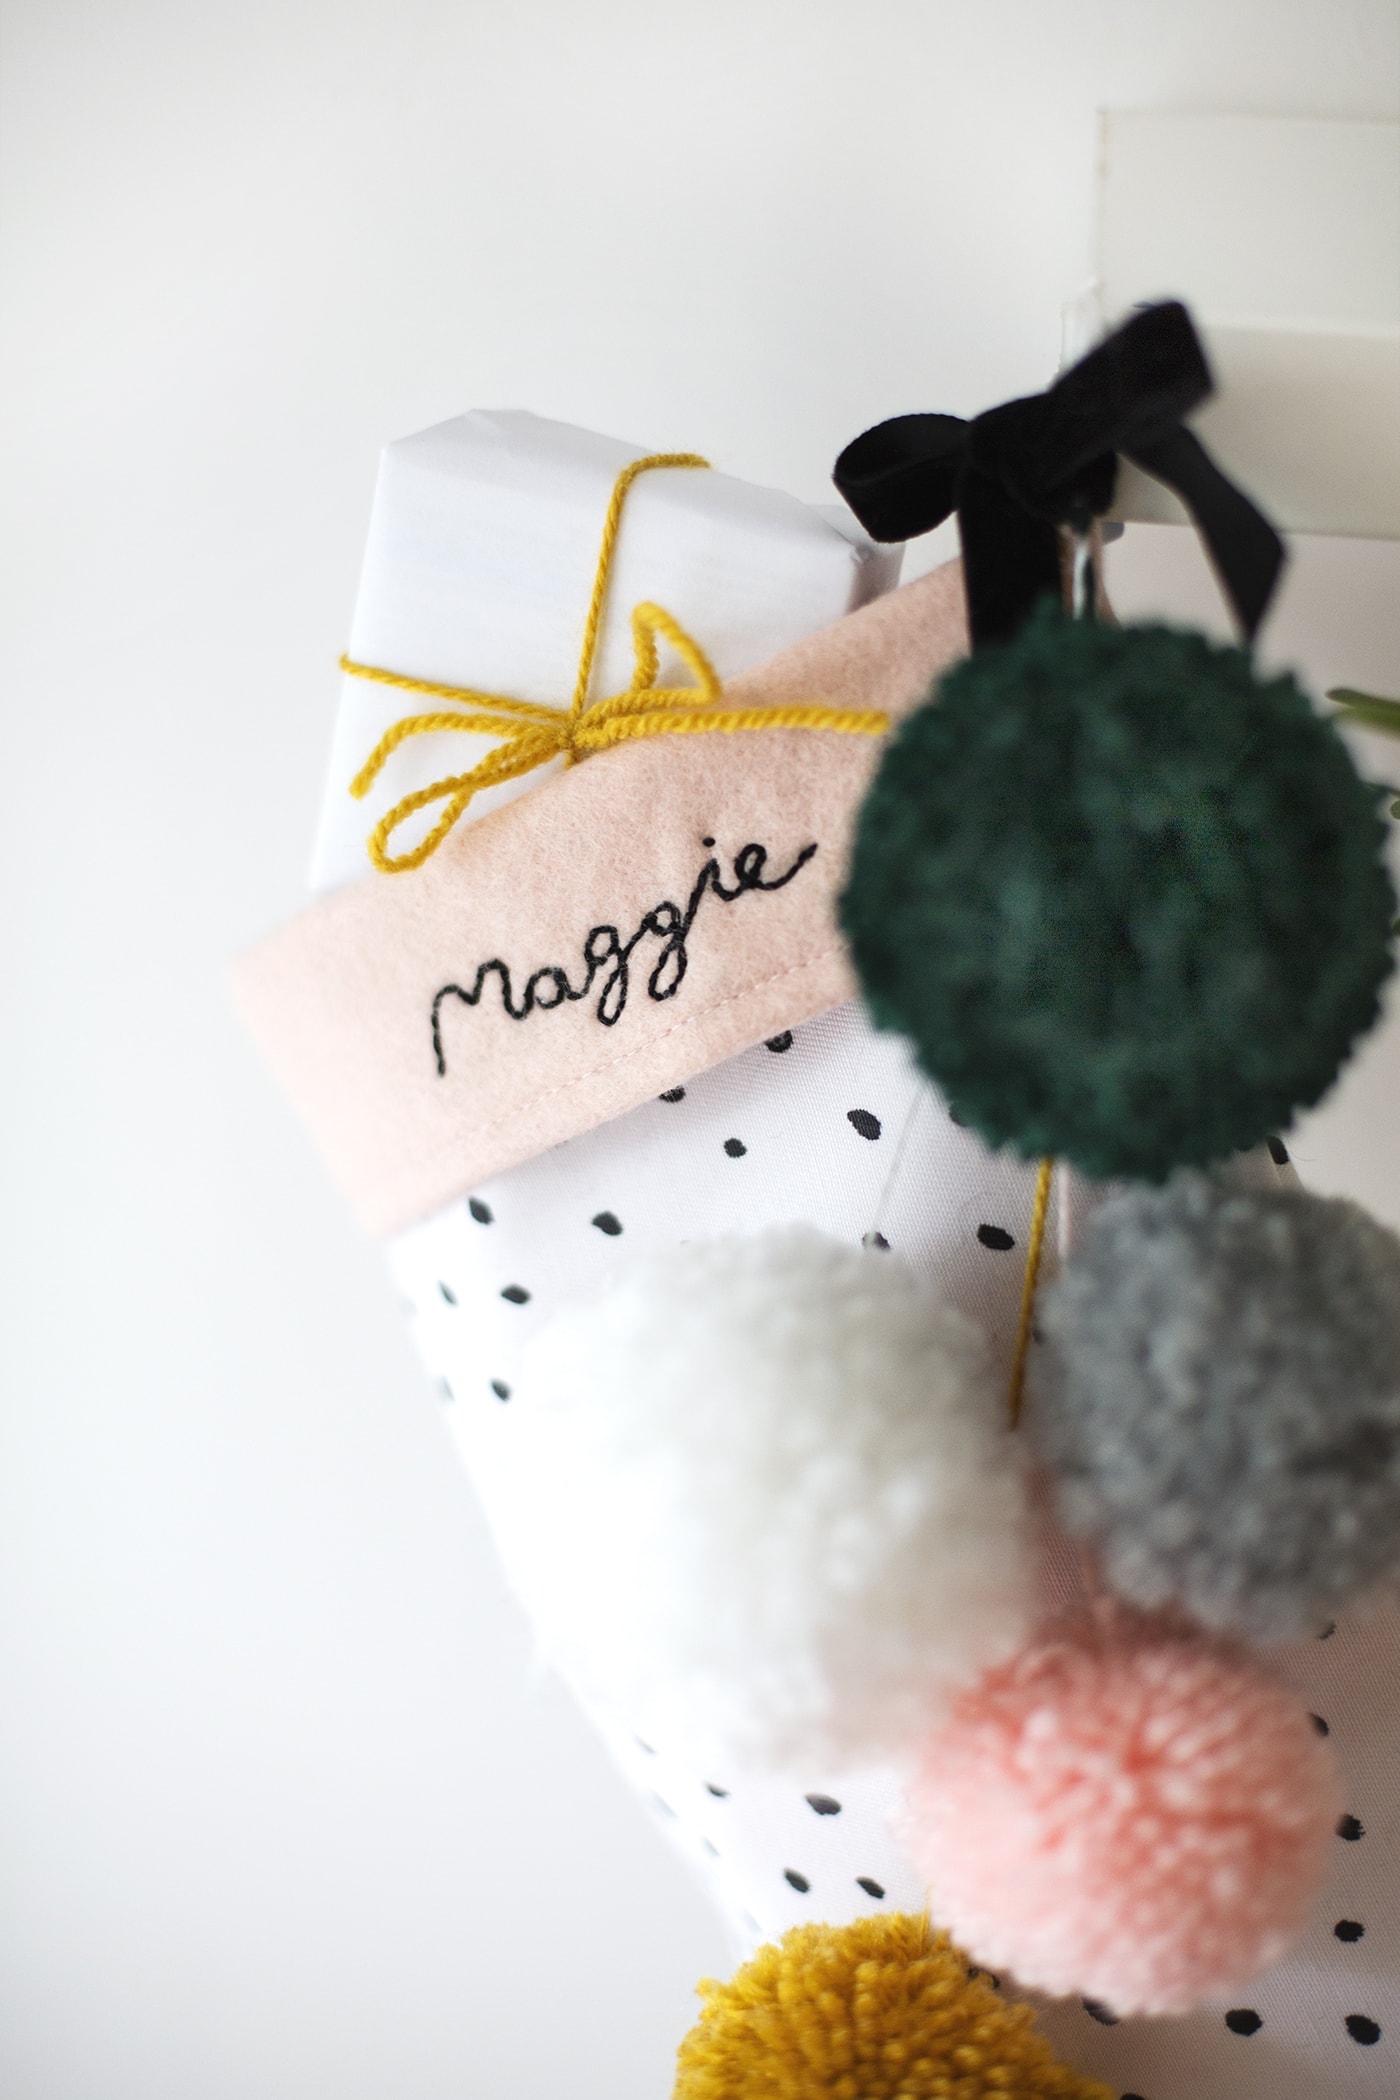
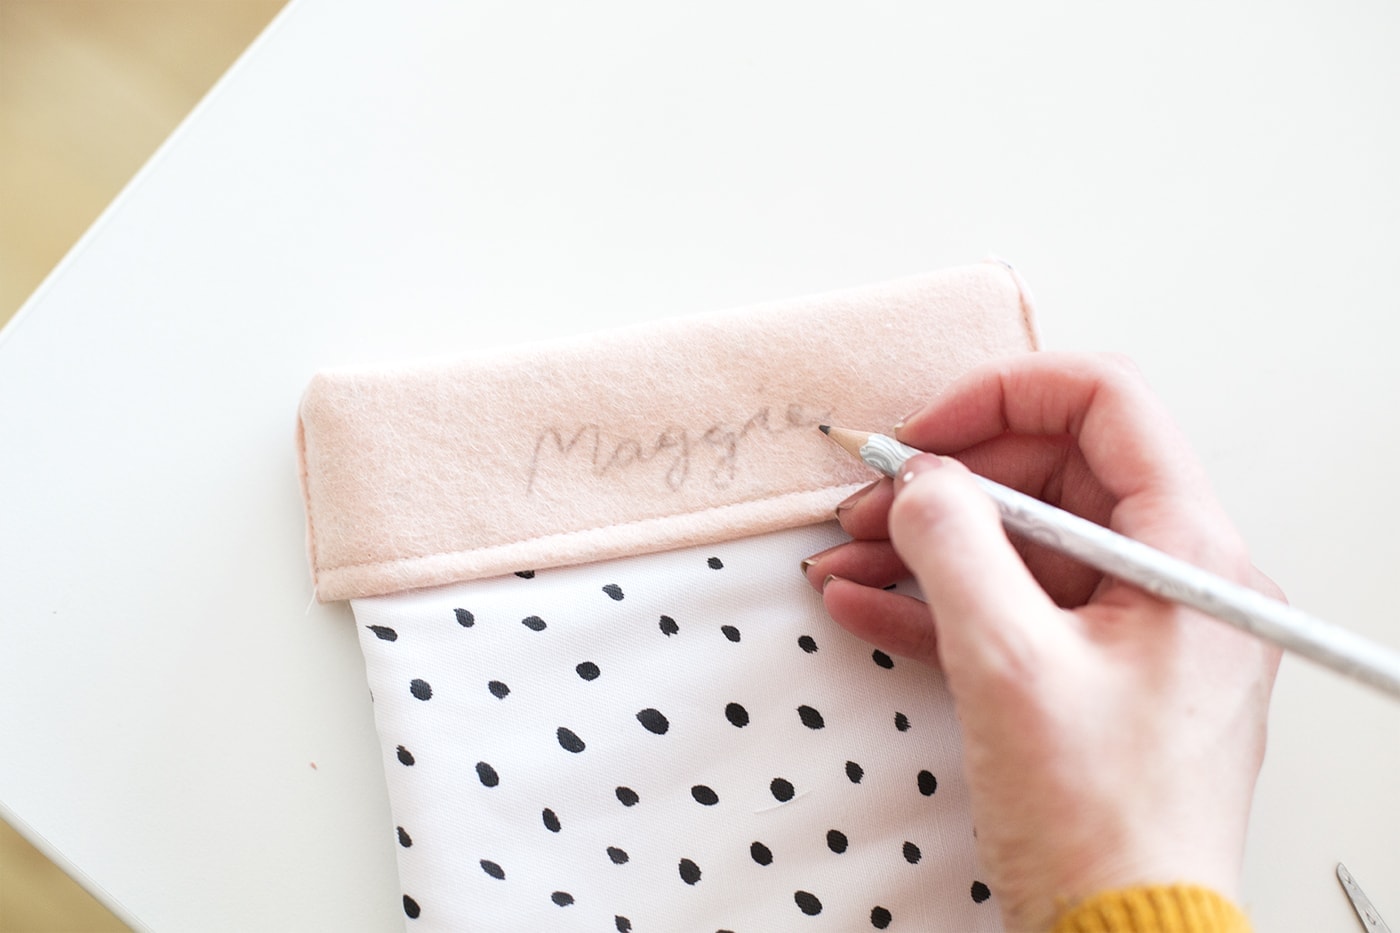 To personalise, simply draw the name/word you want onto the felt lip, lightly with a pencil.
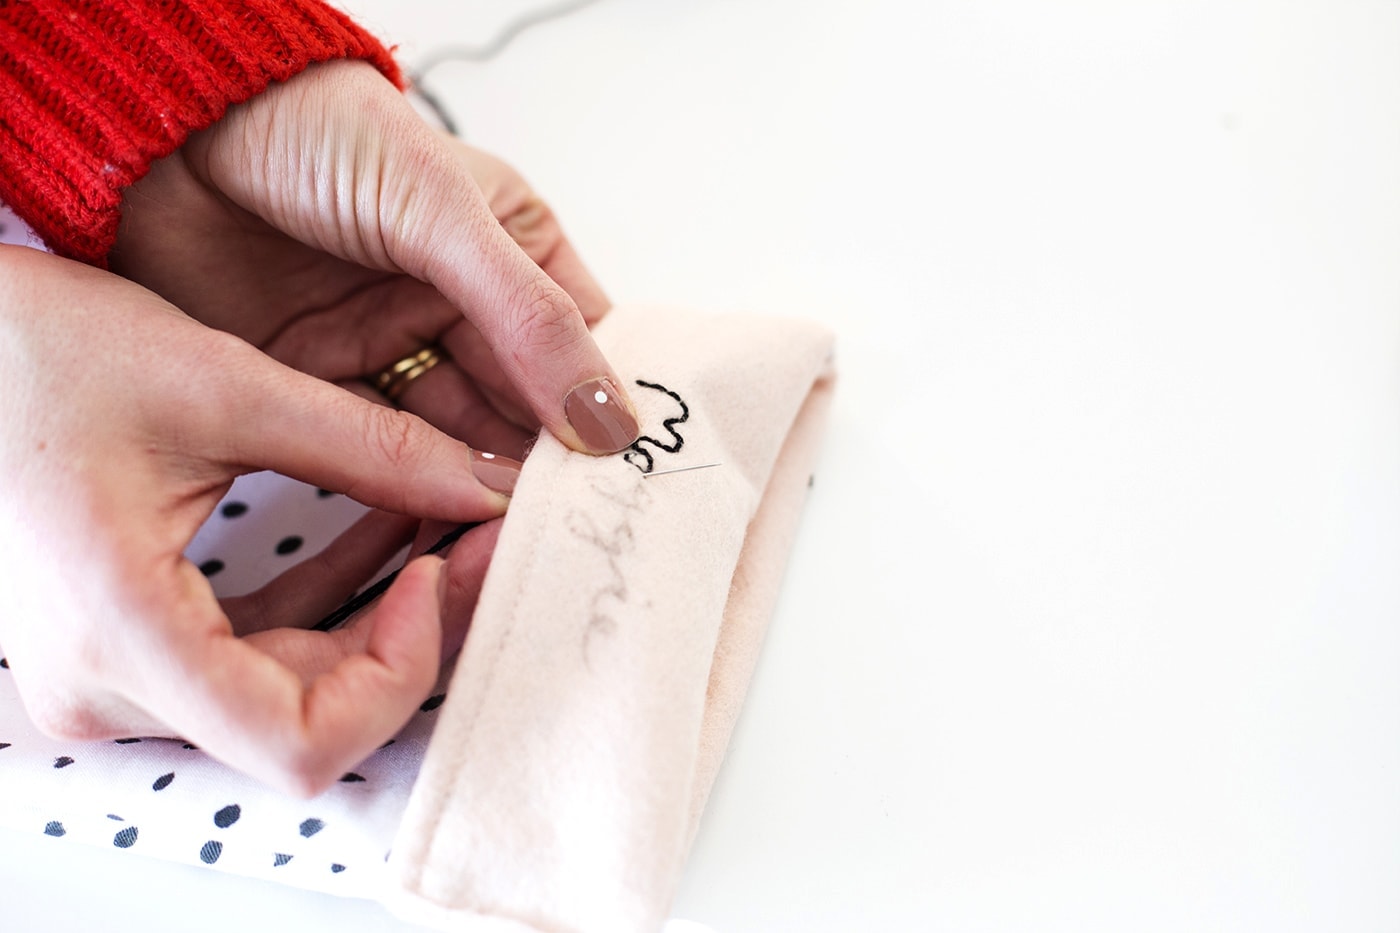 Now, using a simple running stitch, trace around your pencil outline. Make your stitches slightly shorter around bends to ensure they look smooth. Tie a knot at the back at the start and finish to hold your thread in place.
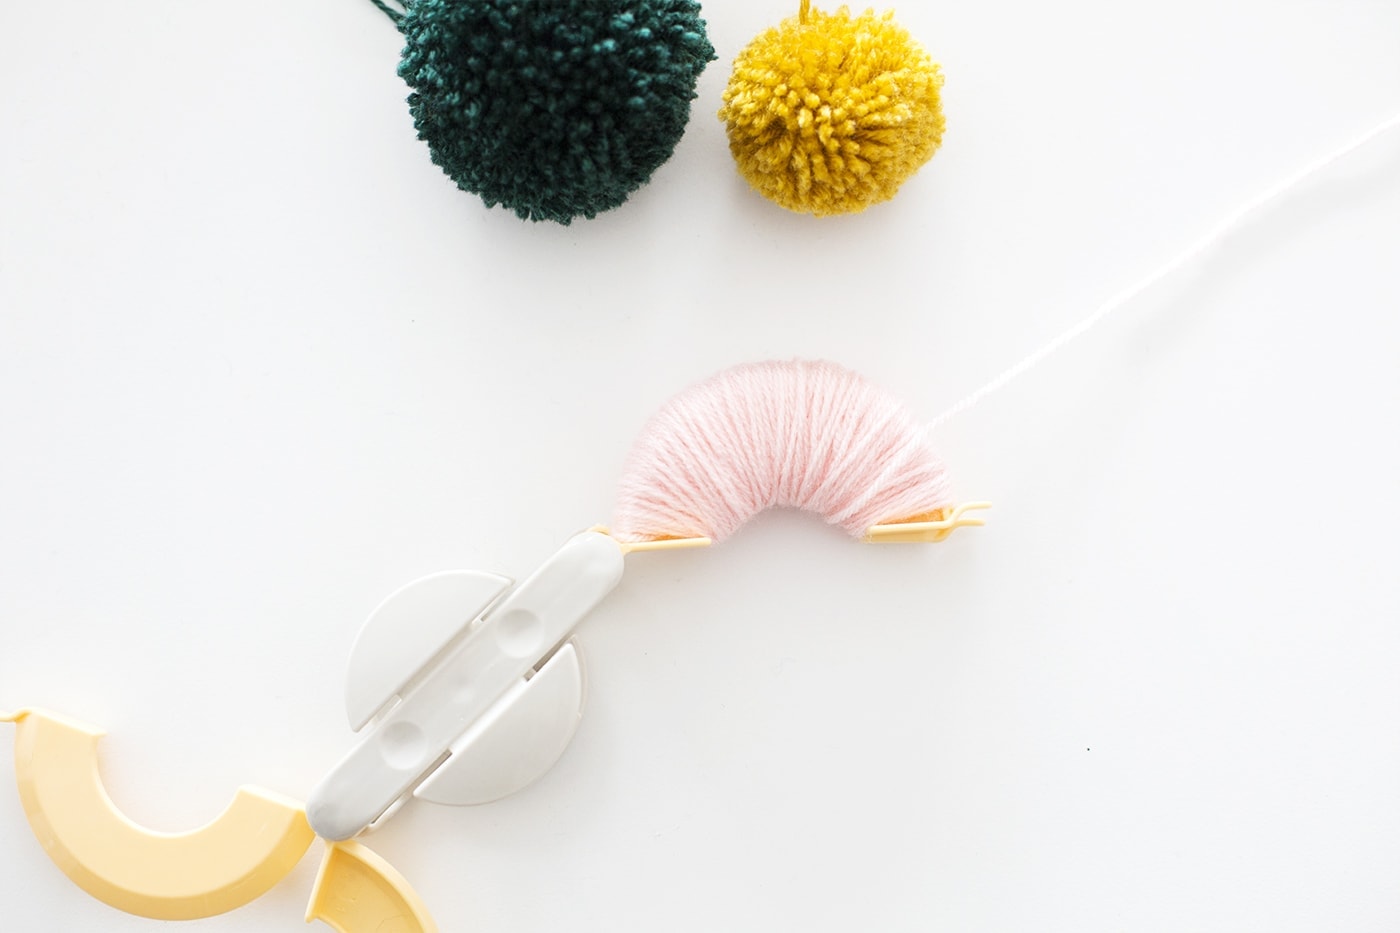 Make your pom poms in a few different colours and sizes. I used my trusty pom pom makers for ease. Open up the pompom maker’s legs and keep them aligned together while wrapping your choice of wool around. Once you’ve covered one of the legs you can close that side of the pompom maker and begin to wrap around the other legs. Once both sides of the pompom maker are covered with wool and you’ve closed them in, you can grab some scissors and cut along the rim. Make sure your pompom maker stays closed and with an extra piece of wool tie a knot around the centre of the pompom maker to secure the pompom. You can then open up the legs of the pompom maker and separate the two sides to reveal your pompom. Use the scissors to neaten up the edges and create a lovely round shape. Make sure you leave one of the long threads attached untrimmed so you can attach it to the loop.
 The next step is to add a loop for hanging the stocking and attaching the pom pom’s to. You can do this by using the white embroidery thread and making a continuous loop. Keep your fingers in the loop to stop the thread from being different lengths at the end. You can create a knot on the inside of the stocking to finish it off.
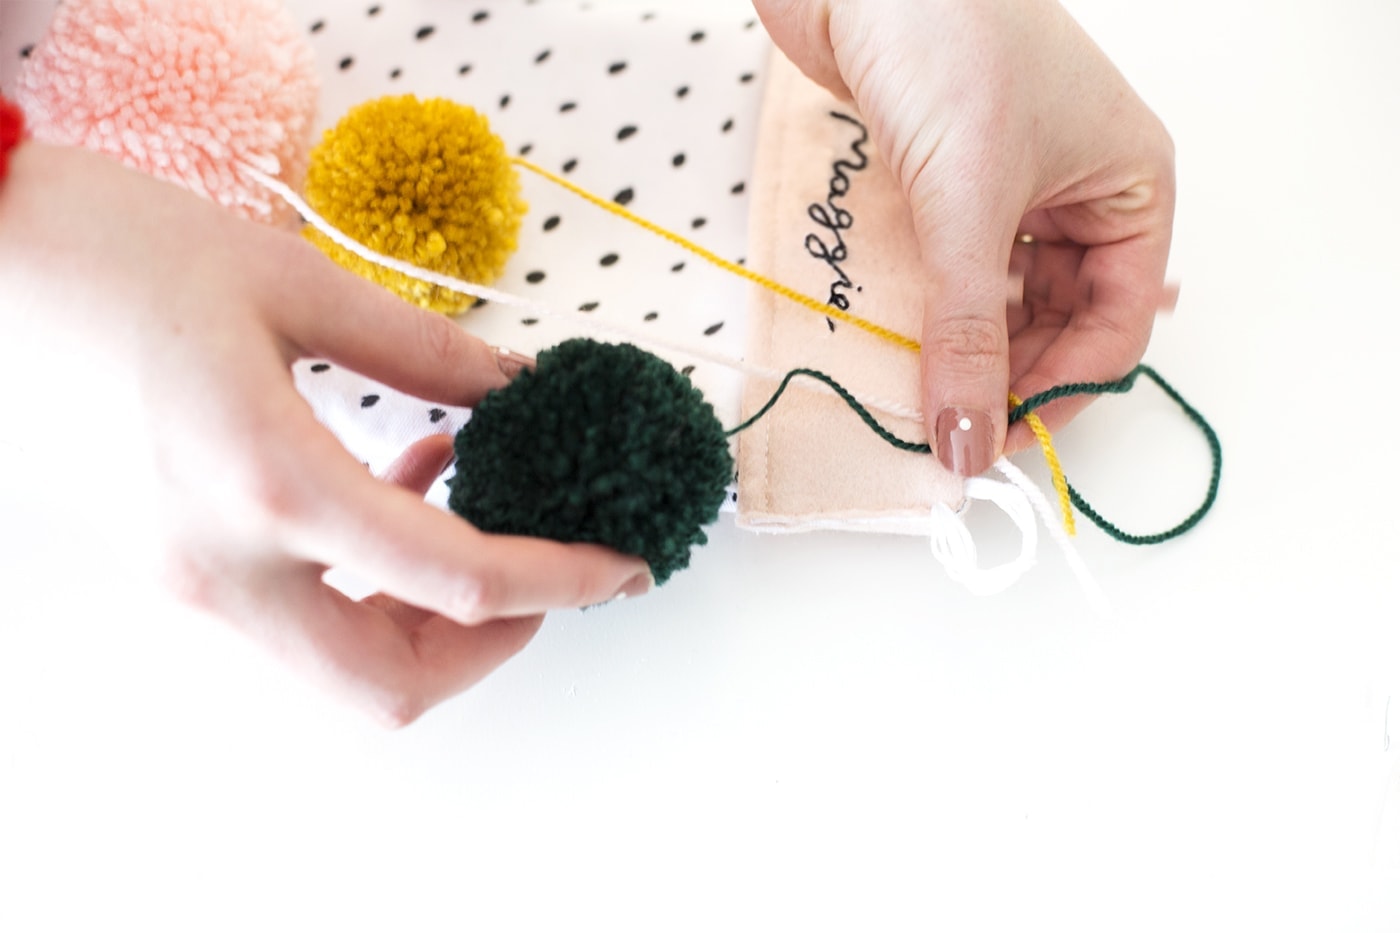
Line up the poms, staggering them to see how they look best.
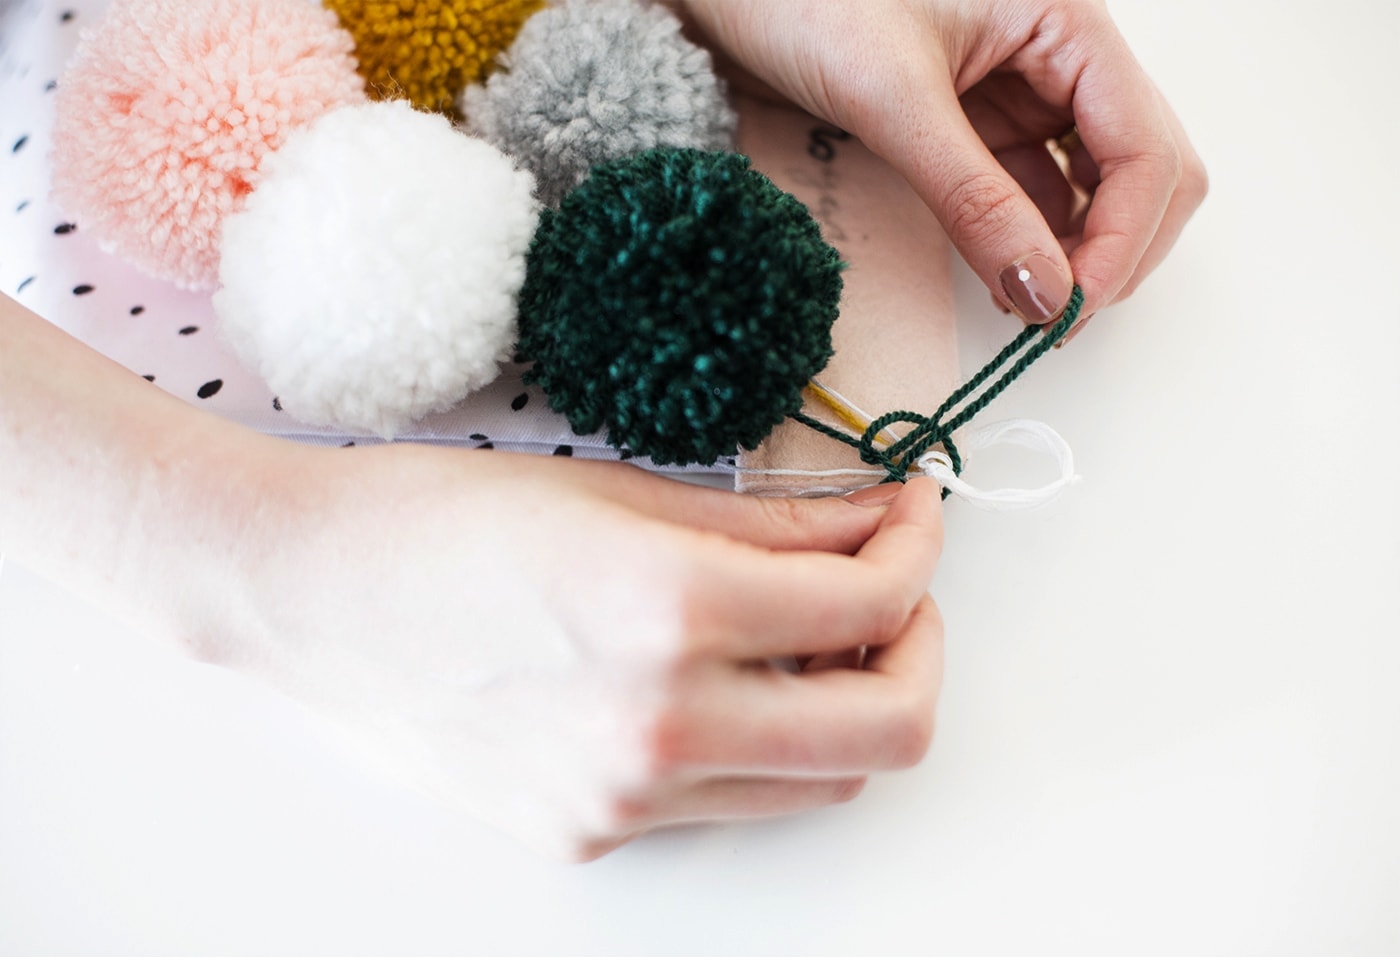 Tie them all onto the loop using double knots and then you can cover this by simply tying a bow over the top with some ribbon.
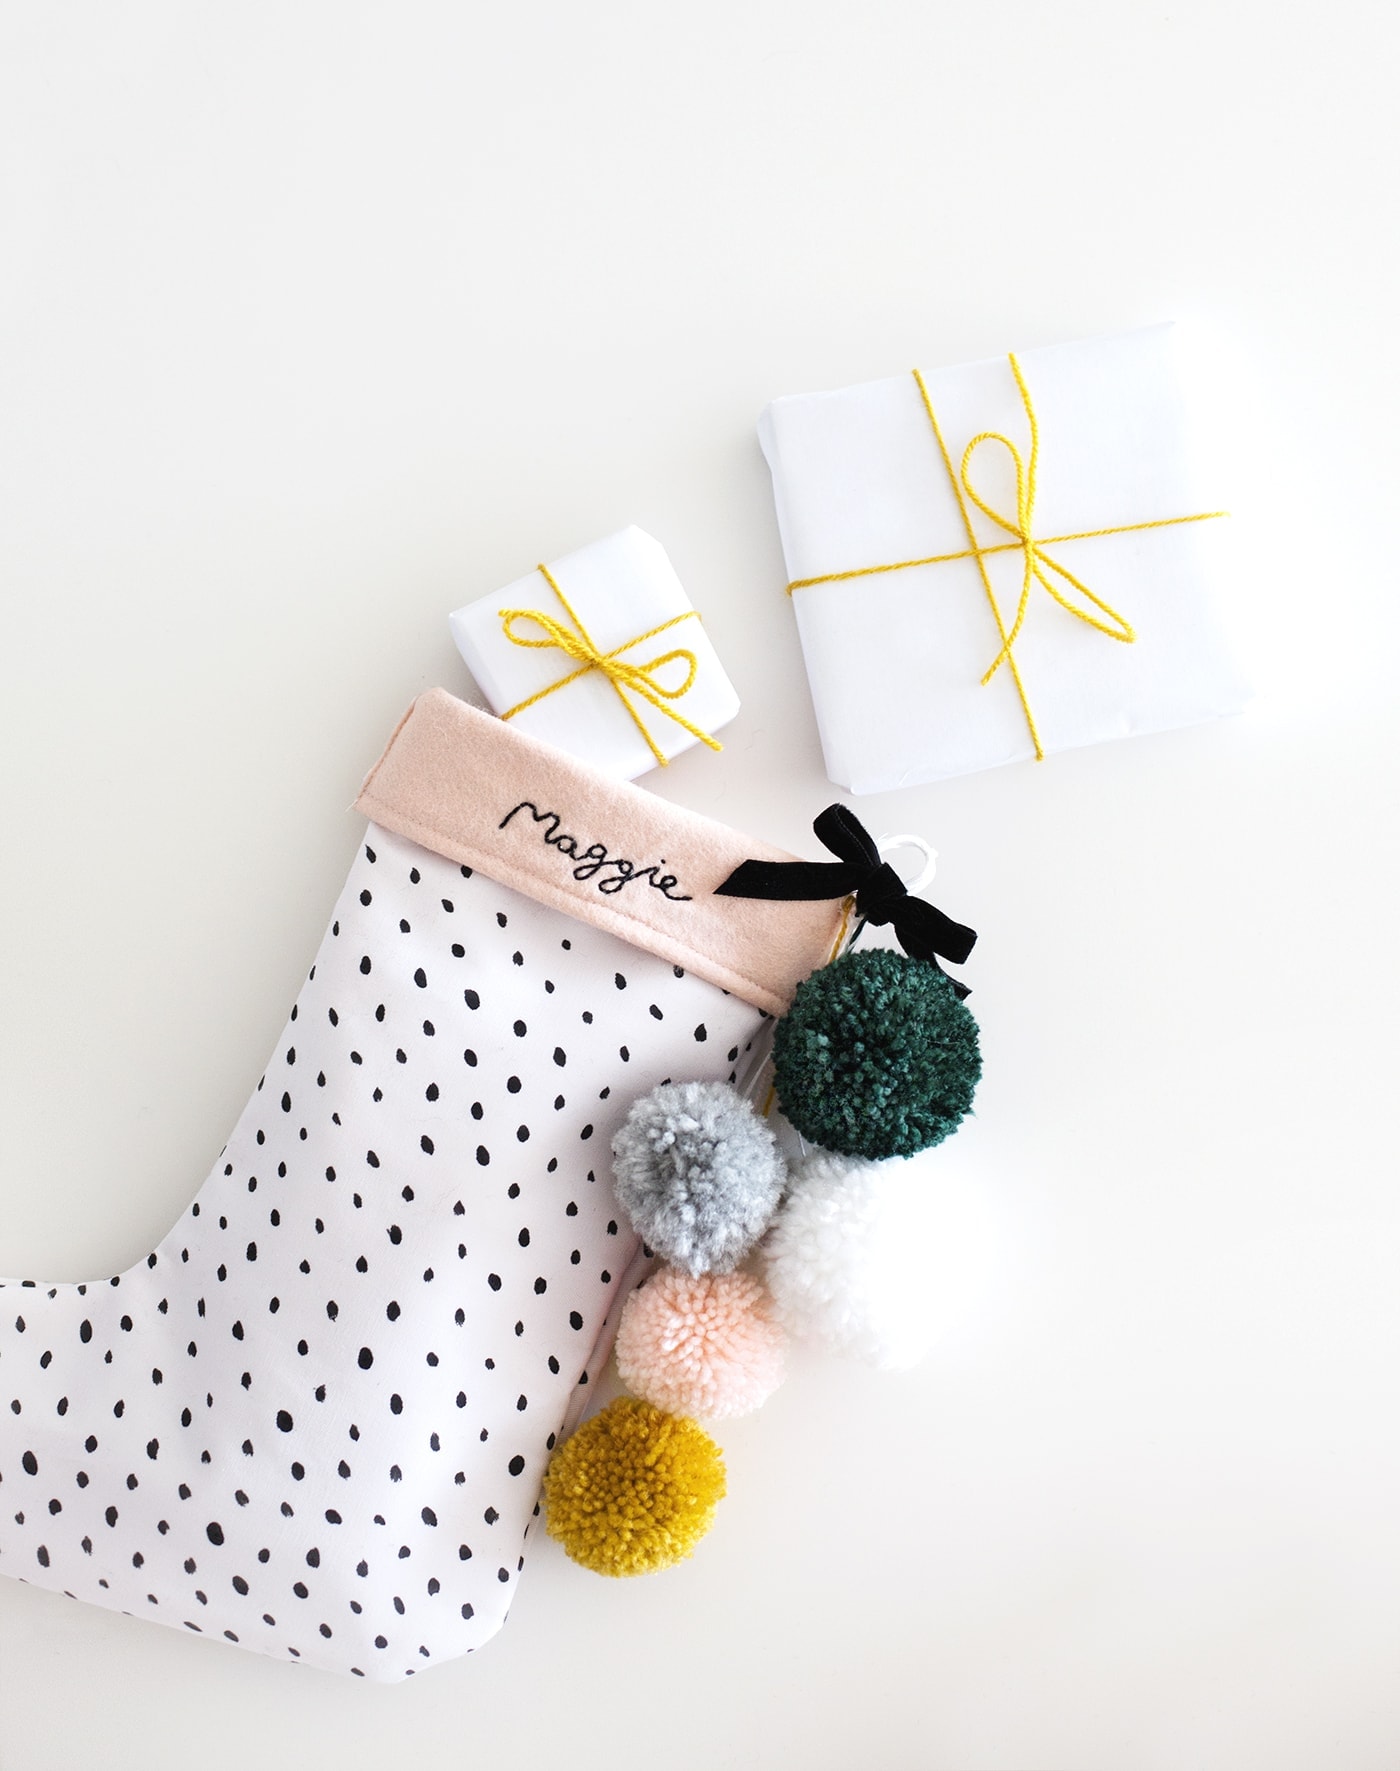 Hey presto! You have a sweet, personalised stocking you couldn’t find in the shops. I can’t wait to use this one for little Magda this Christmas but even more exciting will be the Christmas’ to come. Hopefully she enjoys hers as much as I loved mine!


