At this point, I’m a rug-making nerd, so I am genuinely amped to share my technique for finishing curved edges in latch hook with you. The overwhelming majority of commercially available latch hook kits are square or rectangle, and you just don’t find tutorials online for how to finish a latch hook project with a curved edge. Finishing a curved latch hook edge is slightly more challenging than a square edge, but not by a lot. It’s just a matter of knowing where to fold and stitch your canvas to form a clean edge, which I will walk you through now.
Vocabulary check!
I like to open a more in-depth latch hook tutorial with a vocabulary check to avoid as much confusion as possible. We’re using terms in latch hook like finishing, binding, seam allowance, and others, and defining these terms specifically for latch hook is useful to ensure you’re not, let’s say, trying to bind a latch hooked bath mat project with the same method as a pieced-fabric baby quilt. Check out my for an explanation of latch hook finishing, binding, seam allowance and square latch hook finishing and why the differences matter.
I’ve also put this graphic together to help explain the difference between these techniques. In latch hook projects with silhouettes that combine straight lines, diagonal lines, and curves like the one pictured, both square and non-square finishing may be employed in combination.
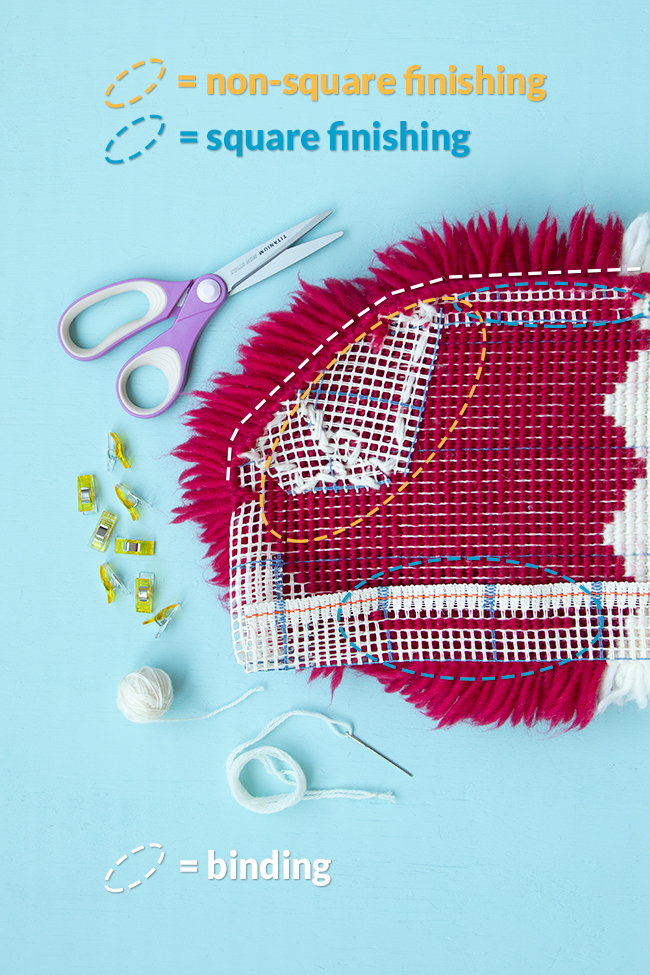
How to Finish Latch Hook Projects Without Square Corners / How to do non-square latch hook finishing
Supplies
hooked latch hook project in need of finishing (All knots in pattern knotted, raw edges of seam allowance yet to be secured.)
scissors
sewing clamps or clothespins (pictured: Clover Wonder Clips)
tapestry (yarn) needle
worsted weight yarn
Directions
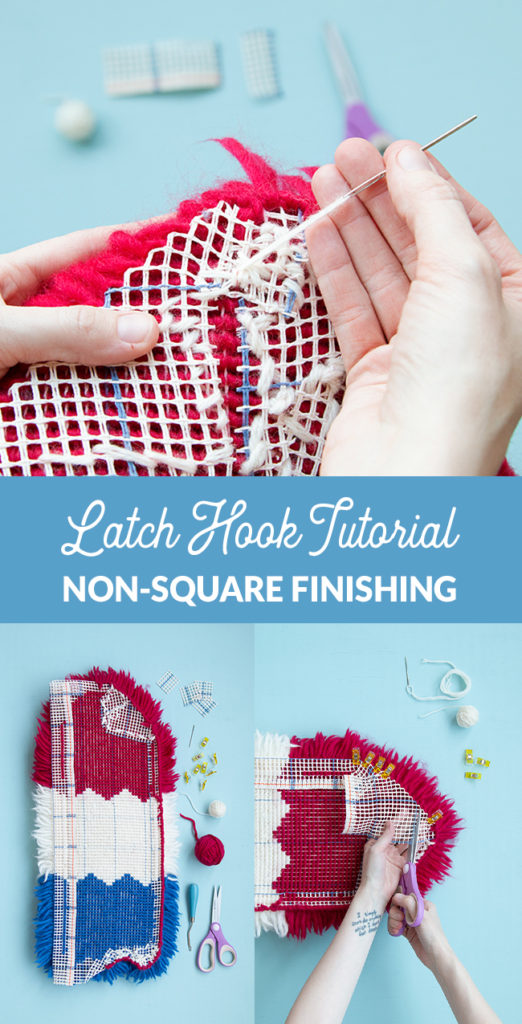
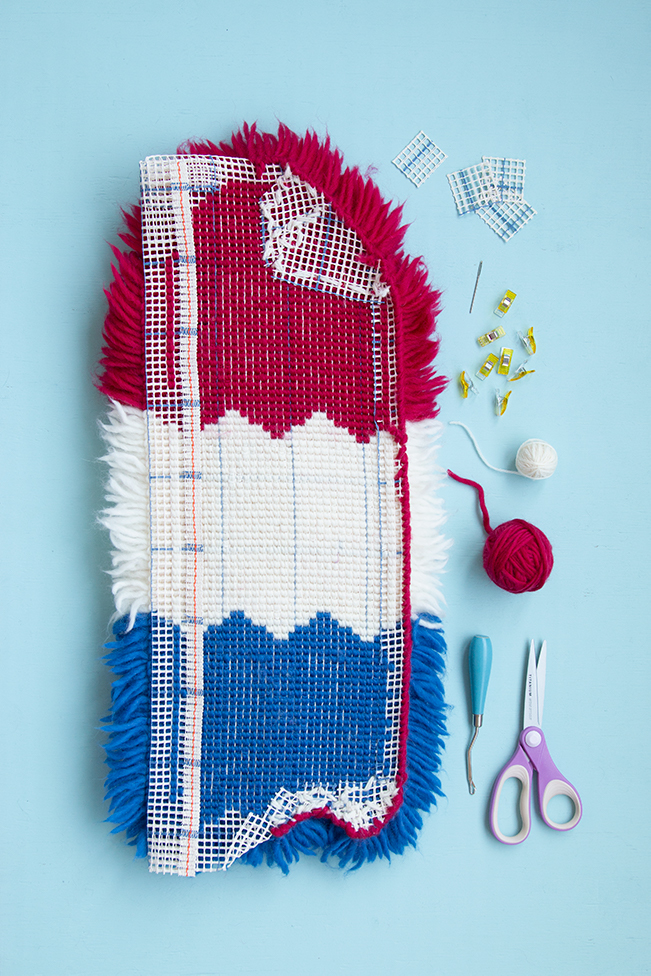
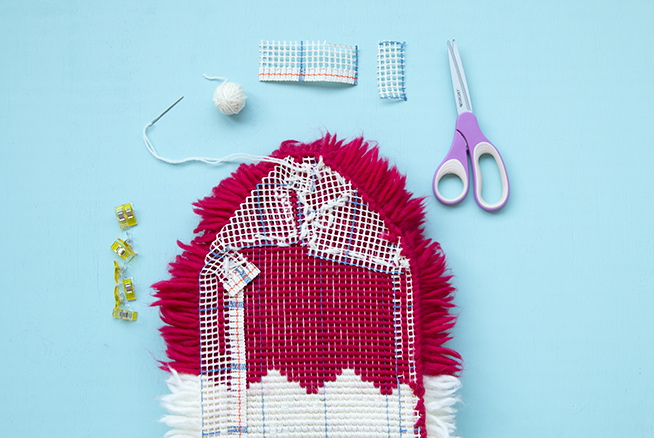
In this example, you can see that the right half of the in-progress rug has been finished and bound. Today, we’re going to go over how to finish the curved edge in the upper left. has been done on the left and right straight edges, as well as across the short, horizontal edge at the top of the rug. We’ll go over how to finish and reinforce nooks and crannies (such as those at the bottom of the pictured project) in an upcoming tutorial.
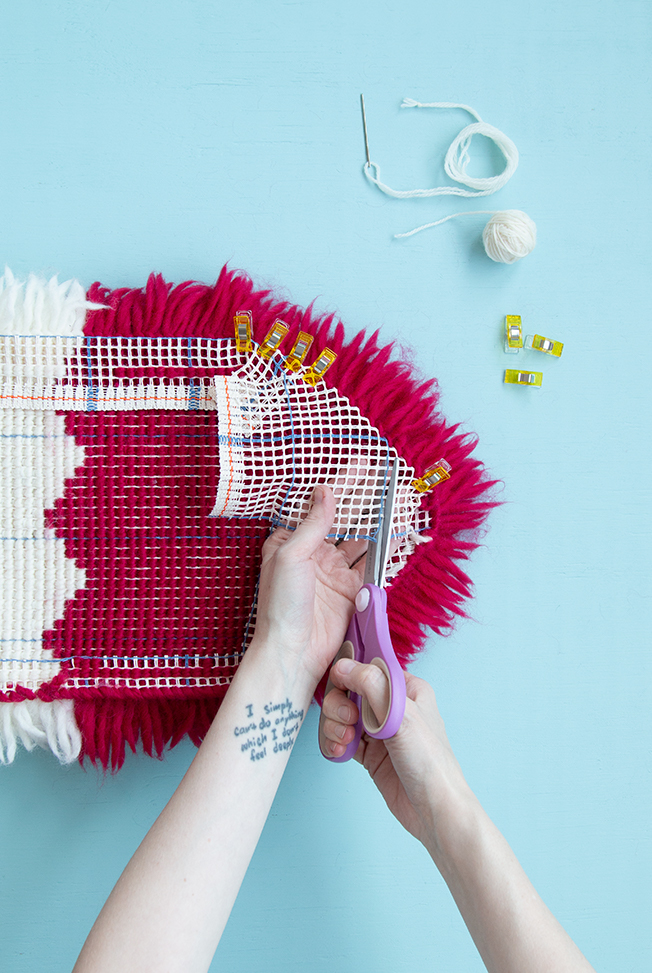
Clamping & Cutting the Canvas
Locate the non-square edge that needs finishing and begin by folding back the seam allowance to the wrong side of your work and clipping in place. As you fold the seam allowance straight back from the knotted edge of your work, natural folds will begin to form in the canvas. Being careful not to trim too much, cut the canvas right along the natural fold. This frees up the canvas to lay cleanly against the back of your rug so it may be hand stitched into place. The first section of clamped and cut canvas looked like this for me:
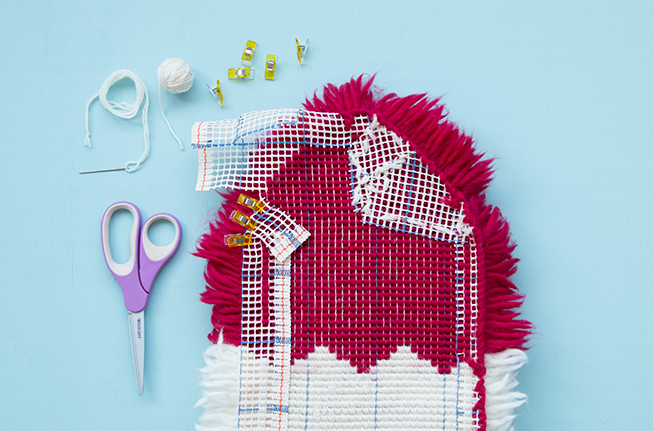
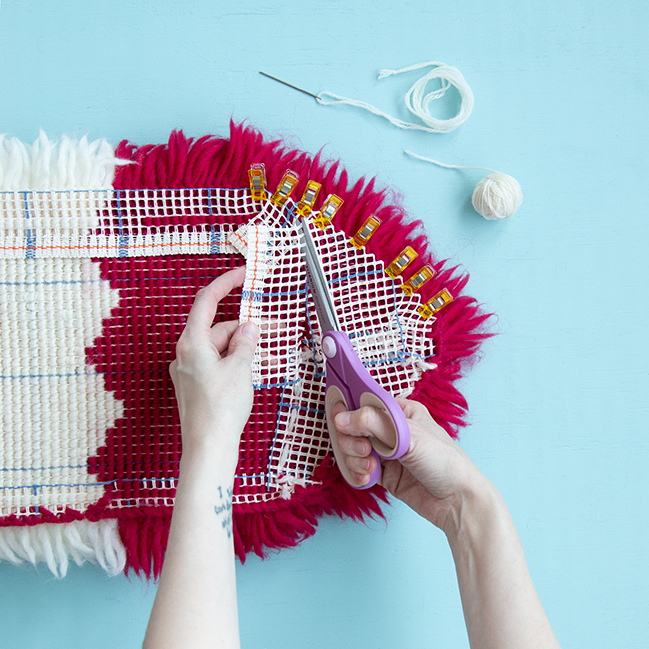
Continuing working in this way along your non-square edge, clamping and cutting folds in the canvas as they form. You can see that the gently curving edge of the canvas I’m finishing in the photos only required cutting at two fold points to achieve a good edge.
Once your canvas edge is all clamped down, you may notice that there’s simply more seam allowance than you need to finish the edge of your latch hook project. Before stitching your seam allowance down, you can take a moment to judiciously trim away excess canvas. This step is optional. It should be noted that in this step, the excess canvas is fully cut away from the project and discarded. When your clipping a flute in a non-square canvas edge, it is to allow the canvas to overlap and be sewn down, rather than cut out entirely for being in the way.
Stitching
This part of non-square finishing is my personal favorite because there are no dang rules! Simply thread your tapestry needle with a couple yards of worsted weight yarn (scraps are great for this!). Double up the yarn and knot the tail ends together. Knot the tail end to an intersection of strands in your rug canvas and, as messily as you want, stitch down the seam allowance. Stitch through the seam allowance as well as into the canvas of the body of your latch hook rug, being careful to stitch into the canvas rather than the yarn of your rug.
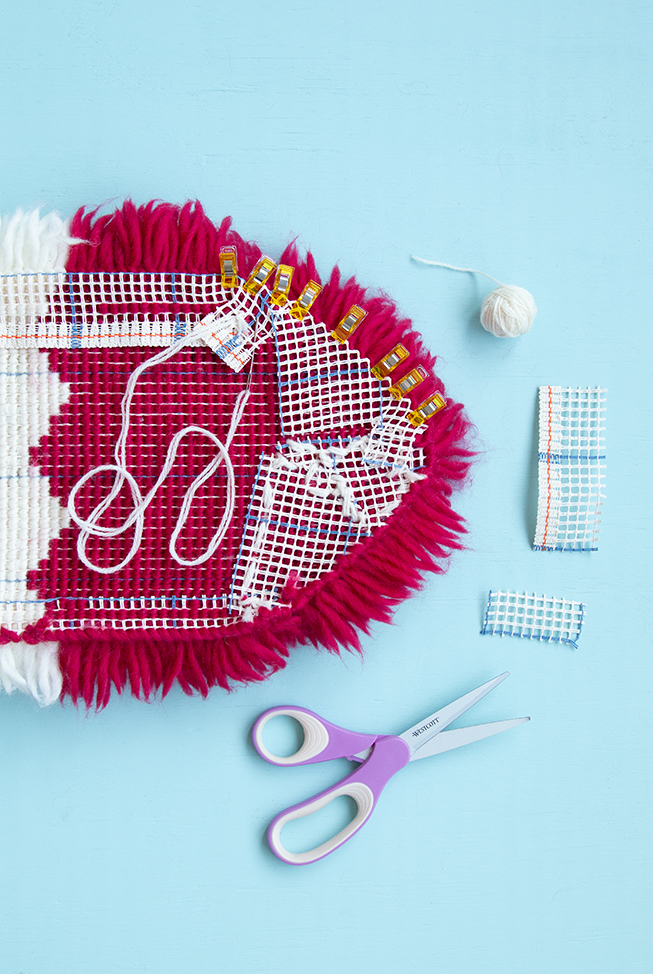
You could cleanly whip stitch or blanket stitch the raw edges down with perfect technique, but it’s just not necessary. This rug will also be bound and potentially even backed with felt or rug backing. (Subjects for more tutorials, stay tuned!  ) Just fold the seam allowance straight back, cut along natural folds that flute out, and stitch the canvas down. Bam.
To further confirm how little the aesthetic of the back means, I can promise you 100% of the projects done with non-square finishing in have the same rough stitched look as this one right here. Finishing can be a boring/fiddly step, so just make it work, my friends!