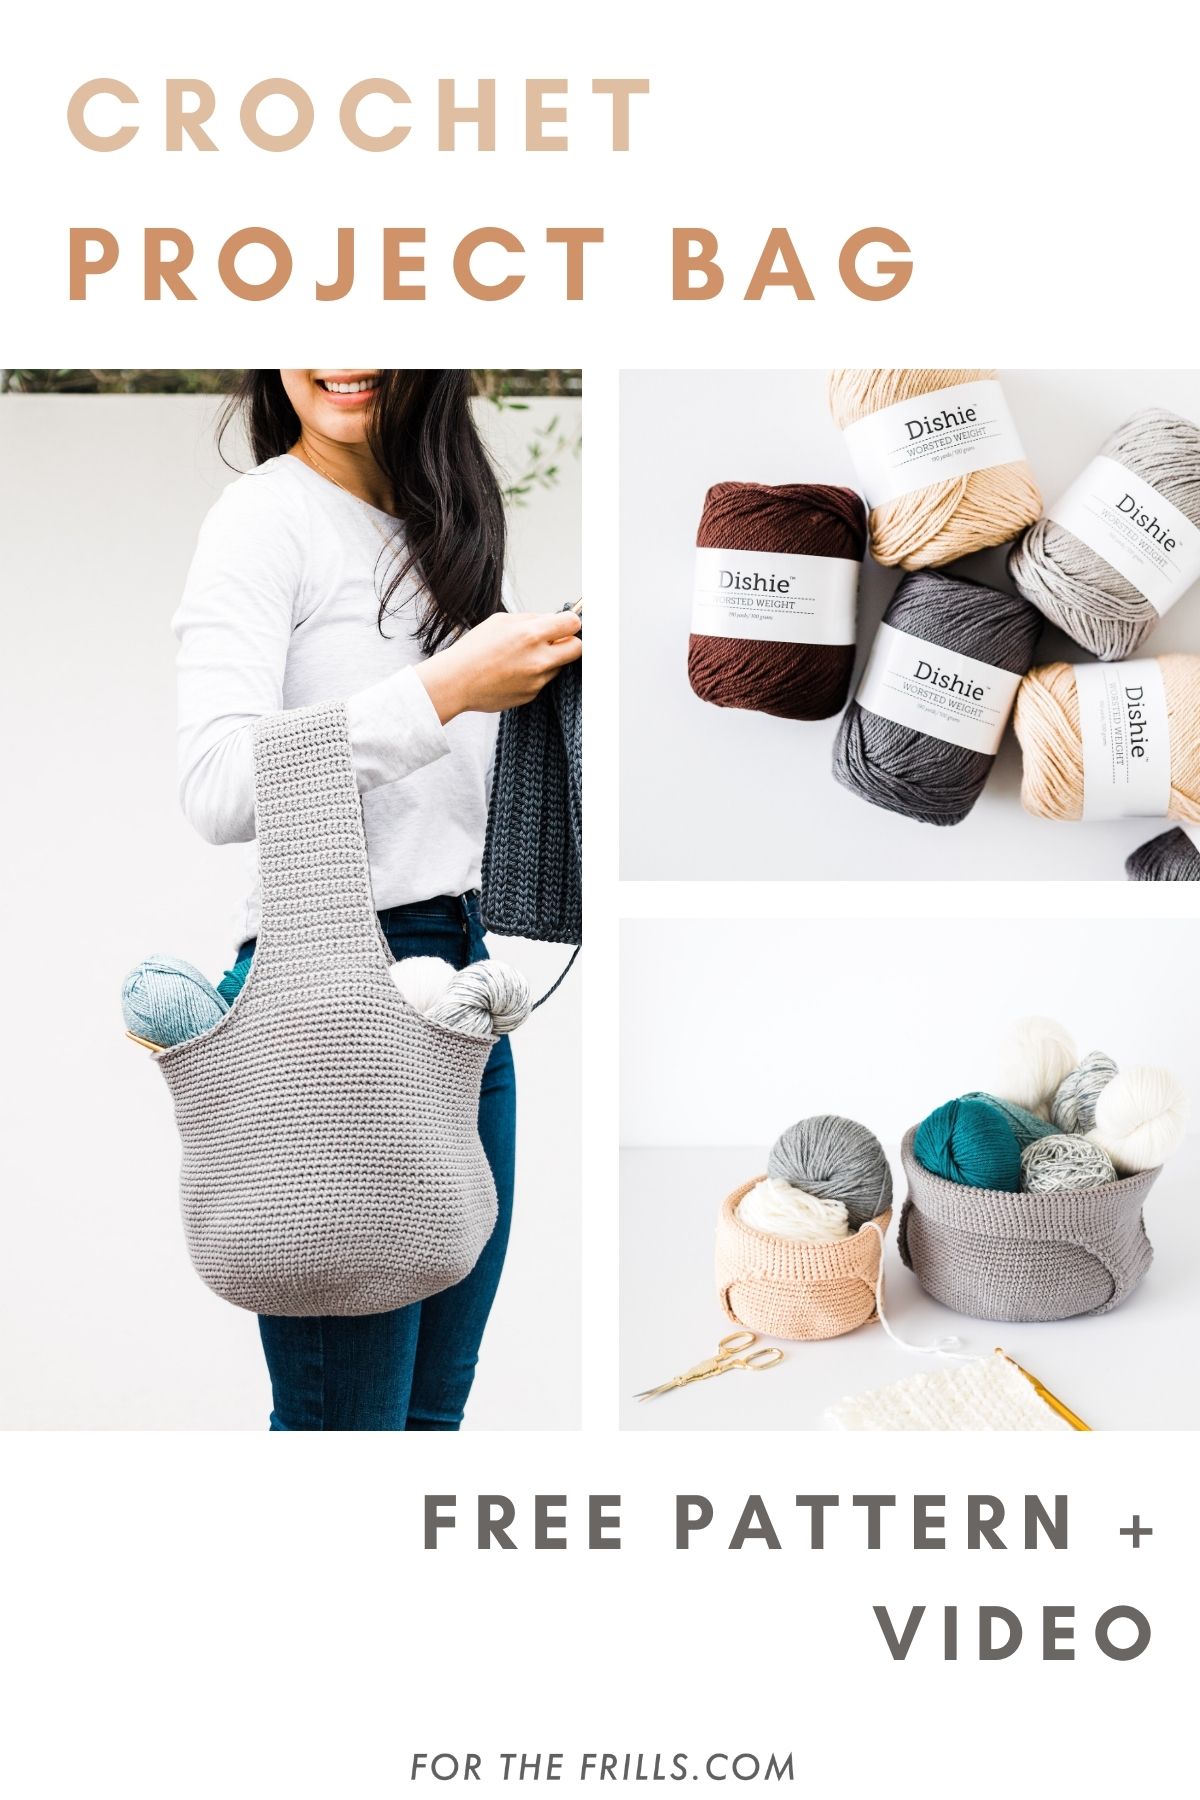
Learn how to crochet a project bag that also doubles as a yarn basket! The Adley Project Bag is an easy crochet pattern that’s worked entirely in one piece!
Scroll down for the free crochet pattern and video tutorial or click !
This post may contain affiliate links, view our for details.
Thank you to for providing the yarn for this free crochet project bag pattern! As always all thoughts and opinions are 100% my own ?
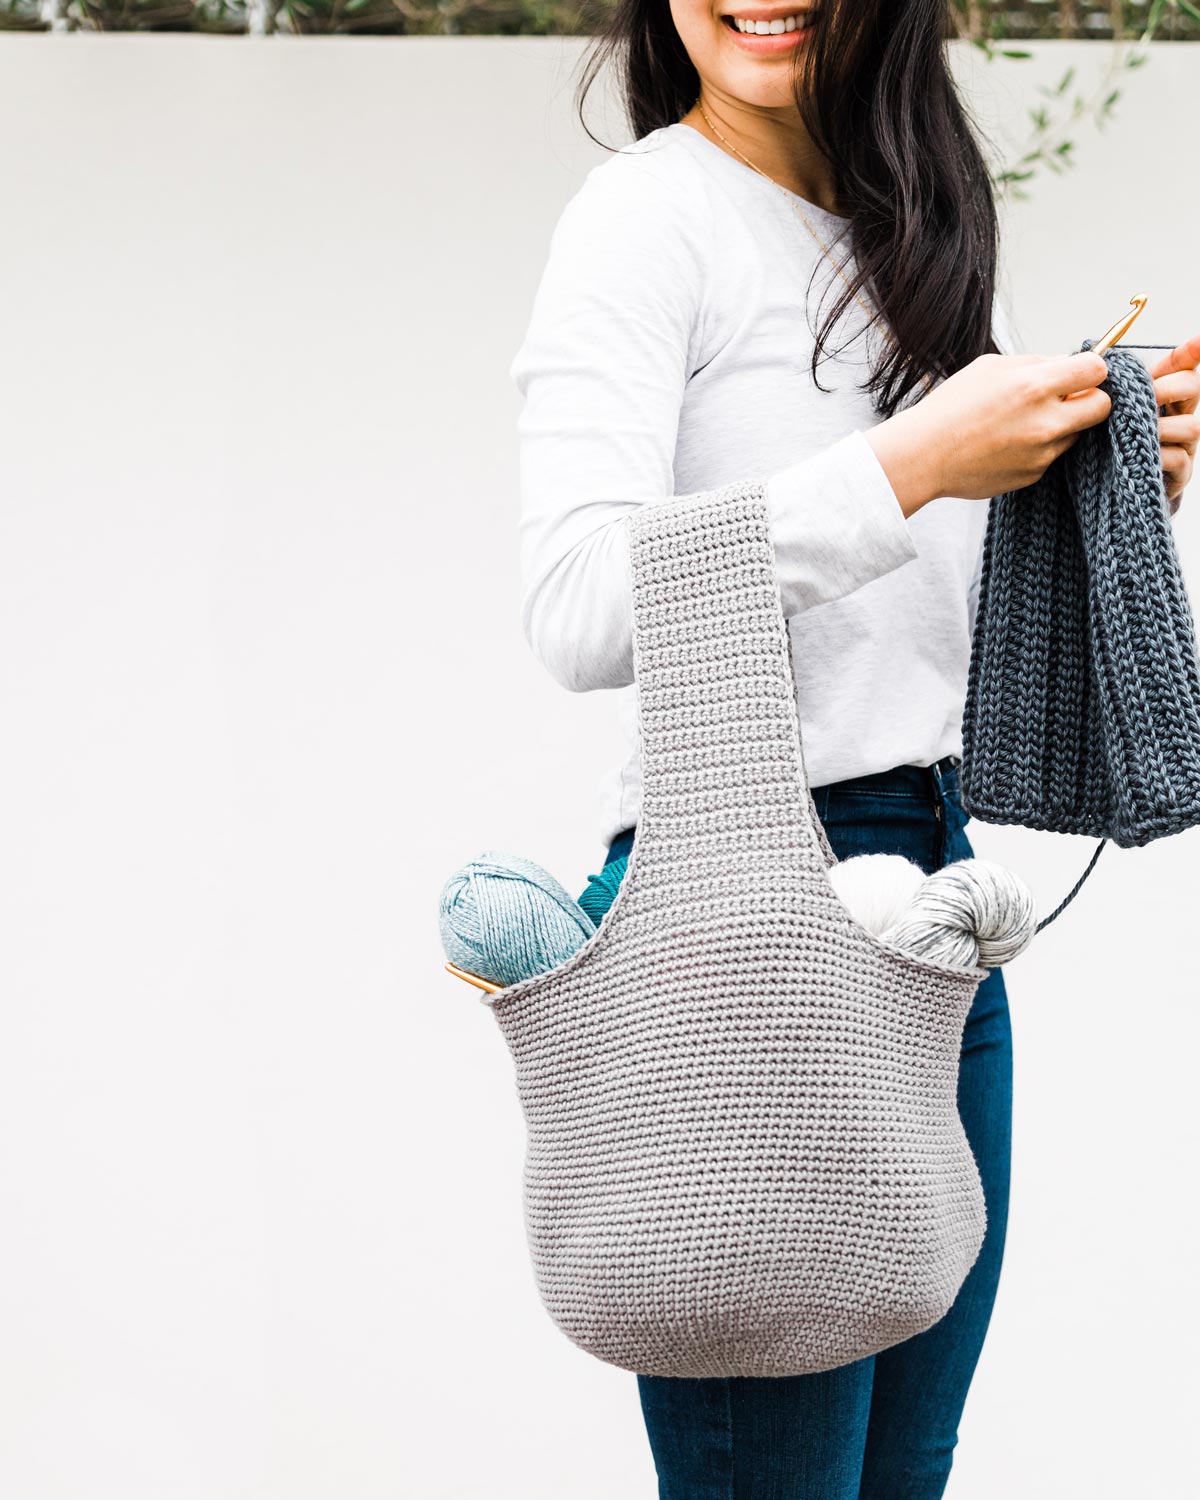
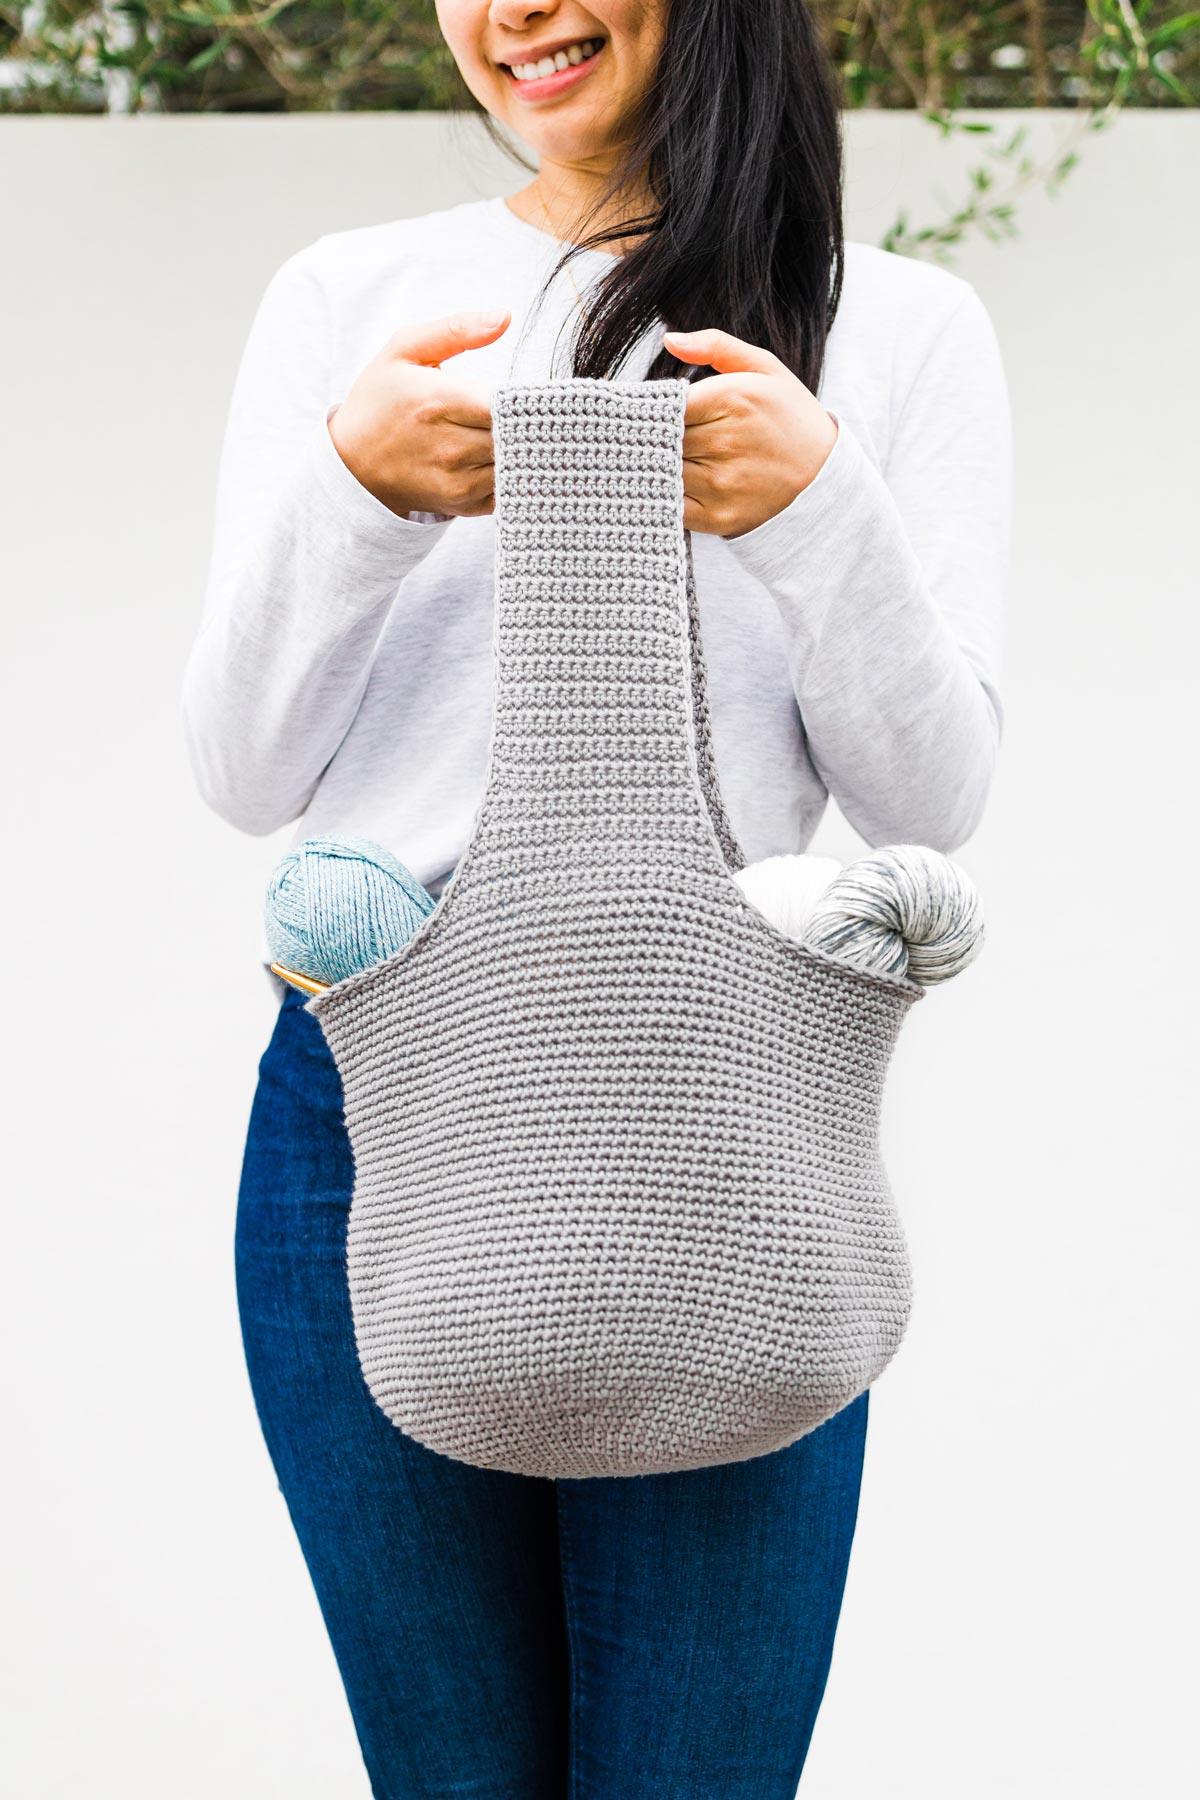
The Adley Project Bag is the item every crocheted (or knitter!) needs! This simple, modern design is perfect for carrying yarn, crochet hooks and all of your notions. The wide flat handle makes this bag very comfortable to hold on your wrist while the larger sizes can also be used as a tote bag.
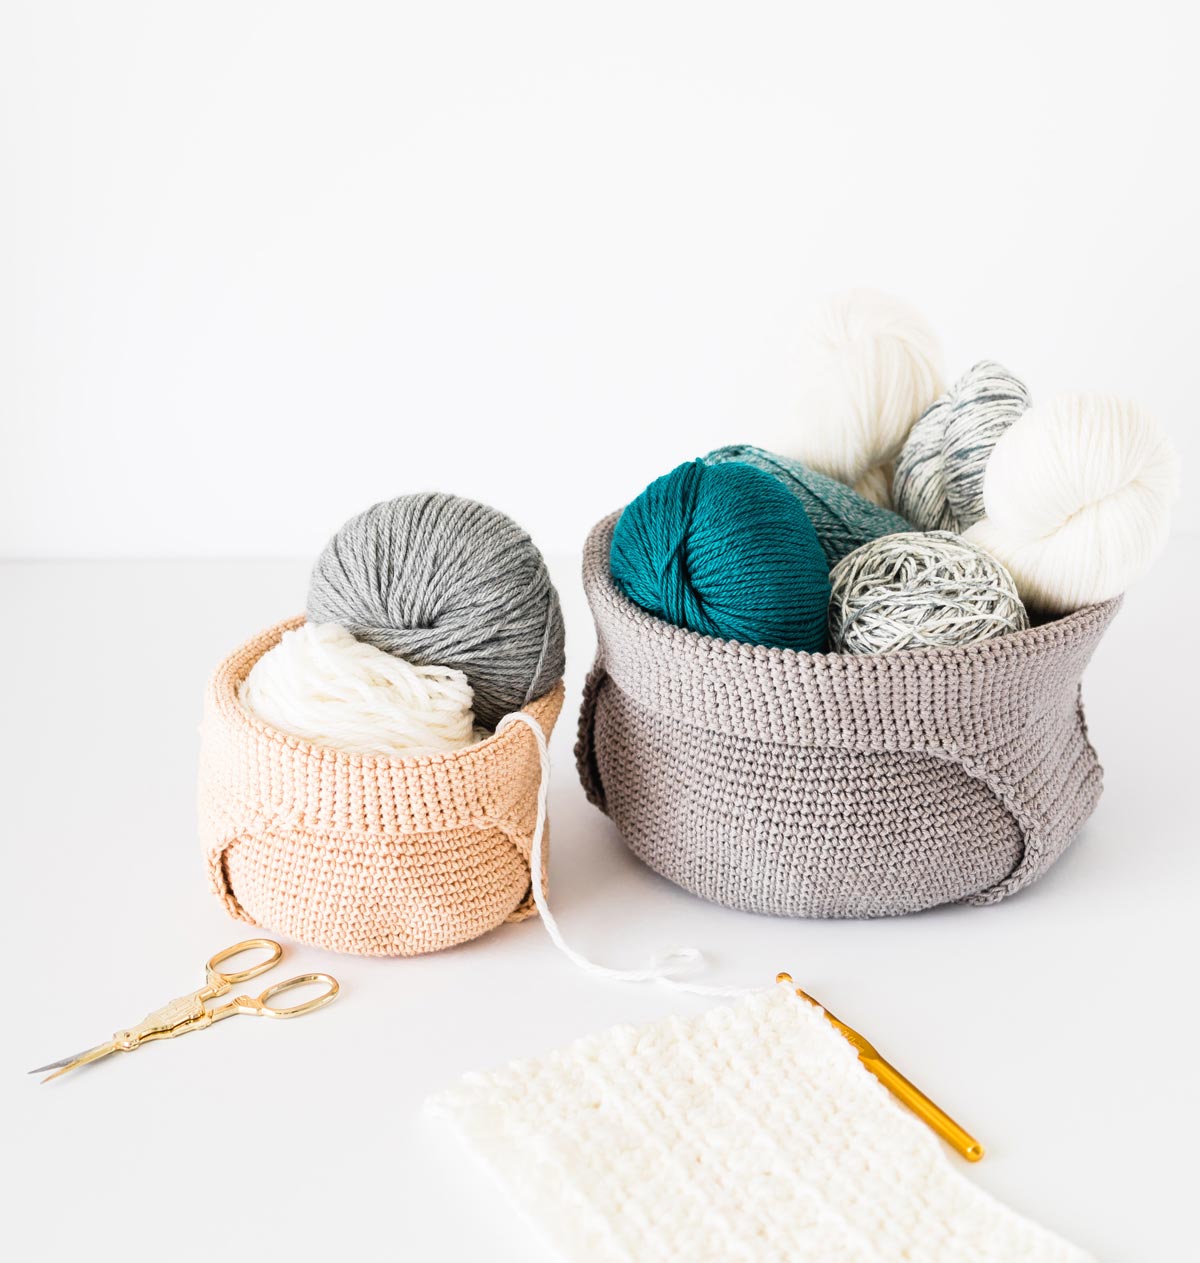
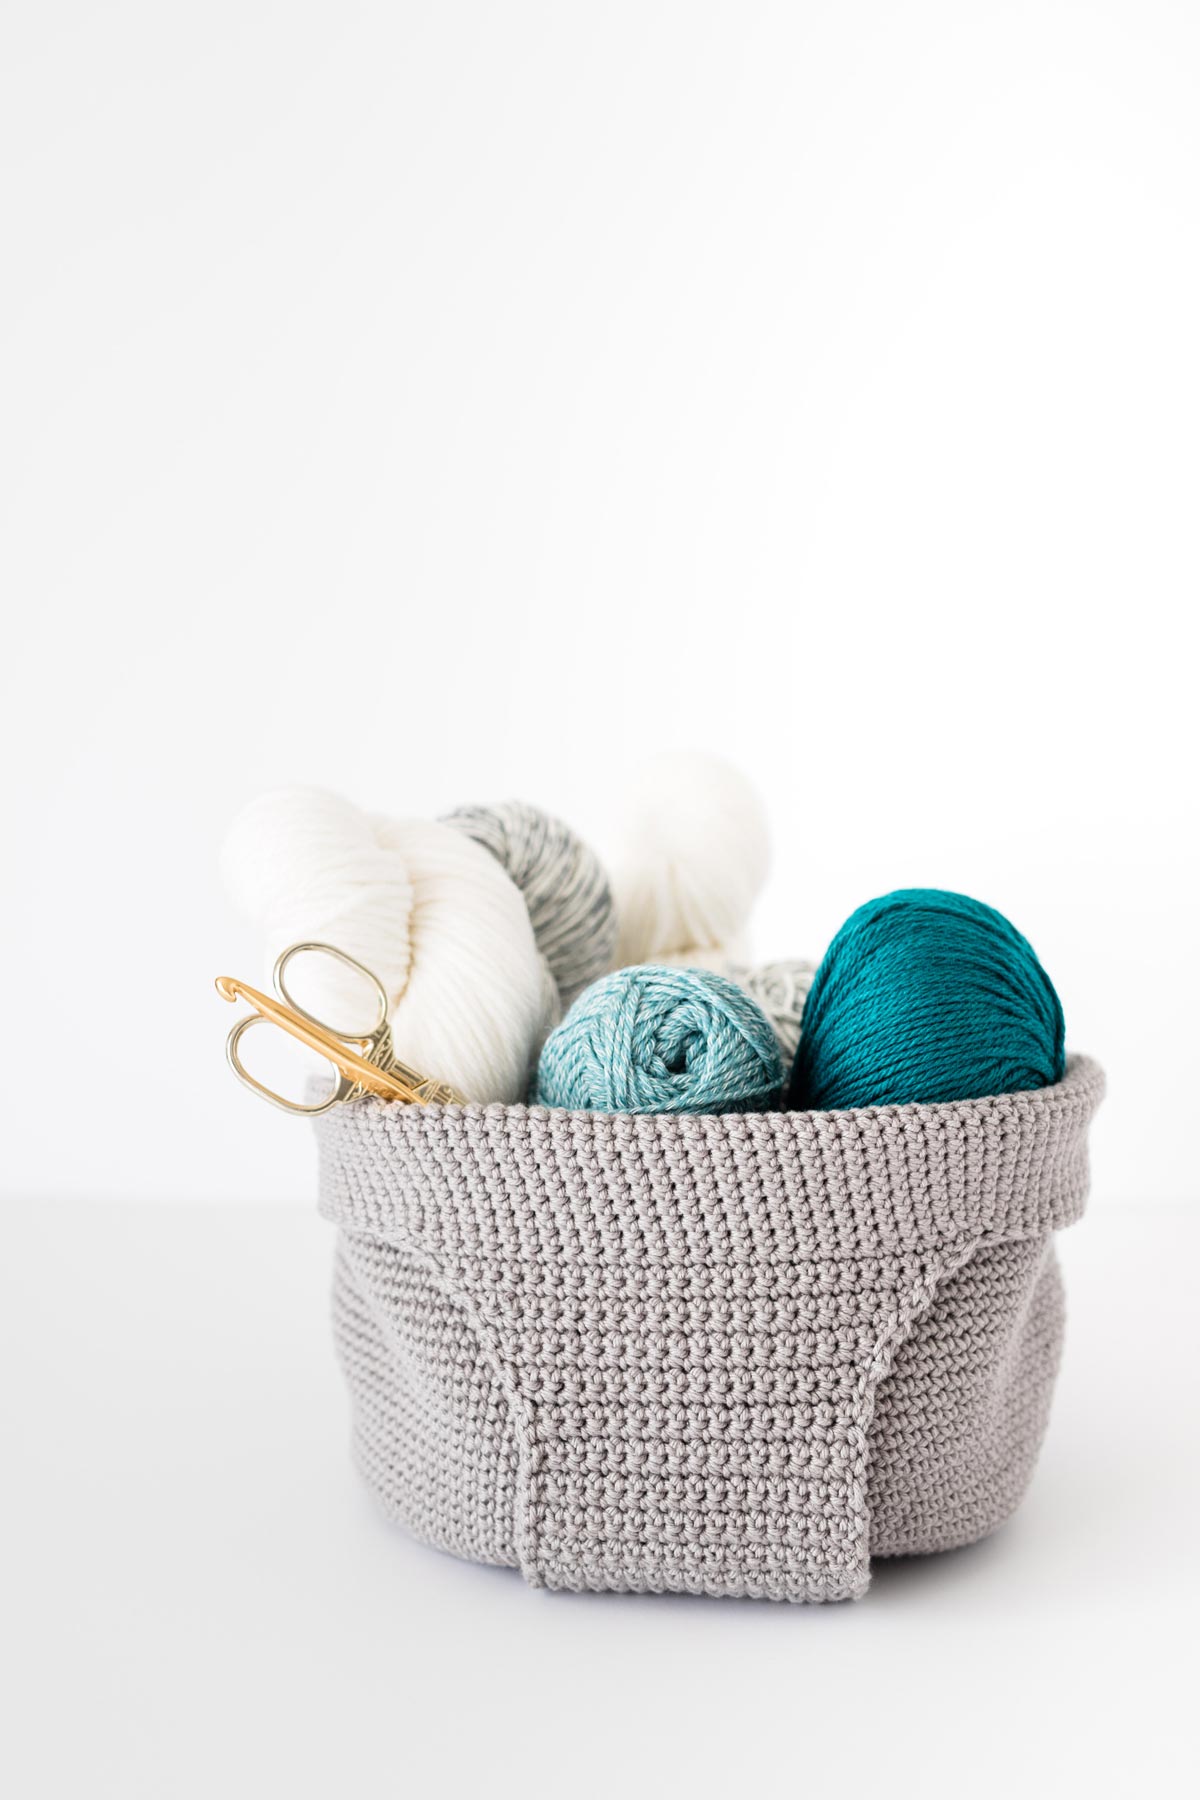
This easy yarn holder bag is perfect for crocheting on the go or at home! You can convert this crochet pattern from a bag to a yarn basket by simply folding the handle underneath the base of the bag.
Design Inspiration
Over a year ago, one of my friends walked in to our knitting group wearing a small wrist bag. To our amazement, she pulled her entire project out of that little wristlet and started knitting!
Her project bag was made out of a dark blue denim cotton and only had one wide handle so that it would comfortably rest on her wrist without digging in. Ever since then, I’ve kept telling myself I needed to sew one but then I realized, why don’t I just crochet one?
When I started designing this bag I decided to keep the wide thick handle but to crochet in the round with a circle base. Creating a circle base allows you to fit so much more inside the bag since it forms a 3D cylinder shape instead of a flat 2D envelope. The circle base also helps the bag stand up by itself and lets you turn it into a yarn basket.
Its projects like these that remind why I love crochet so much! The ability to work in rows to create ‘flat pieces’ or in the round to create sturdy 3 dimensional shapes opens up so many possibilities when designing ?
What size should I crochet?
This pattern has 3 sizes – mini, midi and maxi! Each bag works well in different situations so you’ll probably want to make multiples of this pattern.
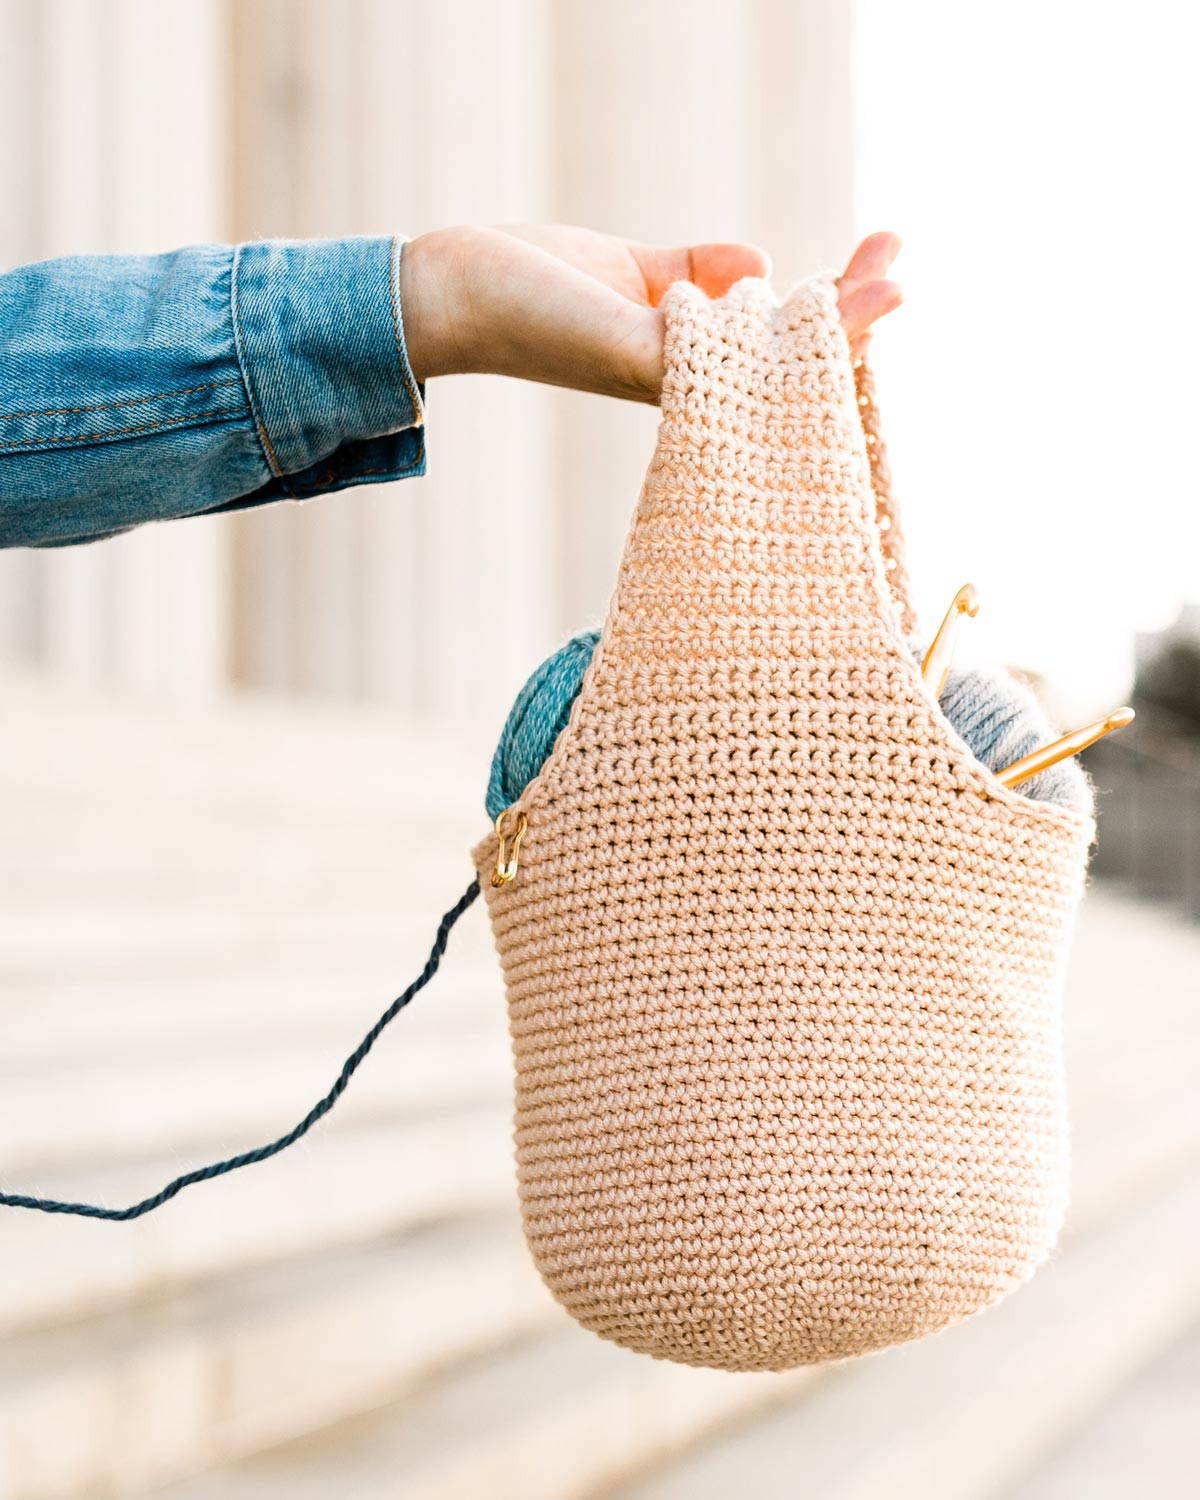
The mini size is great for crocheting while you’re out and about! This size comfortably fits 1 skein of yarn, the start of your WIP, along with all the stitch markers, measuring tapes or crochet hooks that you’ll need. You can even fit a small notebook inside to take notes. I love this size because the bag is so light, you can barely feel it on your arm.
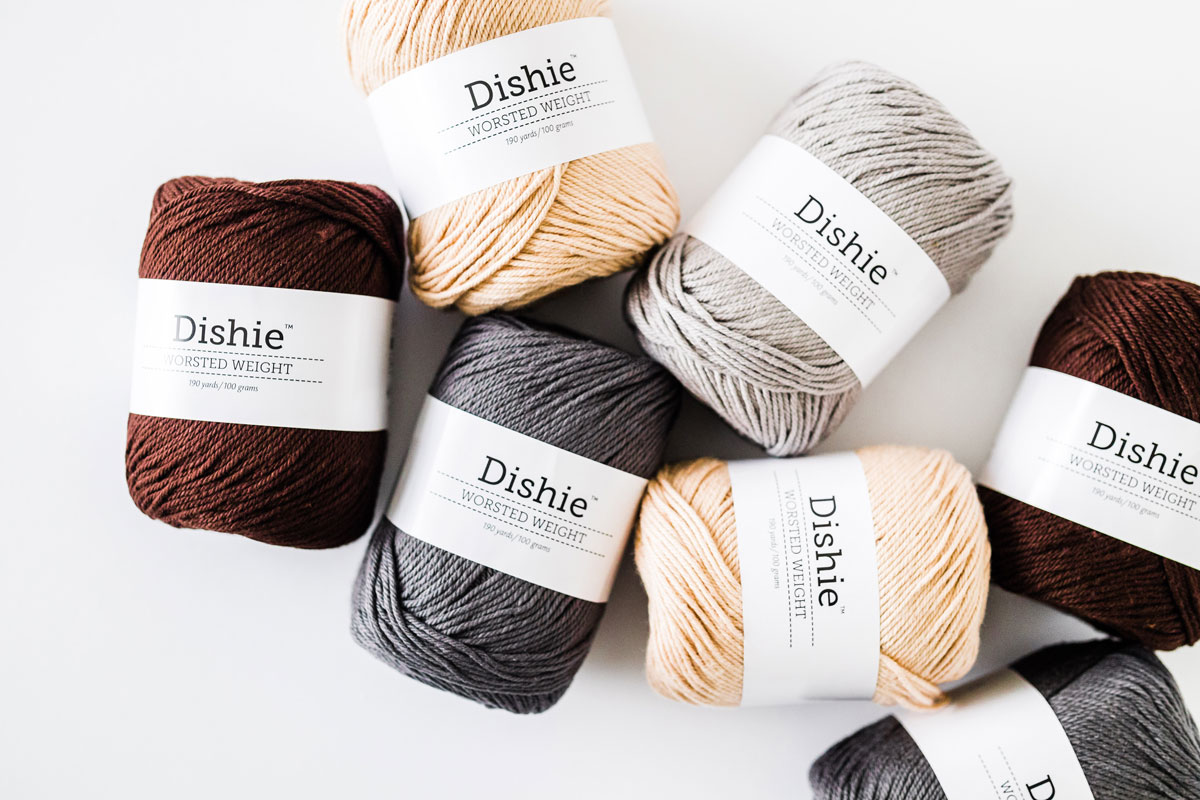
It’s a great bag to carry around if you’re waiting in line and just want to squeeze in a few more rows, while you’re on the bus or take it with you to the park for some outdoor crocheting. The mini size used exactly 1 skein of Dishie yarn and at only $2.99 a skein, this is a great affordable project! This mini project bag is small but mighty!
The midi size is a perfect in-between accessory. If you’re working on a larger project or want to carry all of your stuff (including your phone, wallet, keys etc.) in one bag along with your WIP, this is the size for you! You’ll find that it’s still comfortable to wear on your wrist or in your hand.
Do you love to have all of your yarn, notions and tools with you at all times? Then pick the maxi size – it’s huge! And you’ll be surprised with how much can fit into this crochet bag. When I was testing this size out, I managed to fit in twelve! 50g skeins of yarn and all of my notions.
The maxi size is great for super chunky yarn projects, sweaters or for any larger project that takes up a lot of space. This size also works well as a holiday project bag – if you want to bring supplies for multiple small projects oronea large one, you’ll know that all of your crocheting stuff is in one place.
I recently used it on a 5 day road trip and managed to fit in the yarn for 3 summer top projects, all of my notions, a sketchbook and a pencil case! This Maxi crochet bag would also work really well as a summer beach tote!
If the maxi bag is stuffed to the brim, I found that I couldn’t wear it on my wrist for long periods of time like the mini size. However, since this size has a longer strap, it fits comfortably on my shoulder and the handle width still fits nicely in your hand.
Looking for more free crochet patterns?
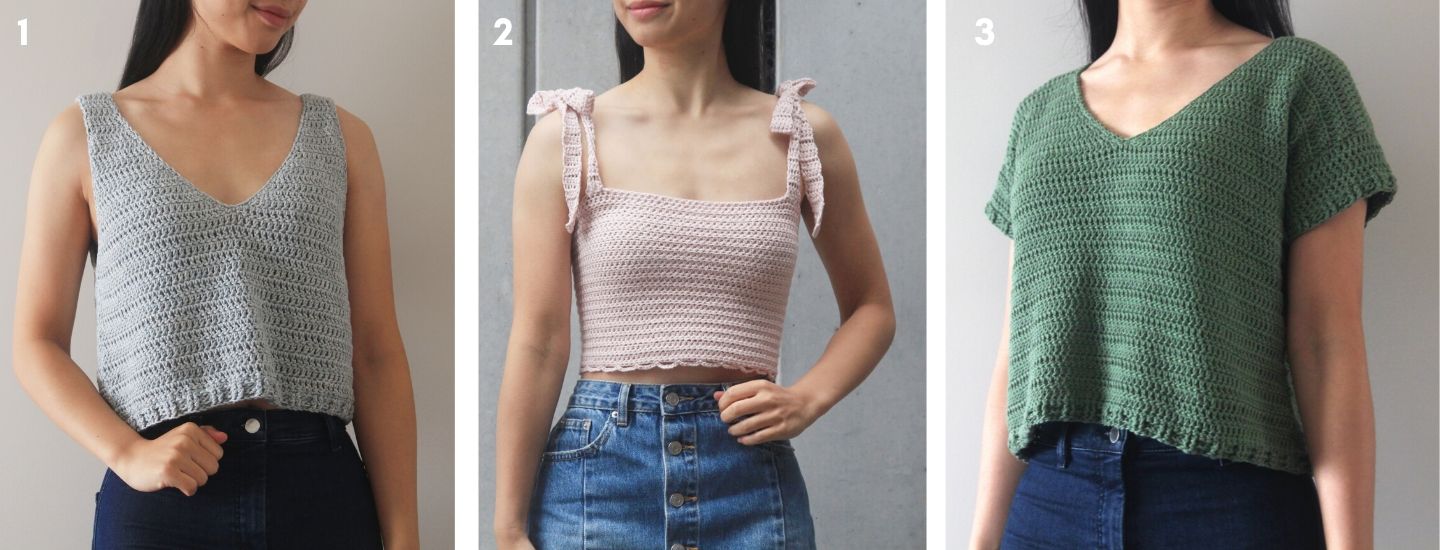
1. / 2. / 3.
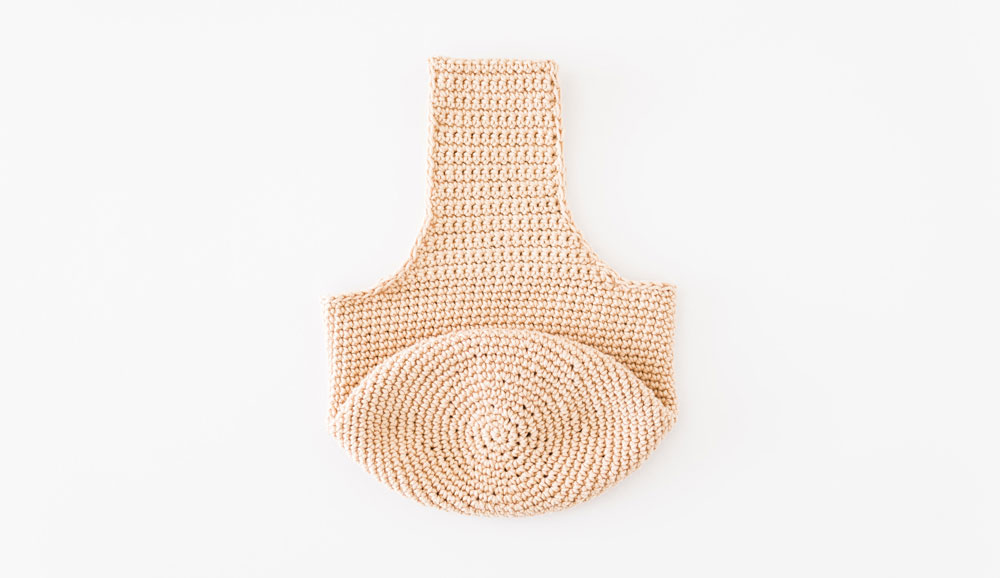
Construction
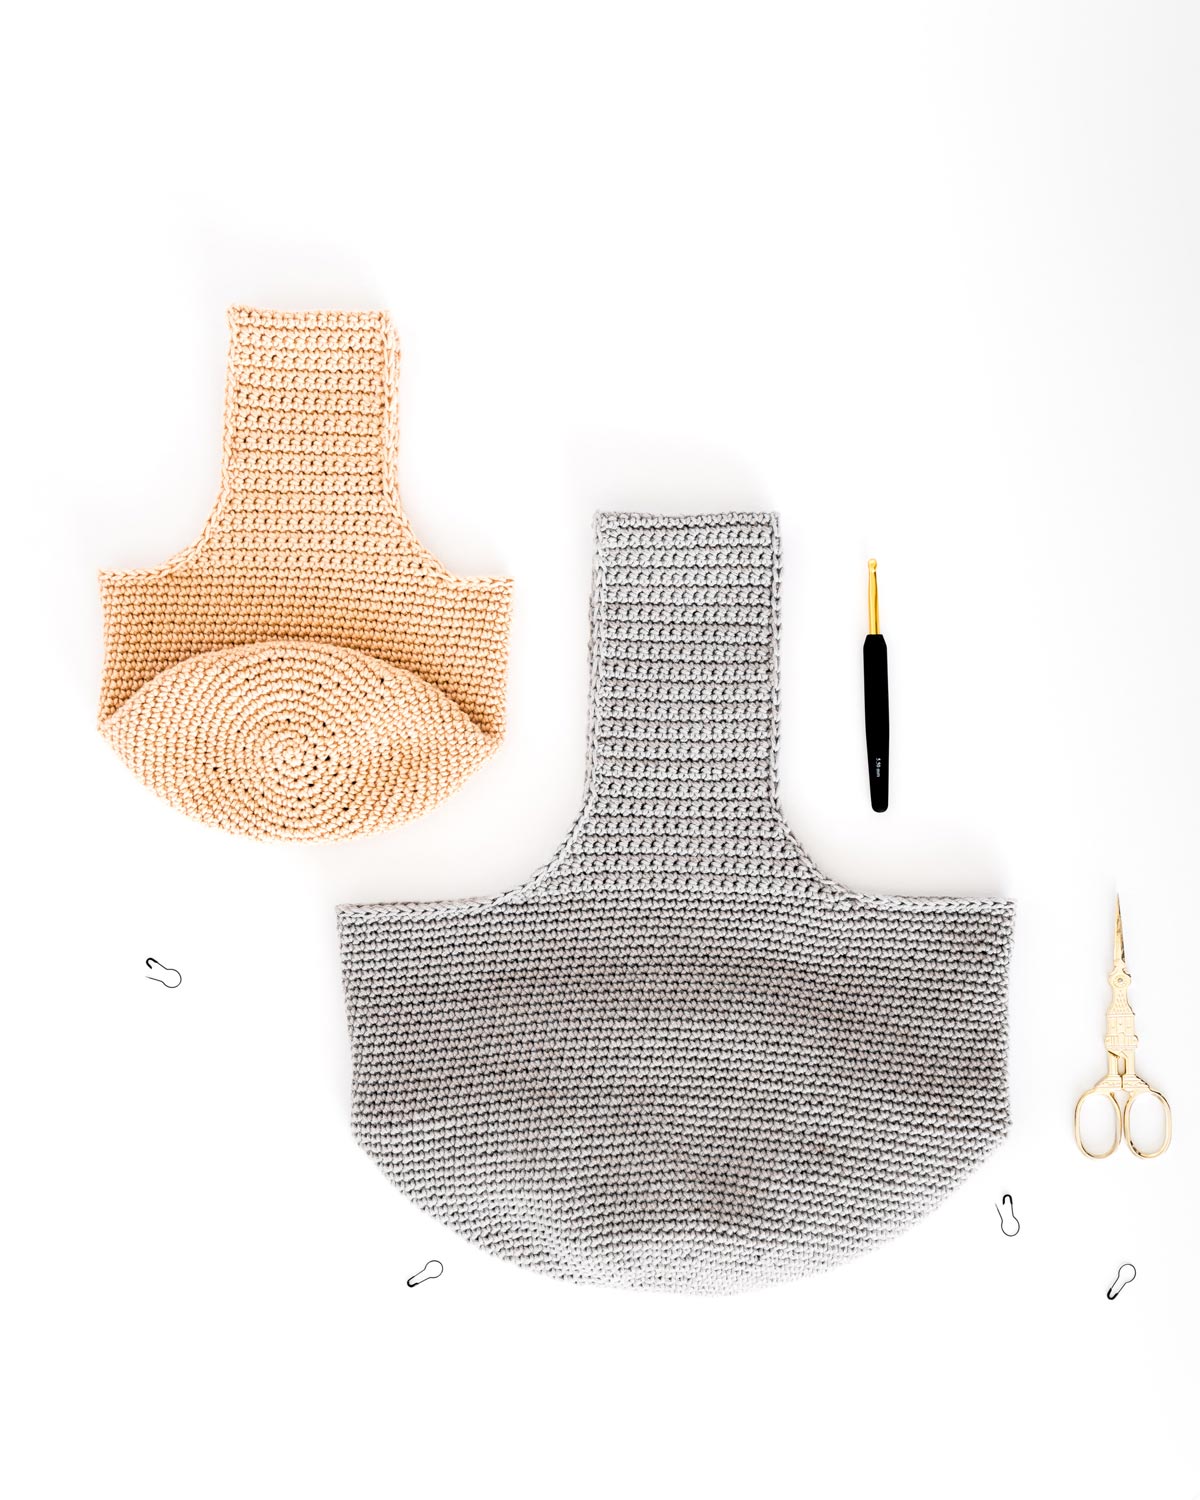
The Adley Project Bag has a super simple construction. The base and sides of the bag are worked in a continuous spiral while the straps are worked back and forth in rows and sewn together to form a handle.
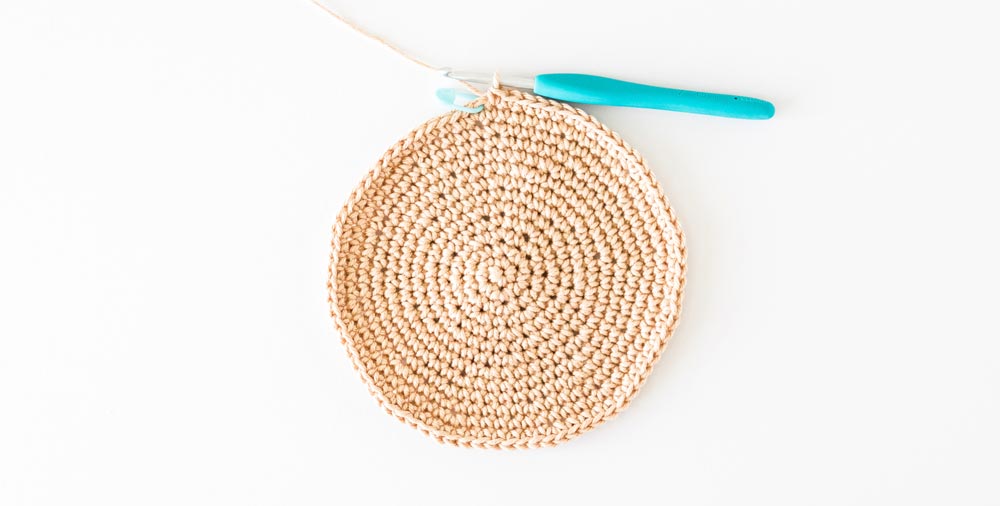
The vast majority of this yarn holder is worked in single crochet with a few (only 4!) single crochets 2 together and an easily slip stitch edging. We’ll start by crocheting a small circle into a magic loop or a chain, and then extend the circle out until it forms the base of the bag.
The trick to crocheting a nicely rounded spiral is to increase 6 times every round as this number works perfectly with the height of the single crochet.
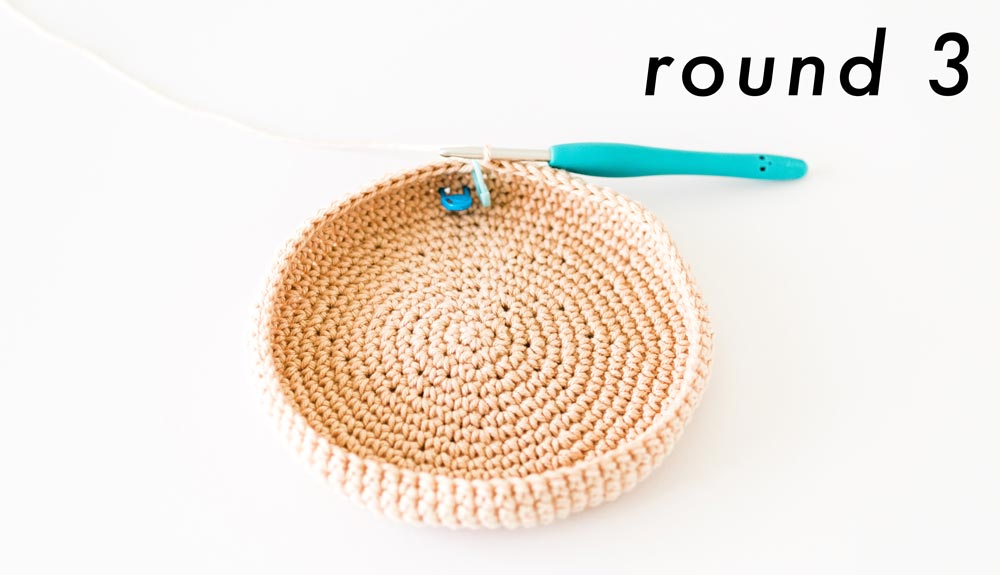
Once we you’re happy with the diameter of the spiral, the sides of the bag are formed by crocheting rounds of single crochet. Don’t worry if your project bag still looks a bit flat after the first few rounds of single crochet. After 5 – 10 rounds, the sides will start to ‘stand up’ and the bag will start to look like a cylinder.
If you’ve crocheted more than 10 rounds and the sides of your bag are still flat it’s probably because –
- Your stitch count has been increasing (instead of having the same number of stitches every round) or
- Your tension (how tightly you hold your yarn) has loosened/changed.
Yarn
The project bag uses is a tightly spun 100% cotton yarn that’s perfect for accessories and homeware! This cotton yarn comes in over 20 shades and I love it so much I’ve used it for multiple home ware patterns – check out the and !
is such a wonderful yarn that has the perfect balance of softness and strength. It’s sturdy enough to hold it’s shape as a basket but the handle is malleable so it sits comfortably on your wrist without digging in. It’s also on the thinner side of an aran cotton yarn so this bag isn’t too bulky or heavy ?
P.S. Dishie yarn is also available in and there’s a two-tone version ‘’ if you’d like to make a multicoloured bag!
Pin me for later!
Video Tutorial
I love to see your finished projects! Use #forthefrills and tag me on Instagram @forthefrills for a chance to be featured
Add the !
Purchase the !
Pattern Notes
*The beige bag is a size mini in shade ‘linen’ and the grey bag is a size maxi in shade ‘silver’.
*The sizing guide follows size XS(S, M, L, XL)(2XL, 3XL, 4XL, 5XL). E.g. “Ch 78(78, 82, 82, 86)(86, 90, 90, 94) means Ch 78 for XS, Ch 78 for Small, Ch 82 for Medium, Ch 82 for Large, Ch 86 for XL, Ch 86 for 2XL, Ch 90 for 3XL, Ch 90 for 4XL and Ch 94 for 5XL.” If there is only one number, it applies to all sizes.
*”SC 10″ means SC into the next 10 stitches.
*”2SC” means place 2 SC into the same stitch.
*The turning chain ch 1 does NOT count as a stitch.
*Total stitches are indicated between < >.
*This pattern uses US crochet terms.
*This project bag begins with the base which is crocheted in a spiral. The sides of the bag are worked in continuous rounds. The straps are worked back and forth in rows and the tops of the straps are sewn together. The edges of the handle are finished with slip stitch edging.
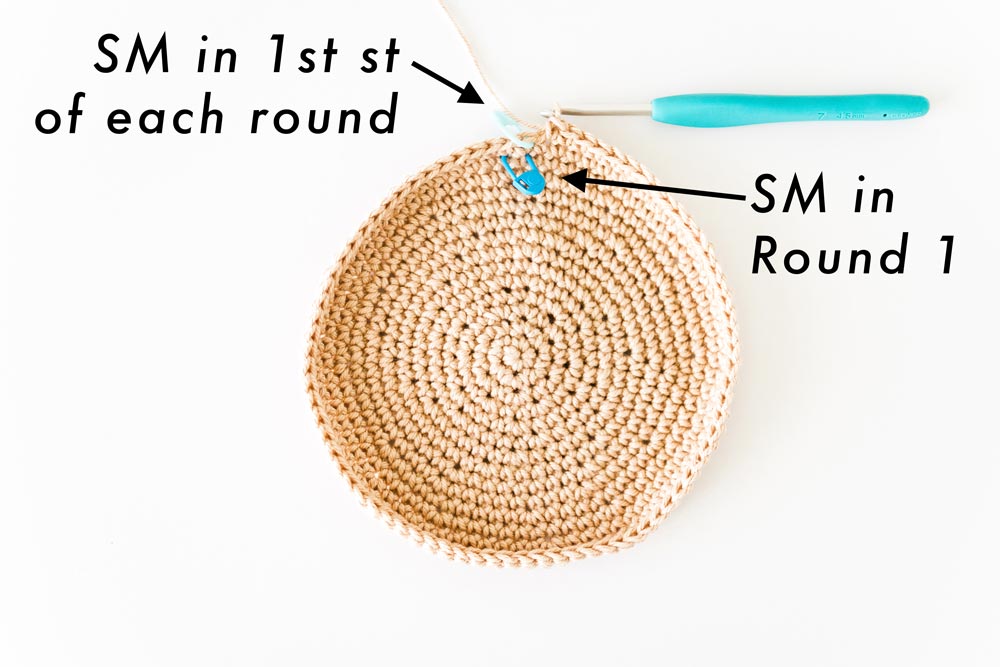
*The spiral is worked in continuous rounds with a stitch marker indicating the 1st st of the round. At the end of a round, do NOT slip stitch into the 1st st to join.
LEVEL: Beginner+
Materials
Yarn – – Aran/Worsted/Medium (4), 100m/173m, 190yds/3.5oz, 100% cotton, linen + silver
100(155, 220)g
*I used exactly 1 skein for the mini size, so you might want to get 2 skeins to be safe.
Scissors
/Safety pins
Stitches & Abbreviations
Ch = Chain
Sl st = Slip Stitch
SC = Single Crochet
SC2tog = Single Crochet 2 Stitches Together
St(s) = Stitch(es)
Rep = Repeat
Measurements
Measurements cm:
Diameter/width: 15(19, 23)
Height (not including handle): 13(16, 19)
Handle height: 14(18, 21)
Measurements inches:
Diameter/width: 6(7.5, 9)
Height (not including handle): 5(6.5, 7.5)
Handle height: 5.5(7, 8)
GAUGE: 10cm/4” square = 18 stitches wide x 20 rows tall in single crochet
Adley Project Bag + Yarn Basket Pattern
Bag Base
To begin ch 2.
*Ch 2 can be replaced by a magic loop, simply work round 1 in the centre of the magic loop and pull tight.
ROUND 1: Working into the 2nd ch from the hook (the ch by the slip knot), SC – place SM in 1st st, 5SC in 2nd ch.
<6>
*Every time you crochet into the 1st st, remove the SM and replace the SM in 1st st of the round.
ROUND 2: 2SC in each st around.
<12>
ROUND 3: *SC, 2SC; rep from * until end.
<18>
ROUND 4: *2SC, SC 2; rep from * until end.
<24>
ROUND 5: *SC 3, 2SC; rep from * until end.
<30>
ROUND 6: *2SC, SC 4; rep from * until end.
<36>
ROUND 7: *SC 5, 2SC; rep from * until end.
<42>
ROUND 8: SC 4, 2SC, *SC 6, 2SC; rep from * until 2 sts left, SC 2.
<48>
ROUND 9: SC 3, 2SC, *SC 7, 2SC; rep from * until 4 sts left, SC 4.
<54>
ROUND 10: SC 2, 2SC, *SC 8, 2SC; rep from * until 6 sts left, SC 6.
<60>
ROUND 11: *SC 9, 2SC; rep from * until end.
<66>
ROUND 12: SC 5, 2SC, *SC 10, 2SC; rep from * until 5 sts left, SC 5.
<72>
ROUND 13: *2SC, SC 11; rep from * until end.
<78>
*Size MINI – do not fasten off! Proceed to ‘BAG SIDES’ instructions.
ROUND 14: SC 3, 2SC, *SC 12, 2SC; rep from * until 9 sts left, SC 9.
<84>
ROUND 15: *2SC, SC 13; rep from * until end.
<90>
ROUND 16: SC 8, 2SC, *SC 14, 2SC; rep from * until 6 sts left, SC 6.
<96>
*Size MIDI – do not fasten off! Proceed to ‘BAG SIDES’ instructions.
ROUND 17: SC 3, 2SC, *SC 15, 2SC; rep from * until 12 sts left, SC 12.
<102>
ROUND 18: *2SC, SC 16; rep from * until end.
<108>
ROUND 19: *SC 17, 2SC; rep from * until end.
<114>
ROUND 20: *2SC, SC 18; rep from * until end.
<120>
*Size MAXI– do not fasten off! Proceed to ‘BAG SIDES’ instructions.
Bag Sides
ROUND 1 (RS): SC in each st around.
<78(96, 120)>
*To help you count your rounds, you can place a 2nd SM in the 1st Round – this SM will not move until the end of the pattern.
Repeat ROUND 1 until your bag measures 13(16, 19)cm / 5(6.5, 7)” tall, approx. ROUND 25(32, 41).
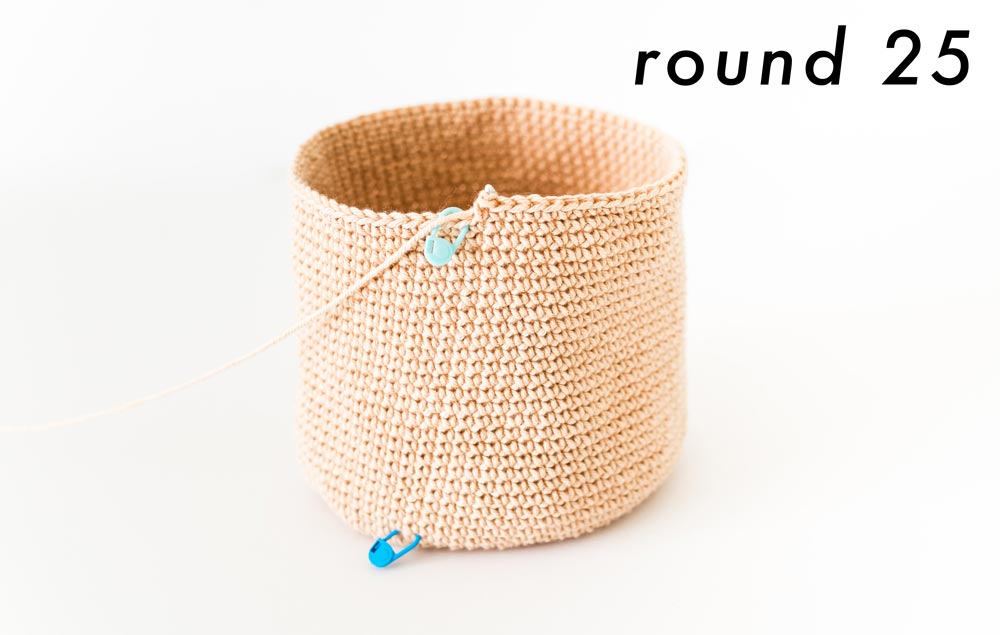
*If your bag still looks flat after a few rounds don’t worry the sides will start to ‘stand up’ after 7-10 rounds.
*Make sure you still have the same number of stitches every round (if your stitch count accidentally increases the sides won’t form) and that your tension – how tightly you hold your yarn – doesn’t change (if you loosen your tension the sides will also not form).
Do not fasten off, proceed directly to ‘FIRST STRAP’ instructions.
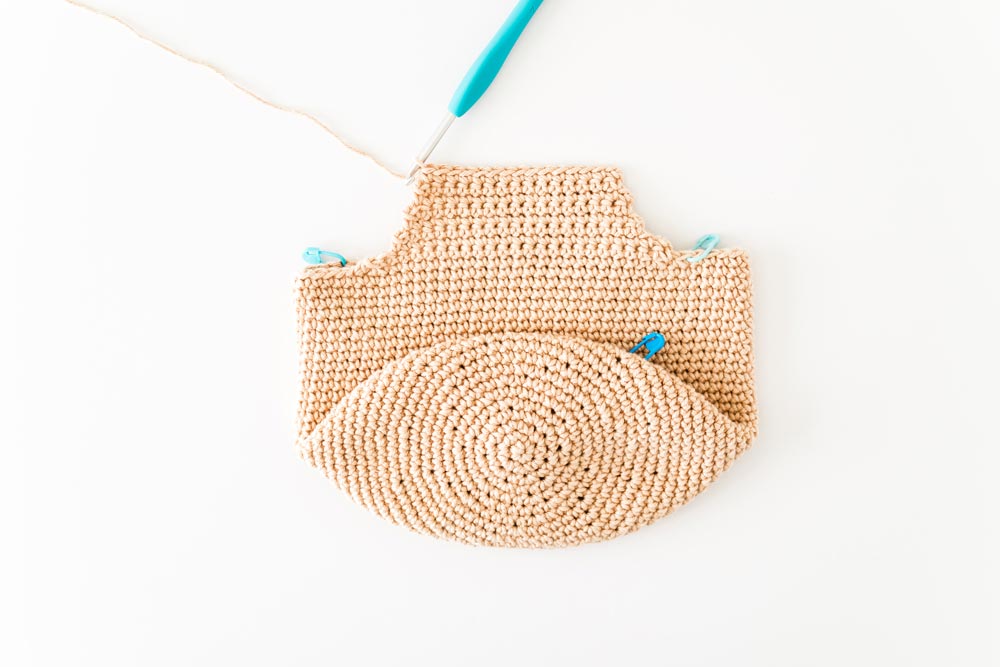
First Strap
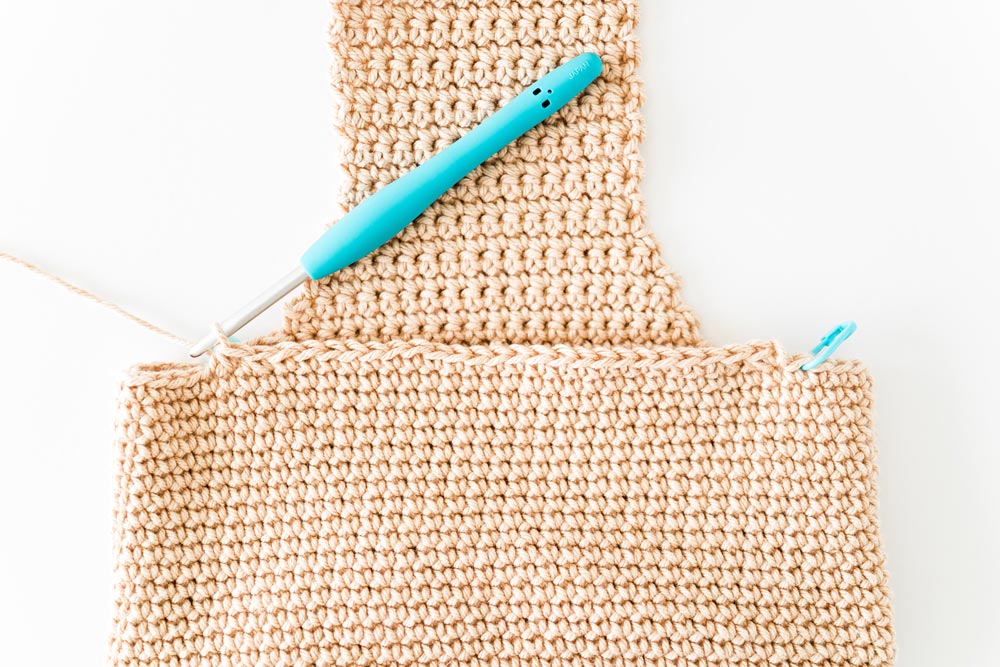
*If you have trouble spotting the 1st of each row while you’re decreasing, simply place a SM in the 1st st of each row and don’t remove the SMs until you’ve finished decreasing.
ROW 1: SC2tog 2, SC 21(23, 25), SC2tog 2, skip 9(16, 26) sts, place SM in next st, turn,
<25(27, 29)>

ROW 2: Ch 1, skip 1st st, SC across until 2nd to last st (don’t place a SC in the last st), turn.
<23(25, 27)>
ROW 3: As ROW 2.
<21(23, 25)>
ROW 4: As ROW 2.
<19(21, 23)>
Size MINI Only
ROW 5: Ch 1, skip 1st st, SC in each st until last st, turn.
<18>
ROW 6: As ROW 5.
<17>
ROW 7: As ROW 5.
<16>
ROW 8: As ROW 5.
<15>
ROW 9: As ROW 5.
<14>
ROW 10: Ch 1, SC in each st across, turn.
<14>
Repeat ROW 10 until strap measures 14cm/5.5” tall, approx. ROW 27.
Fasten off.
Sizes MIDI + MAXI Only
ROW 5: Ch 1, skip 1st st, SC across until 2nd to last st (don’t place a SC in the last st), turn.
<(19, 21)>
ROW 6: Ch 1, skip 1st st, SC in each st until last st, turn.
<(18, 20)>
ROW 7: As ROW 6.
<(17, 19)>
ROW 8: As ROW 6.
<(16, 18)>
ROW 9: As ROW 6.
<(15, 17)>
ROW 10: As ROW 6.
<(14, 16)>
ROW 11: Ch 1, SC in each st across, turn.
<(14, 16)>
Repeat ROW 11 until strap measures (18, 21)cm / (7, 8)” tall, approx. ROW (36, 42).
Fasten off.
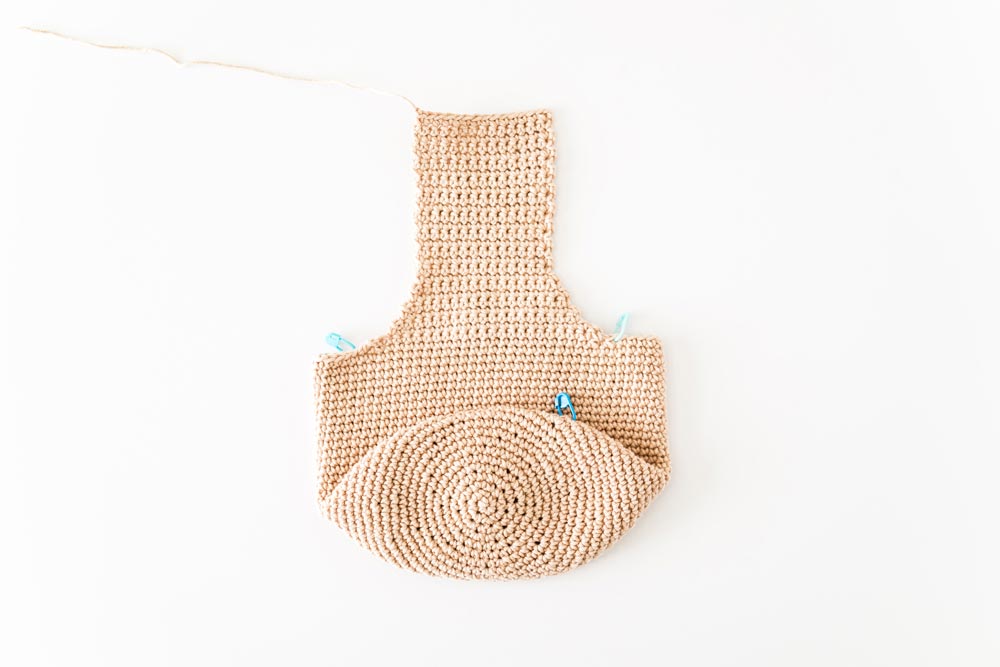
Second Strap
Insert hook 1 st to left of SM (that you placed at the end of FIRST STRAP ROW 1.
Secure your yarn and pull up a loop.
Repeat the ‘FIRST STRAP’ instructions for the SECOND STRAP.
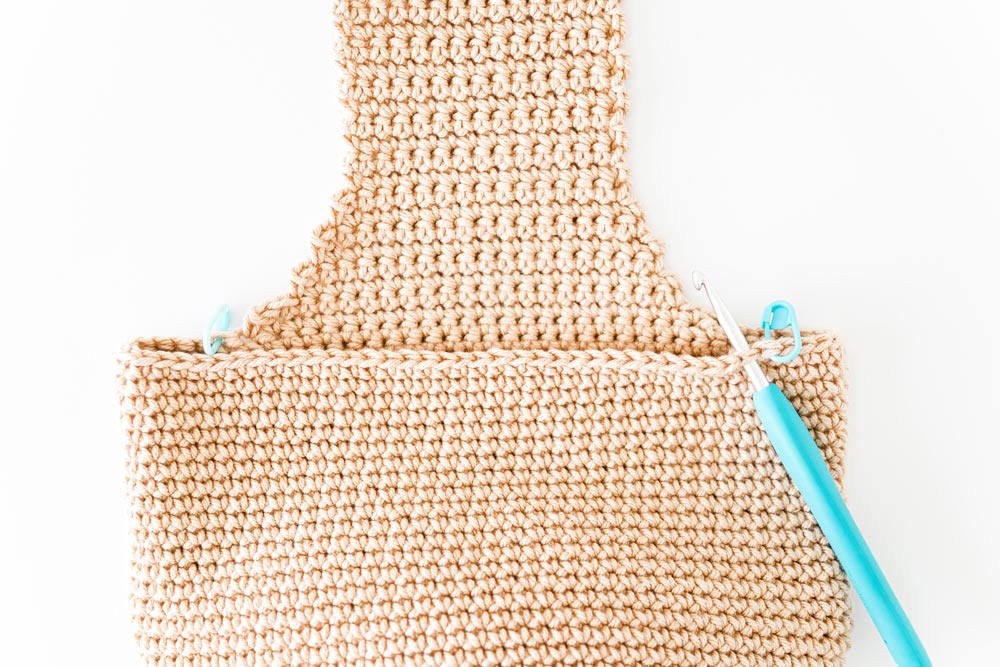
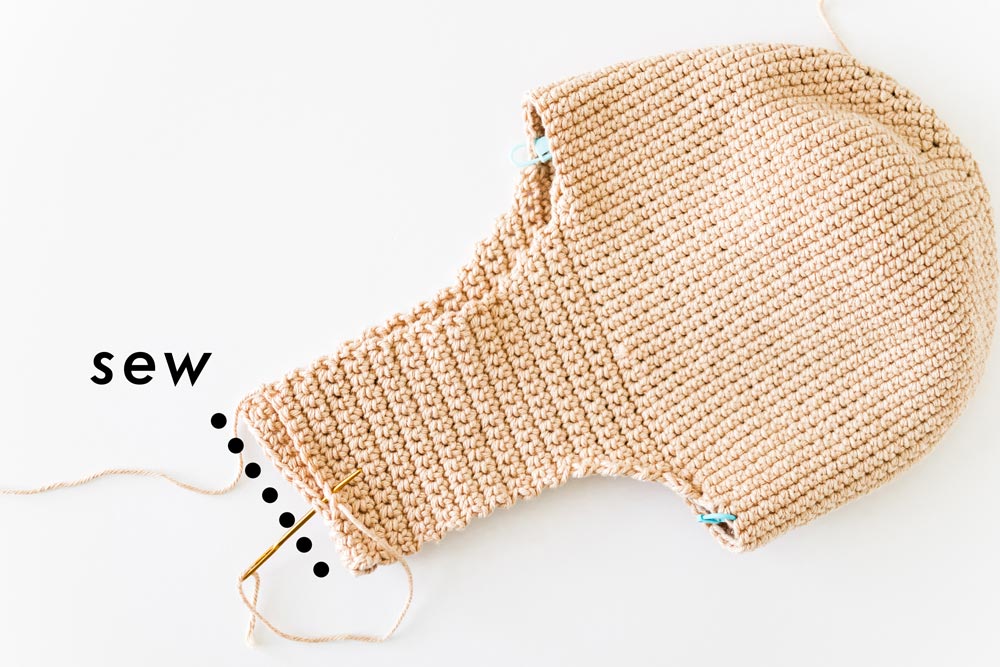
Handle Assembly
With the wrong side facing up, whip stitch the tops of the straps together to form the handle.
Remove all stitch markers and turn bag inside out so that the right side is facing up.
Edging
Along one of the edges, insert hook at the top of the handle. Secure yarn and pull up a loop.
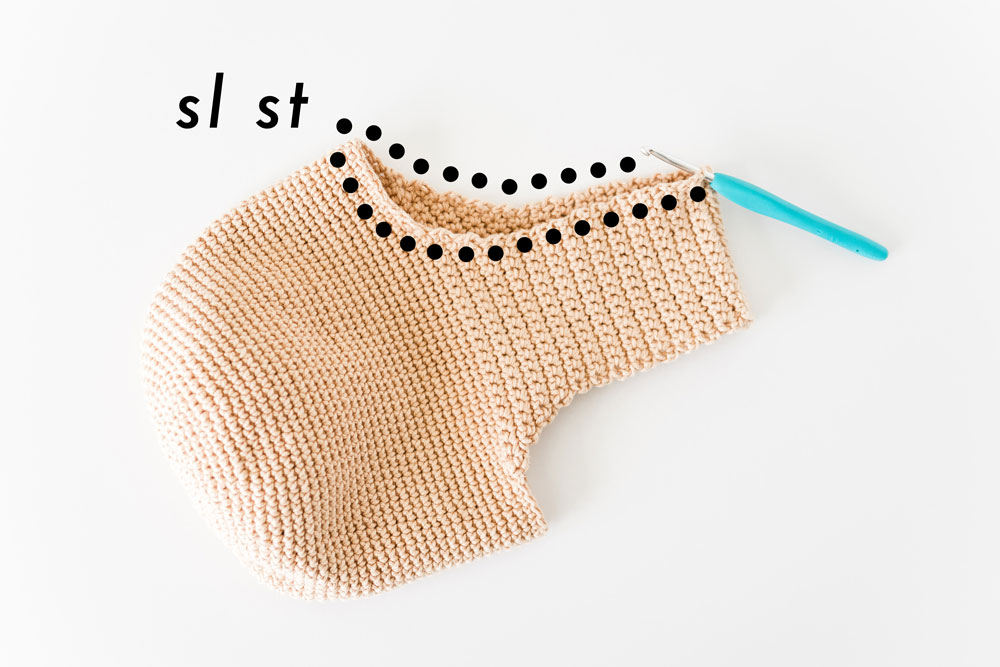
Ch 1, sl st evenly along the edge of the handle, when you reach the first sl st, sl st to join.
*Along the curves of the handle, ‘smooth out’ the bumps by spacing stitches evenly in a curved line.
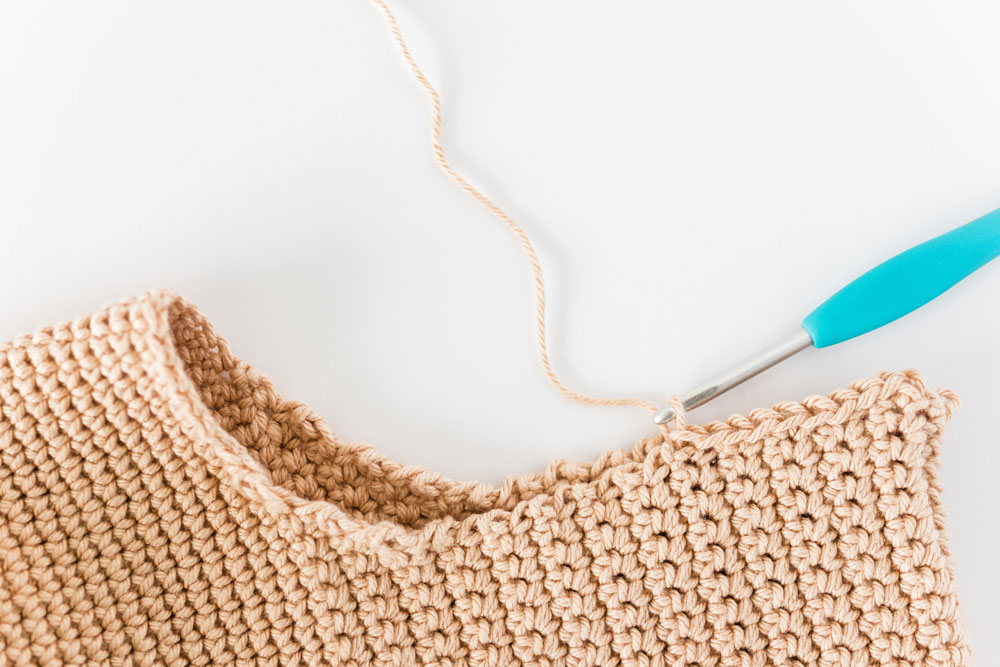
Fasten off.
Repeat ‘EDGING’ instructions for the 2nd edge of the handle.
Weave in all of your ends.
Voilà! You’ve finished your Adley Project Bag ?
The post appeared first on .


