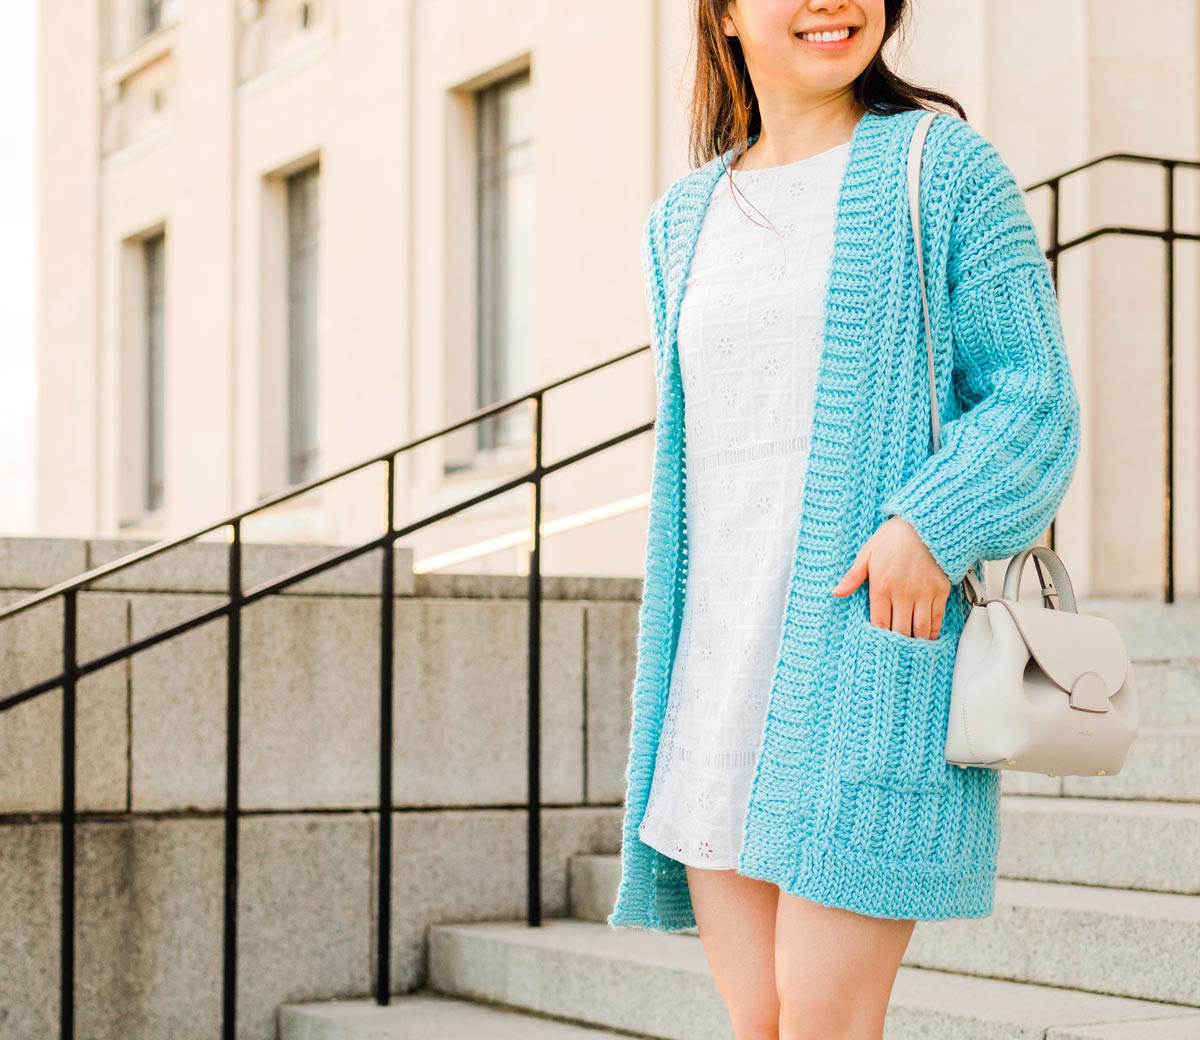
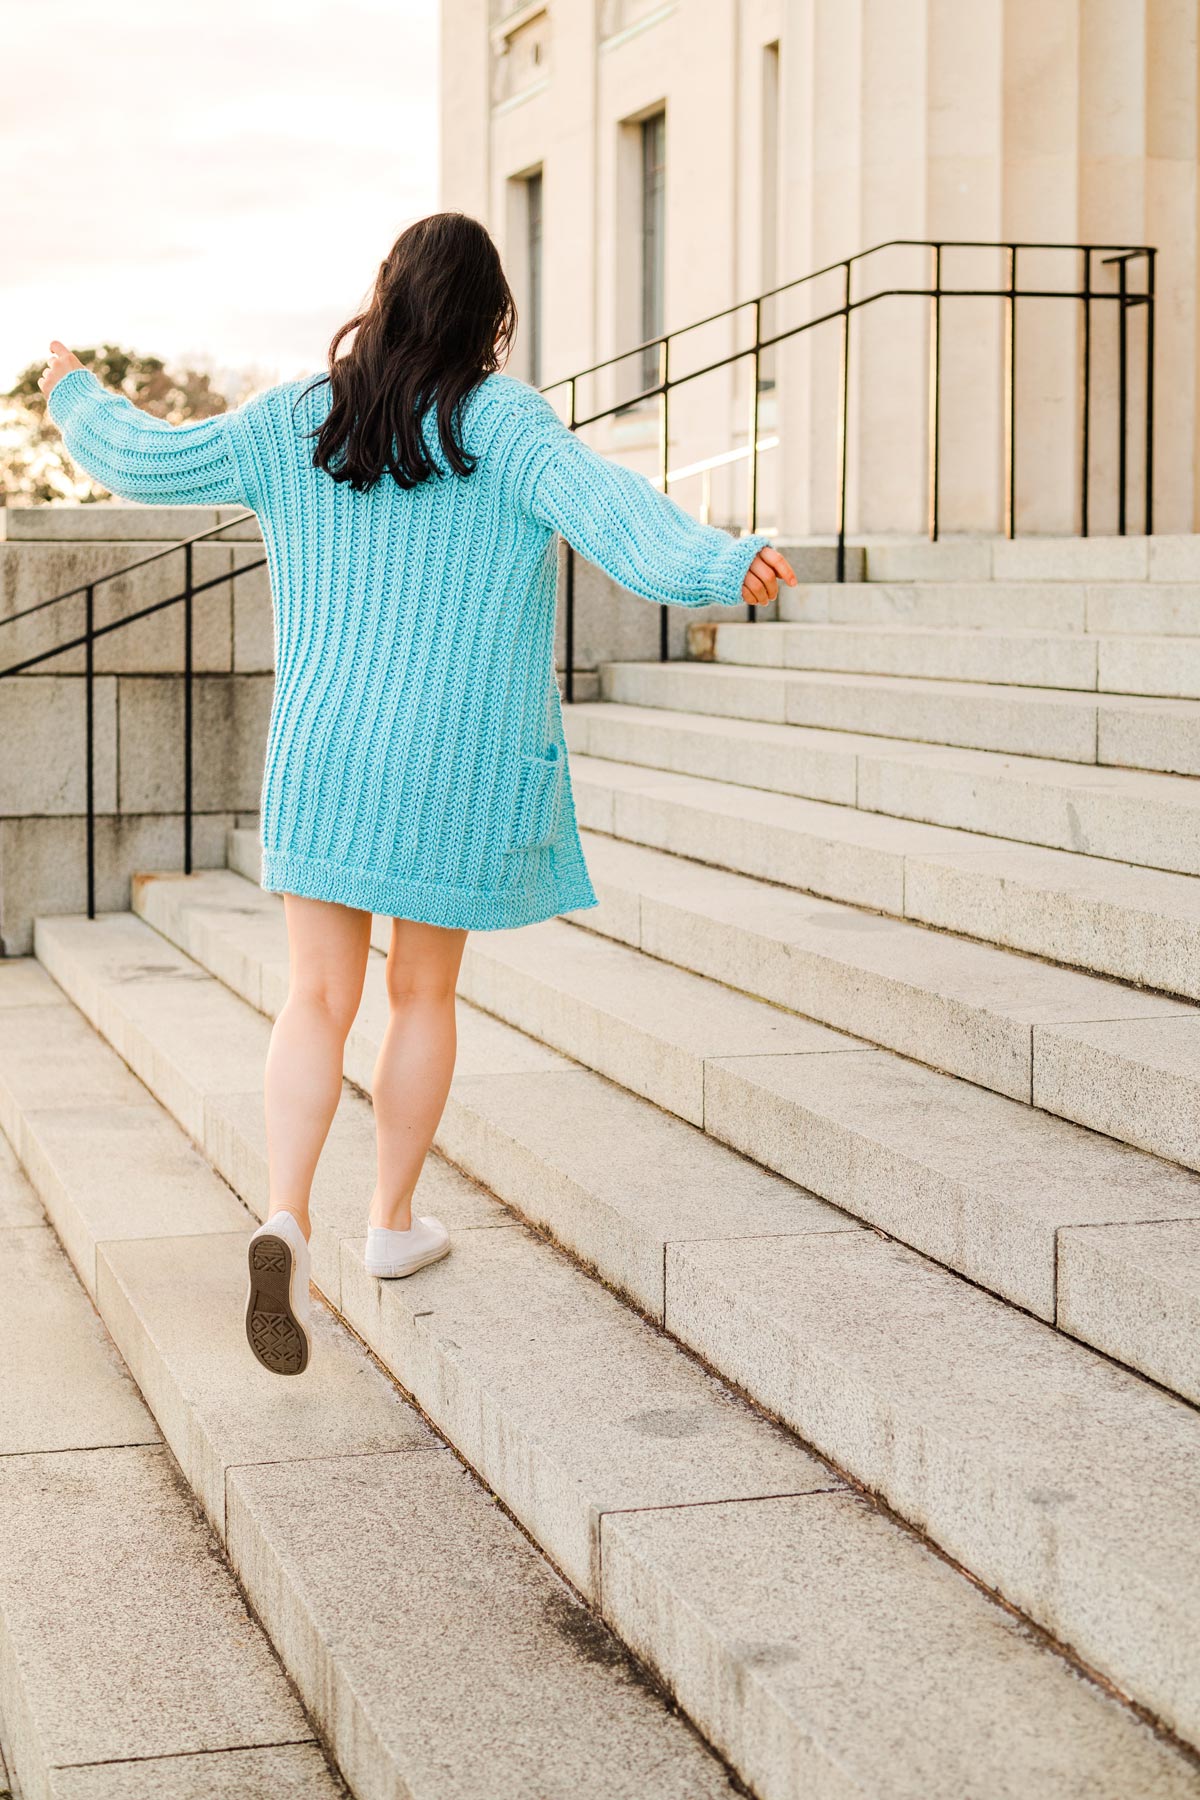
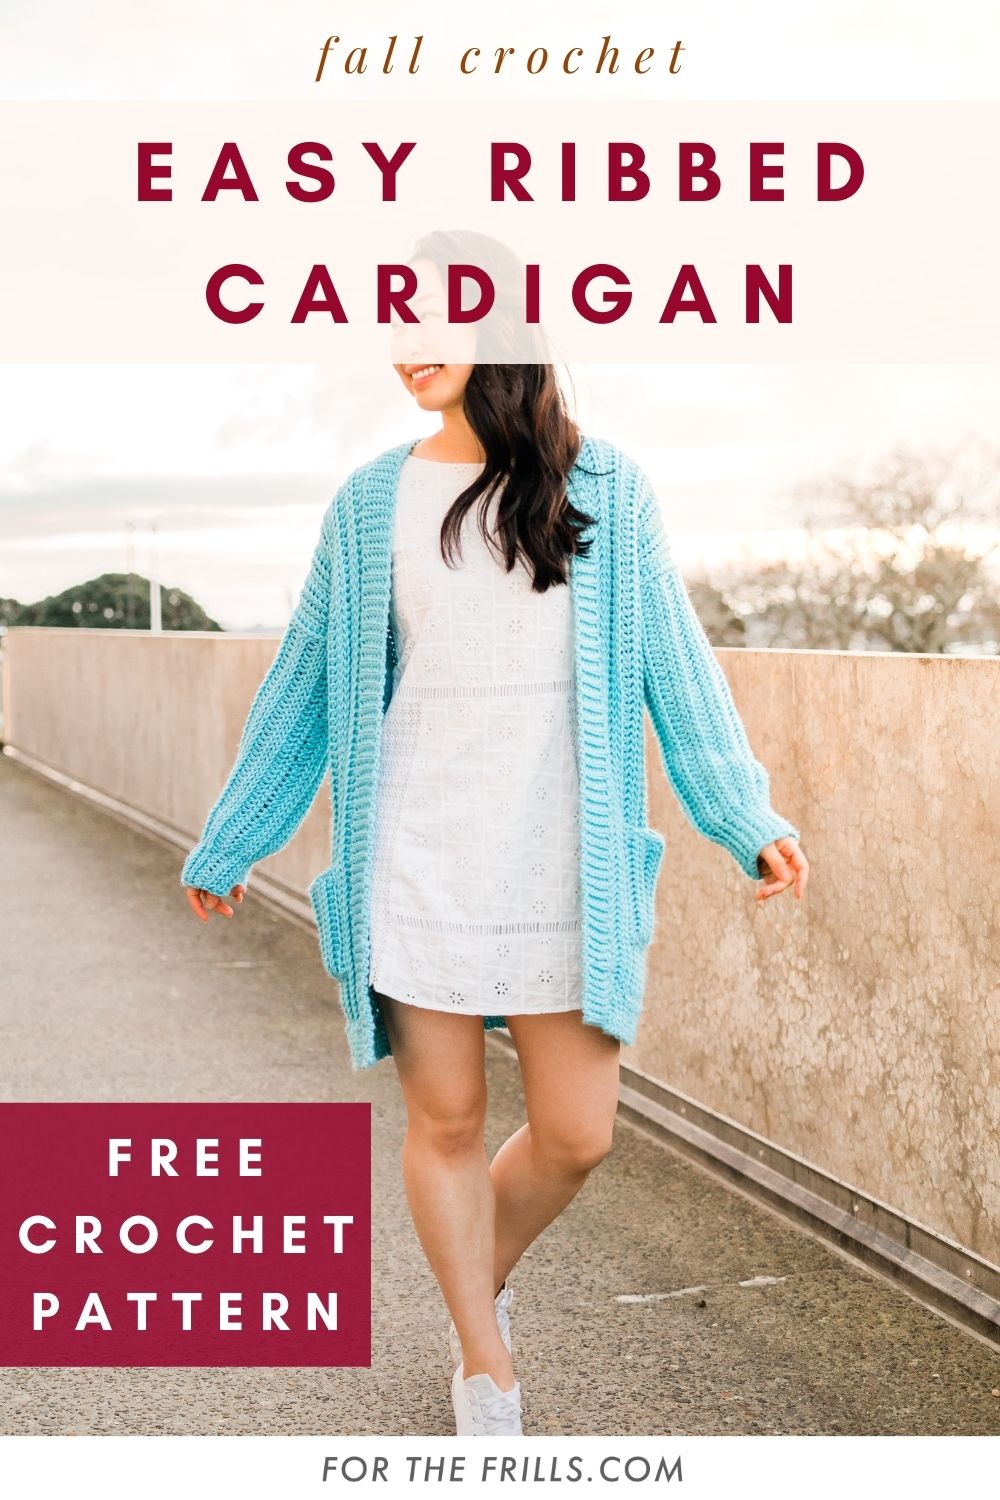
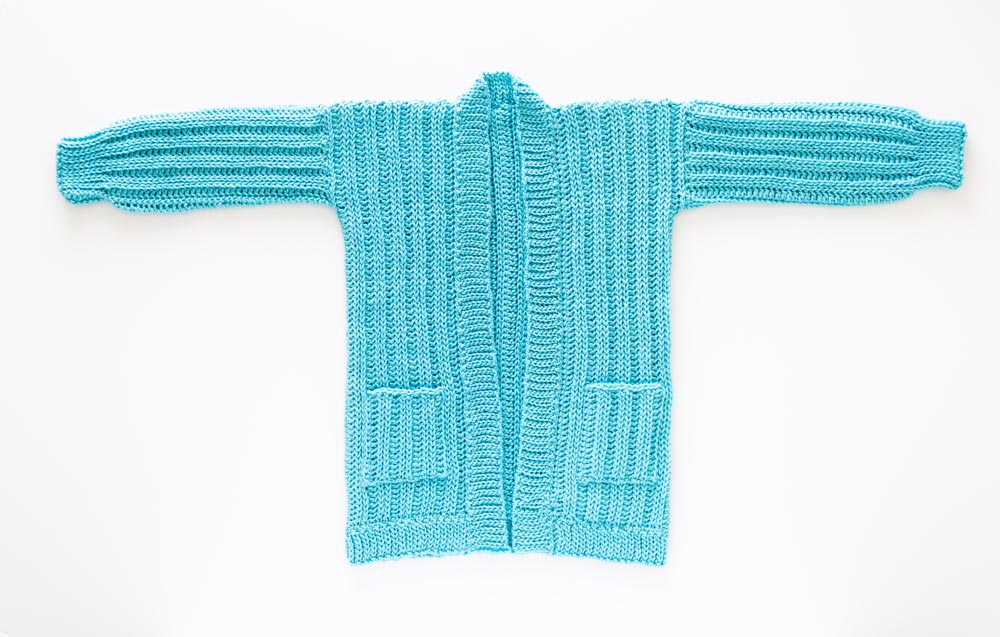
Learn how to crochet a chunky ribbed cardigan for fall! The Palermo Cardigan features knit-like ribbing, slouchy balloon sleeves and a long legging friendly length! It also has additional large pockets for all the cosy weather vibes!
Scroll down for the free crochet cardigan pattern and video tutorial or you can purchase the !
This post may contain affiliate links, view our for details.
Thank you to for providing the yarn for this free crochet cardigan pattern! As always all thoughts and opinions are 100% my own ?
The Palermo Cardigan is the perfect throw-on and go sweater! The loose, oversized fit means that you can pair this modern cardigan with jeans, dresses or leggings and you can wear heaps of layers underneath! This crochet cardigan is a lovely balance between being chic and cosy!
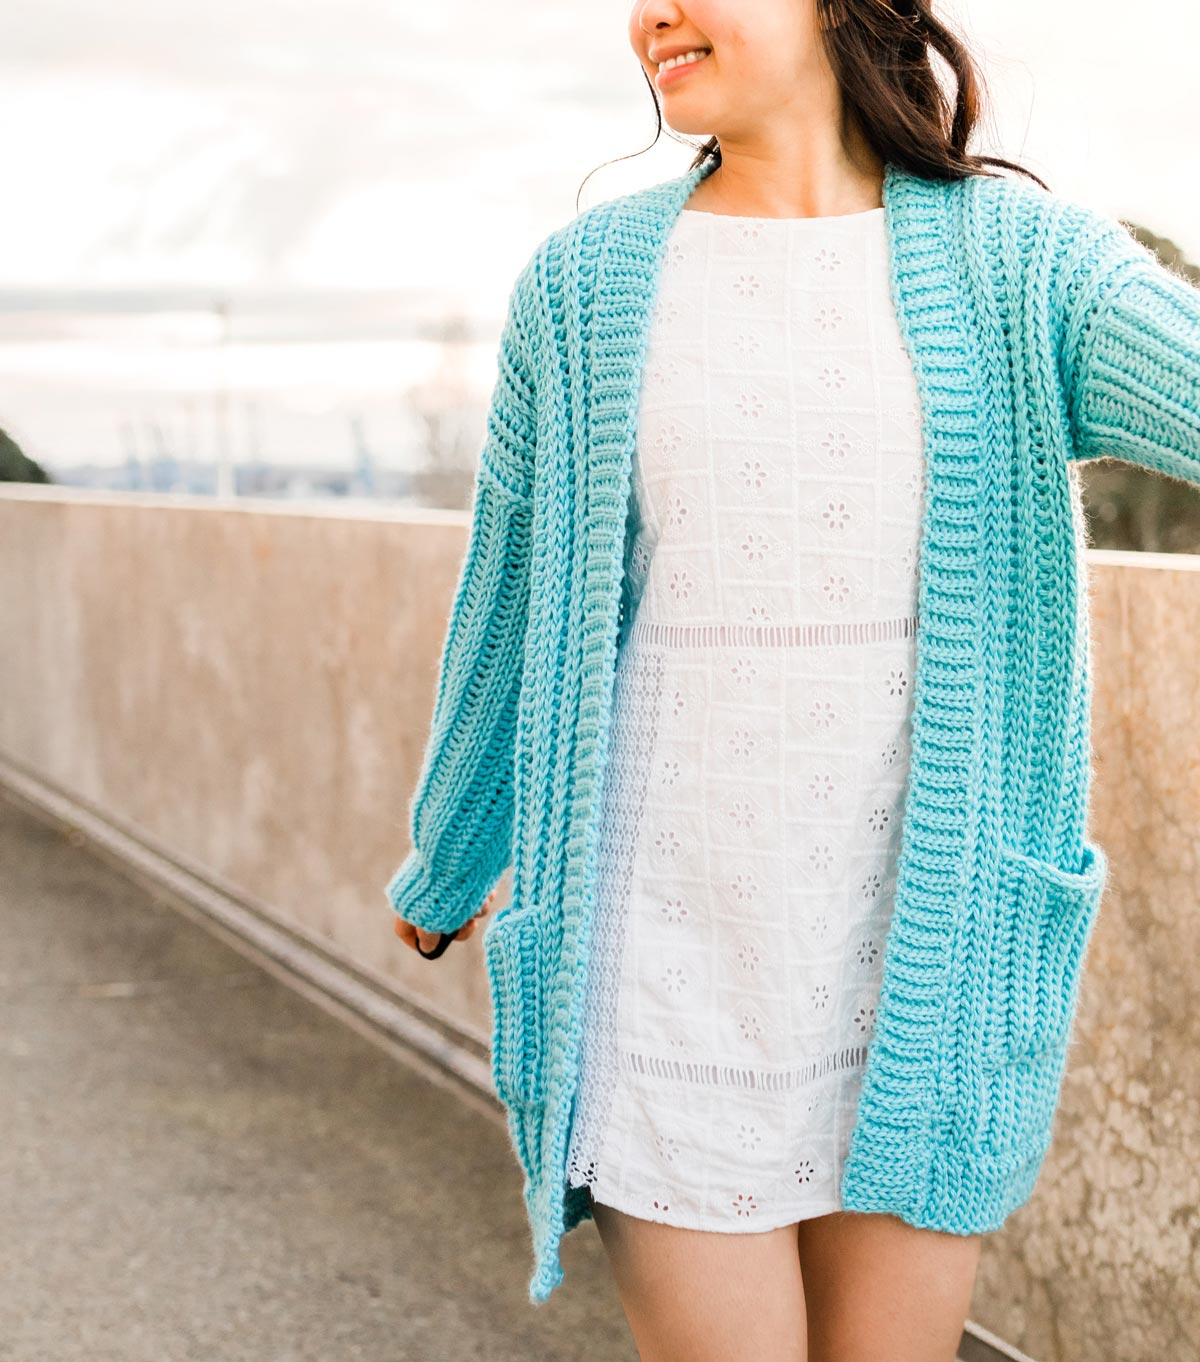
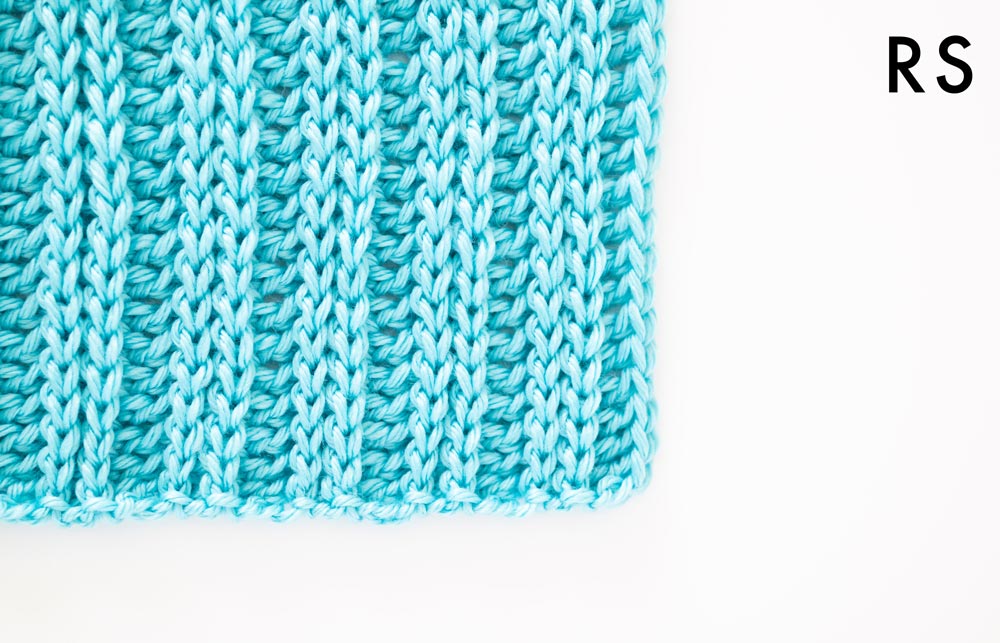
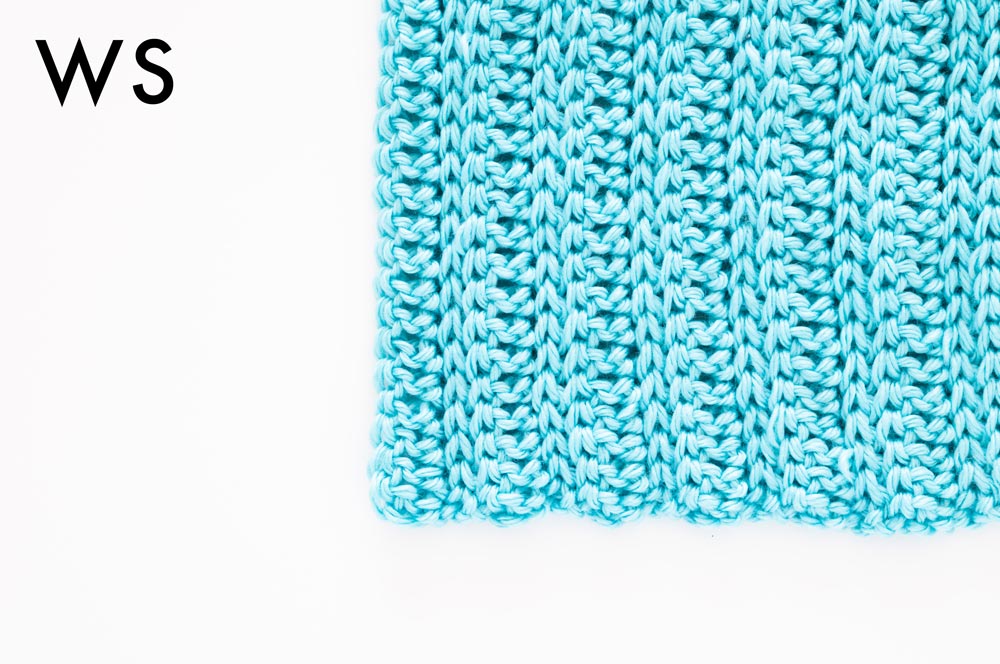
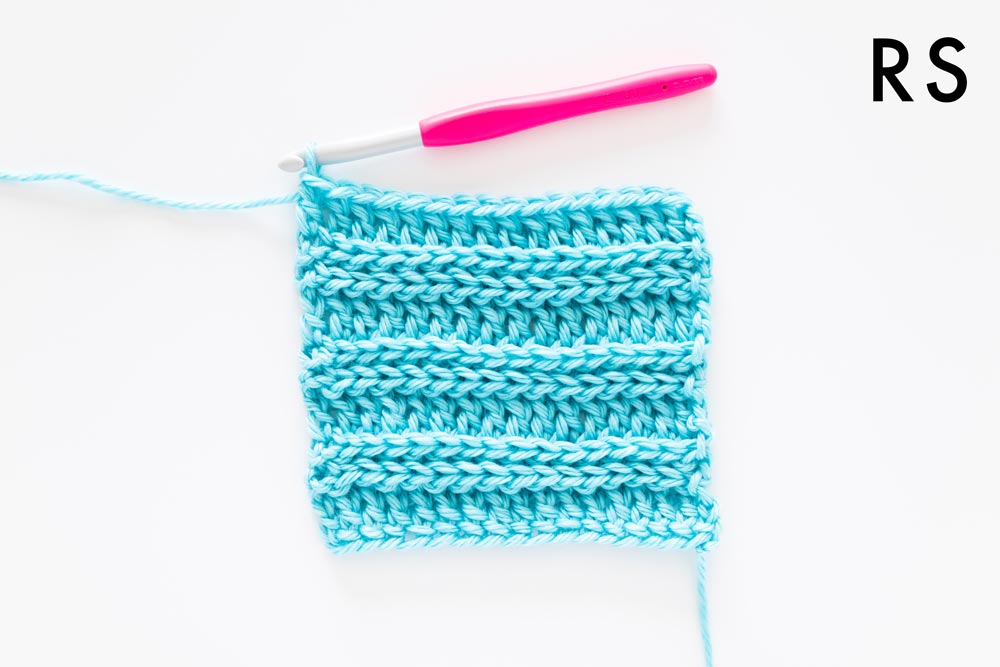
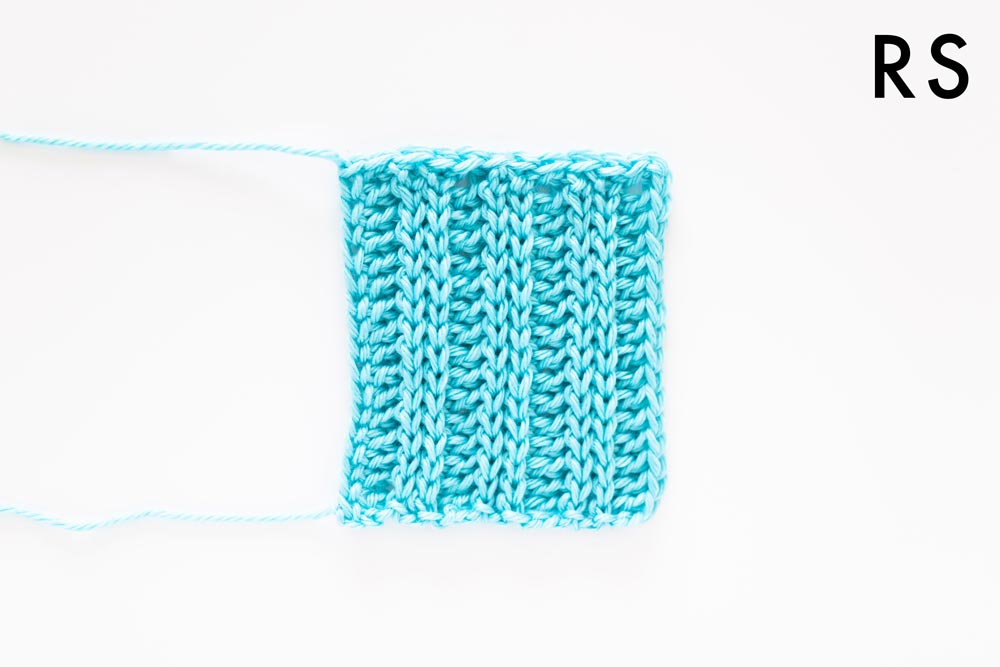
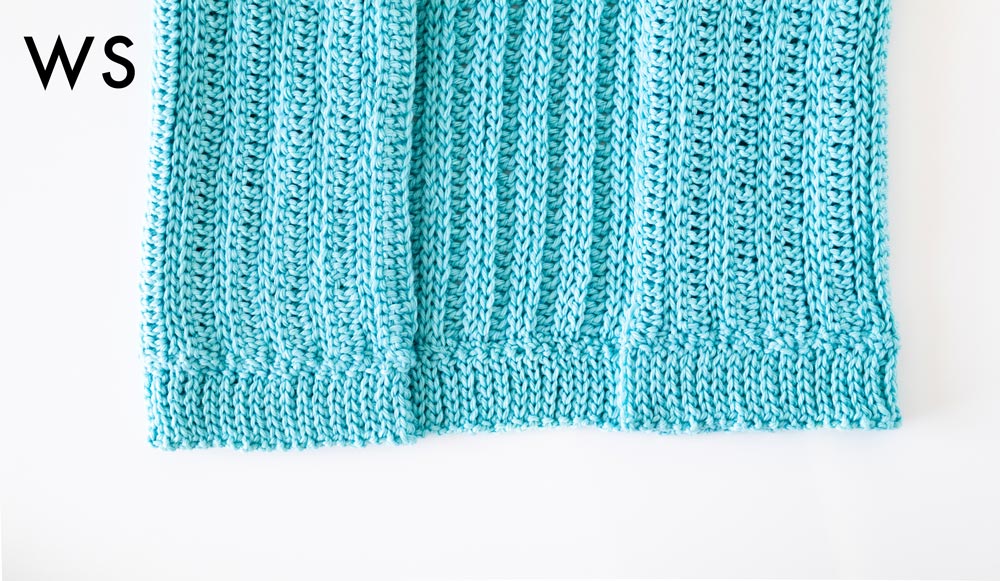
For this design, I used one of my favourite ribbing techniques – back loop slip stitches! The entire pattern consists of a repeat of one row of back loop double crochets for every 3 rows of back loop slip stitches.
By working into the back loops, the cardigan will be a lot more stretchy and drapey than if we’d picked up the front and back loop as per normal. Working into the back loops will create that knit-look cosiness!
You can see the knit-look ribbing featured in the and !
How to ‘Spot’ the Back Loop
The key to ‘seeing’ the back loops is to make sure the tops of the current row of stitches are facing you. Rotate the top of your crochet panel towards you instead of resting it on your table or desk.
If you’ve never worked into back loops before I highly recommend watching the video tutorial because it’s always helpful to learn visually as well!
If you haven’t been working into the back loops, you’ll be able to see pretty quickly that there isn’t a ribbed texture on only one side of your work. If that happens chances are that you’re probably accidentally inserting your hook into the front loop of the stitch instead.
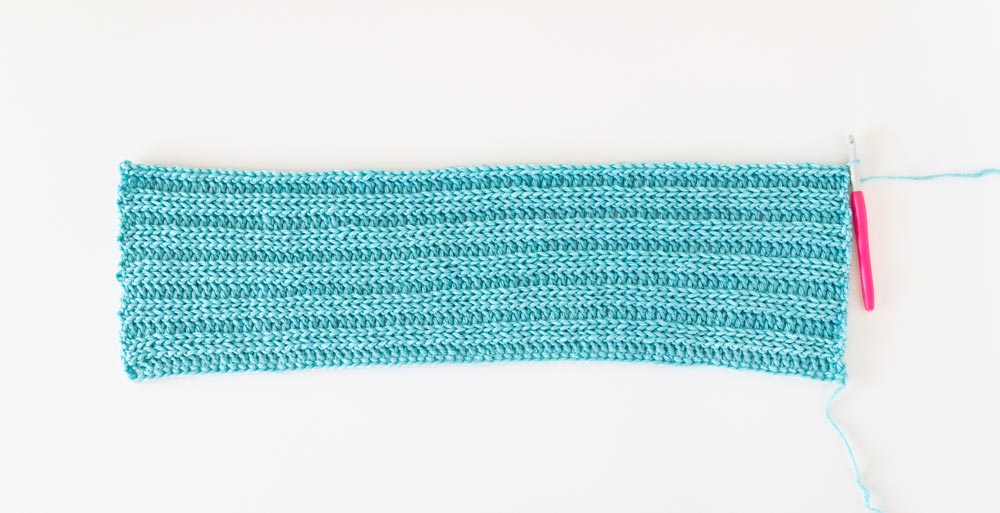
Another tip for crocheting the Palermo Cardigan is too make sure your slip stitches are loose. Ideally, they should be the same width as the double crochets. I’d recommend crocheting the slip stitches with a slightly looser tension than your normal tension.
Even if your slip stitches are a looser than double crochets the ribbing texture will even everything out.
However, if your slip stitches are too tight your cardigan will slowly get smaller and tighter. The tighter the slip stitches, the more difficult it will be to work your hook into the back loop which means you’ll crochet at a slower pace.
The tight slip stitches will make your sweater less slouchy and relaxed!

Construction
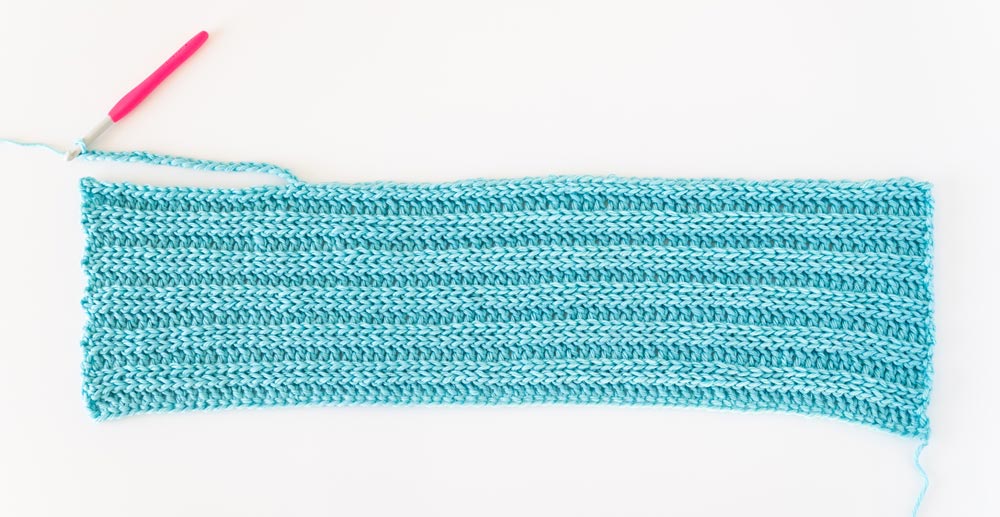
The Palermo Cardigan is made up of 3 main pieces – body + 2 sleeves, along with 2 pockets, hemline and neckline ribbing. All the pieces are worked lengthways which means that the foundation chain/stitches are equal to the length of the cardigan/sleeves not the width.
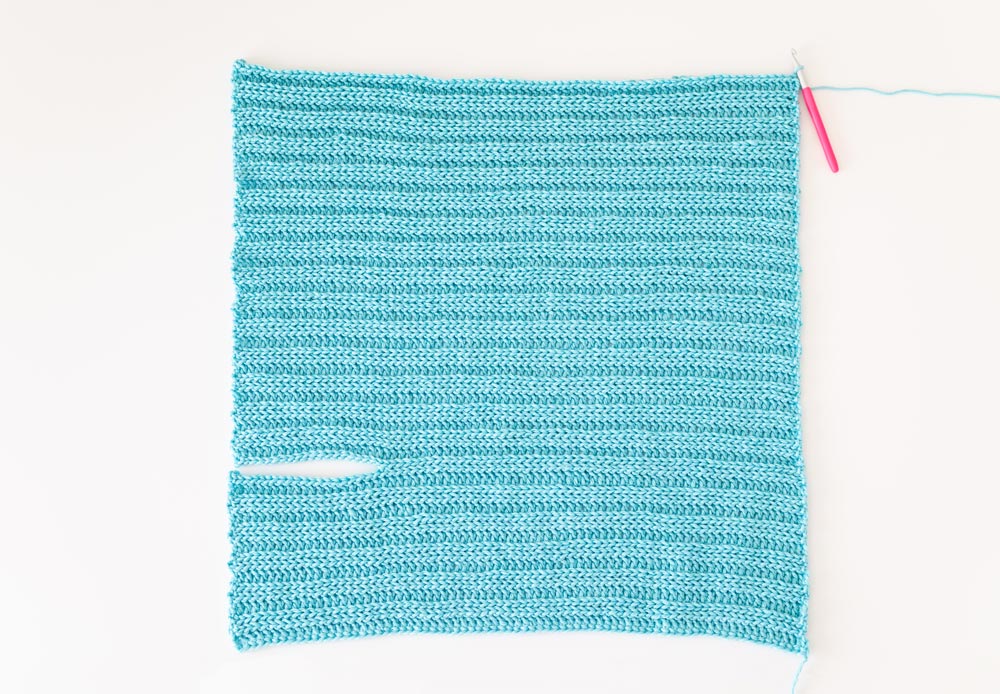
To minimise the amount of sewing, the body is crocheted in entirely in one entire piece. We’ll crochet the first front panel, create a gap for the first armhole, crochet the back panel, create a gap for the second armhole and then crochet the second front panel.
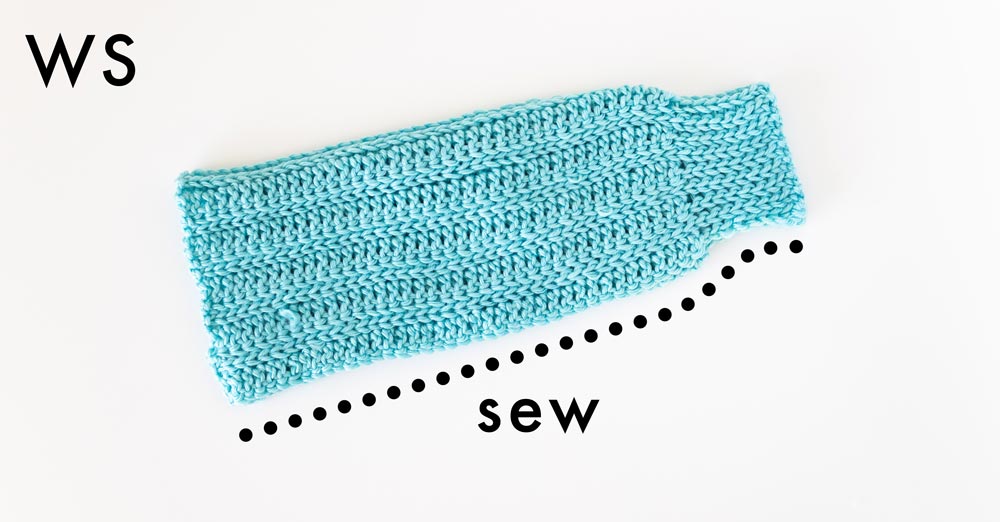
The sleeves are crocheted lengthways with the ribbing incorporated and then folded in half and the edges sewn together.
To assemble to cardigan, the front panels are folded on top of the back panels and the shoulders and sewn together. Then we’ll sew the edge of the sleeves to the armholes.
The hemline and neckline ribbing are exactly the same – a one row repeat of back loop slip stitches. We’ll crochet the hemline ribbing first, sew it onto the cardigan and then crochet the neckline ribbing. The pockets are crocheted separately and then sewn onto the right side of the cardigan.
Remember that when sewing your pieces together, try to keep your stitches the same length and space them out evenly for a neat finish!
Pin me for later!
Design Inspiration
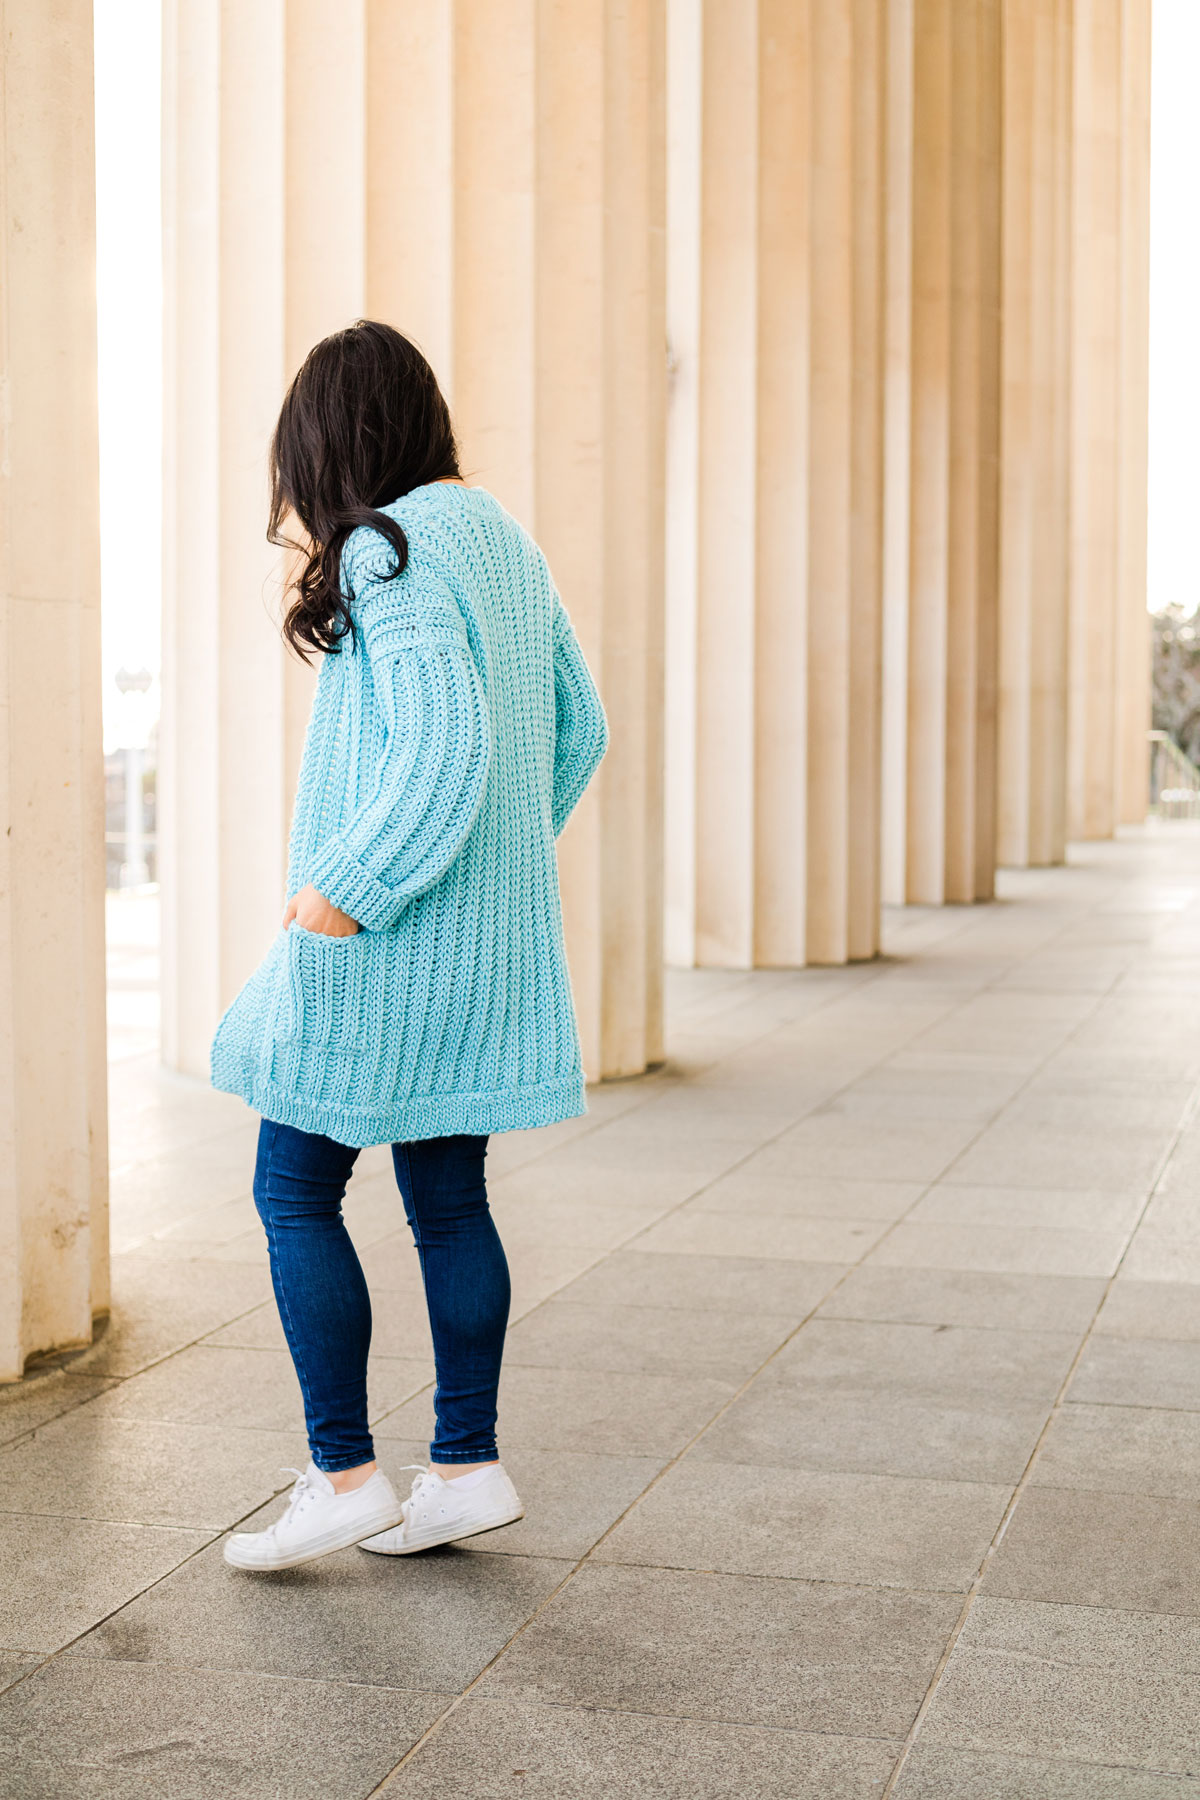
The Palermo Cardigan is pretty much the oversized ribbed cardigan of my dreams! It’s stylish and modern, yet it’s the type of pattern you can wear year after year. It takes so much time and effort to crochet a sweater, so timeless pieces are my favourite kind of pattern!
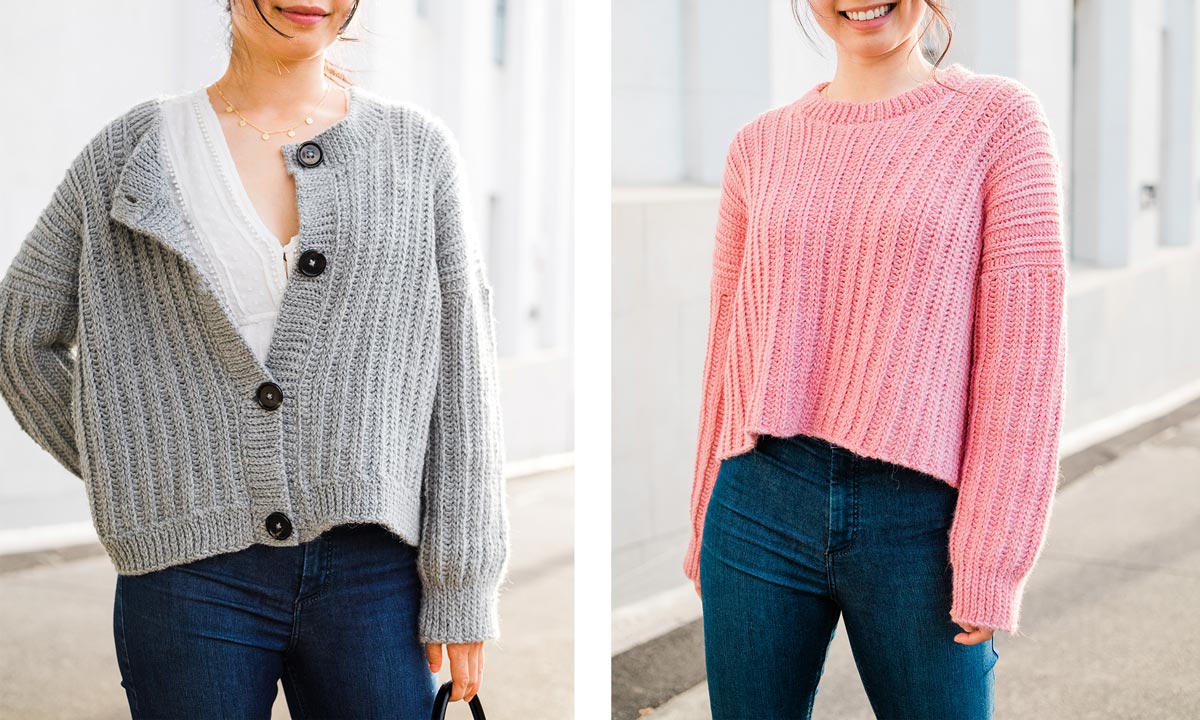
Ever since I crocheted the , I’ve been wanting a chunky ribbed version and now that I’ve finished it I keep reaching for it in my wardrobe.
As much as I love sweaters (for more crochet sweater patterns see the or ), there is just something so easy about a long cardigan!
You can take them on and off without worrying they’ll get caught on earrings or necklaces. On top of that, they layer really well under coats or puffer jackets so they don’t get caught in zips!
I’ve noticed that I tend to save some of my more precious handmade sweaters for ‘special occasions’ because I don’t want them to get damaged … but then I remember the whole point of making things is to wear them and enjoy them ?
Yarn
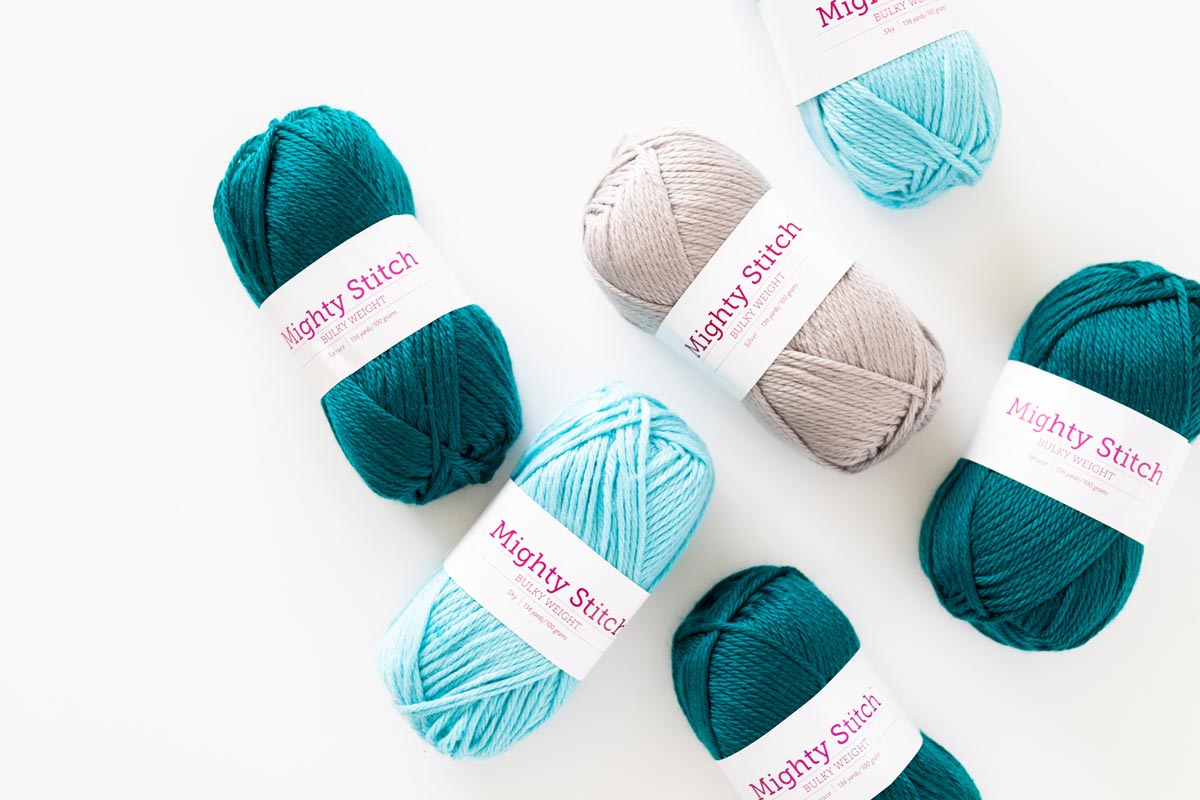
This ribbed cardigan uses yarn in the bulky size. A blend of 80% Acrylic + 20% Superwash Wool which means it’s machine washable and dryable! The blend of fibres means that this cardigan is durable and warm while the loose spin of the yarn gives an incredible drape for an acrylic!
Often bulky/chunky yarns create very stiff crochet garments that are really thick and heavy. The beauty of Mighty Stitch is that the yarn has drape and it works up quickly so your cardigan will be ready right in time for fall!
comes in a range of 24 solid colours and for this pattern I used the shade Sky for this cardigan!
Looking for more free crochet patterns?
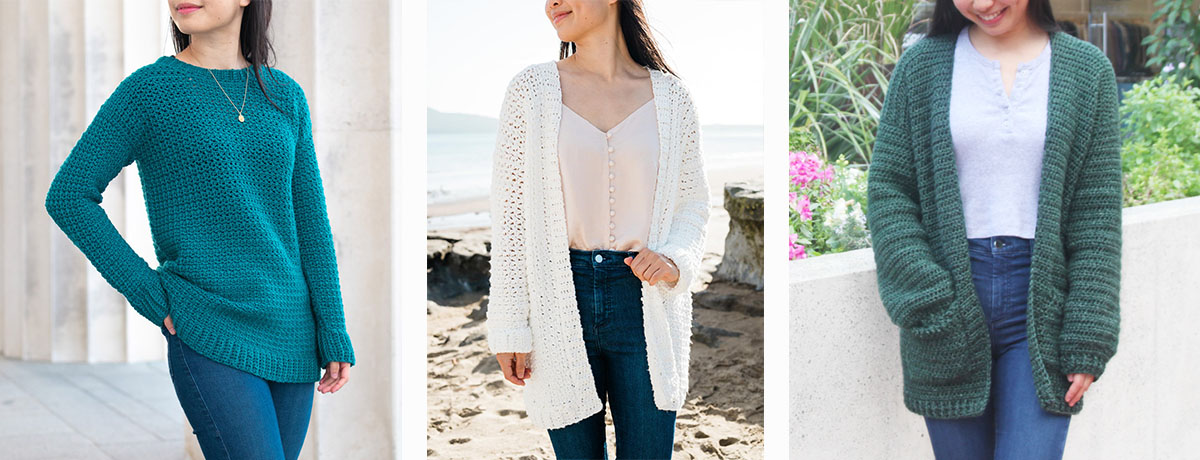
1. / 2. / 3.
Video Tutorial
Add the !
!
NOTES:
*Sample is a size small shown on a 5’3” model with a 32” bust.
*The sizing guide follows size XS(S, M, L, XL)(2XL, 3XL, 4XL, 5XL). E.g. “FDC 72(75, 75, 75, 78)(78, 78, 81, 81)” means FDC 72 for XS, FDC 75 for Small, FDC 75 for Medium, FDC 75 for Large, FDC 78 for XL, FDC 78 for 2XL, FDC 78 for 3XL, FDC 81 for 4XL and FDC 81 for 5XL.” If there is only one number, it applies to all sizes.
*”DC 10″ means DC into the next 10 stitches.
*The turning chains, ch 1 and ch 2, do NOT count as a stitch.
*Total stitches are indicated between < >.
*This pattern uses US crochet terms.
*The majority of this crochet sweater follows a 4-row repeat comprising of 2 different types of rows which are referred to as BASE DC row and BASE SL ST row.
*The sleeves, back and front panels are worked from side to side, so the foundation chain runs the length of the sleeve/sweater. To make your sweater shorter/longer, remove/add chains.
*Add approx. 16(19, 22, 23, 26)(28, 31, 33, 35)g of yarn for every additional 2.5cm / 1” of body length.
*The body is worked entirely in one piece beginning with crocheting the first front panel, an opening for the 1st sleeve, the back panel, an opening for the 2nd sleeve and the second front panel.
*Pockets and ribbing are crocheted separately and are sewn onto the cardigan.
*All pieces are sewn together with the RS on the inside and the WS facing outwards.
LEVEL: Easy+
Materials
Yarn – – Bulky / Chunky (5), 124m/100g, 136yds/3.5 oz, 80% acrylic + 20% superwash wool, Sky
approx. 740(860, 940, 985, 1135)(1225, 1330, 1410, 1525)g
8(9, 10, 10, 12)(13, 14, 15, 16) skeins
Scissors
Stiches & Abbreviations
Ch = Chain
Sl st = Slip Stitch
DC = Double Crochet
FDC = Foundation Double Crochet
BLO = Back Loop
St(s) = Stitch(es)
RS = Right Side
WS = Wrong Side
Measurements
*Measurements are taken from the garment lying flat. This cardigan is oversized and VERY stretchy. Choose your normal t-shirt size for an oversized fit (as pictured). If you are in between sizes, size down.
*Cardigan width will stretch out by 3-7cm / 1-3” after being worn a few times.
Measurements cm:
To fit Bust: 71(81, 91, 101, 112)(122, 132, 142, 152)
Back Width: 43(49, 55, 58, 65)(71, 75, 78, 84)
Armhole: 14(15, 15, 16, 18)(19, 21, 23, 24)
Sleeve length: 40(40, 40, 40, 40)(43, 43, 43, 43)
Length: 60(63, 63, 63, 65)(65, 65, 68, 68)
Measurements inches:
To fit Bust: 28(32, 36, 40, 44)(48, 52, 56, 60)
Back Width: 17(19, 21.5, 23, 25.5)(28, 29.5, 31, 33)
Armhole: 5.5(6, 6, 6.5, 7)(7.5, 8, 9, 9.5)
Sleeve length: 16(16, 16, 16, 16)(17, 17, 17, 17)
Length: 23.5(24.5, 24.5, 24.5, 25.5)(25.5, 25.5, 25.5, 25.5)
GAUGE: 10cm/4” square = 12 stitches wide x 12.5 rows tall (3.5 DC rows + 9 sl sts rows) in Knit-Look Rib Stitch pattern
Knit-Look Rib Crochet Stitch Pattern
FOUNDATION CHAIN: Ch any number of stitches.
ROW 1(RS): DC into 3rd ch from hook, DC in each st until end, turn.
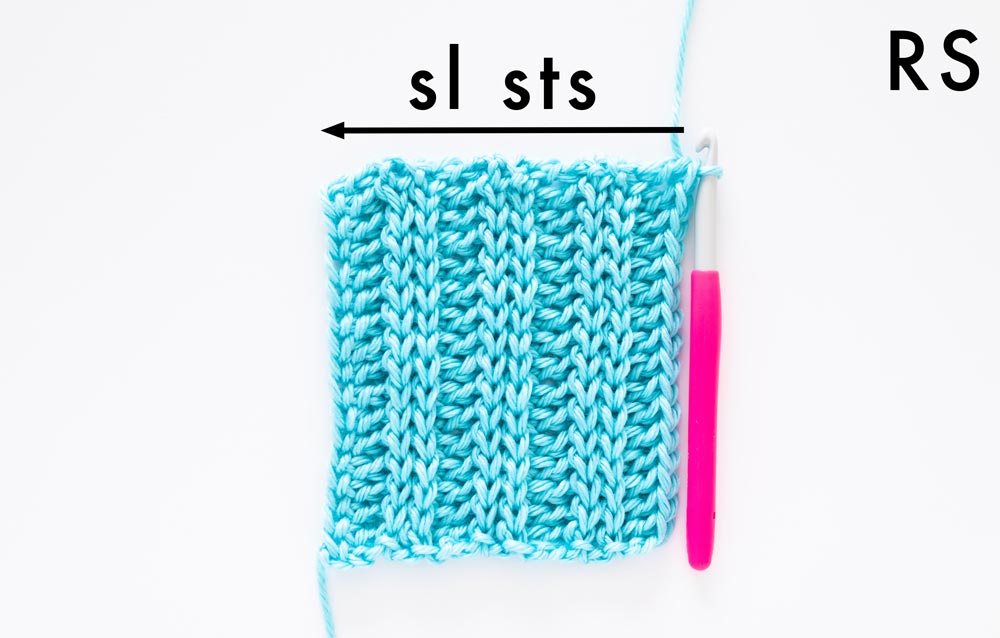
ROWS 2 – 4 (BASE SL ST ROW): Ch 1, BLO sl st across, sl st in last st, turn.
ROW 5 (BASE DC ROW): Ch 2, BLO DC across, DC in last st, turn.
Repeat ROWS 2 – 5 until you reach your desired length.
Palermo Cardigan Crochet Pattern
First Front Panel
ROW 1 (RS): FDC 72(75, 75, 75, 78)(78, 78, 81, 81), turn.
<72(75, 75, 75, 78)(78, 78, 81, 81)>
ROWS 2 – 4 (BASE SL ST ROW): Ch 1, BLO sl st across, sl st in last st, turn.
<72(75, 75, 75, 78)(78, 78, 81, 81)>
ROW 5 (BASE DC ROW): Ch 2, BLO DC across, DC in last st, turn.
<72(75, 75, 75, 78)(78, 78, 81, 81)>
Repeat ROWS 2 – 5 until ROW 18(22, 26, 26, 30)(34, 38, 38, 42).
<72(75, 75, 75, 78)(78, 78, 81, 81)>
*Final row should be a BASE SL ST ROW.
Do not fasten off! Proceed directly to ‘BACK PANEL’ instructions.
Back Panel
BACK PANEL ROW 1: Ch 1, BLO sl st across until 20(21, 21, 23, 24)(26, 27, 29, 31)sts left in the row, sl st in next st, ch 20(21, 21, 23, 24)(26, 27, 29, 31), turn.
<53(55, 55, 53, 55)(53, 52, 53, 51)sts + 20(21, 21, 23, 24)(26, 27, 29, 31)chs>
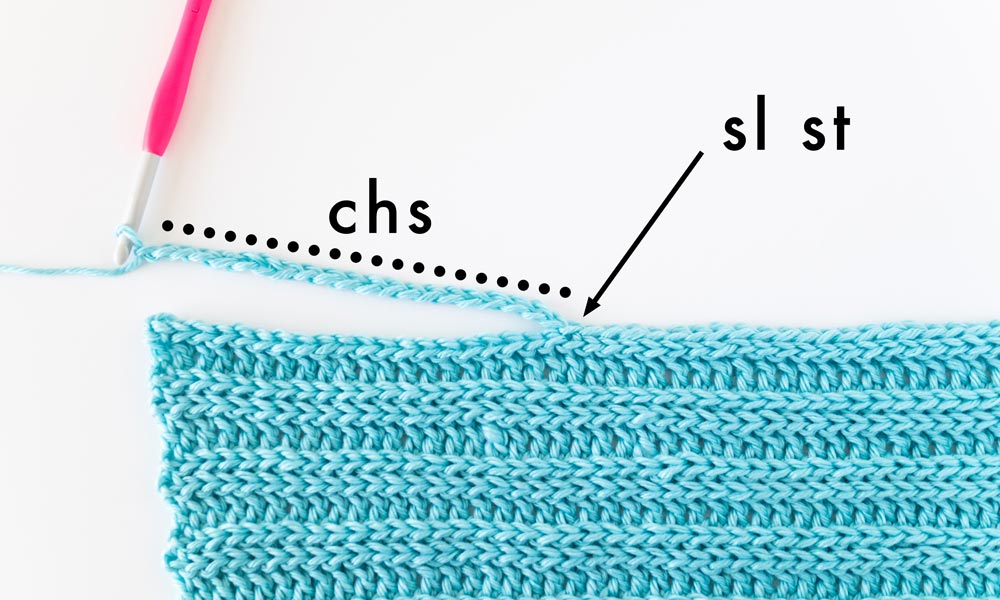
BACK PANEL ROW 2: Sl st in 2nd ch from hook, sl st in each ch, BLO sl st in each st across, sl st in last st, turn.
<72(75, 75, 75, 78)(78, 78, 81, 81)>

BACK PANEL ROW 3: As BASE DC row.
BACK PANEL ROWS 4 – 6: As BASE SL ST row.
Repeat BACK PANEL ROWS 3 – 6 until ROW 52(60, 68, 72, 80)(84, 92, 96, 104).
*Final row should be a BASE SL ST ROW.
<72(75, 75, 75, 78)(78, 78, 81, 81)>
FINAL BACK PANEL ROW 1: As BACK PANEL ROW 1.
FINAL BACK PANEL ROW 2: As BACK PANEL ROW 2.
Do not fasten off! Proceed directly to ‘SECOND FRONT PANEL’ instructions.
Second Front Panel
ROW 1: As BASE DC row.
<72(75, 75, 75, 78)(78, 78, 81, 81)>
ROWS 2 – 4: As BASE SL ST row.
ROW 5: As BASE DC row.
Repeat ROWS 2 – 5 until ROW 17(21, 25, 25, 29)(33, 37, 37, 41).
*Final row should be a BASE DC row.
<72(75, 75, 75, 78)(78, 78, 81, 81)>
Fasten off.

Sleeves
*Make 2
FOUNDATION CHAIN: Ch 49(49, 49, 49, 49)(52, 52, 52, 52).
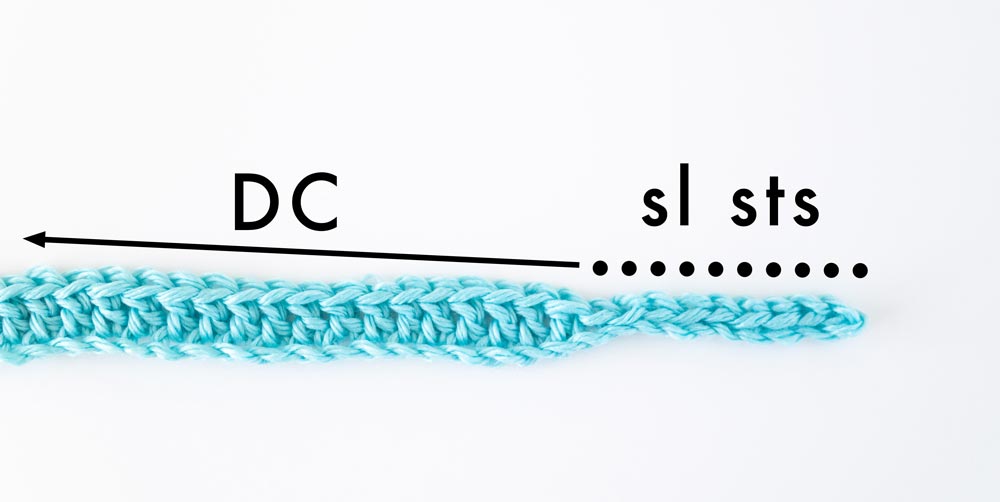
ROW 1 (RS): Sl st into 2nd ch from hook, sl st 8, DC in each ch until end, turn.
<48(48, 48, 48, 48)(51, 51, 51, 51)>
ROWS 2 – 4: As BASE SL ST row.
ROW 5: Ch 1, BLO sl st 9, BLO DC across, DC in last st, turn.
<48(48, 48, 48, 48)(51, 51, 51, 51)>
Repeat ROWS 2 – 5 until ROW 34(37, 37, 41, 45)(49, 53, 57, 61).
<48(48, 48, 48, 48)(51, 51, 51, 51)>
Fasten off.
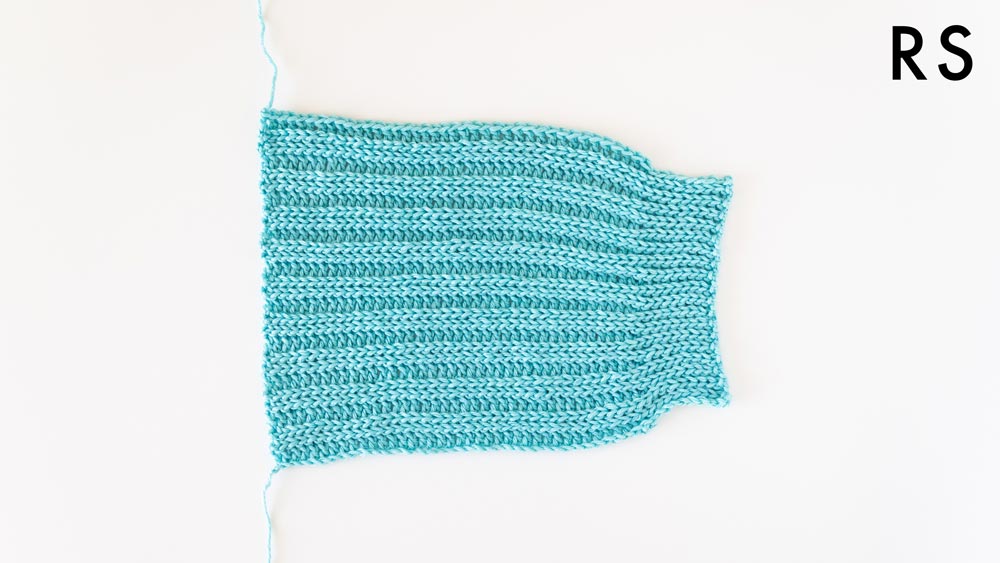
Fold sleeve in half lengthways. Whip stitch the edges of the sleeve together.
Pockets
*Make 2
ROW 1: FDC 17(17, 17, 17, 19)(19, 19, 19, 19), turn.
<17(17, 17, 17, 19)(19, 19, 19, 19)>
ROWS 2 – 4: As BASE SL ST row.
ROW 5: As BASE DC row.
Repeat ROWS 2 – 5 until ROW 13(13, 13, 13, 17)(17, 17, 17, 17).
<17(17, 17, 17, 19)(19, 19, 19, 19)>
With the RS facing you, rotate the pocket 45 degrees.
Sl st evenly along the raw edge of the pocket.
Fasten off.
Assembly
Lay the front panels on top of the back panel.

Whip stitch the shoulder seams together.
*For a neat finish and smooth seams, make sure that the ribbing matches on the RS of the sweater and place whip stitches into the centre of the DCs, rather than wrapping around the entire stitch.
Whip stitch top of sleeves to arm holes.
Hemline Ribbing
FOUNDATION CHAIN: Ch 8.
ROW 1: Sl st into 2nd ch from hook, sl st in each ch until end, turn.
<7>
ROW 2: Ch 1, BLO sl st across, sl st in last st, turn.
<7>
Repeat ROW 2 until ribbing equals the width of the back and front panels.
Fasten off.
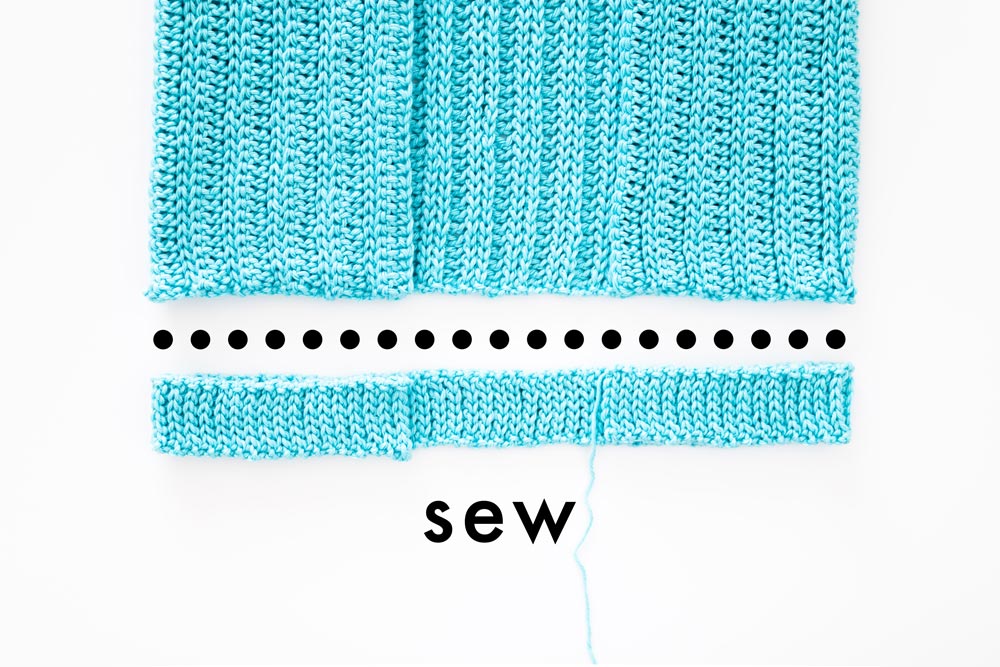
Whip stitch ‘HEMLINE RIBBING’ to hem of the ‘BODY PANEL’.
Neckline Ribbing
Repeat the same instructions as the ‘HEMLINE RIBBING’ until the ribbing measures the length of the neckline opening.
Whip stitch ’NECKLINE RIBBING’ to neckline of the ‘BODY PANEL’.
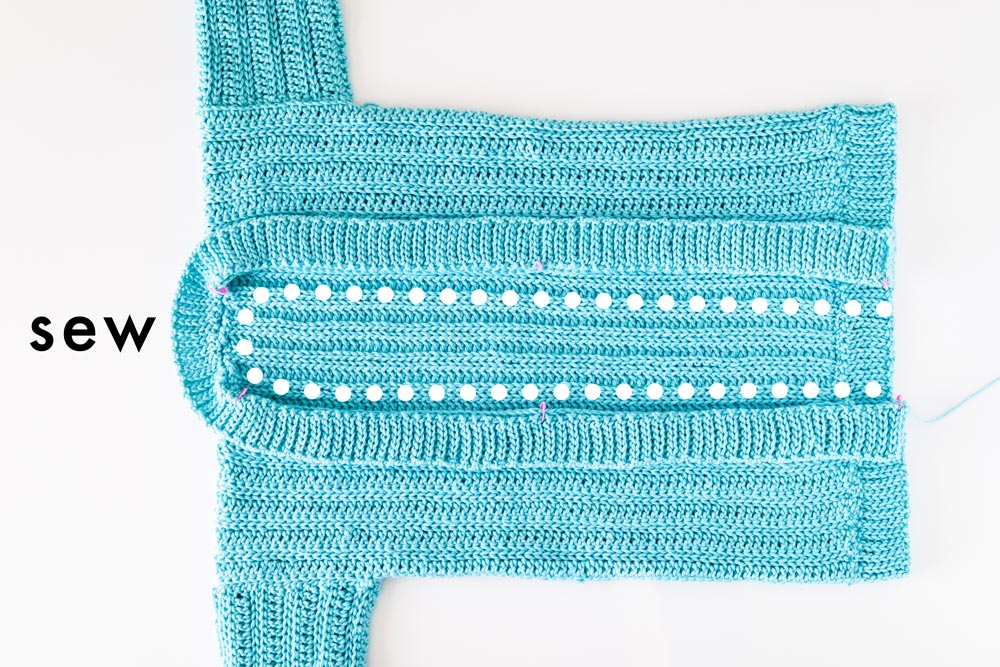
Pocket Assembly
Using stitch markers/safety pins, pin the pockets into place on the front panels.
*I suggest trying on the cardigan to double check the pocket placement.
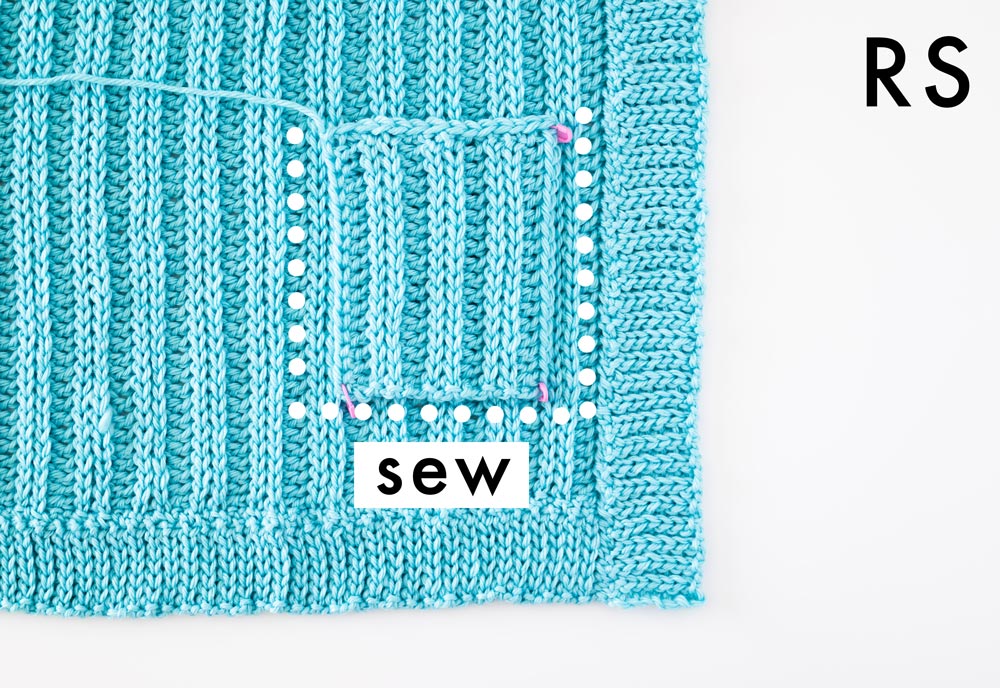
Whip stitch the edges of the pocket to the front panels.
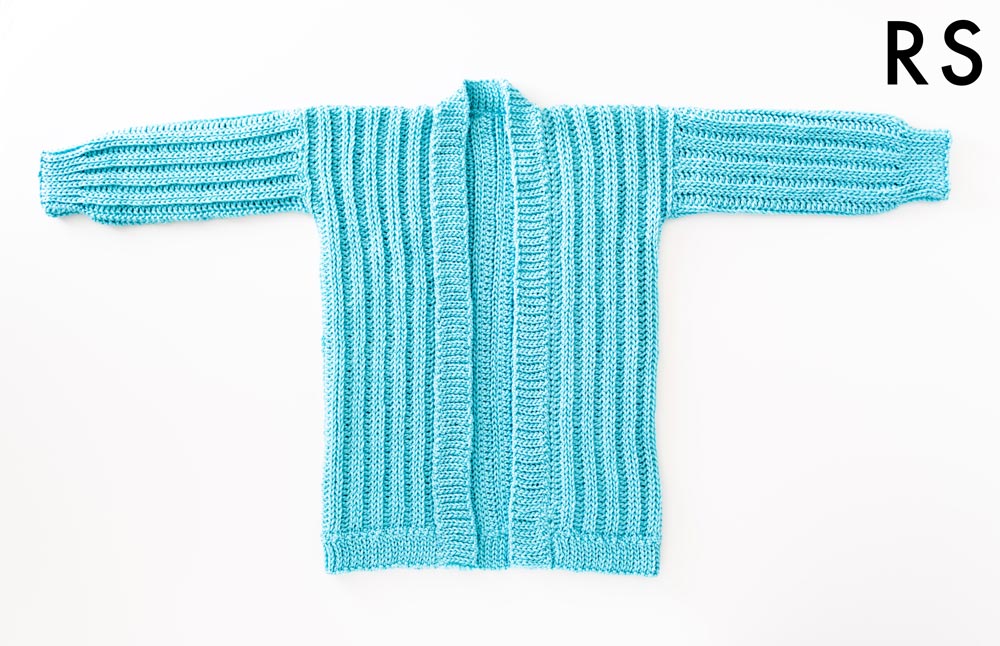
Weave in all of your ends and steam block your cardigan.
Voilà! You’ve finished your Palermo Cardigan ?
Ready for your next crochet project? You can find more
The post appeared first on .


