Every year me and Alex have the same conversation. I want to start Christmas off around mid November and he tells me I am a maniac and to just calm my Christmas self down (in a few nicer words). I am so ready to start celebrating the minute the clocks go back. Christmas makes winter worth doing in my book. Otherwise I’d just go hibernate for a few months… because of course that’s a legit option for an adult human being right?
I want the magic of Christmas to last as long as possible. Frosty mornings are so much more bearable when I’ll be home for Christmas is playing in the background. We’ve simply no place to go (except work). Let it snow! (I realise this is a different song… I am the Christmas song queen guys. Just so you know.)

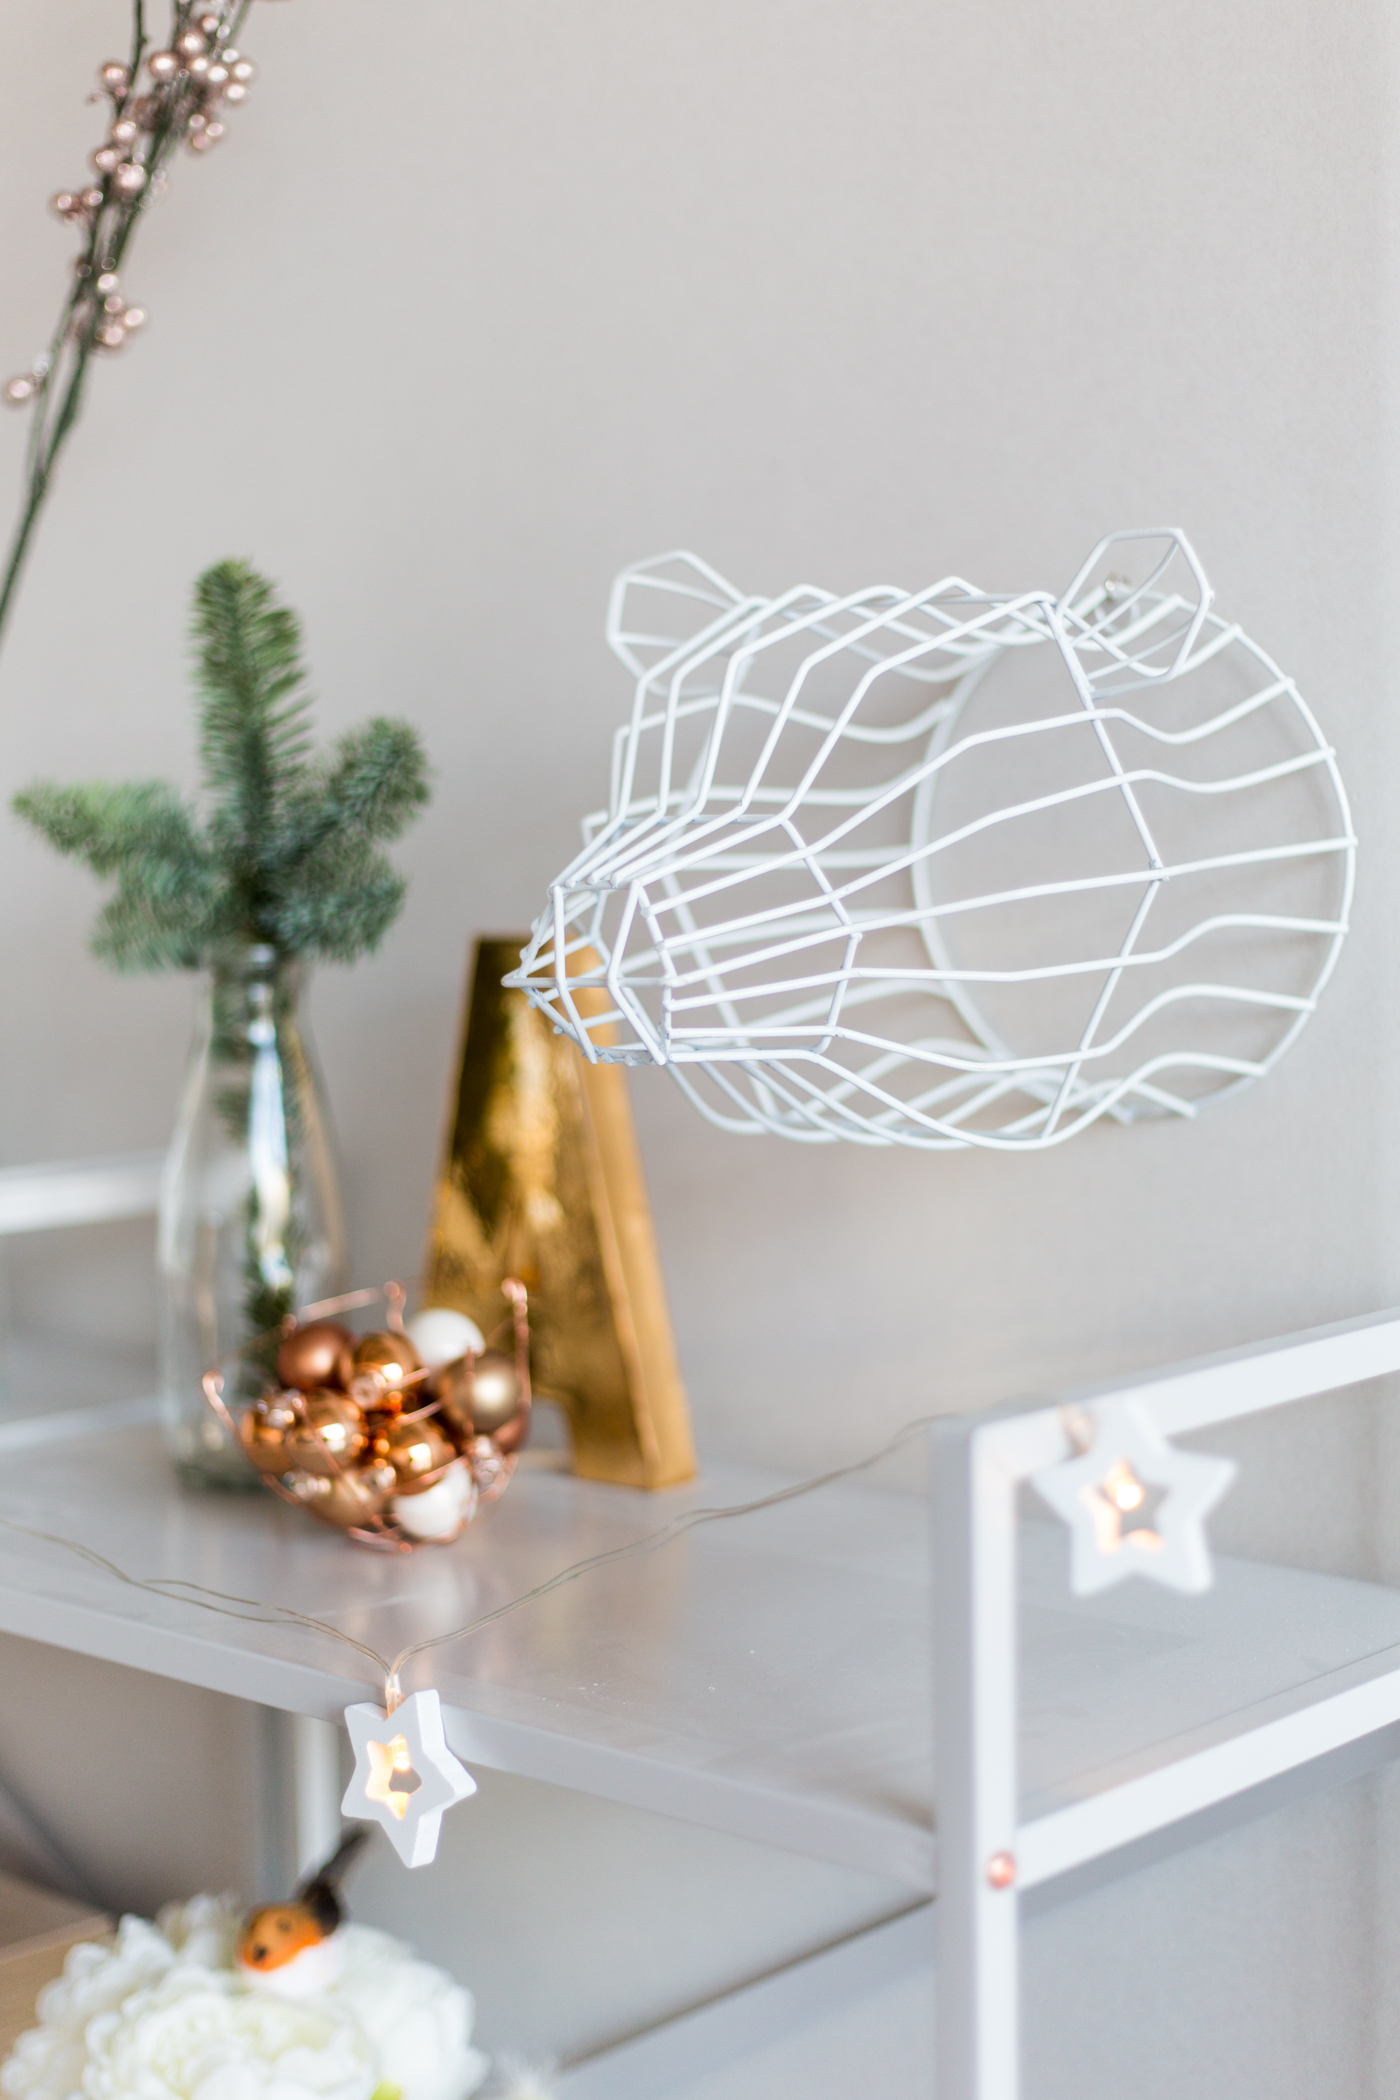
But! Luckily this year I have my own space to create a Christmas wonderland away from the humbug at home. My studio is a grotto of festive goodness. It might look like a heard of reindeer just flew through, bull in a china shop style, but it’s been Christmas in here none the less!
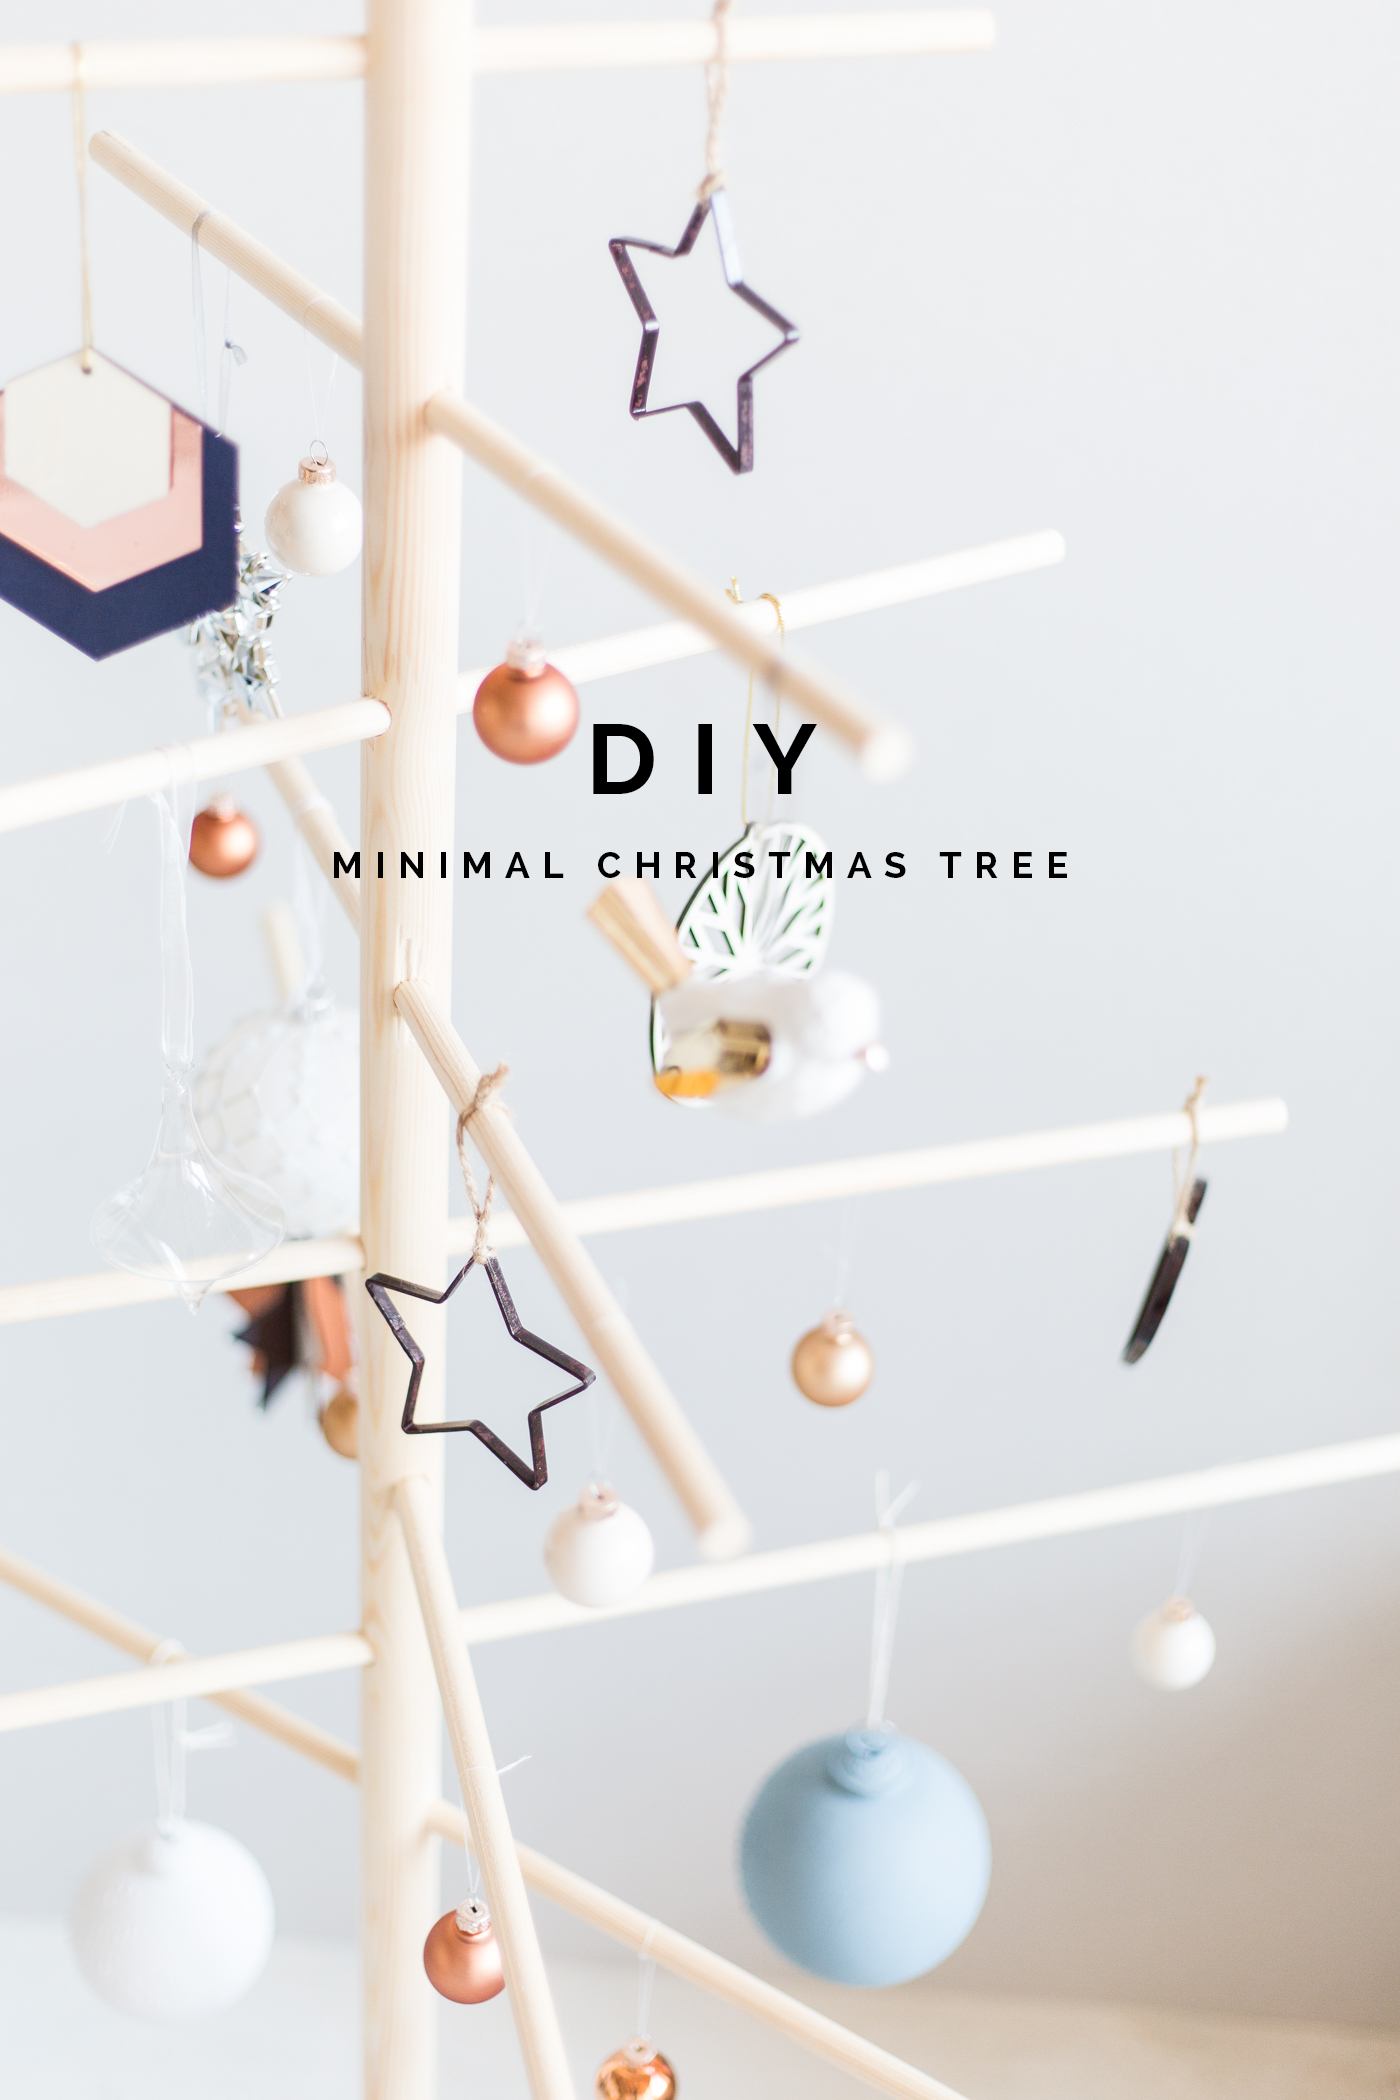
One of the first things I was sure to put up was the tree! I currently have three, but you can never really have enough trees. Especially when you get to make them too! This DIY minimal wooden tree was such an easy additional I had to show you how to make it too.
Materials
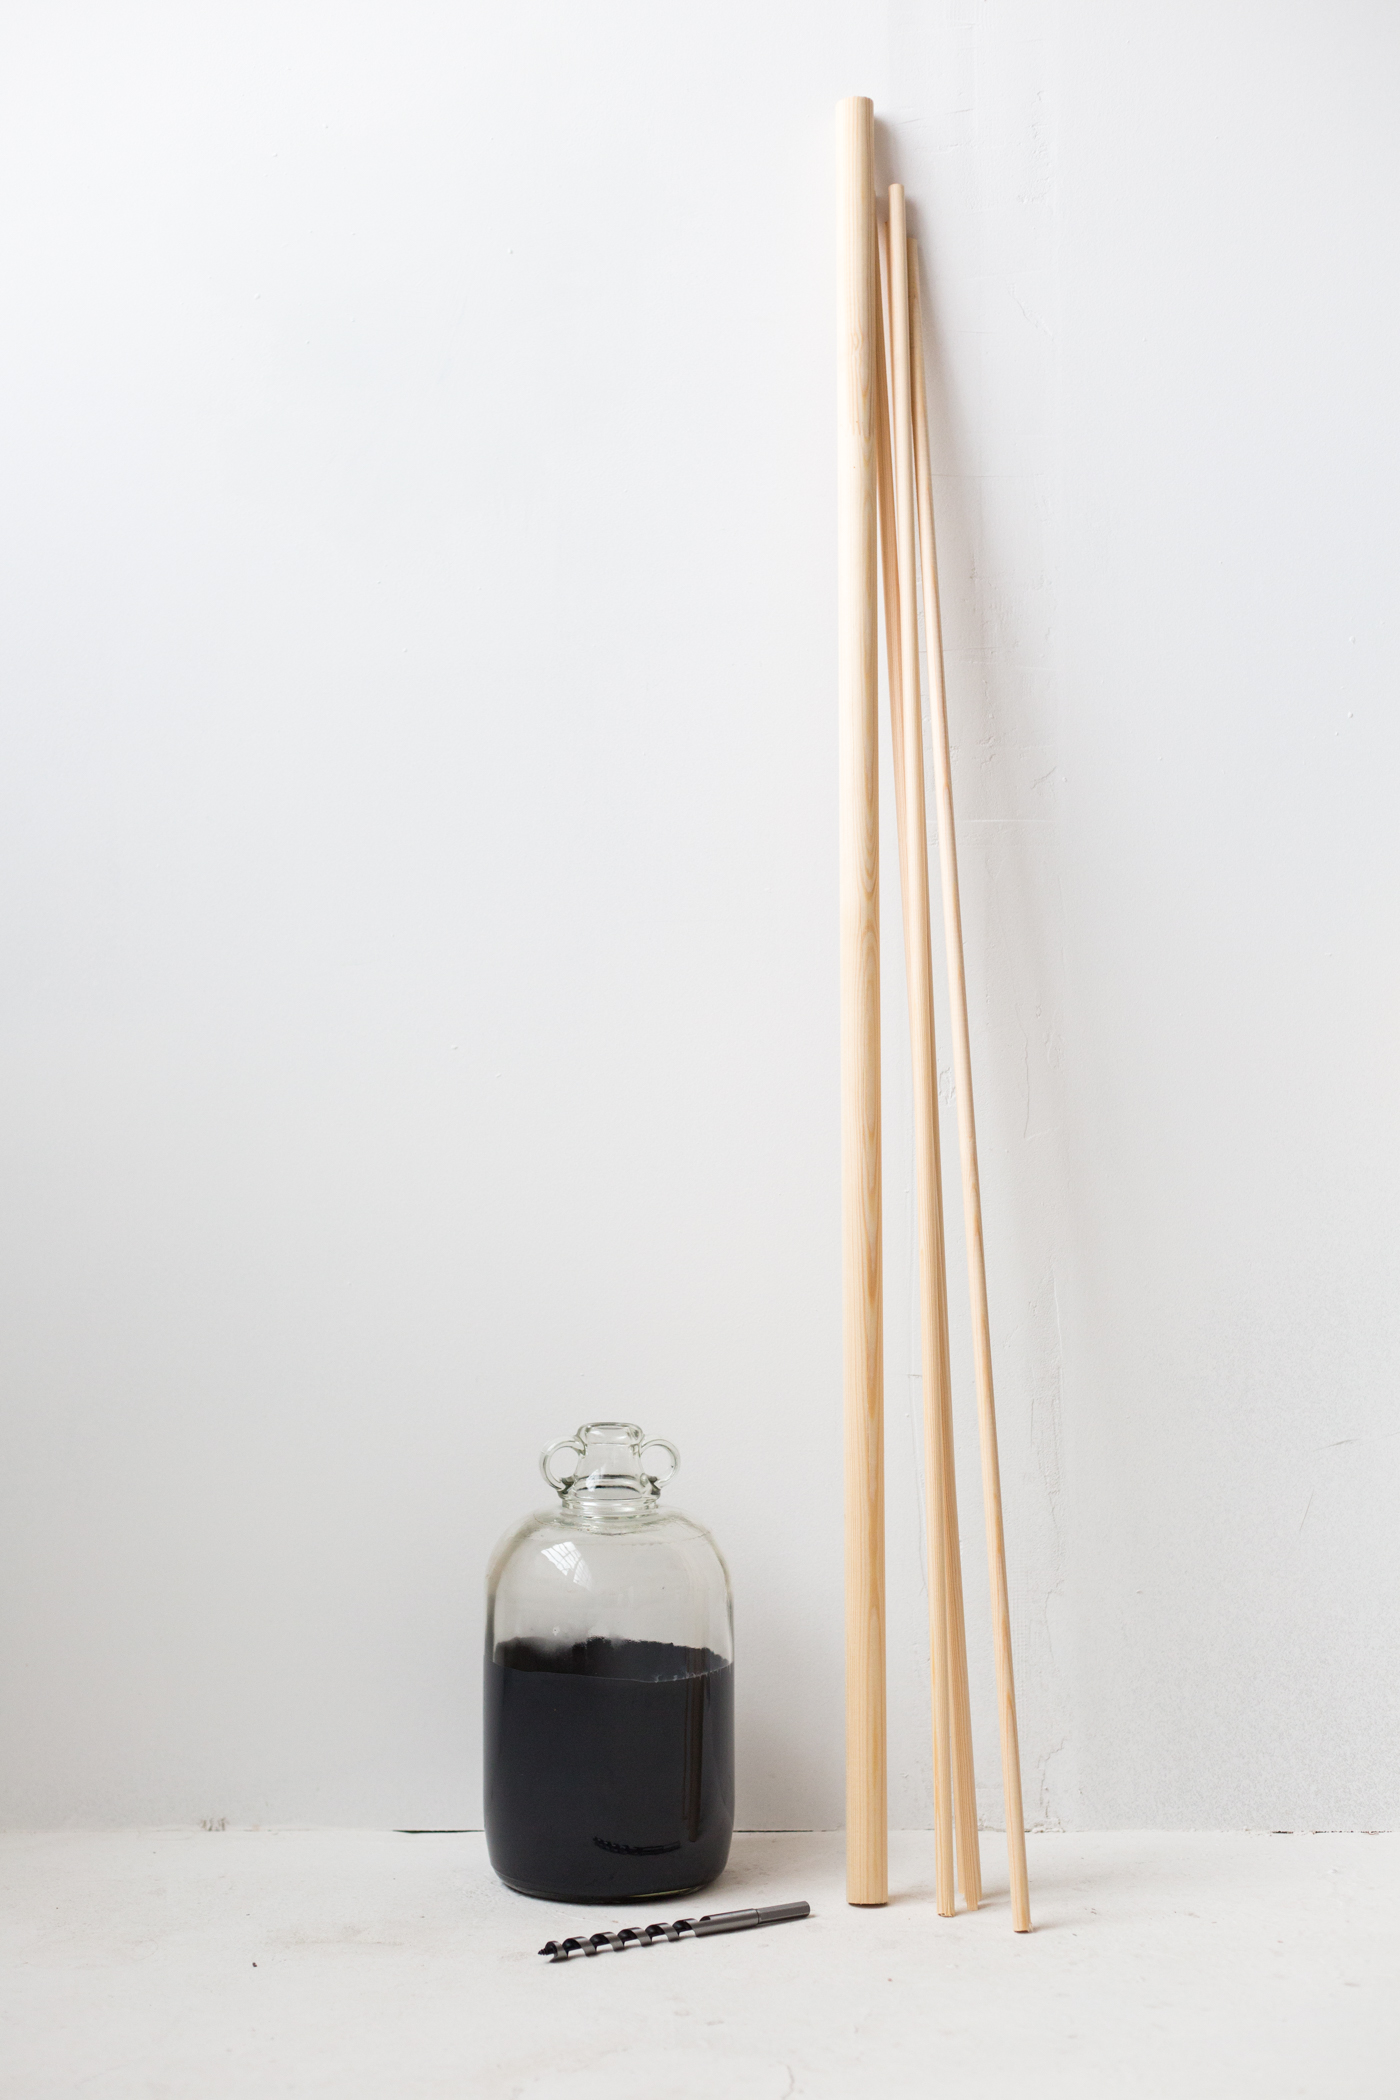
Large glass bottle/demijohn
Wooden dowel the width of the bottle opening
12mm Wooden dowel poles
12mm Drill bit and electric drill
Sandpaper
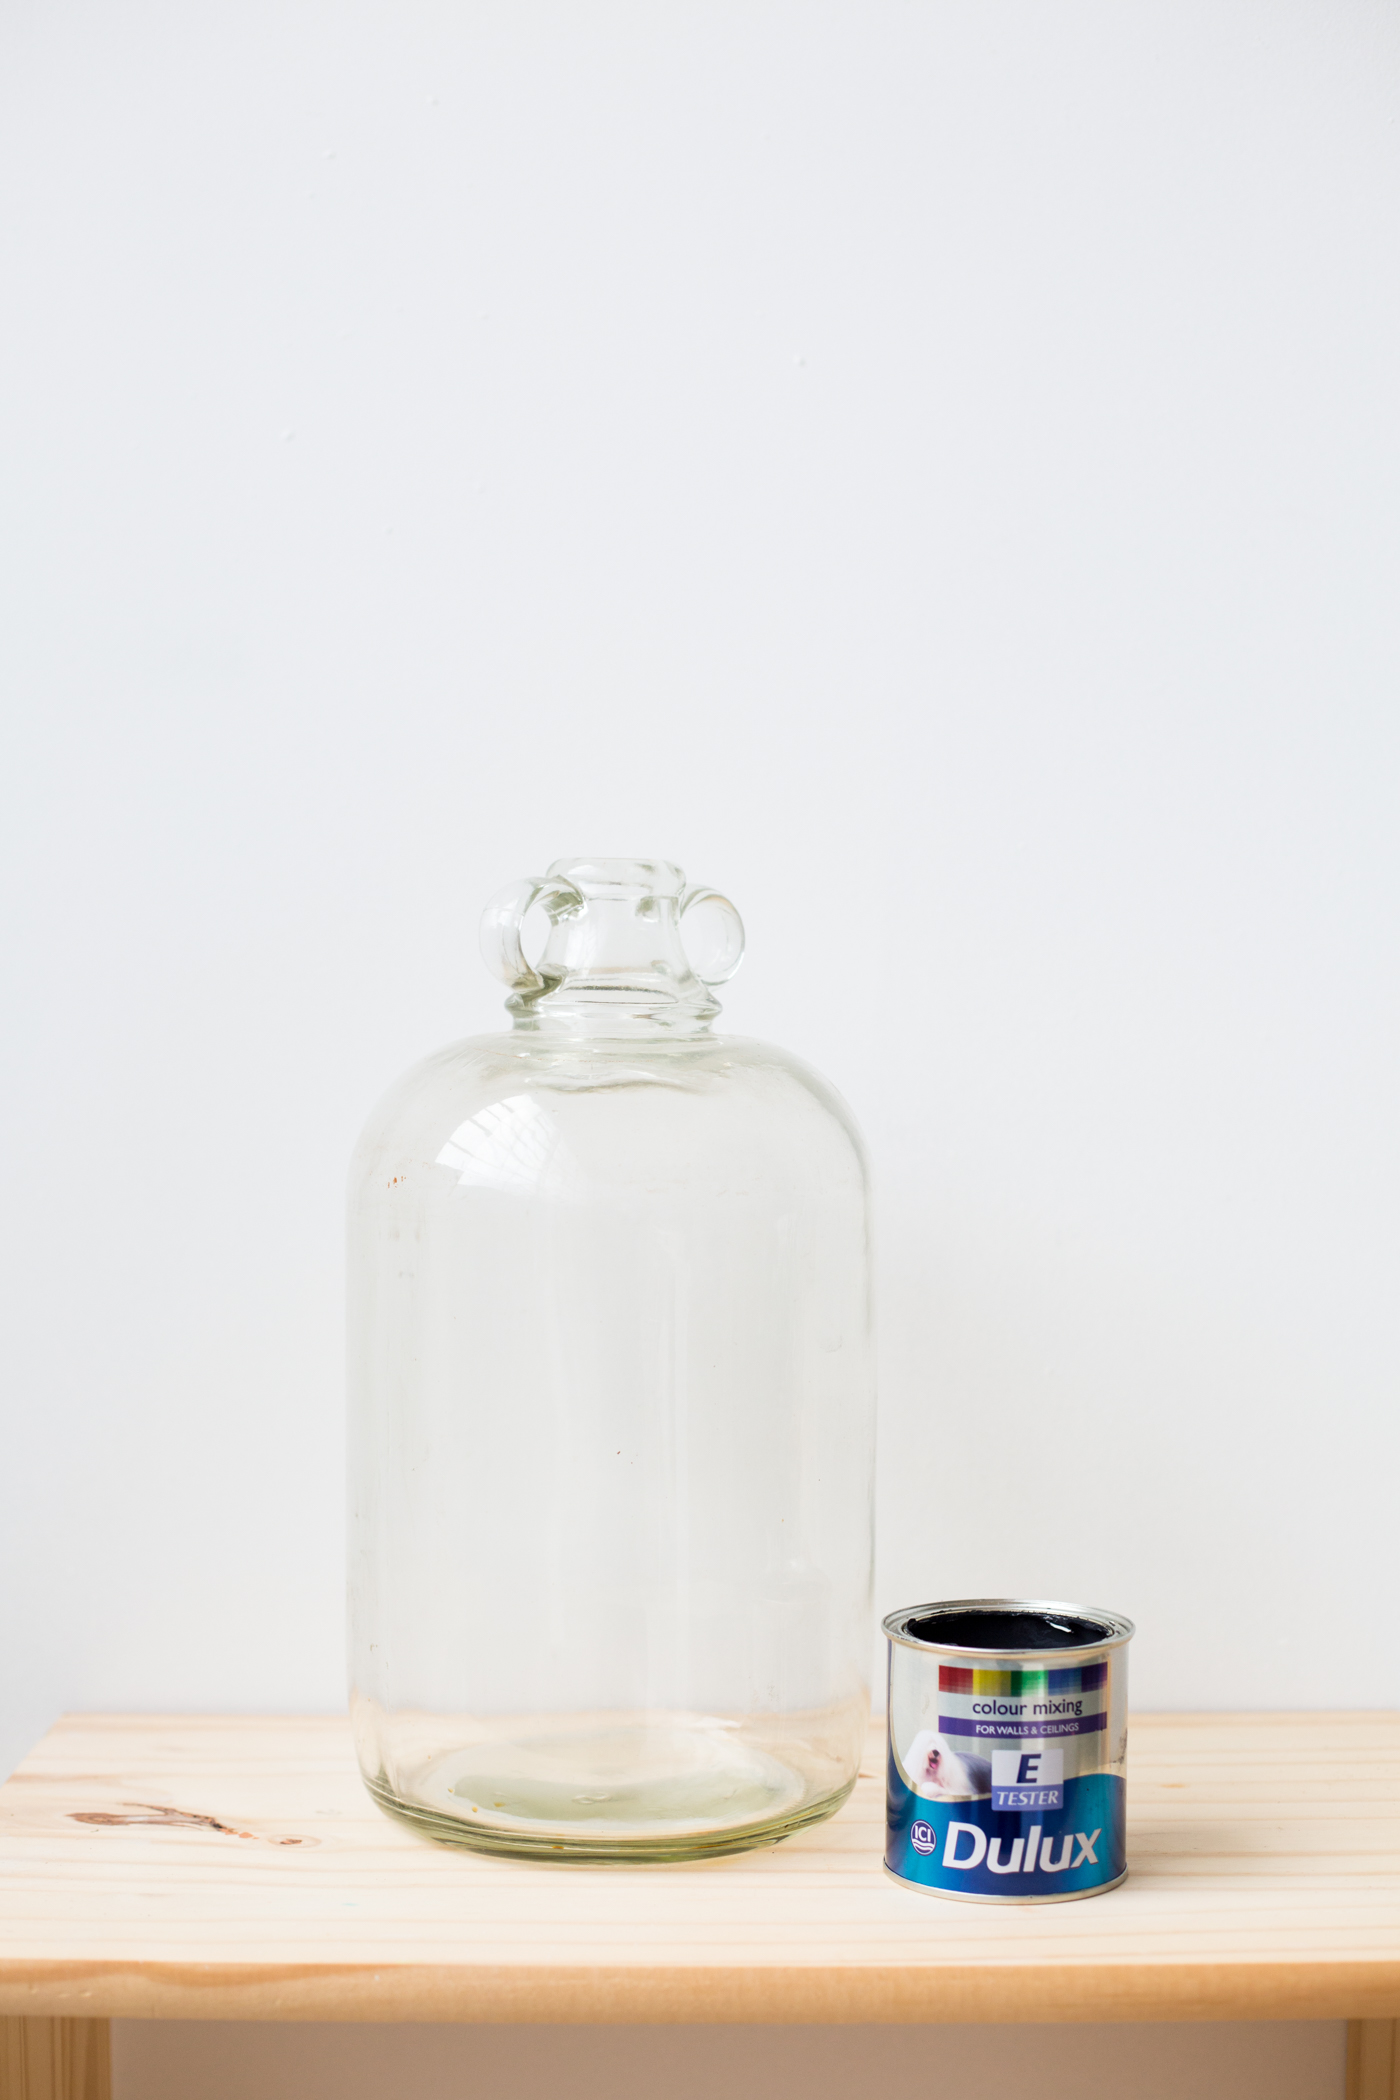
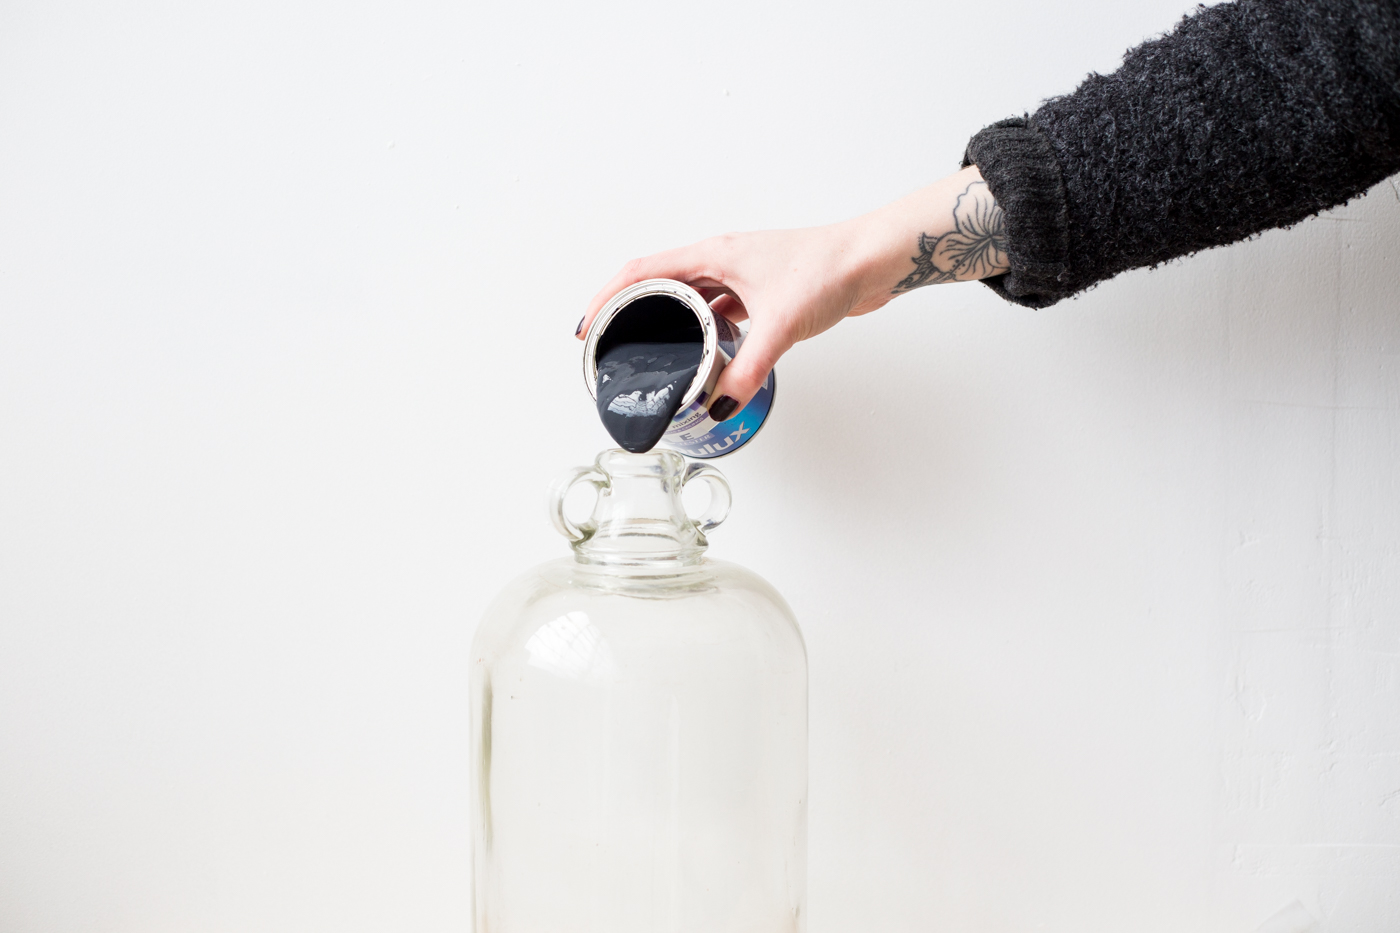
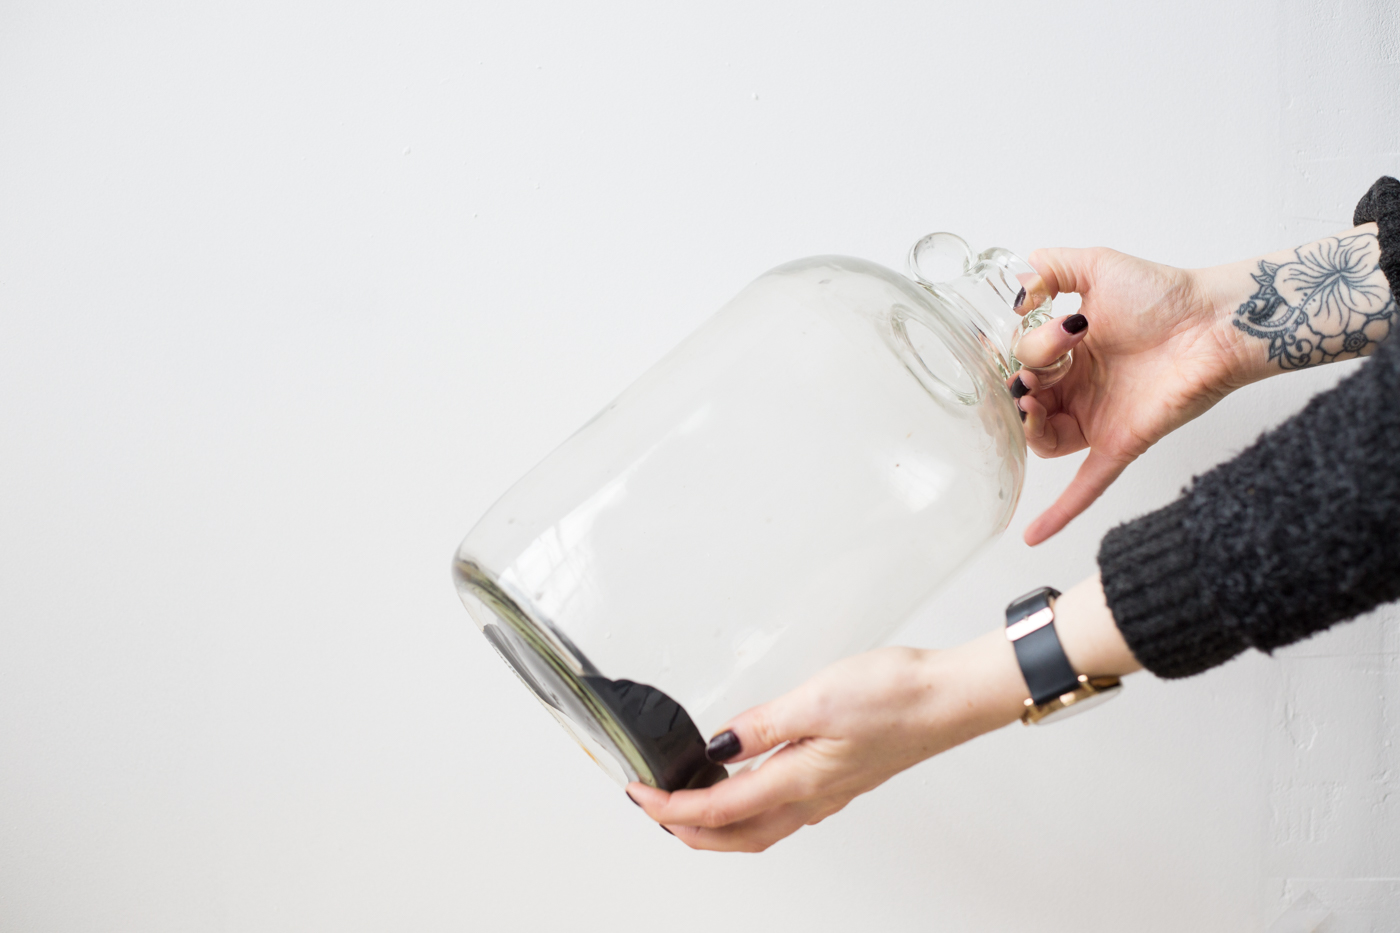
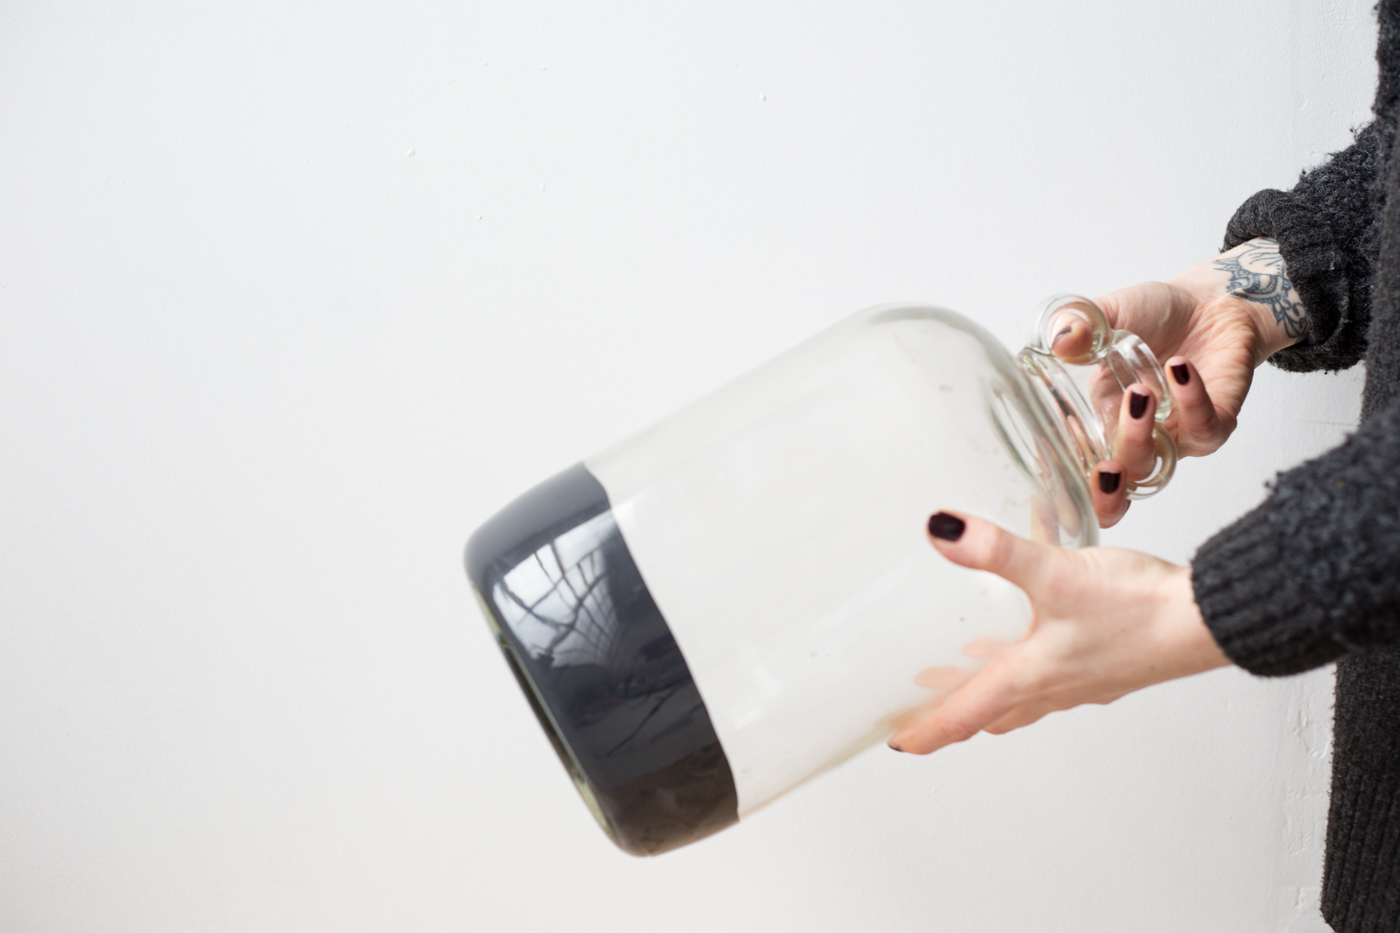
1. Before we started I gave my bottle a little makeover. I’d bought it second hand and as much as I tried I couldn’t get the inside 100% clean. So I painted over the dirt by pouring paint into the bottle (this is SO much easier with a funnel and will minimise clean up) and slowly twisted to bottle around to cover the bottom half in paint. Repeat until you have a smooth, dry surface.
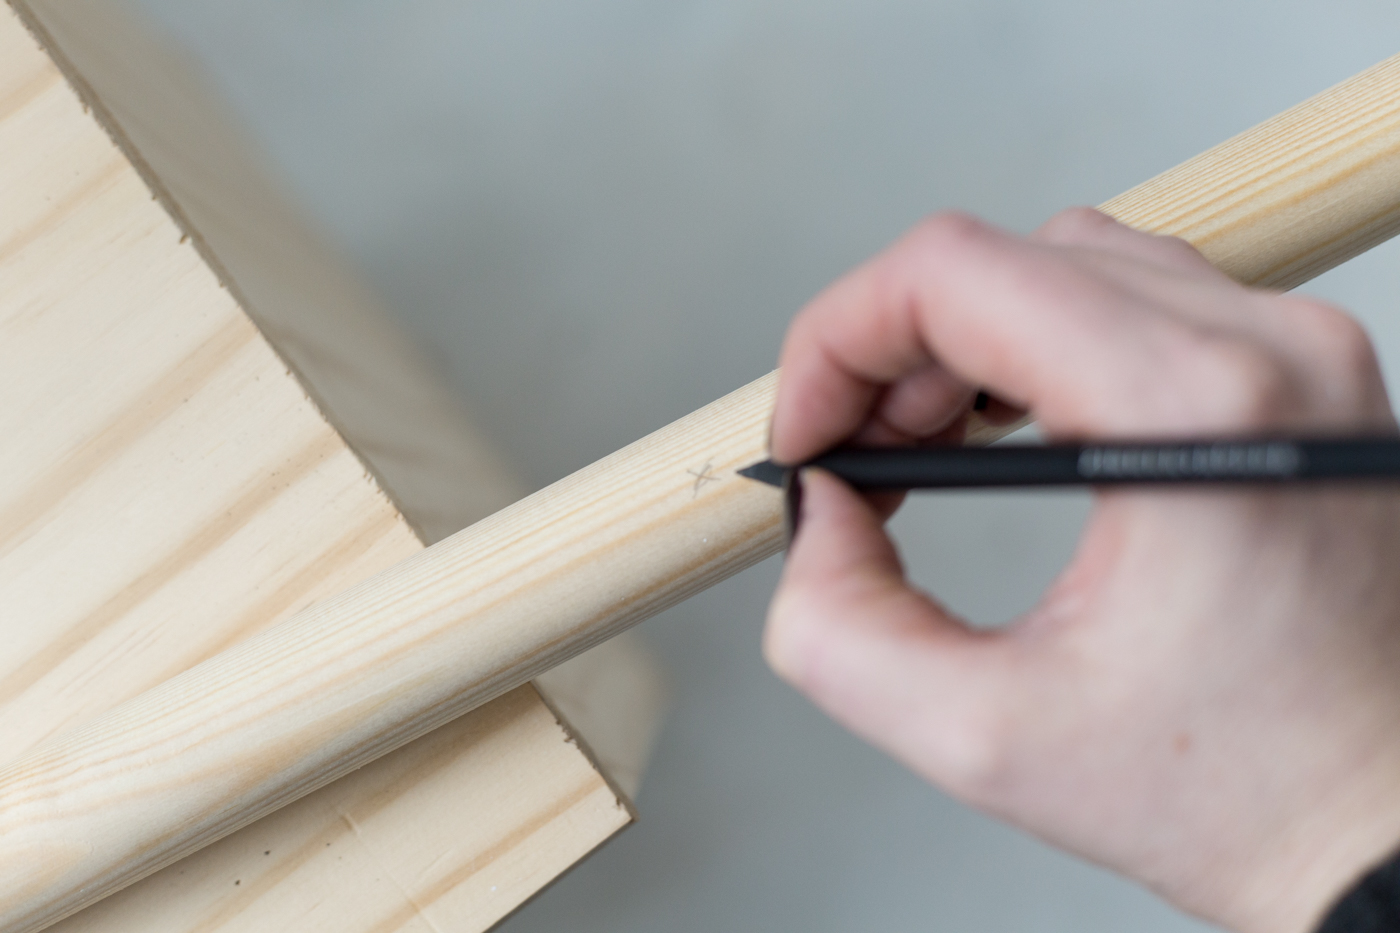
2. While the bottle is drying mark evenly spaced points along the thicker dowel, starting around the middle and working your way up. Mark these moving around the diameter of the dowel so that none of them align vertically.
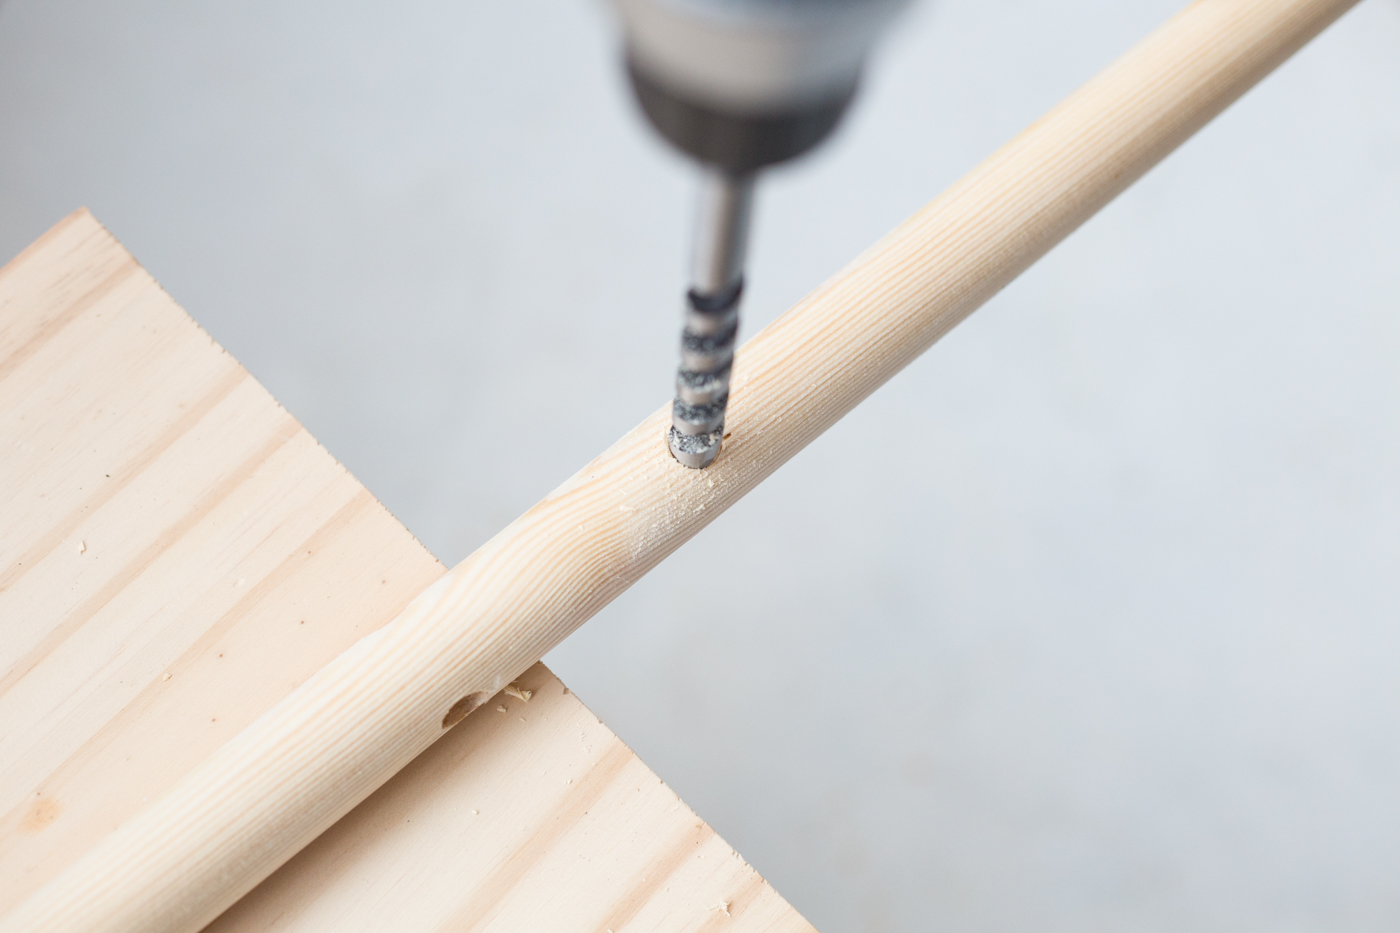
3. Drill through the centre of the dowel at the points you have marked going all the way through. Sand down all the rough areas.
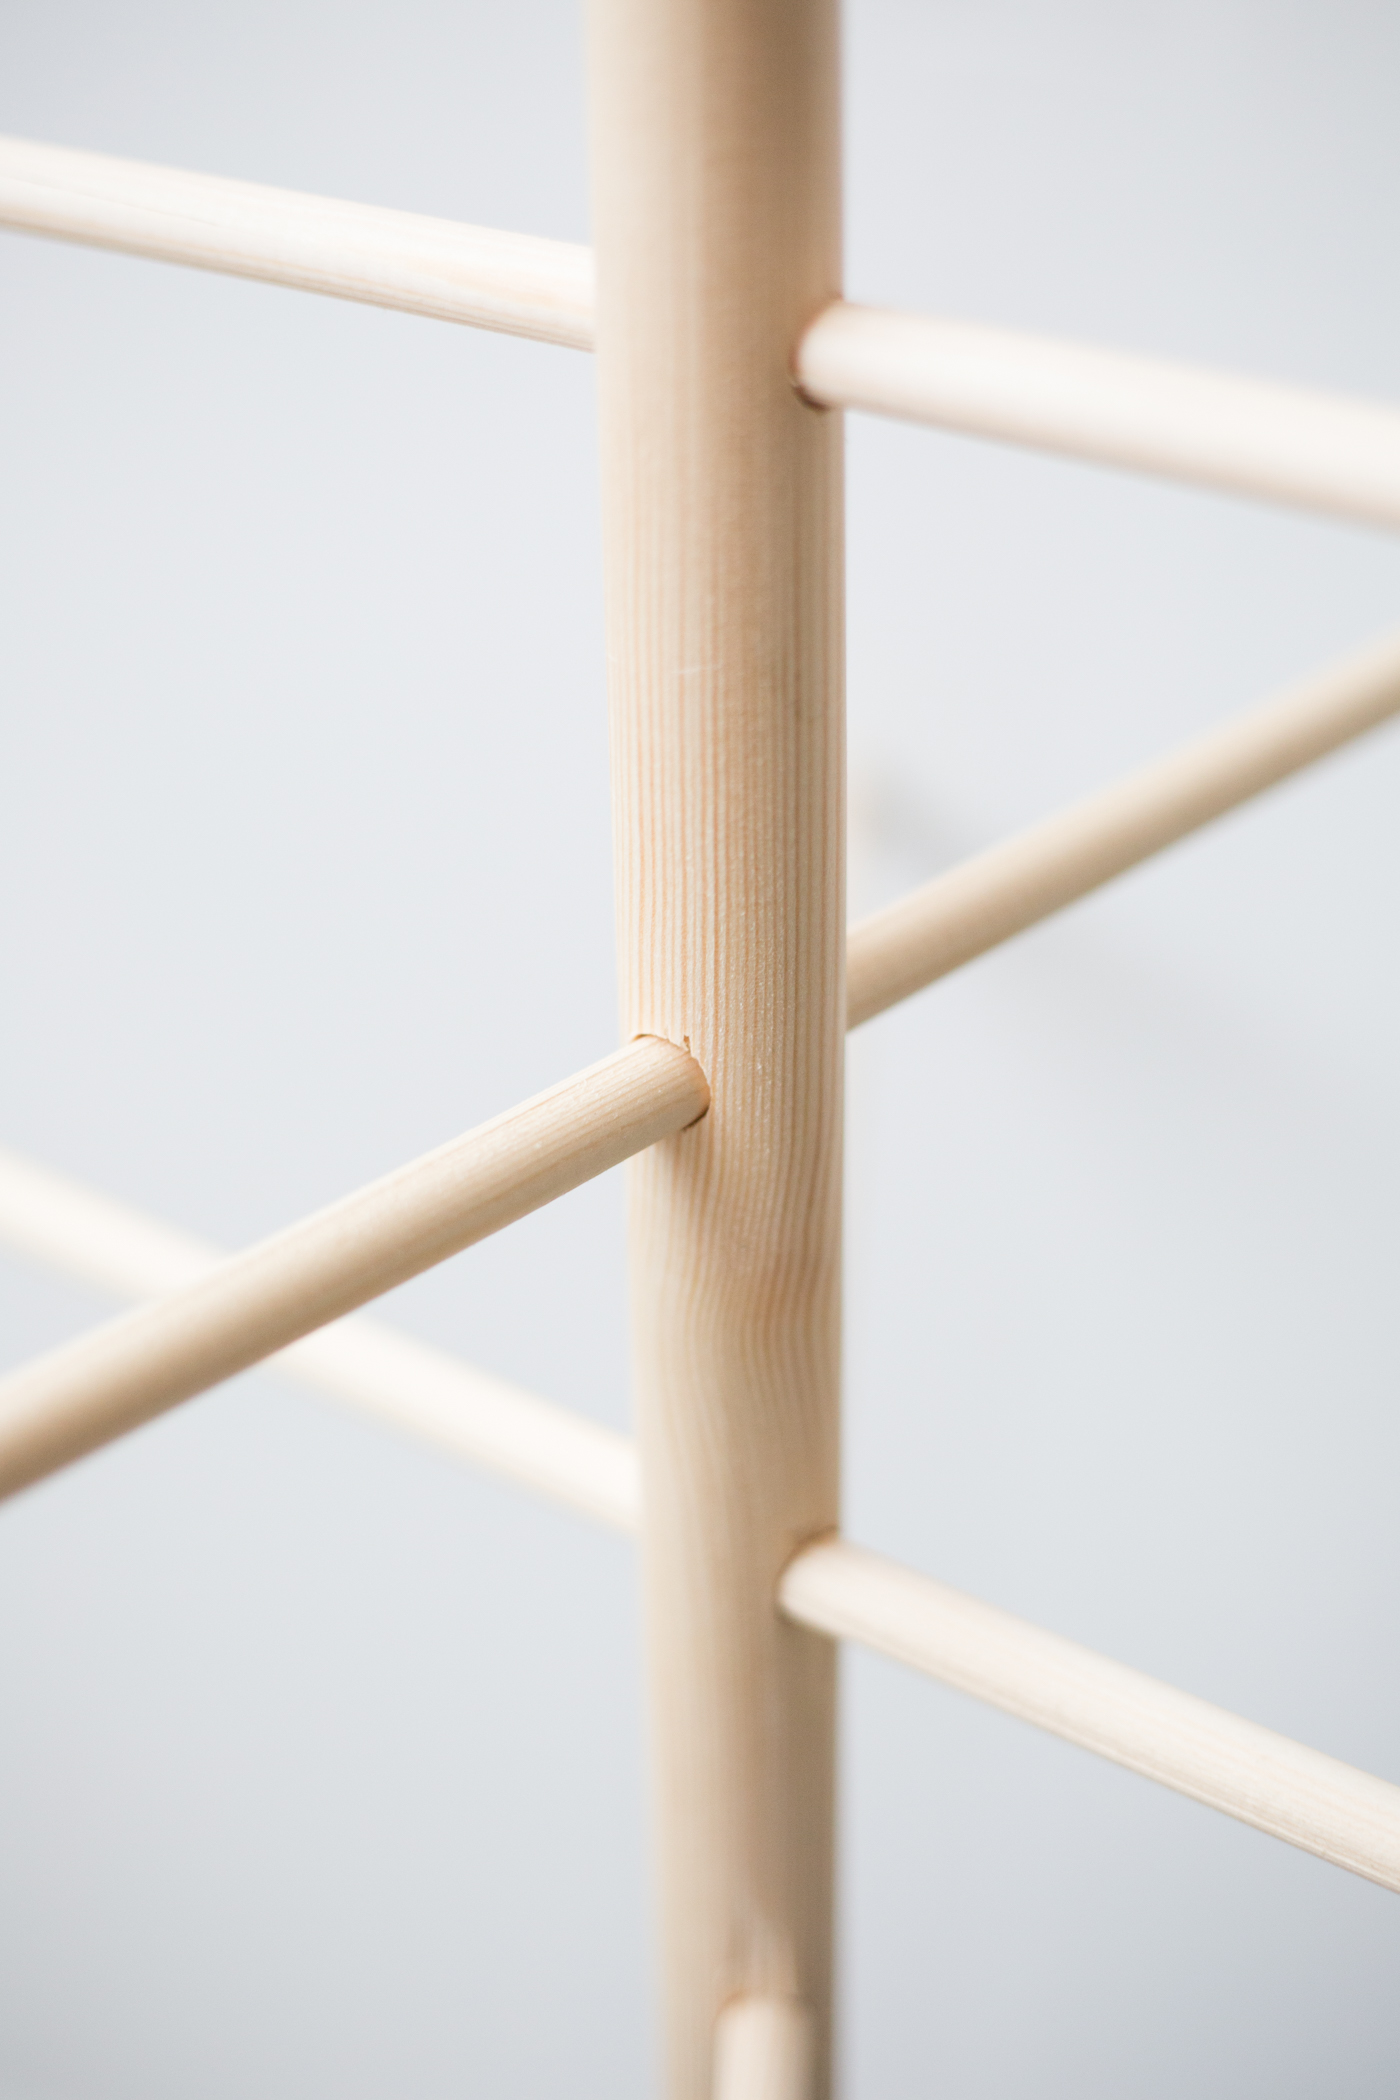
4. Cut the 12mm dowel into different sizes – enough to fit in each hole and arrange from large to small. Push them through the holes – largest at the lowest and working your way up to the smallest.

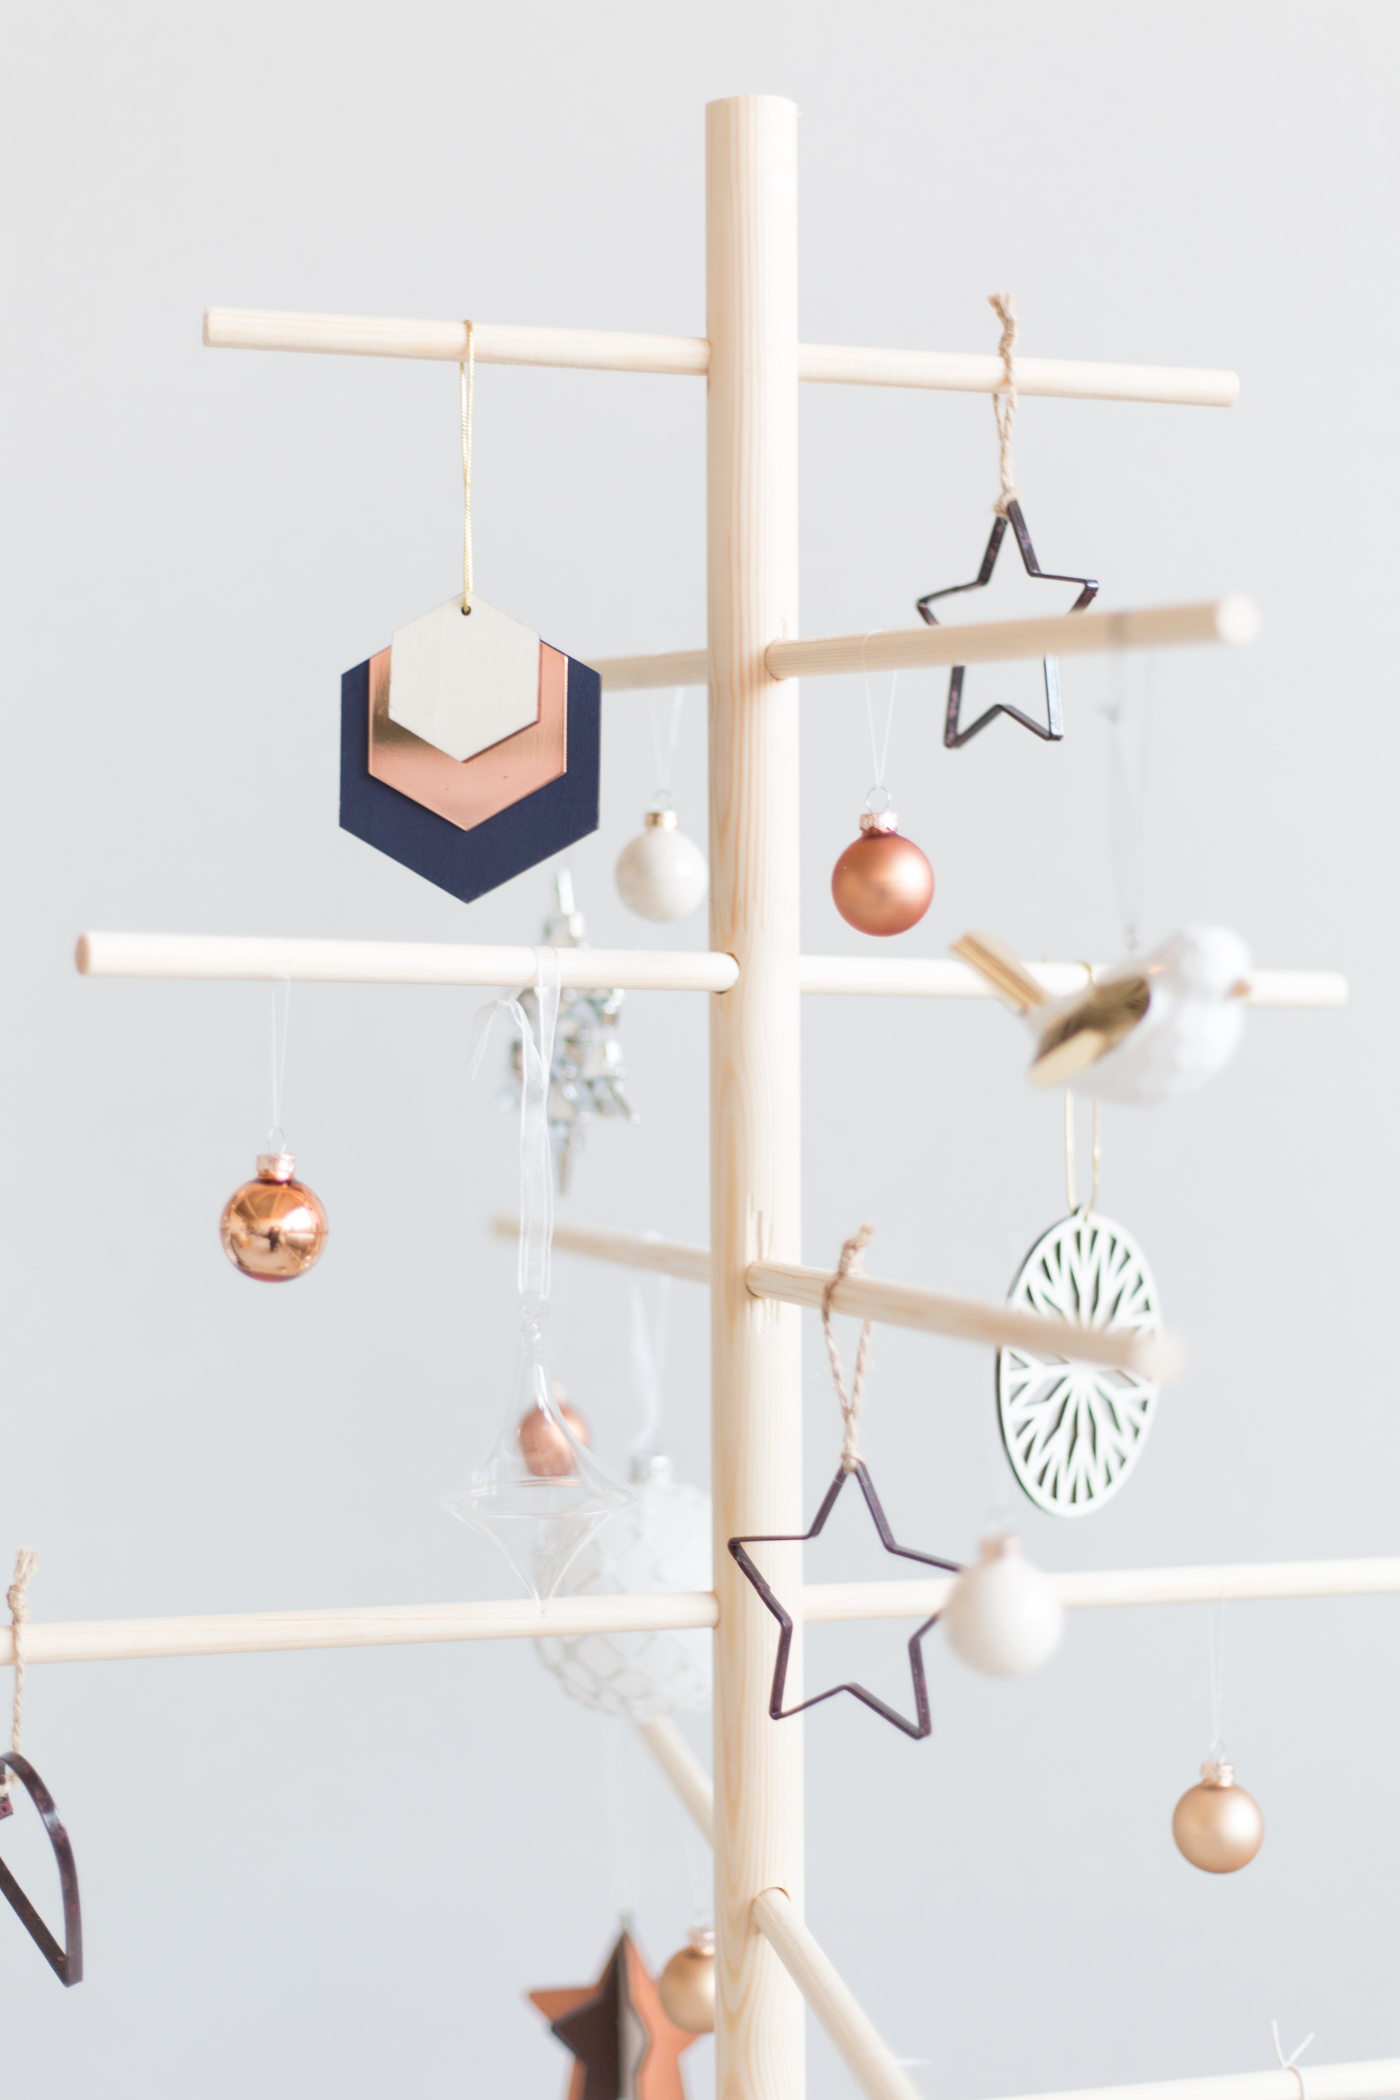

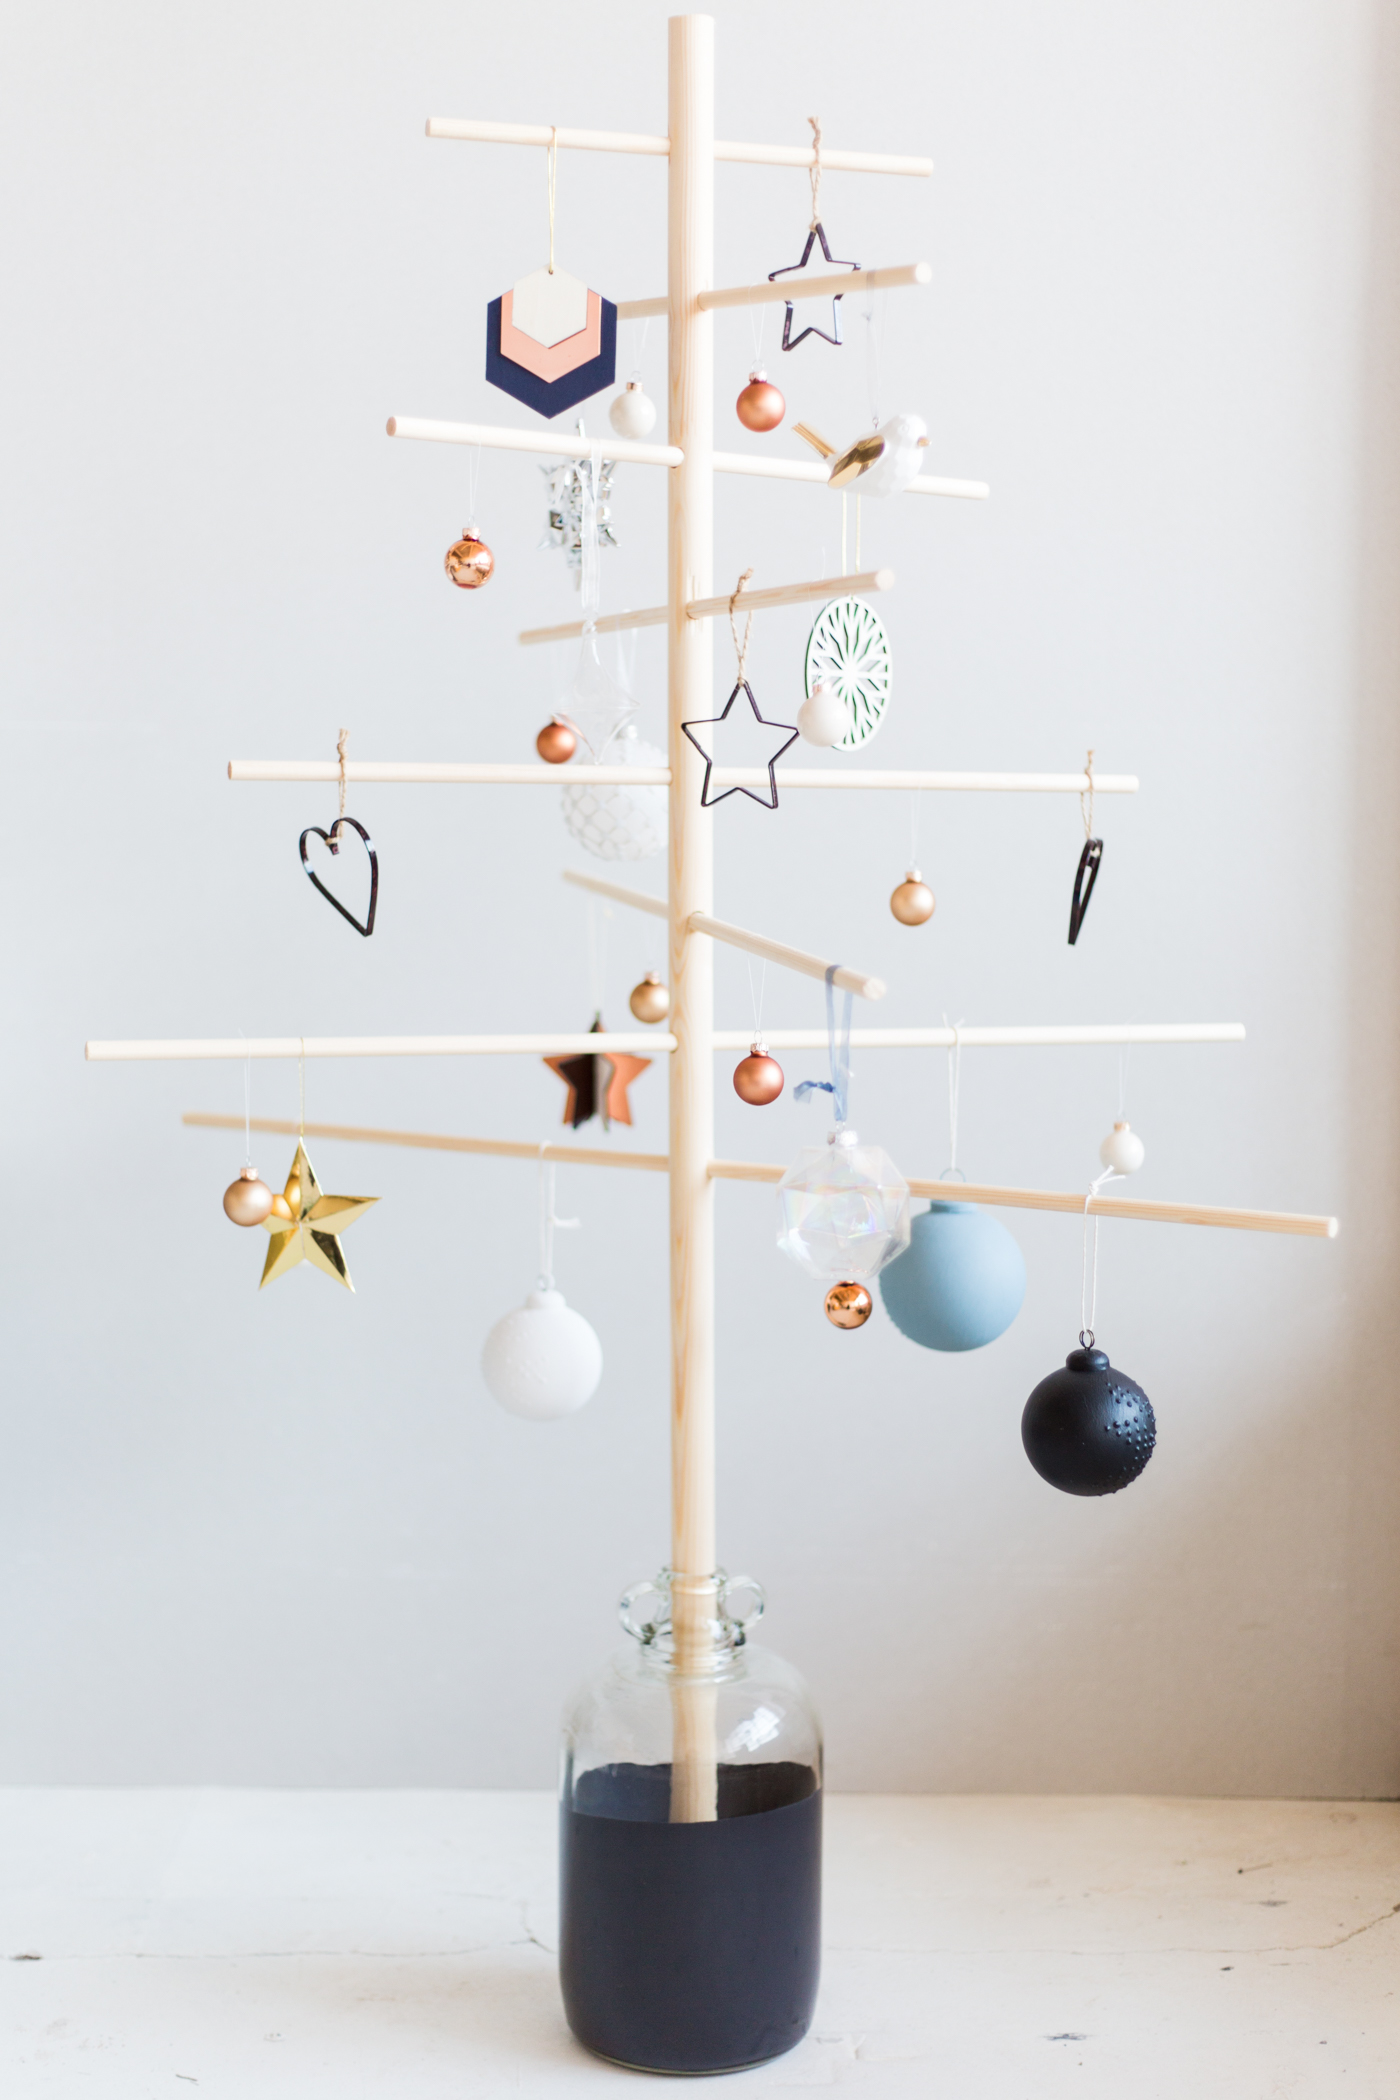

Push the dowel into the bottle and now you’re ready to decorate! I’m using decorations from the and getting some right here.


* This post was sponsored by John Lewis. Thank you for supporting the brands that support Fall For DIY
The post appeared first on .


