 This is a paid partnership with
If you’ve spent any amount of time on my blog, you’ll know of my aching love for Fimo!We’ve had a long term relationship with many creations birthed over the years. I’d go as far as to say that Fimo has been my most used material for my makes and so obviously you can imagine my excitement to actually be partnering with them for this DIY project!
Fimo is such a versatile material as it is but now they’ve even come up with a that not only looks like but behaves like the material too. This stuff is so clever and can be sewn on, bent, punched or cut into. To be honest I’m still a bit baffled as to how all of these things can be achieved with clay but I’m certainly not complaining, just totally addicted to the stuff, along with my clay roller.
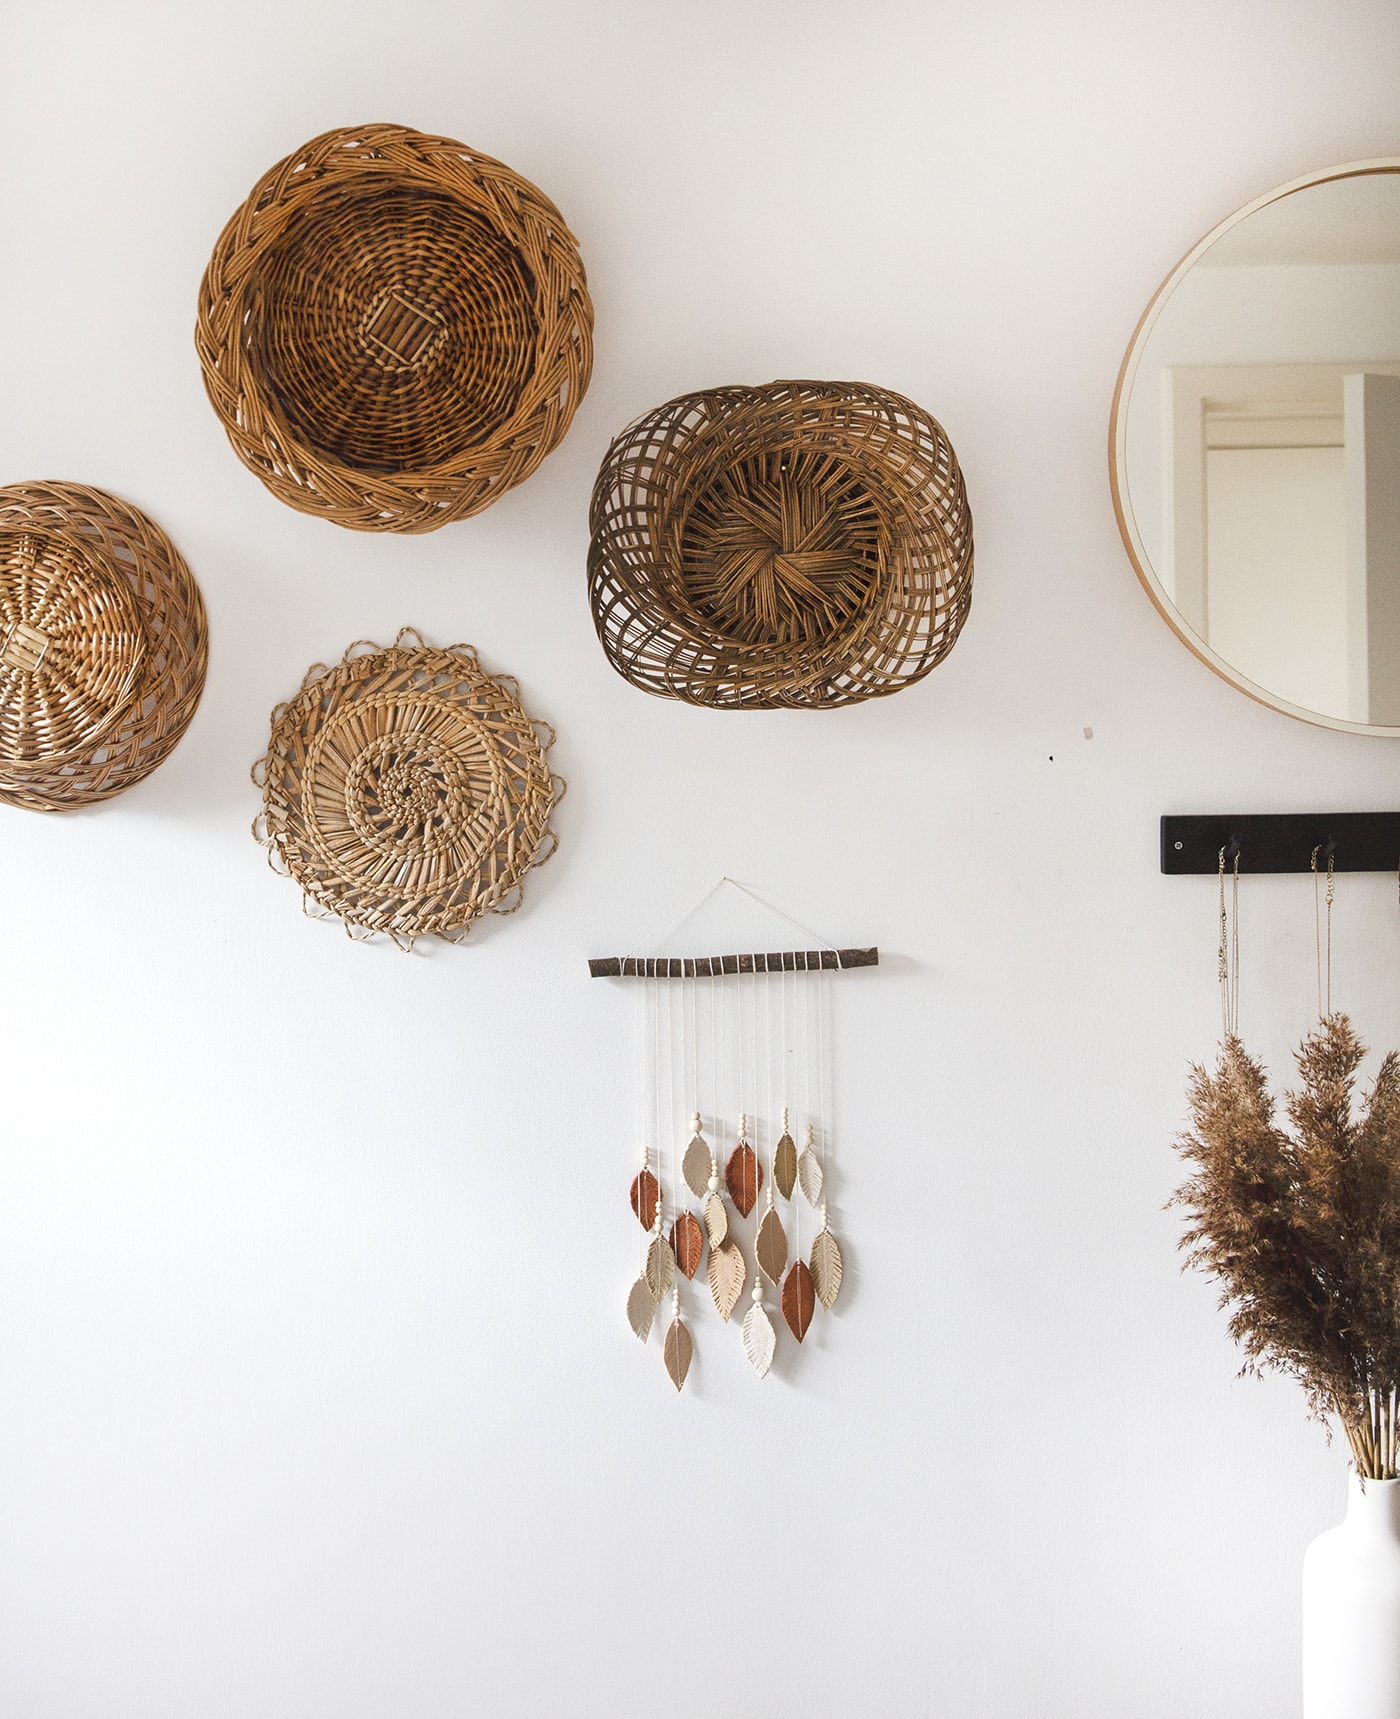
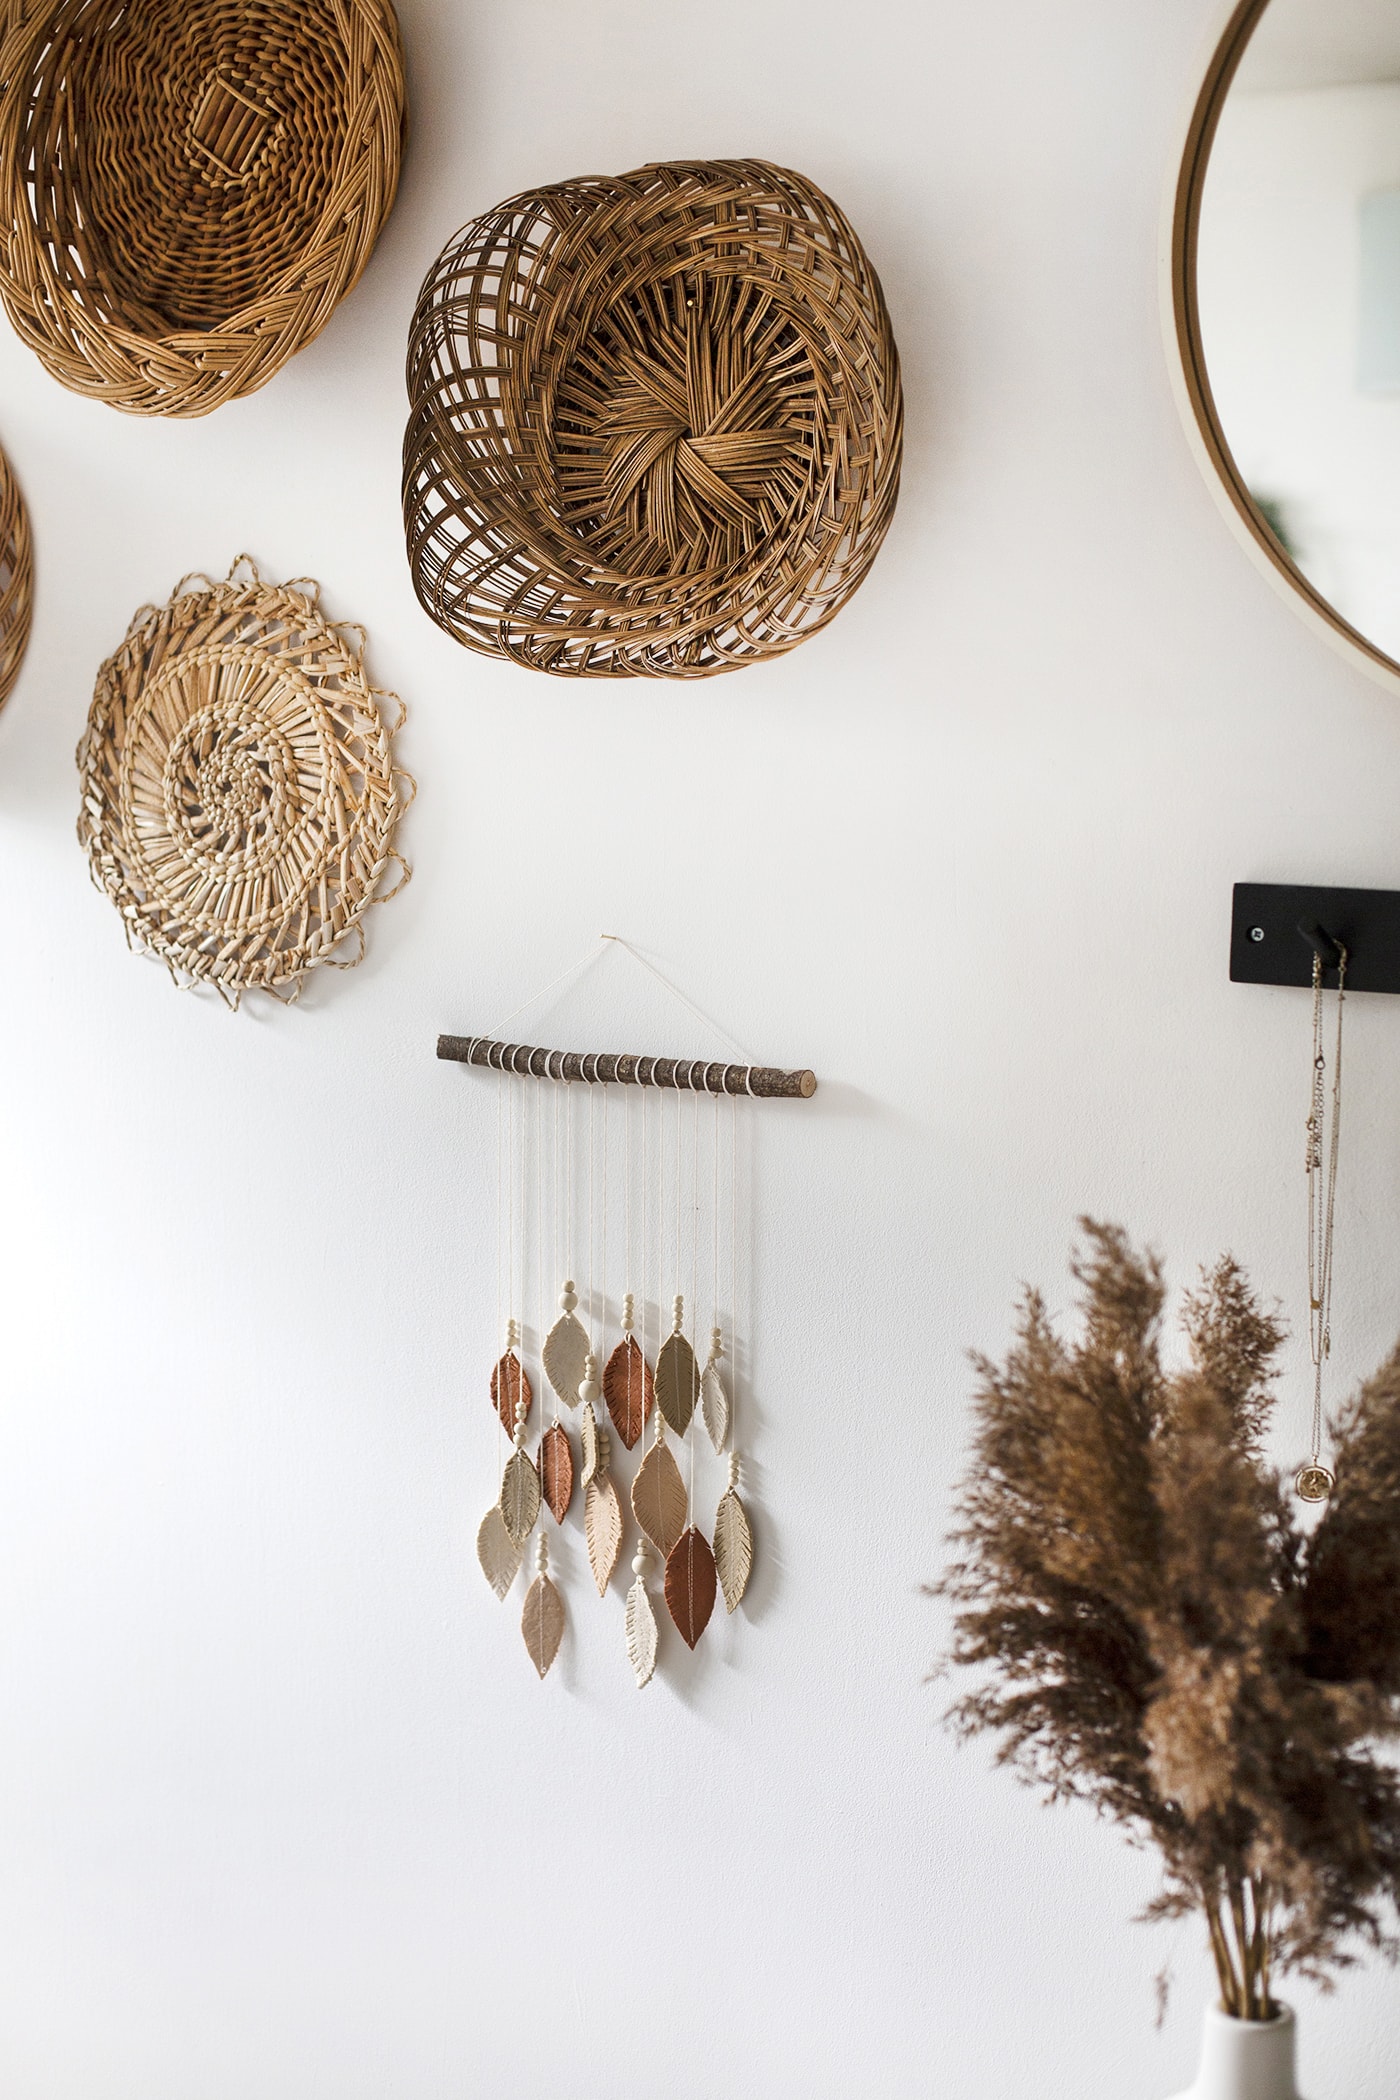
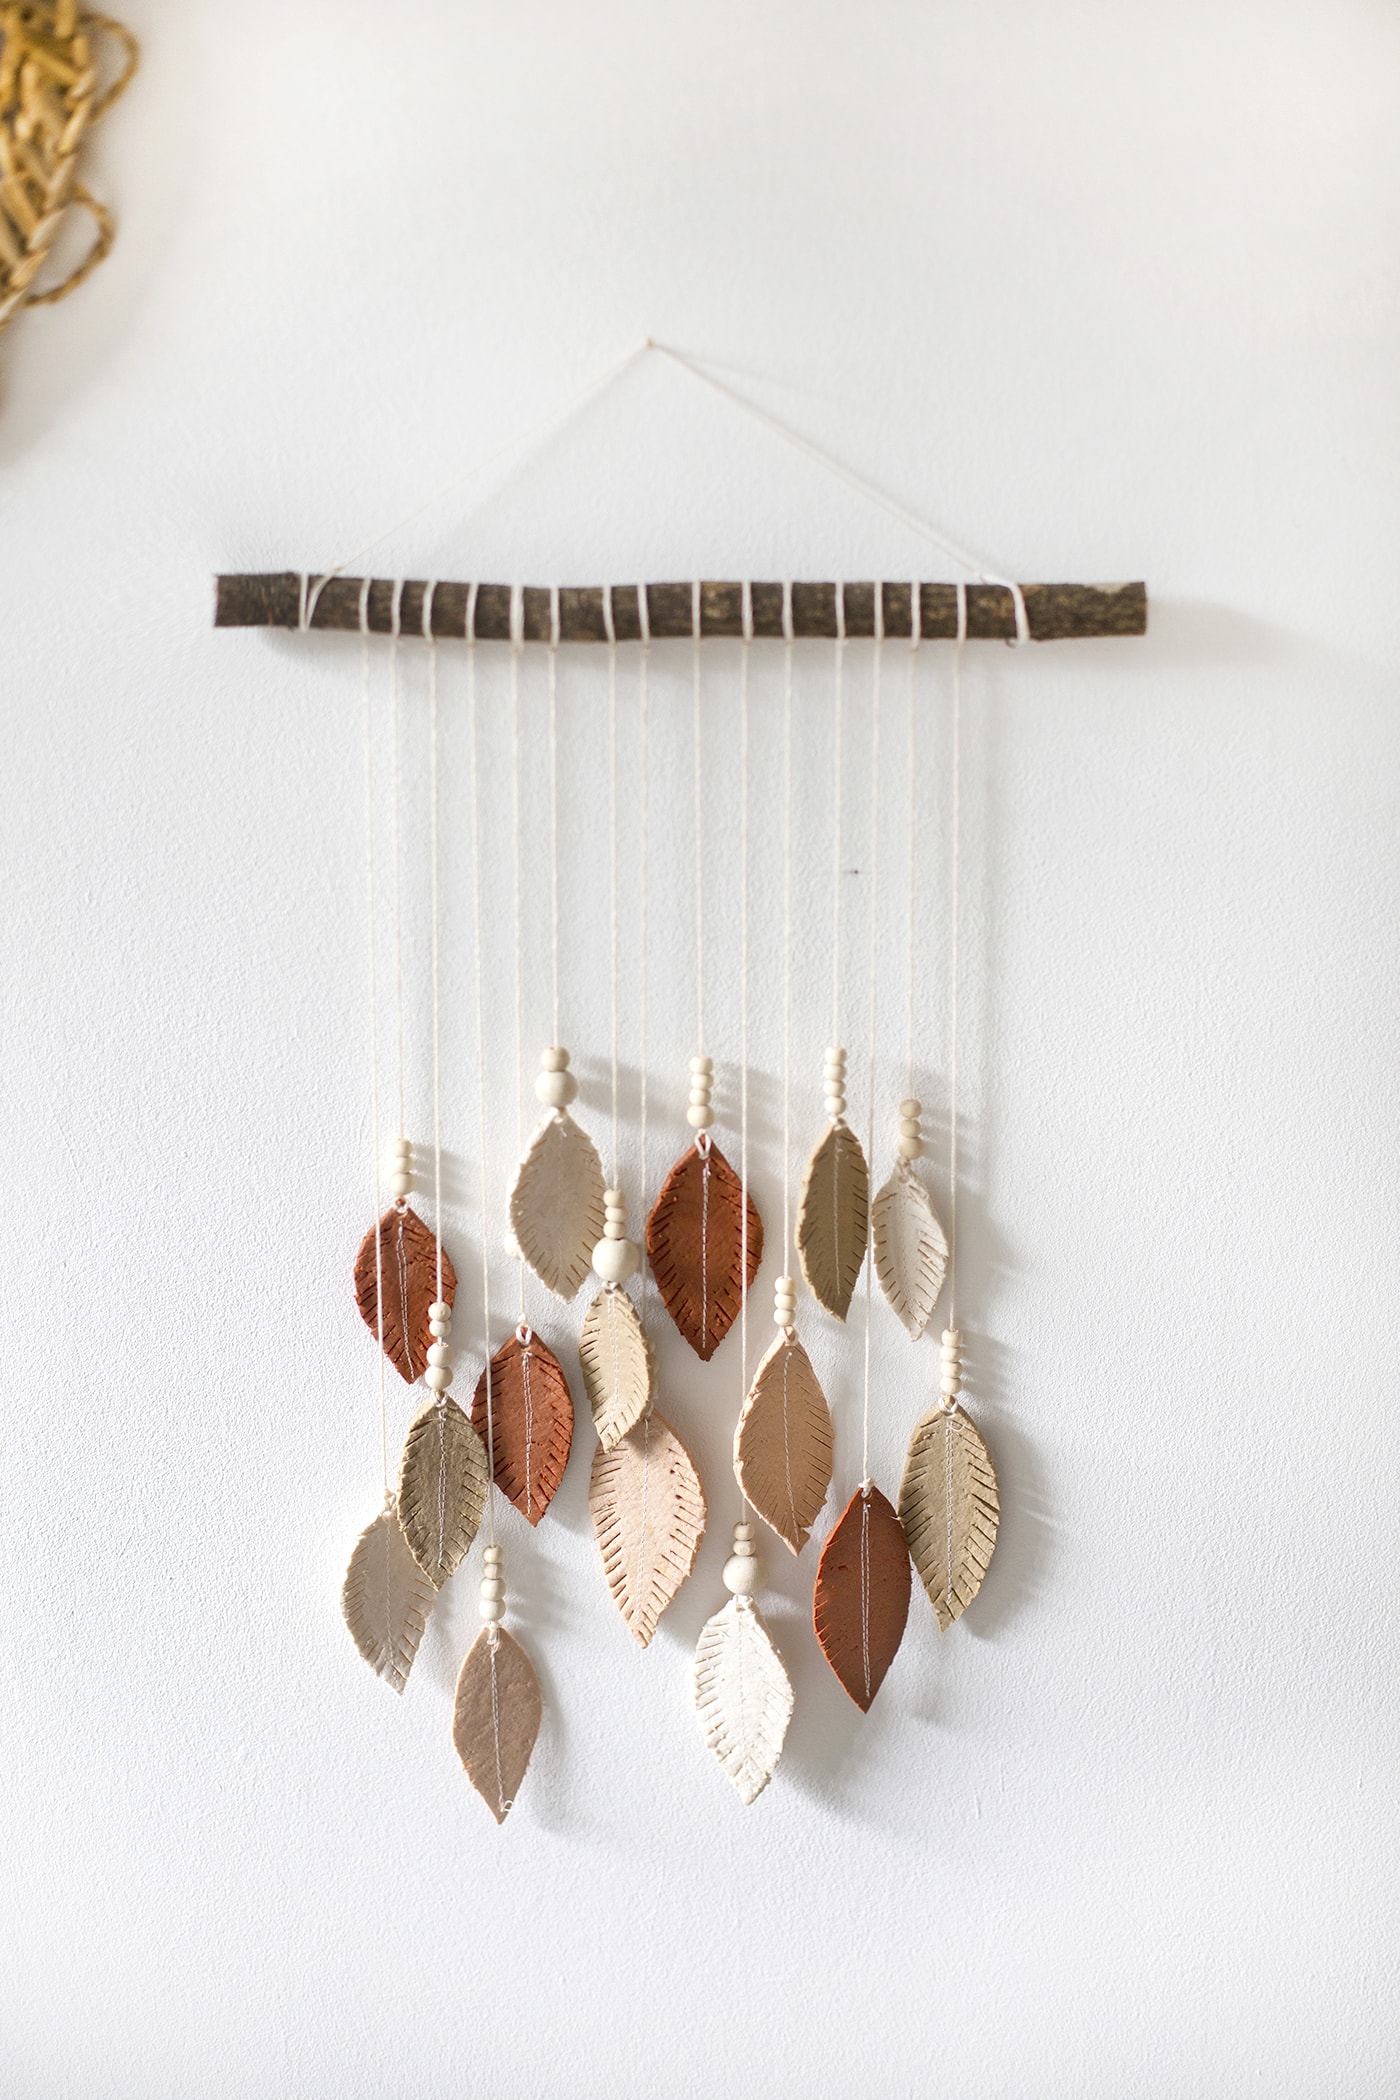
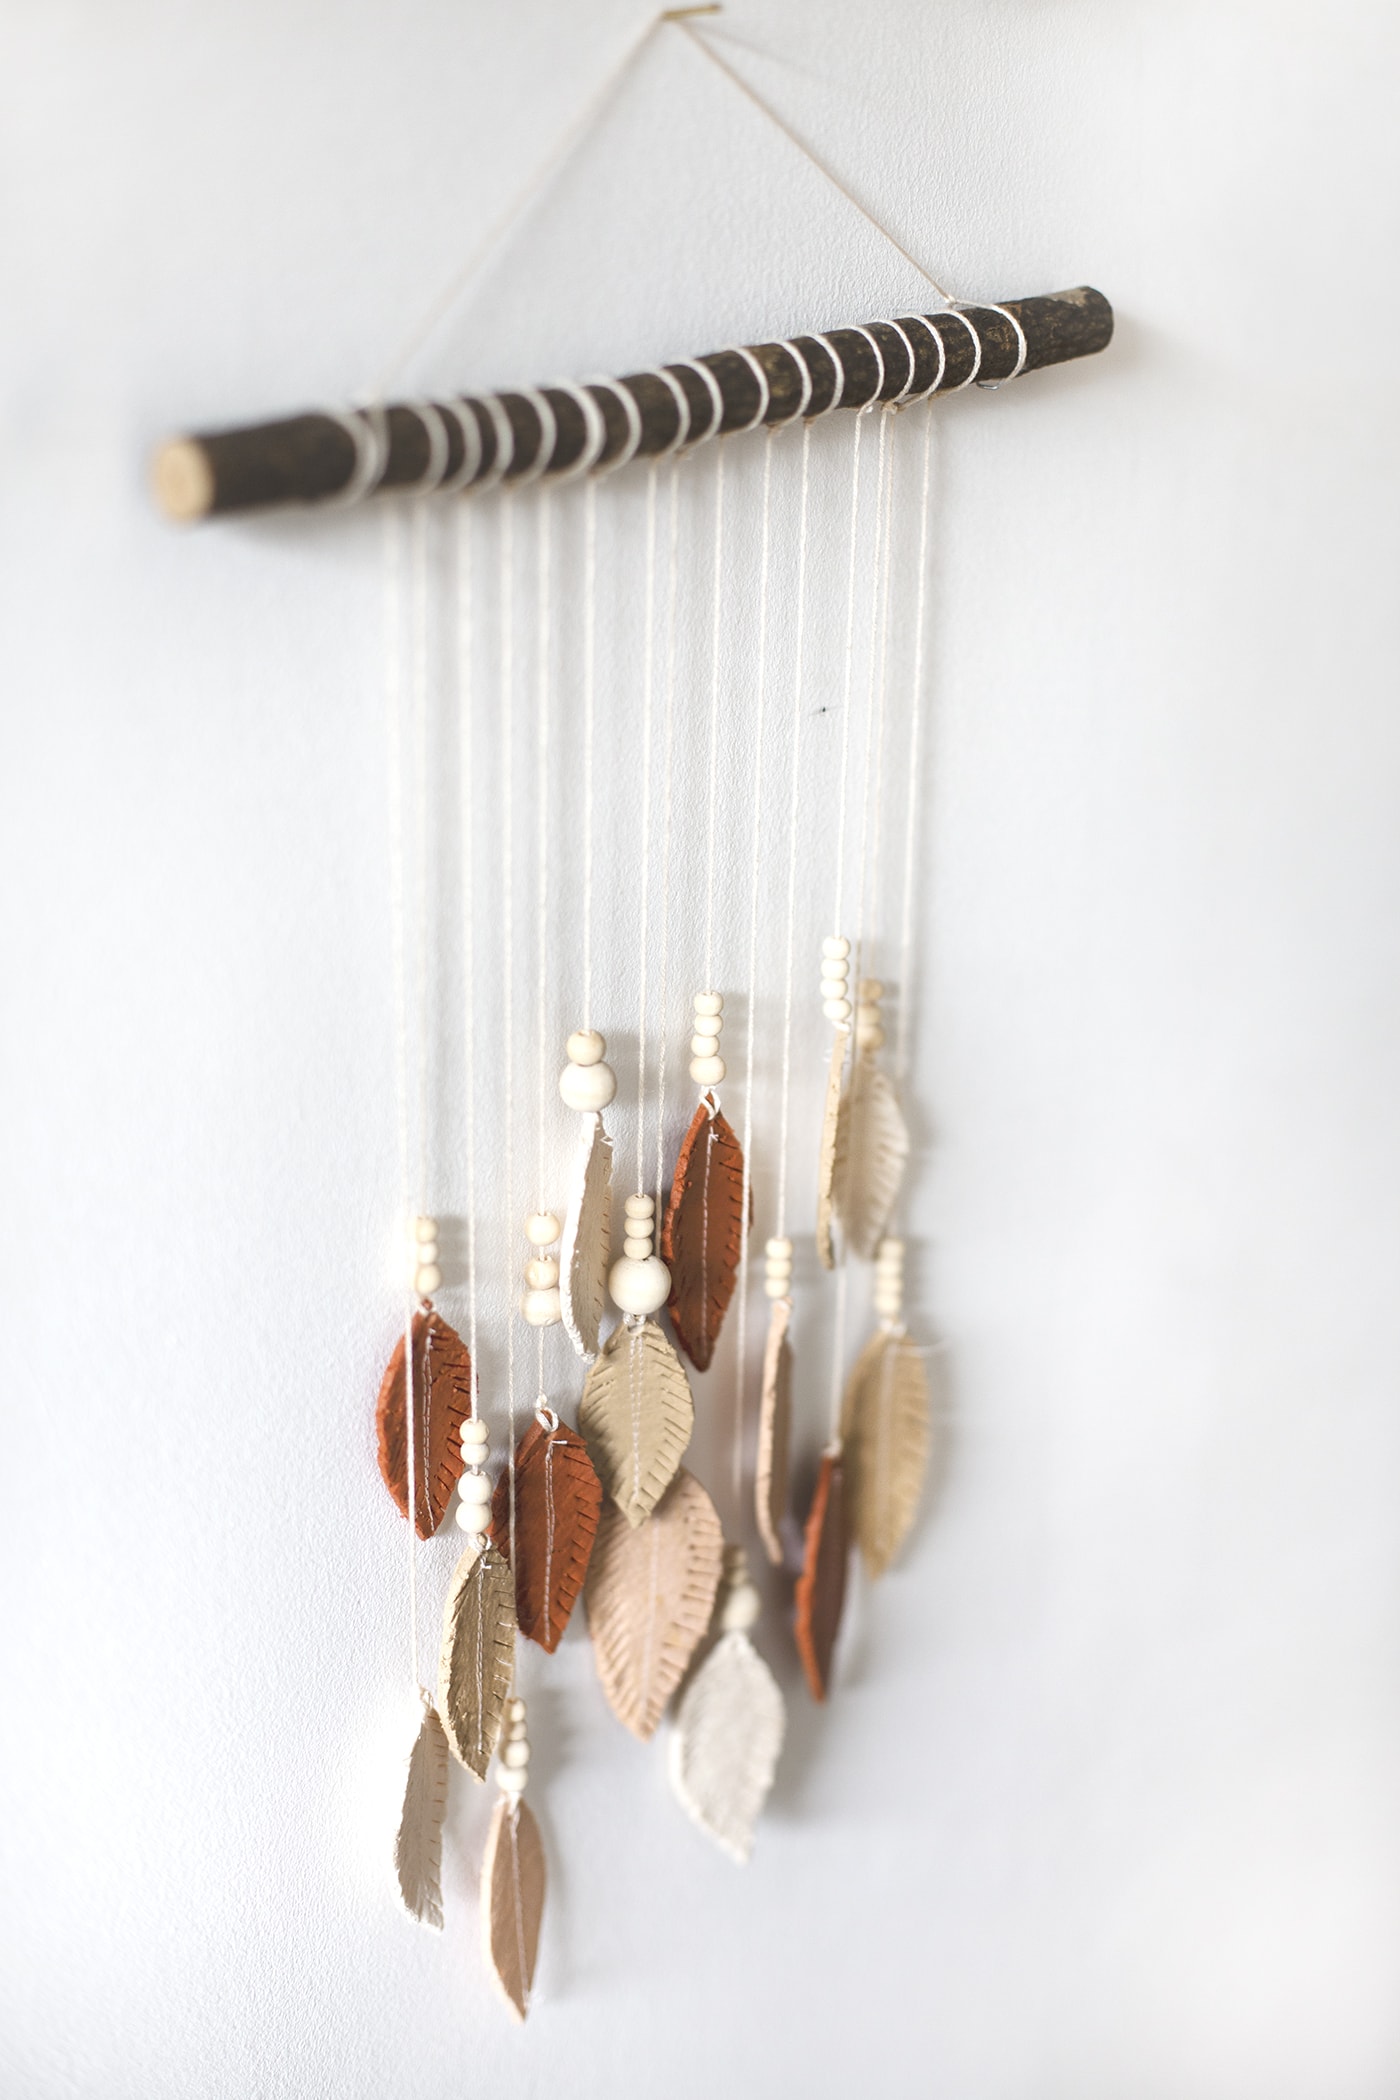
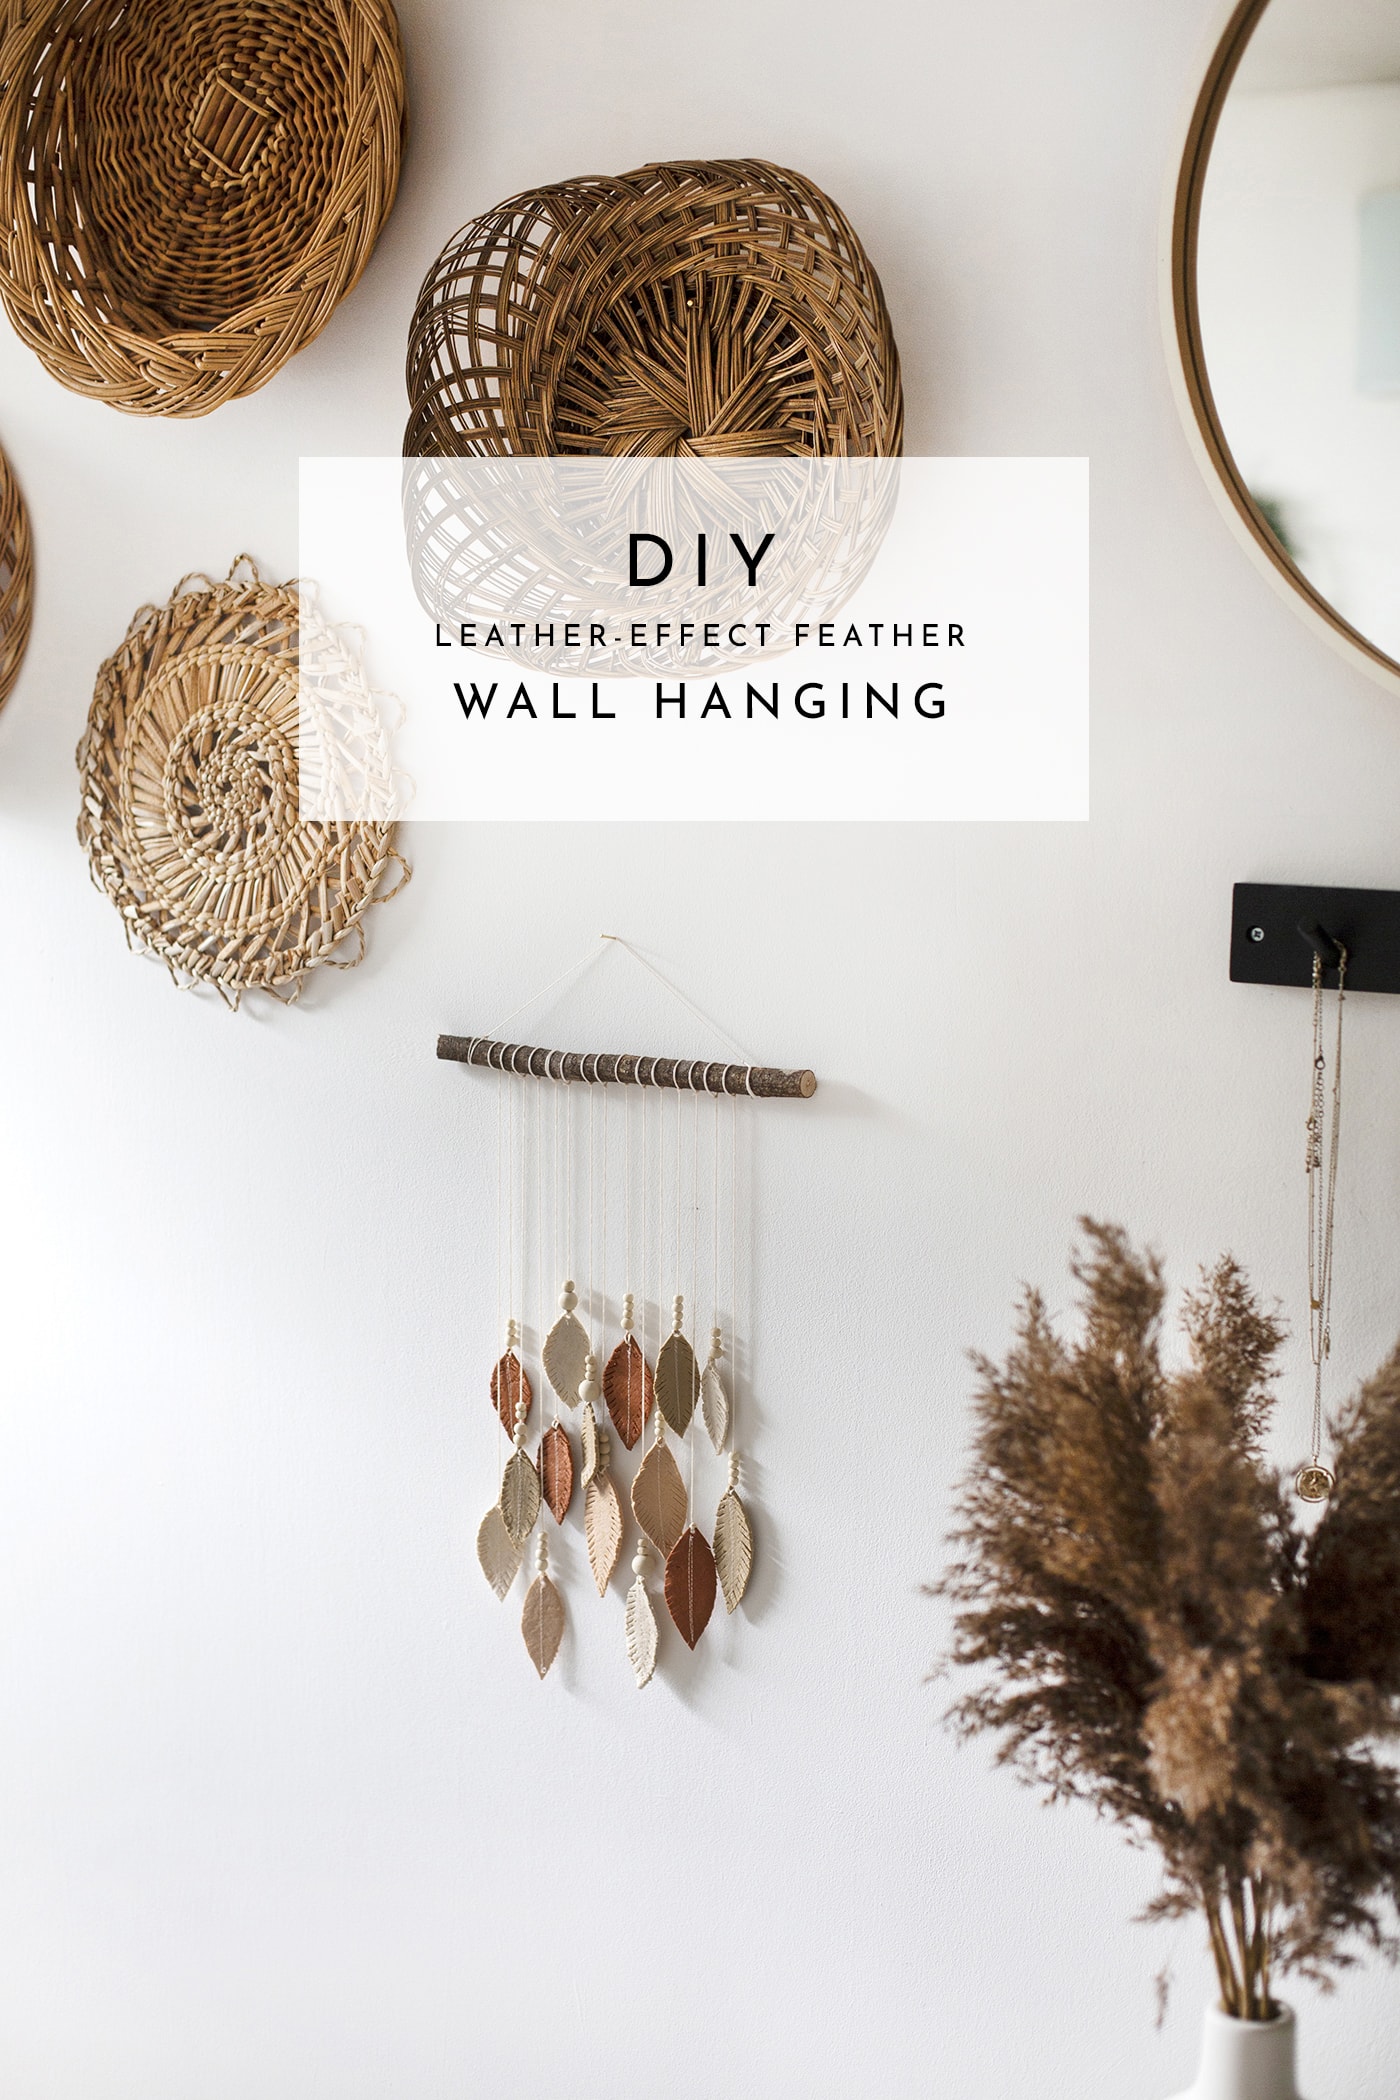
I’ve come up with a little project to inspire you to get making and that’s this DIY feather wall hanging. I love finding new ways to decorate our walls and this is such a simple but effective idea that could equally be used to make a baby mobile too.
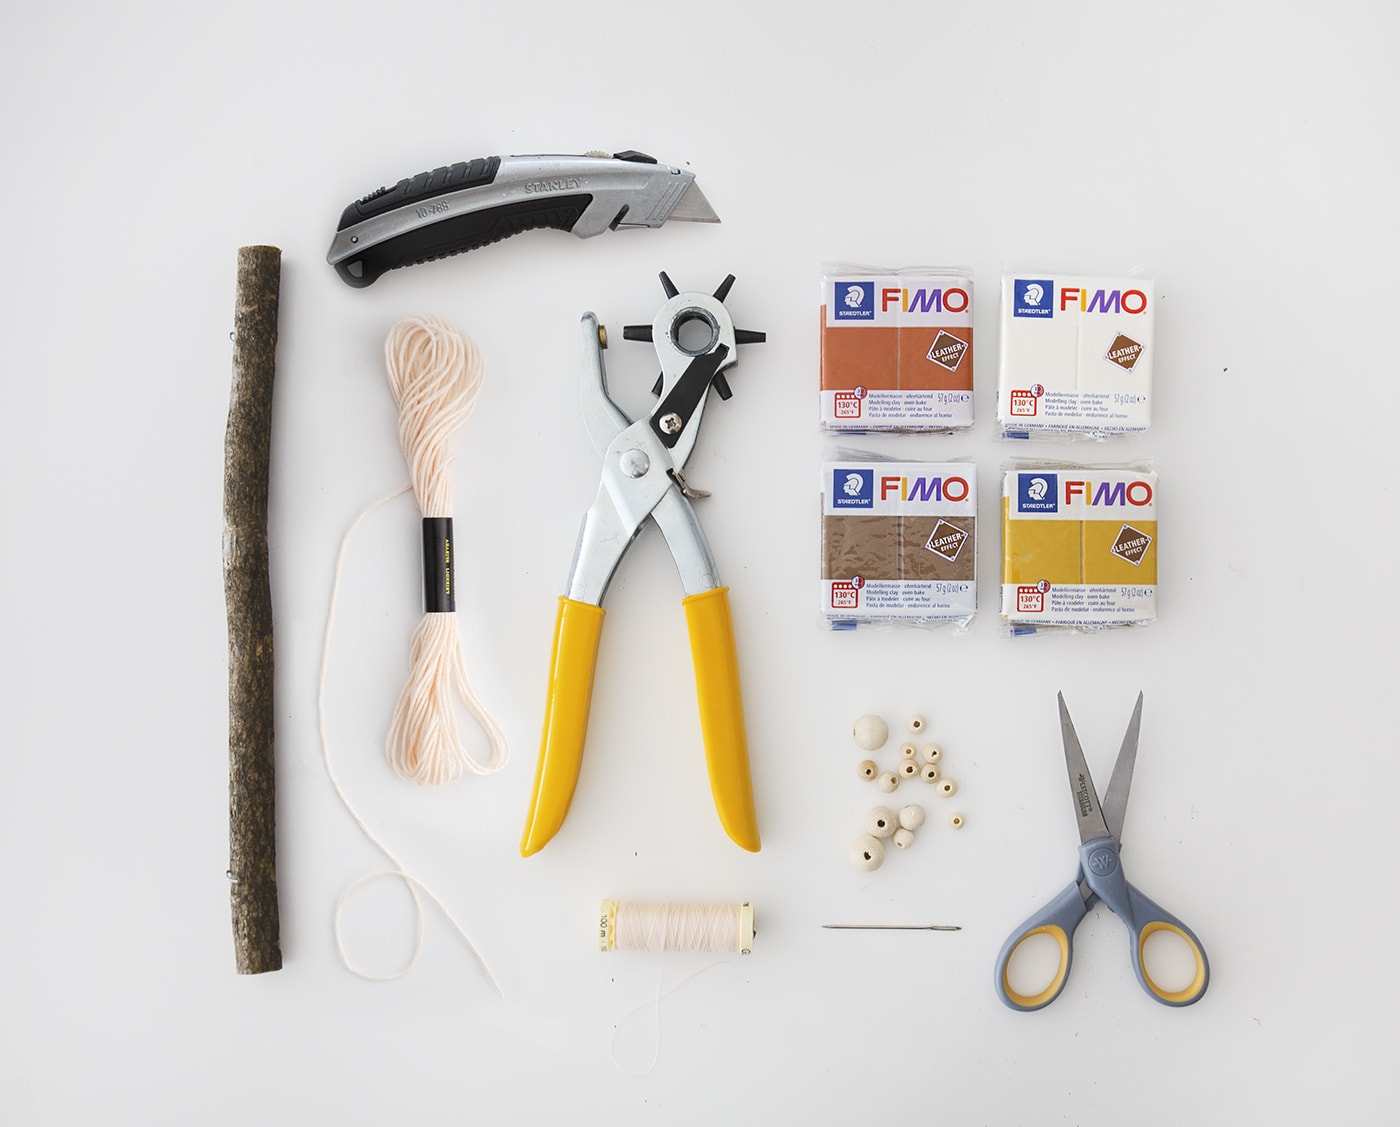
Materials
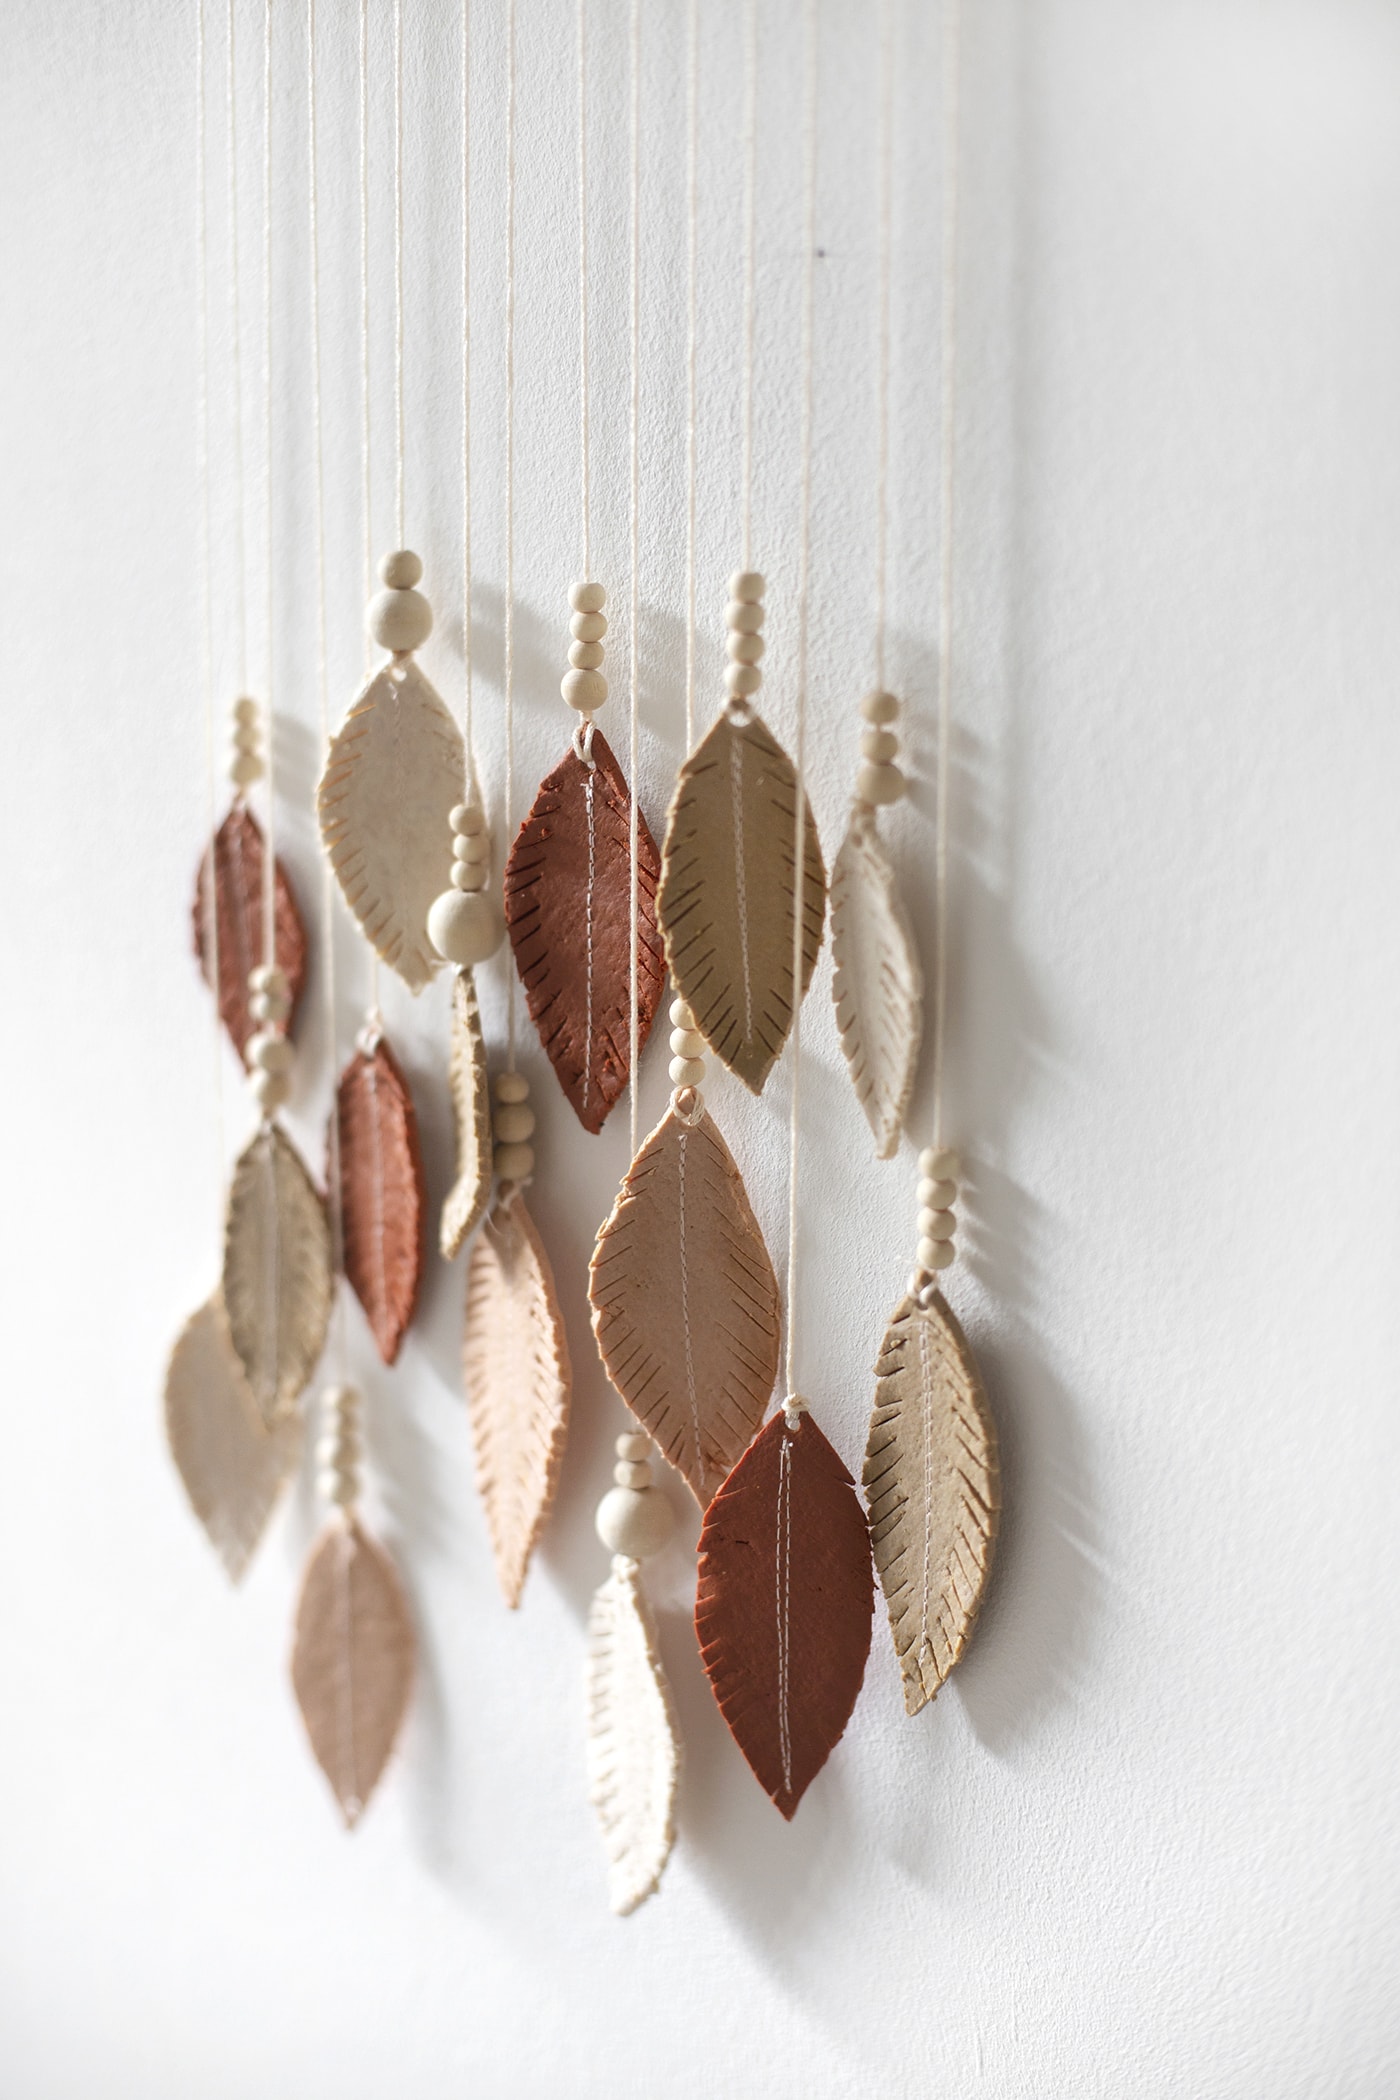
- in your desired colours (I used Rust, Ochre, Nut and Ivory)
- Stick
- Craft knife
- Leather punch
- Embroidery thread
- Sewing machine
- Machine thread
- Hand embroidery needle
- Round wooden beads in an assortment of colours
- Scissors
- Cutting mat
- Lined tray
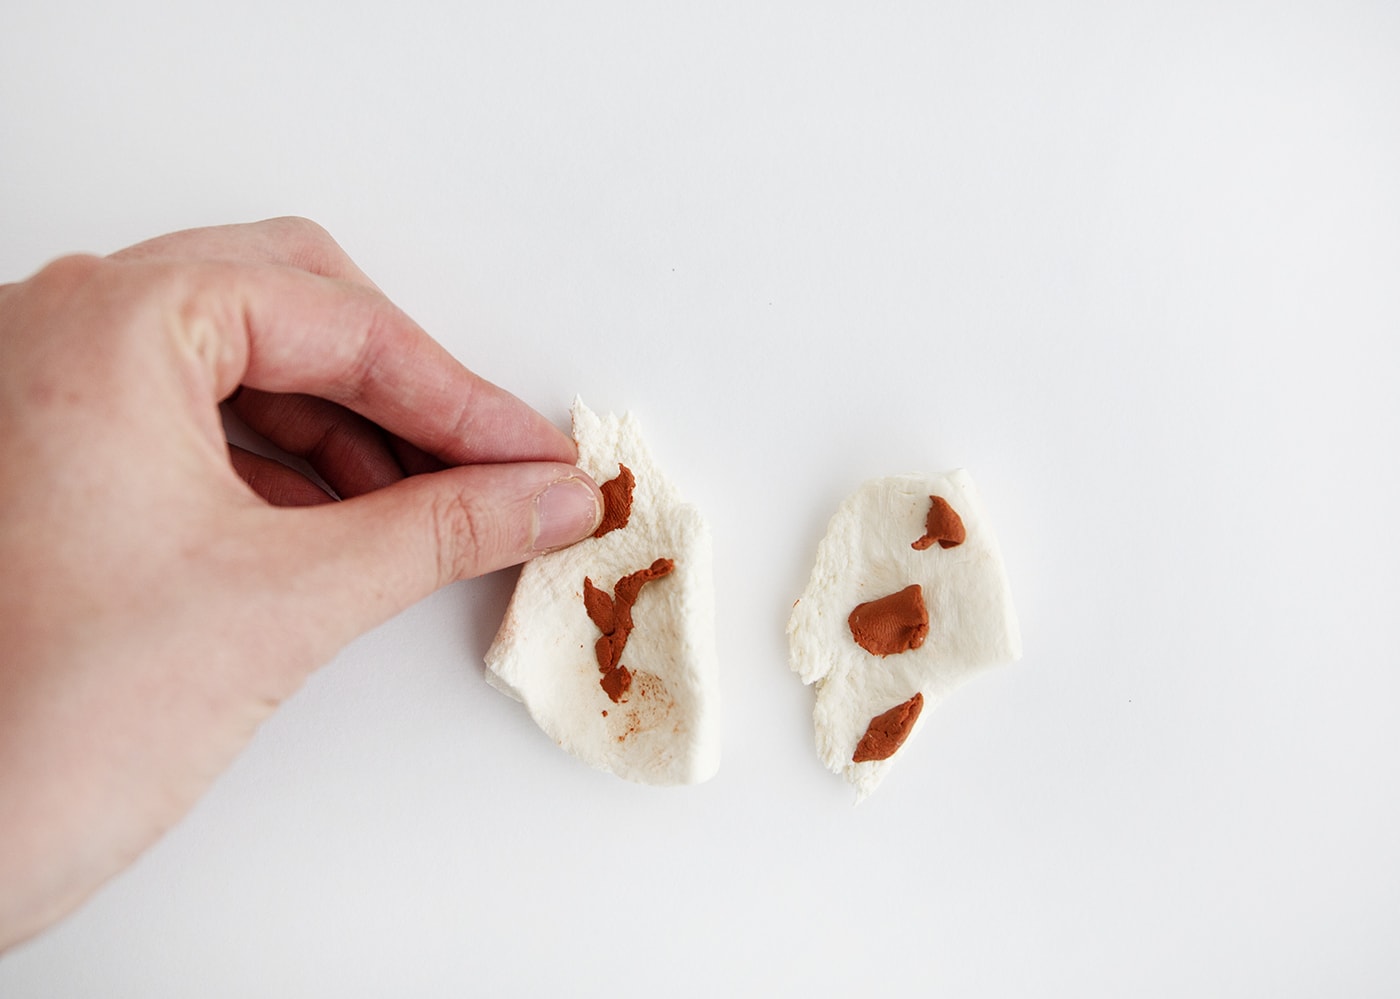
Begin by mixing the colours you want but adding flecks of one fimo colour to another.
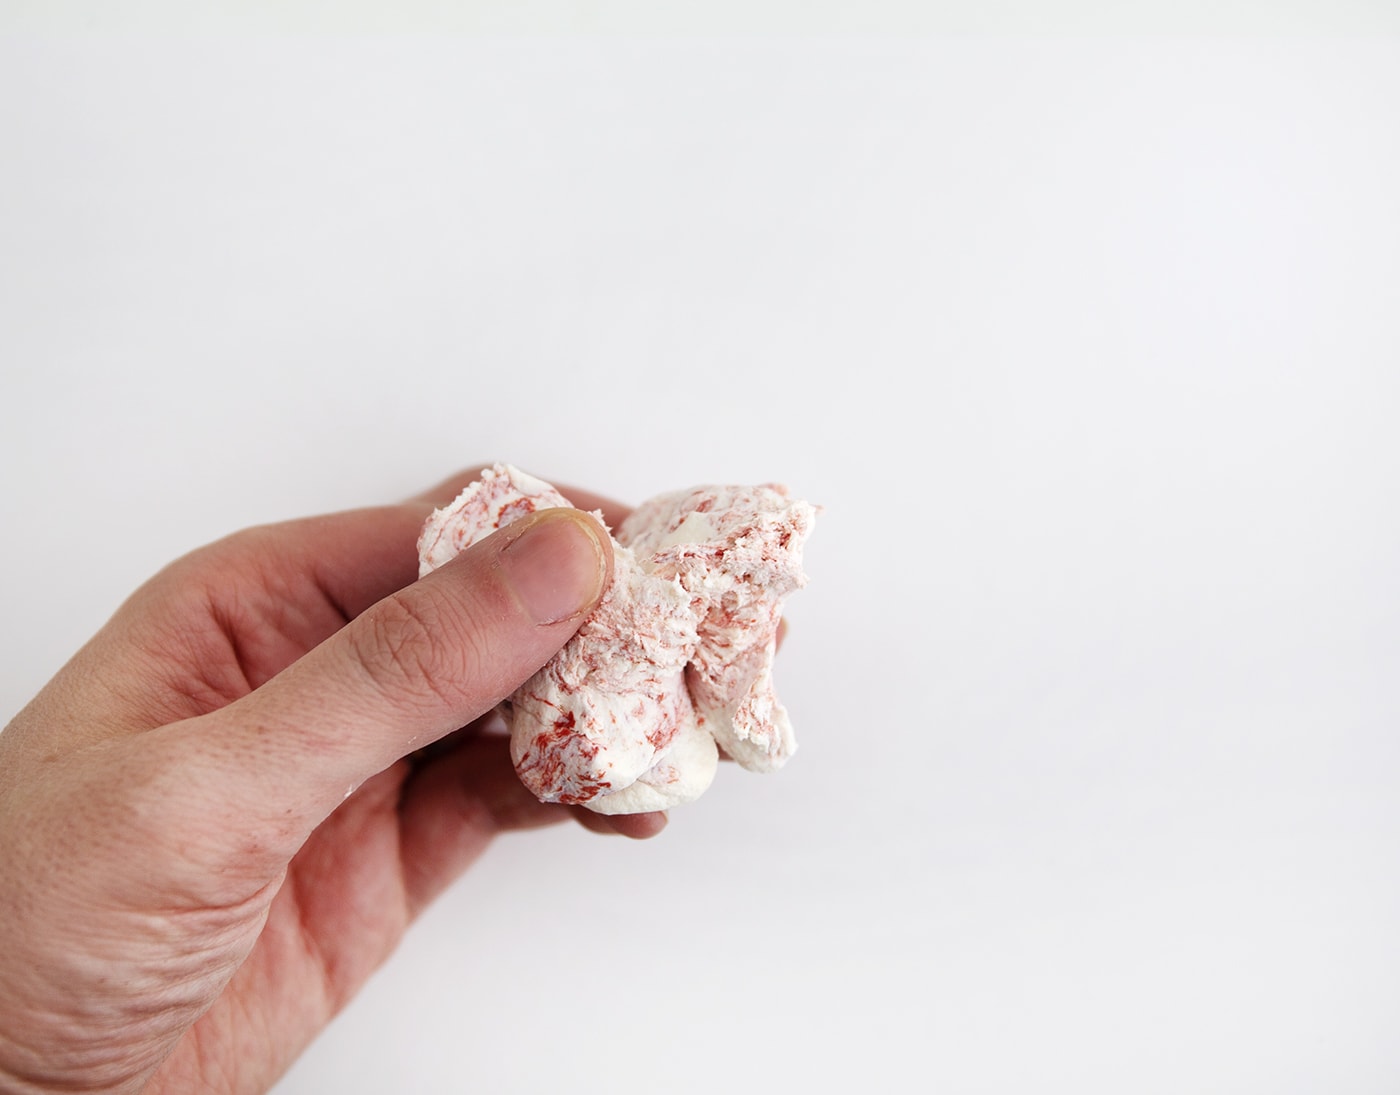
Pull apart and keep kneading with your hands to work the colours together.
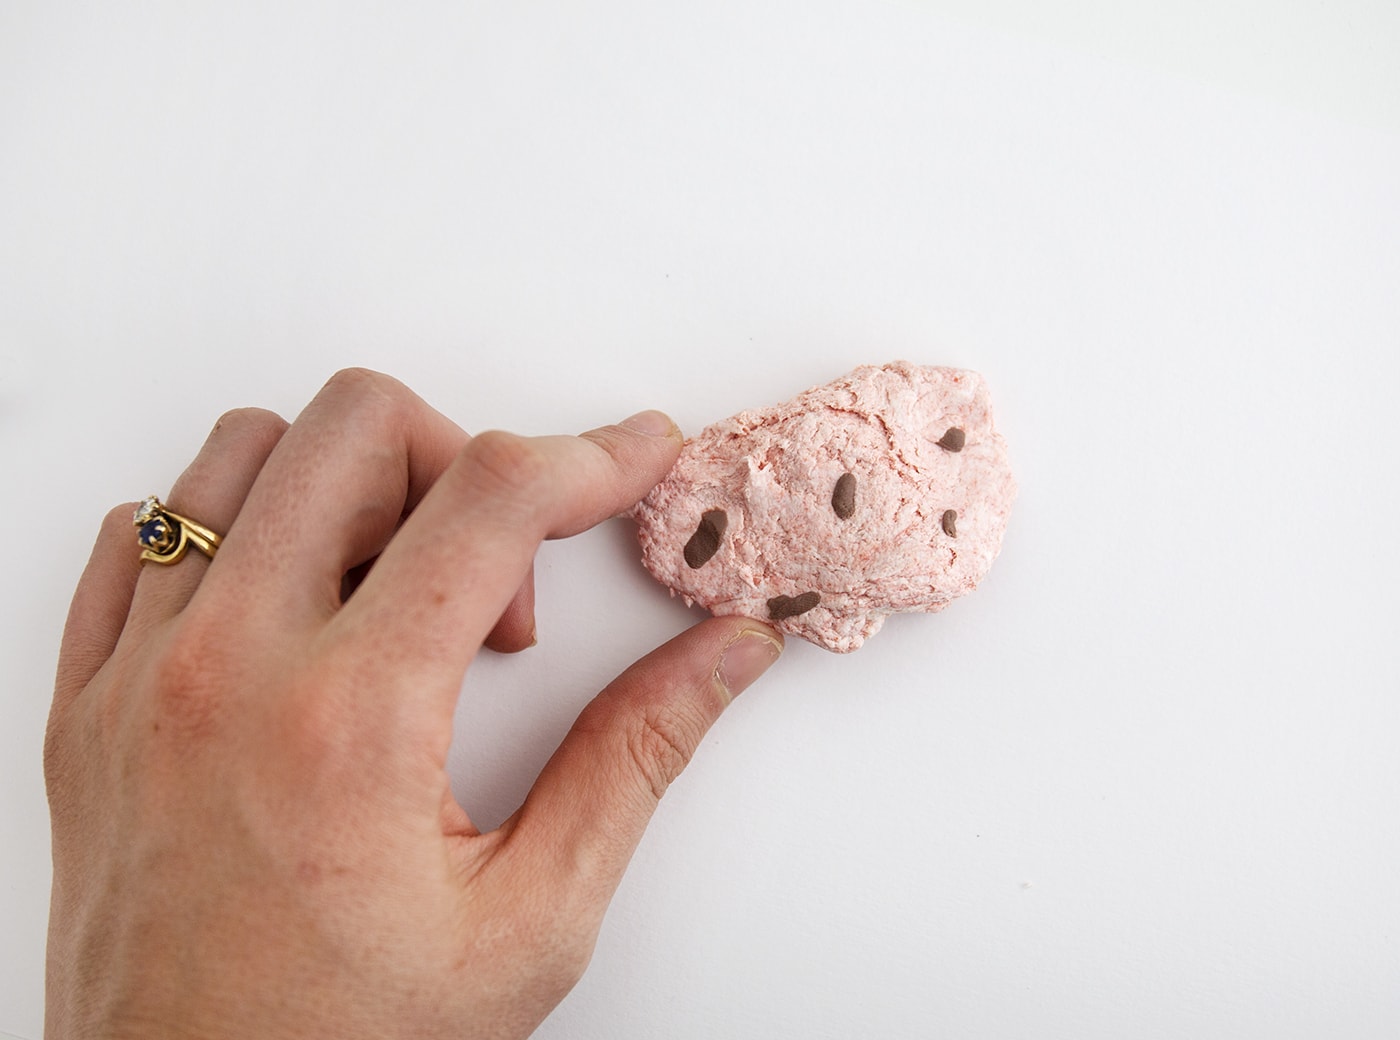
Continue this process adding colours to transform the clay into the exact colour you’d like. Here I wanted a more muted peach so I added ‘nut’ to dull it slightly.
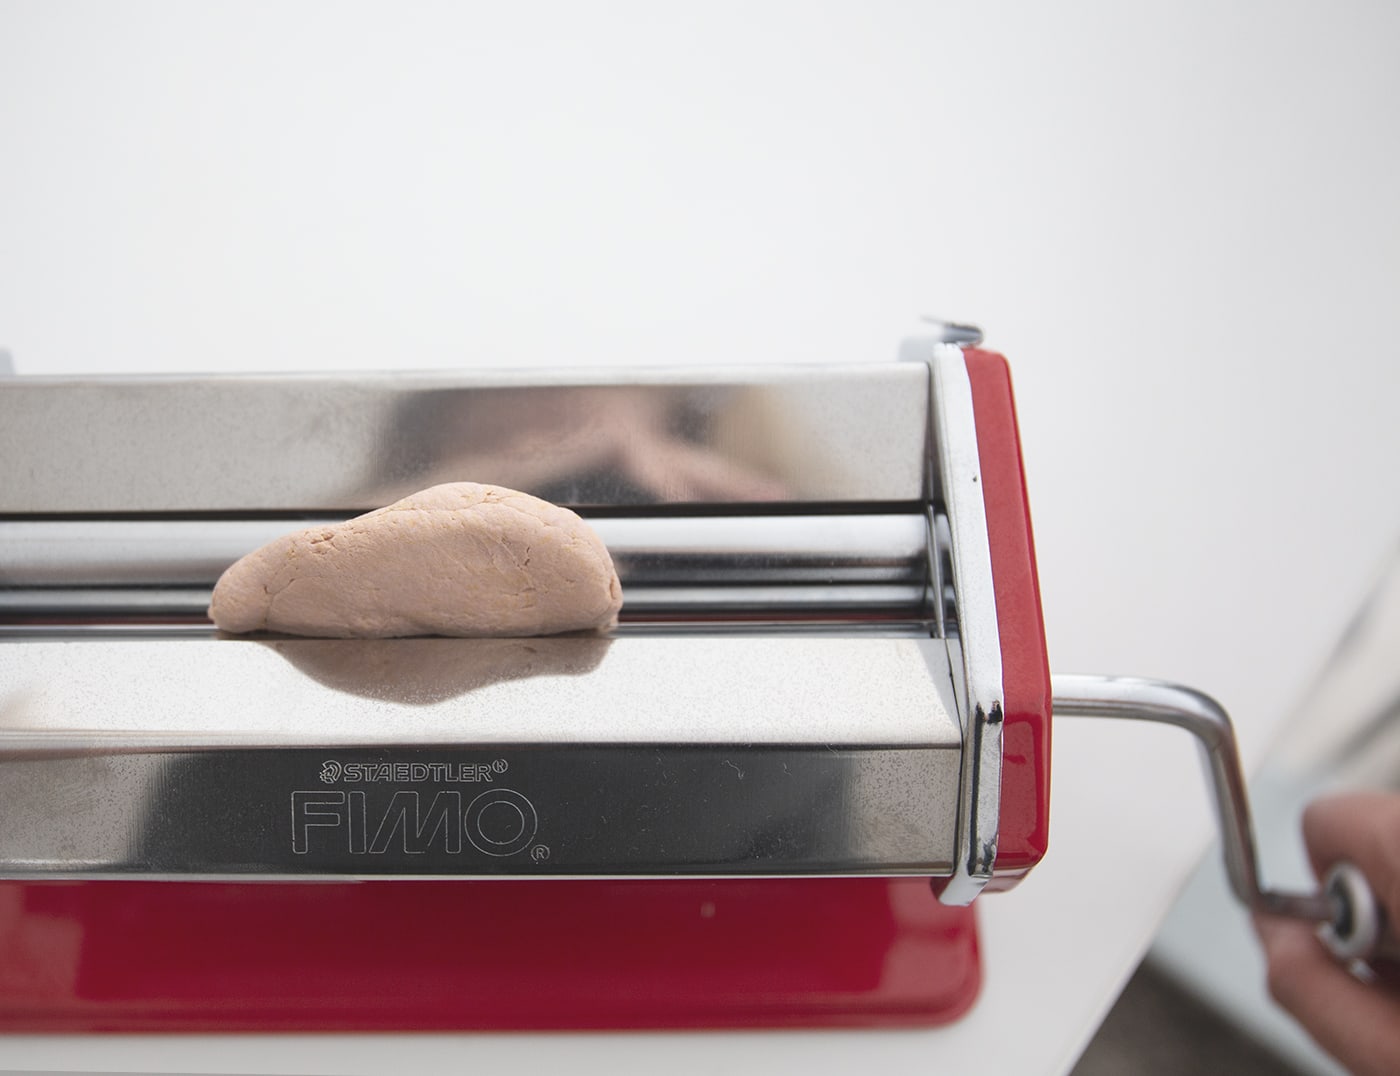
Once mixed, roll through the clay machine to flatten to an even surface.
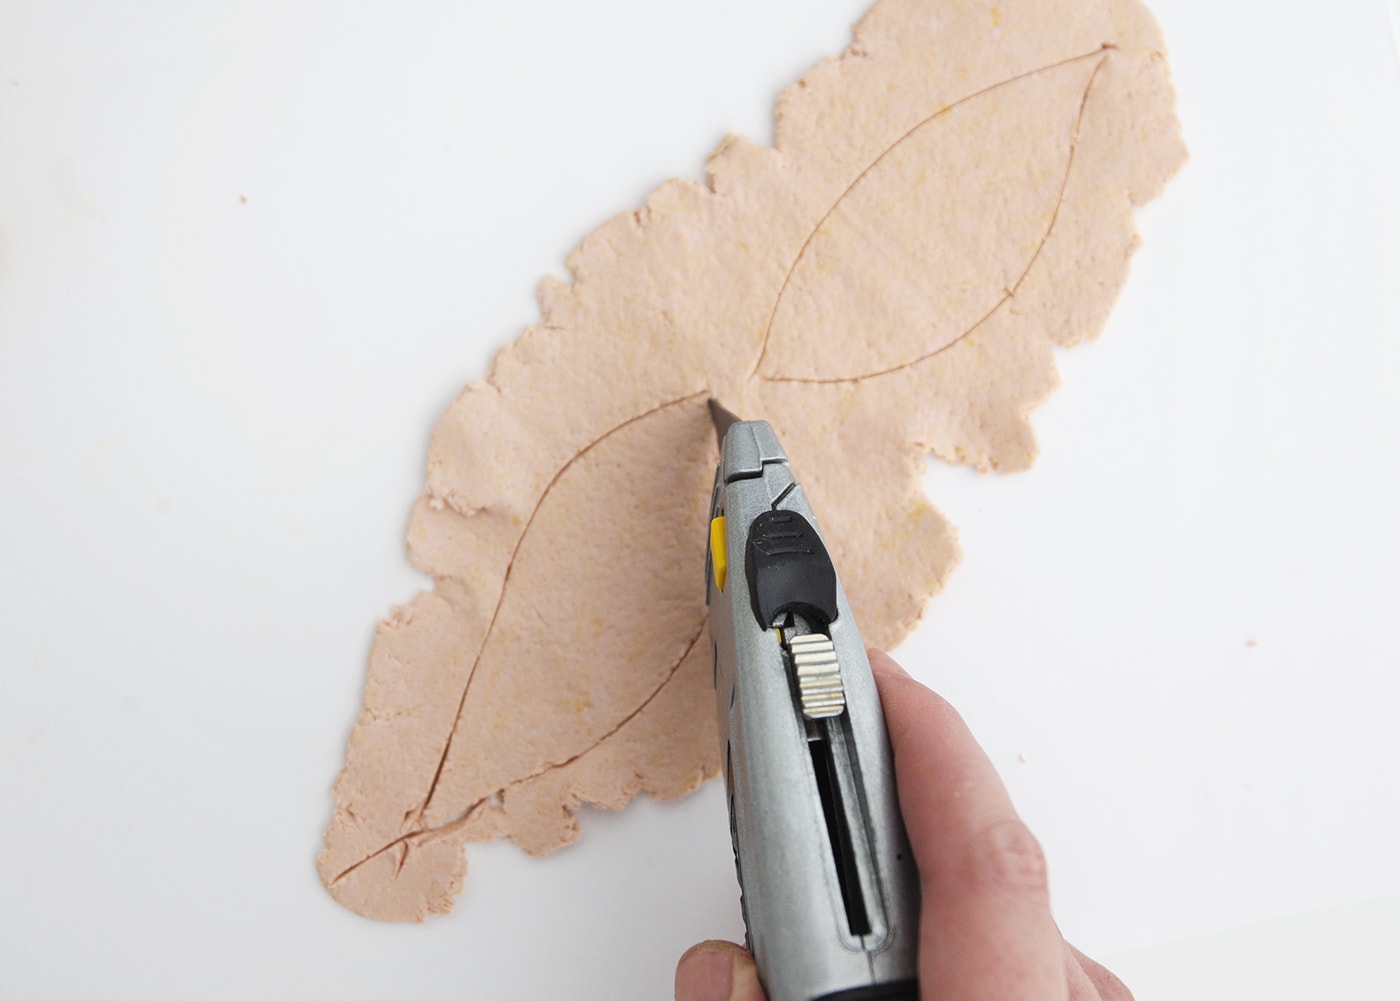
Once flat, cut out the feather shapes with the craft knife. They don’t need to be exactly the same shape or size, in fact I think it’s nicer to have some variation.
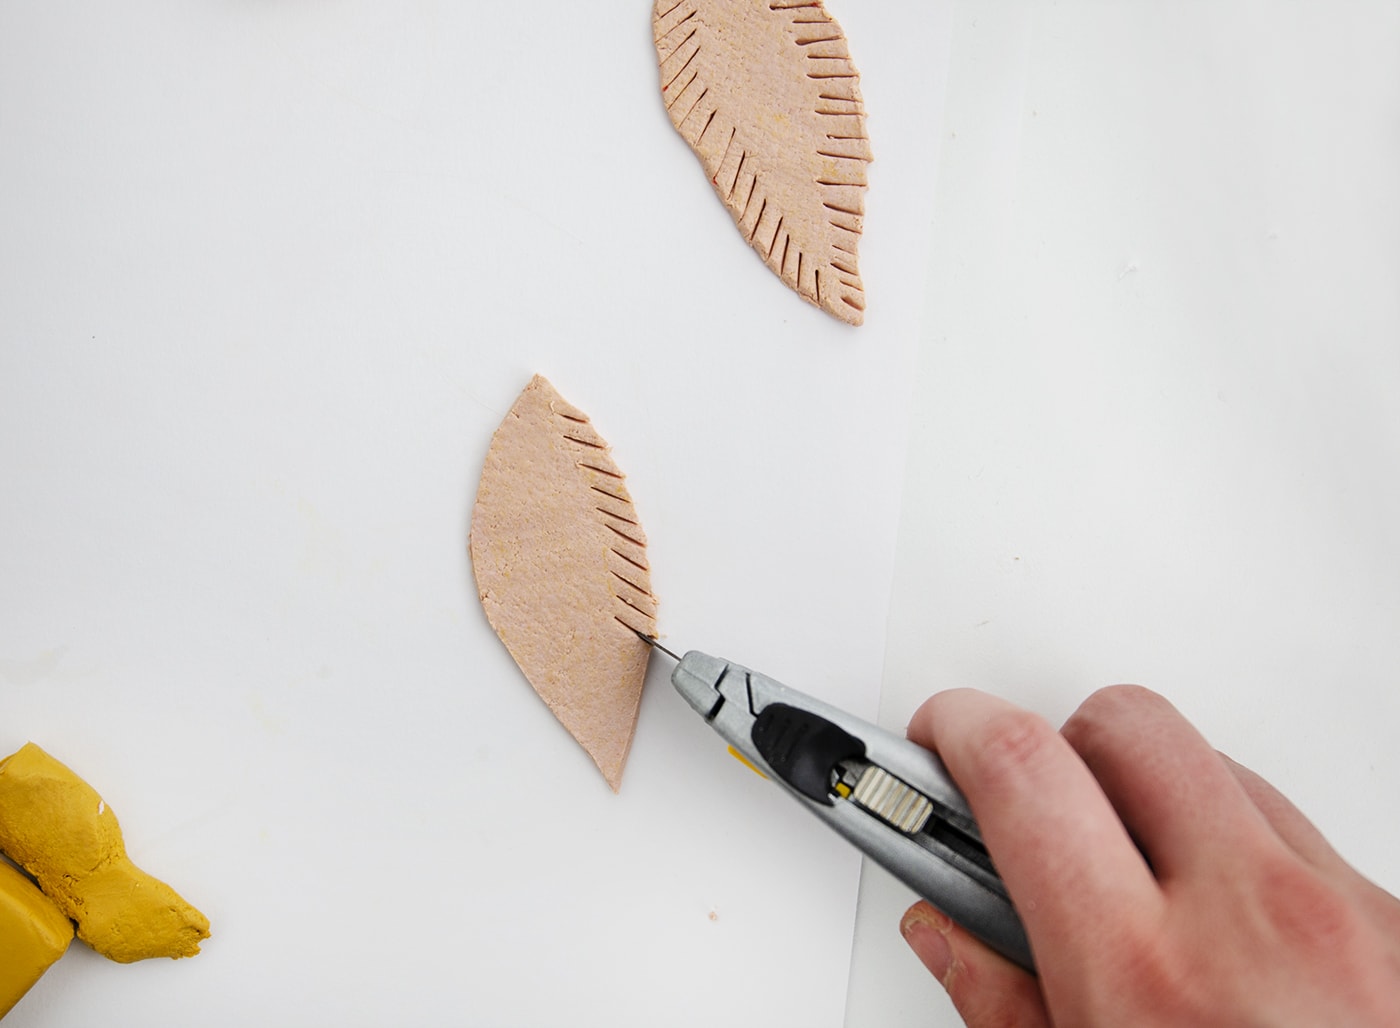
Then used the craft knife to cut into the sides of the shape to create a feather effect.
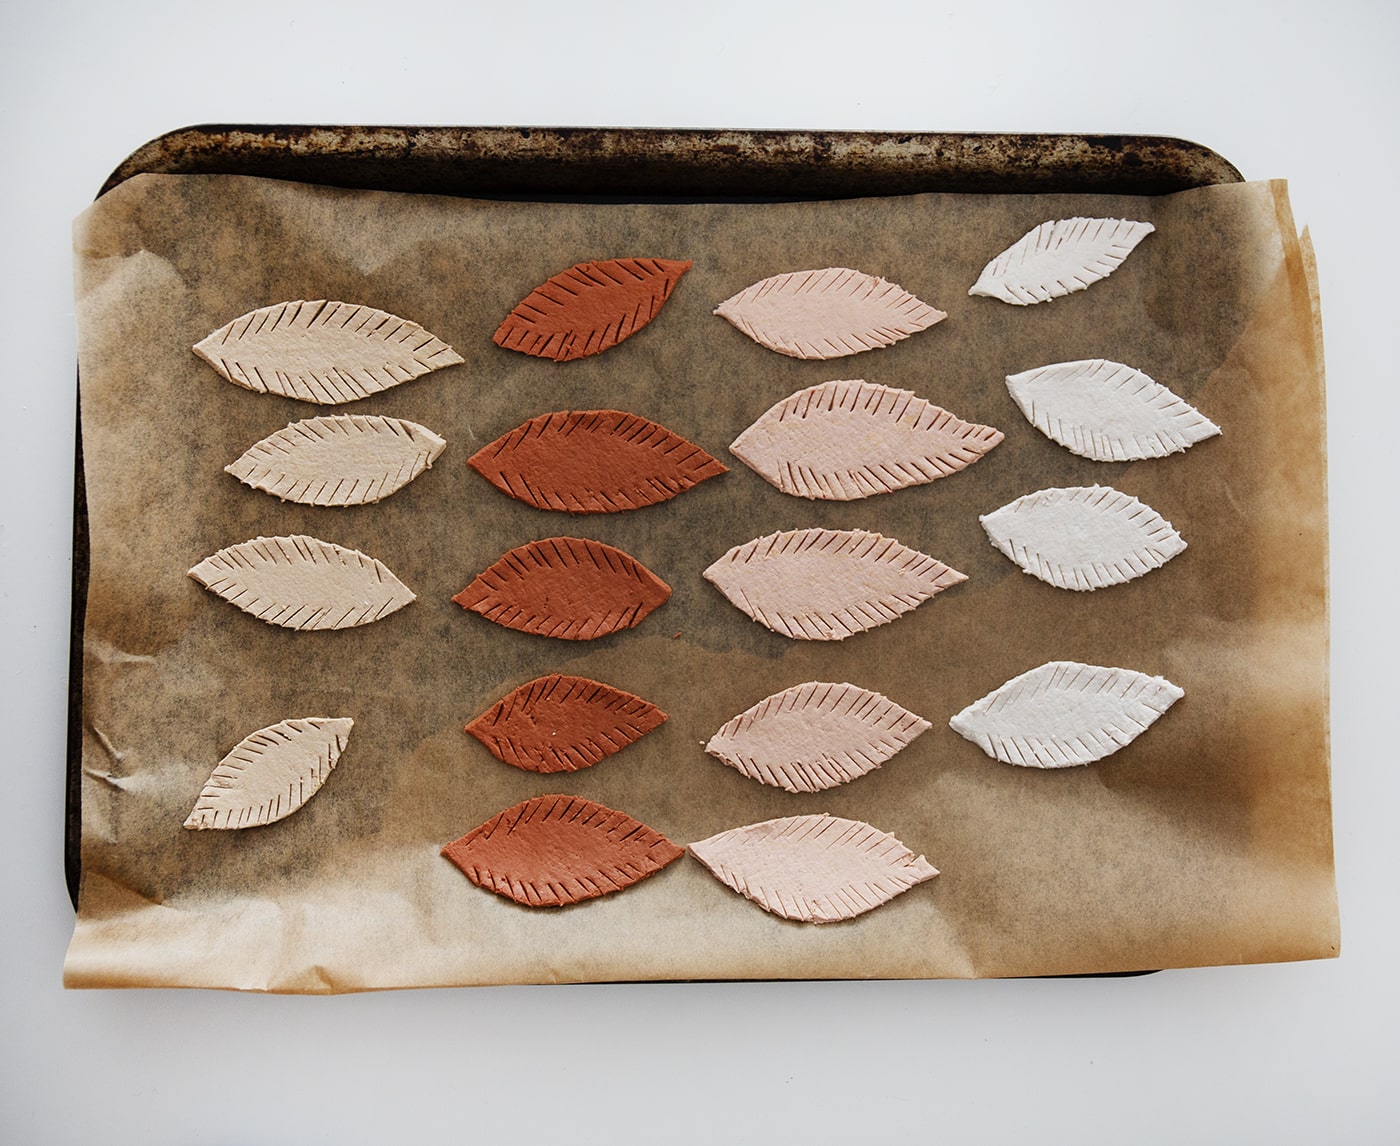
Line all the feathers out on a lined tray and leave to harden in a 130C preheated oven for 30 minutes and then leave to cool.
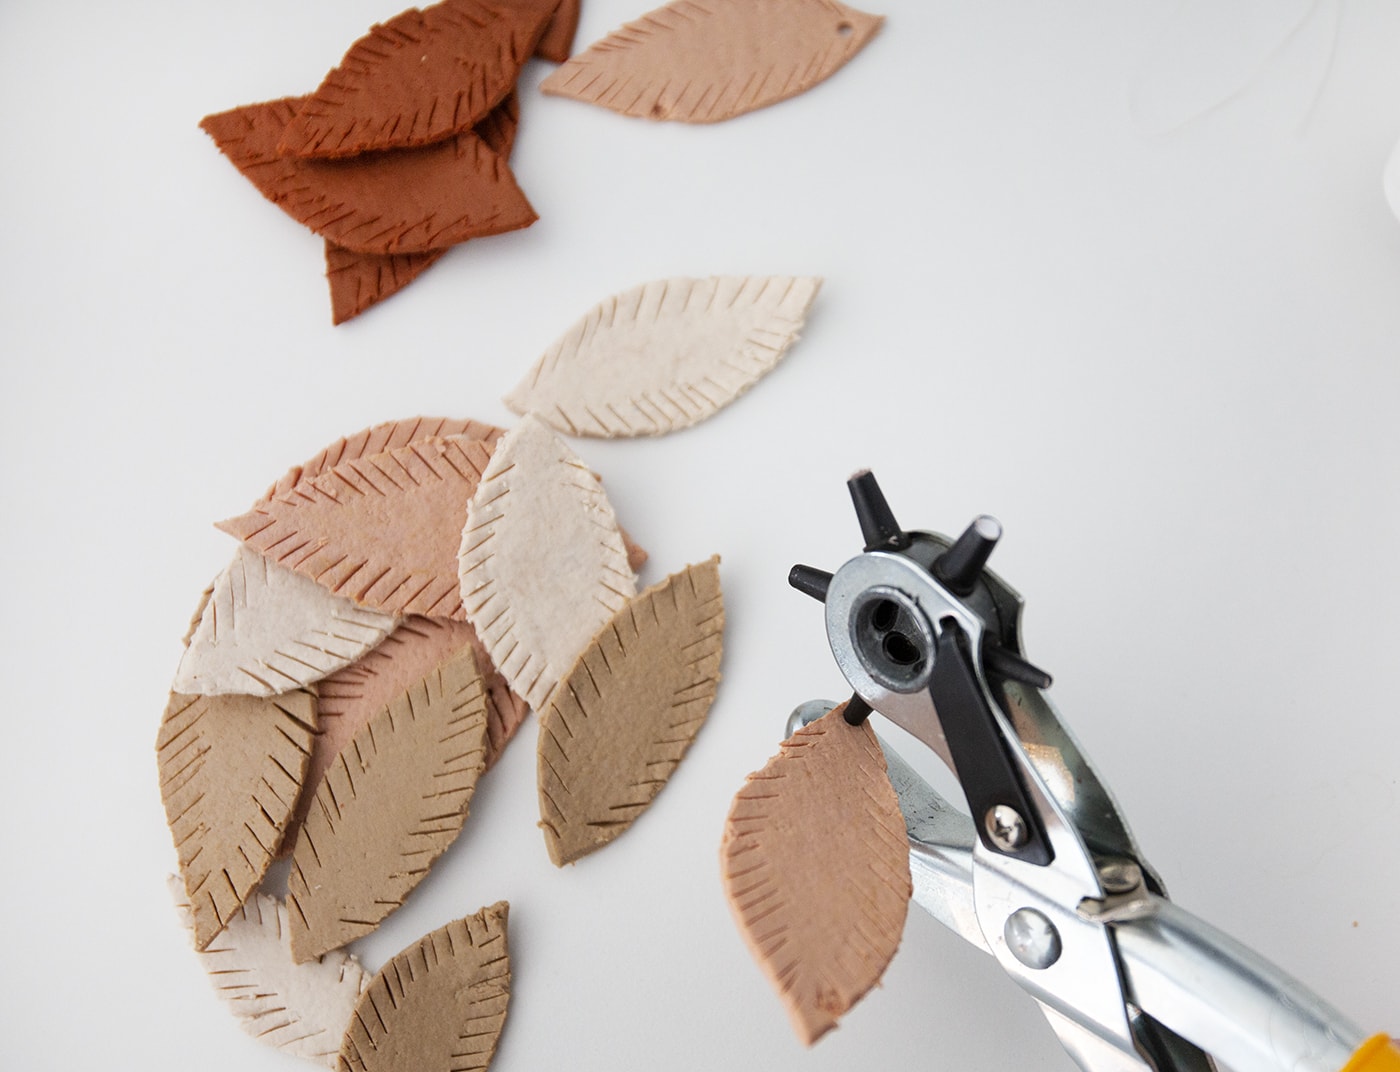
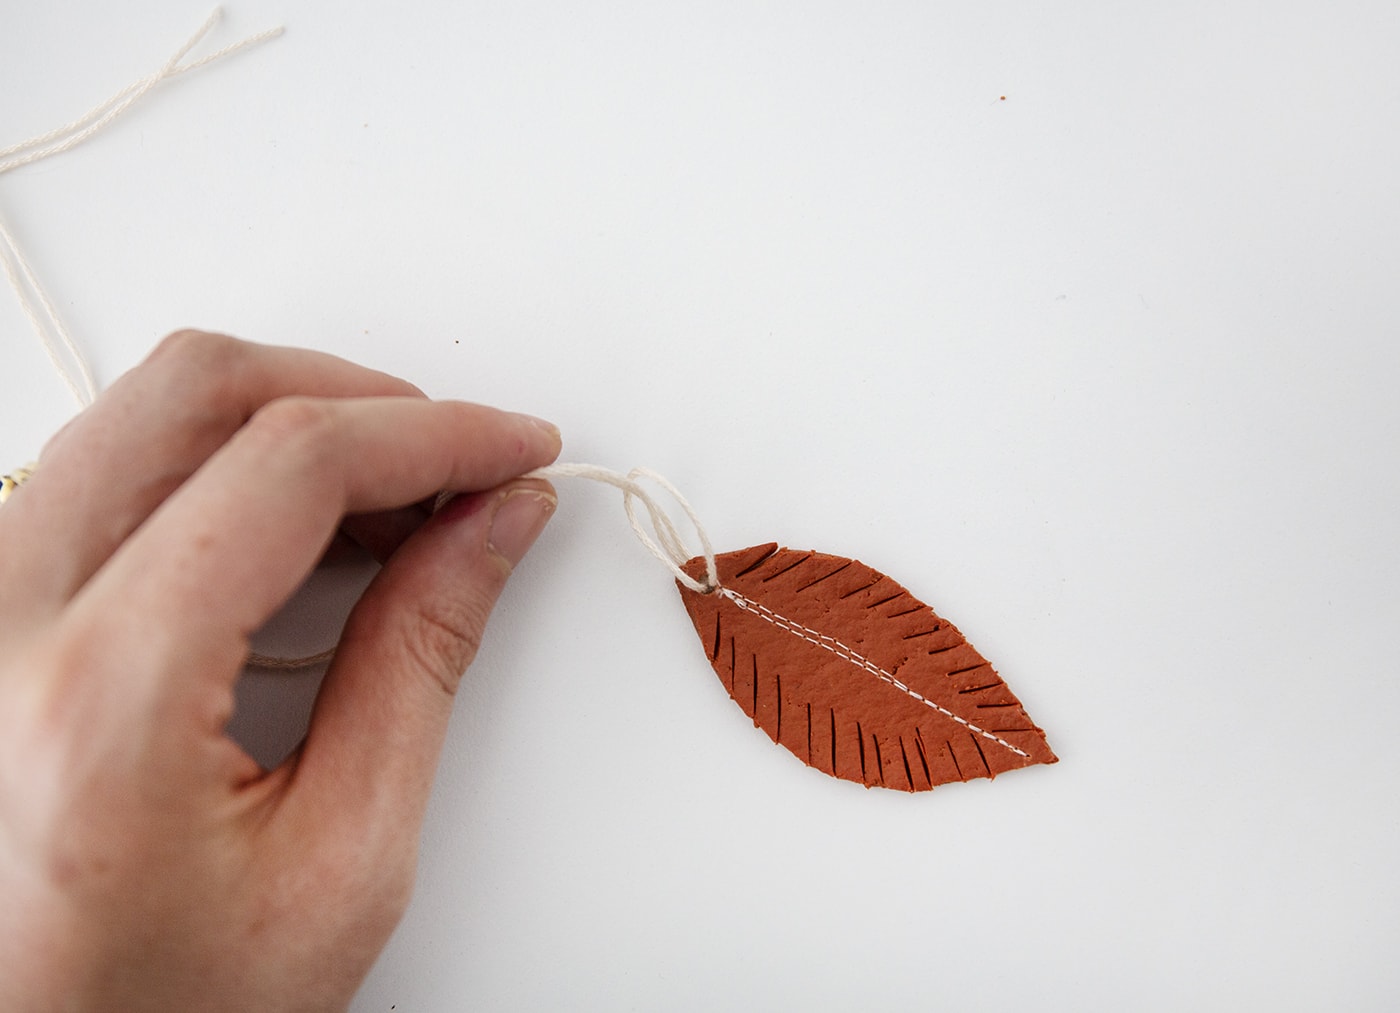
Use the leather punch on a suitable sized setting to create holes in the tops of the feathers.
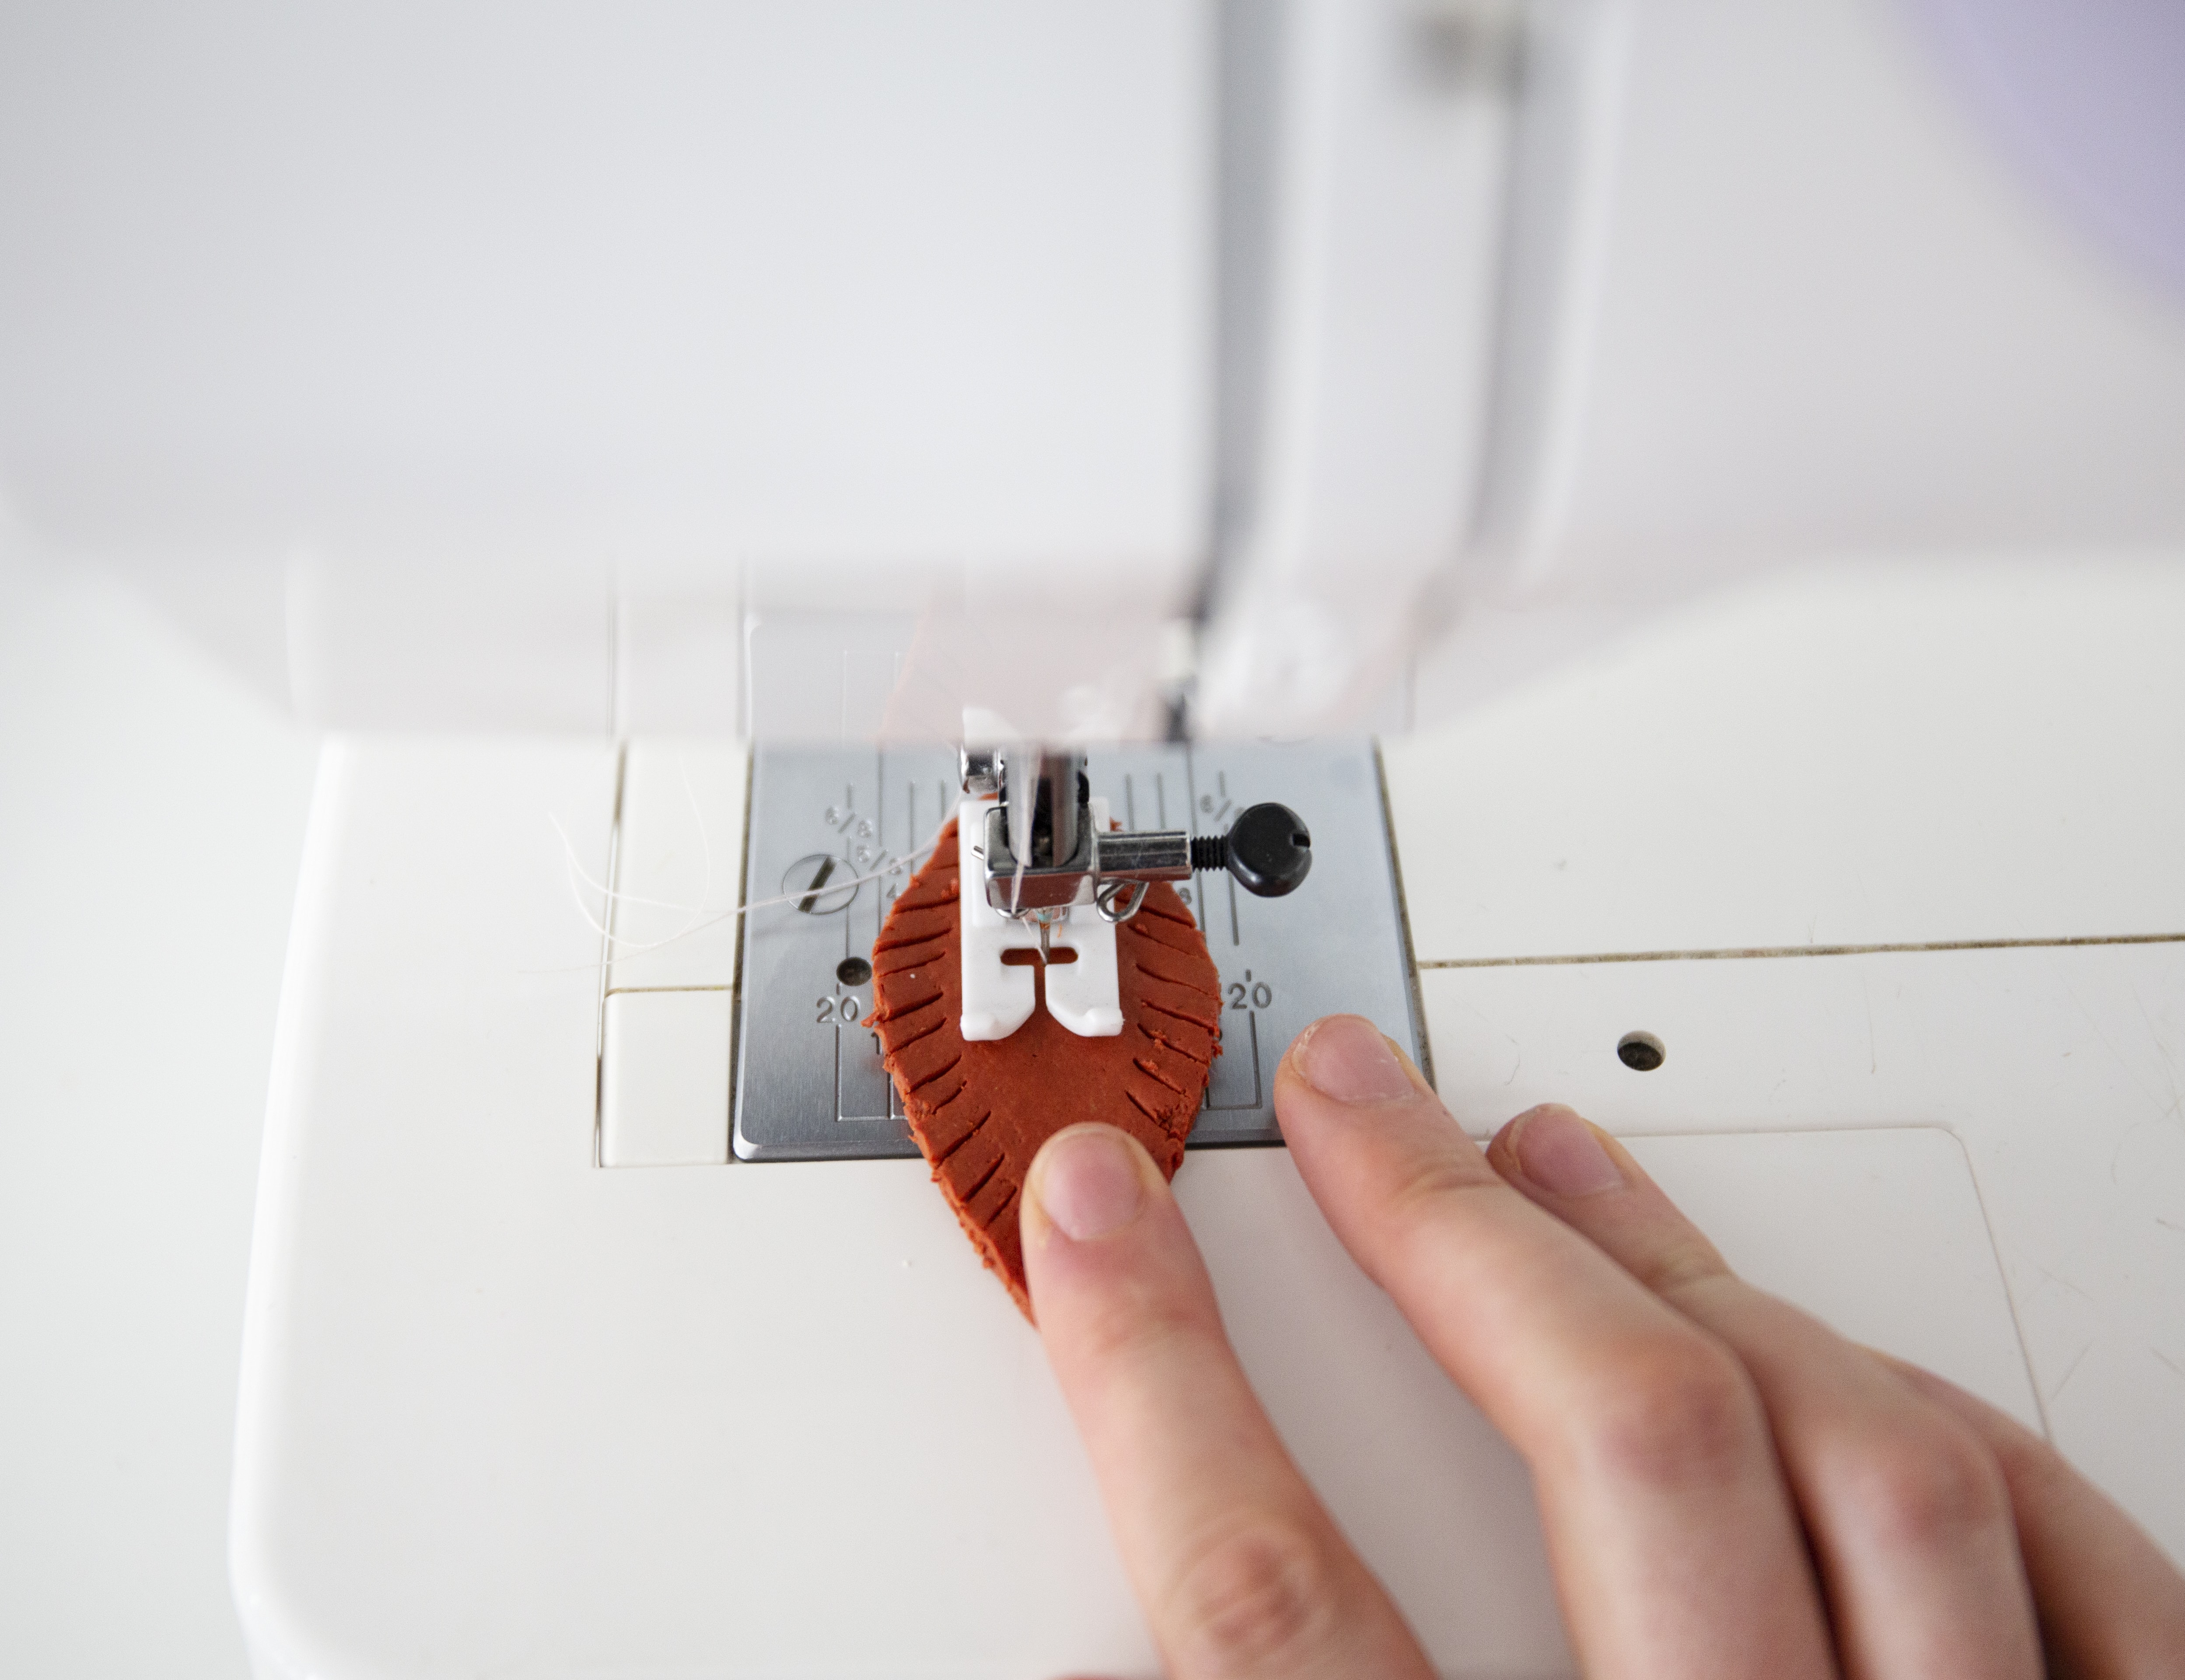
Thread your sewing machine and sew down the centre of each feather.
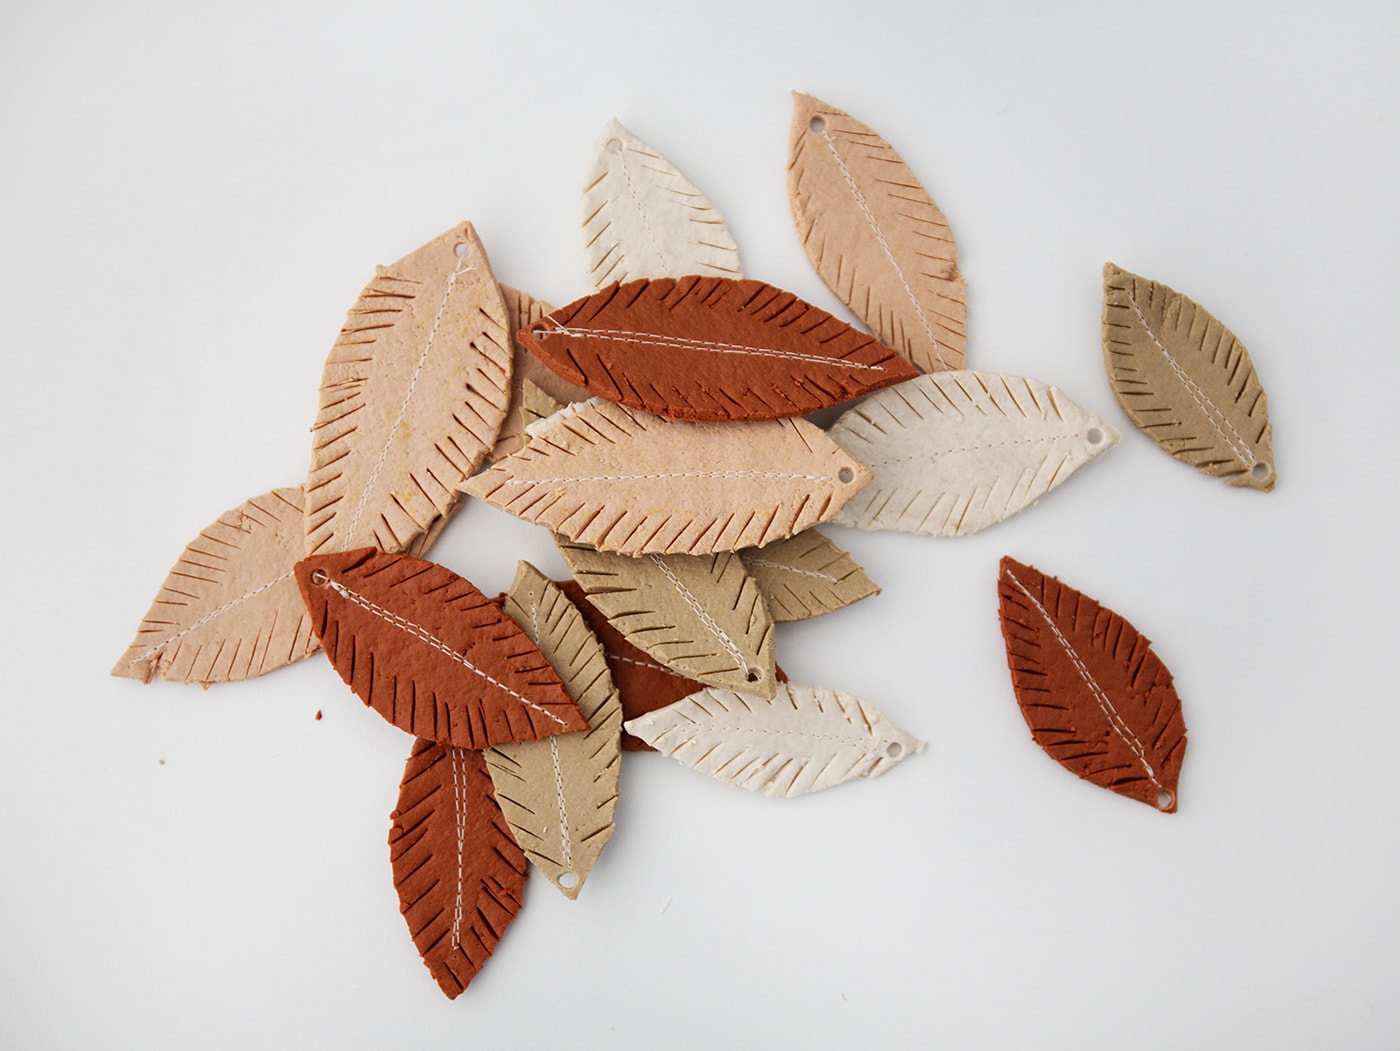
I did a few lines of stitching over the centre, once again not worrying about being super neat to create a more handmade look.
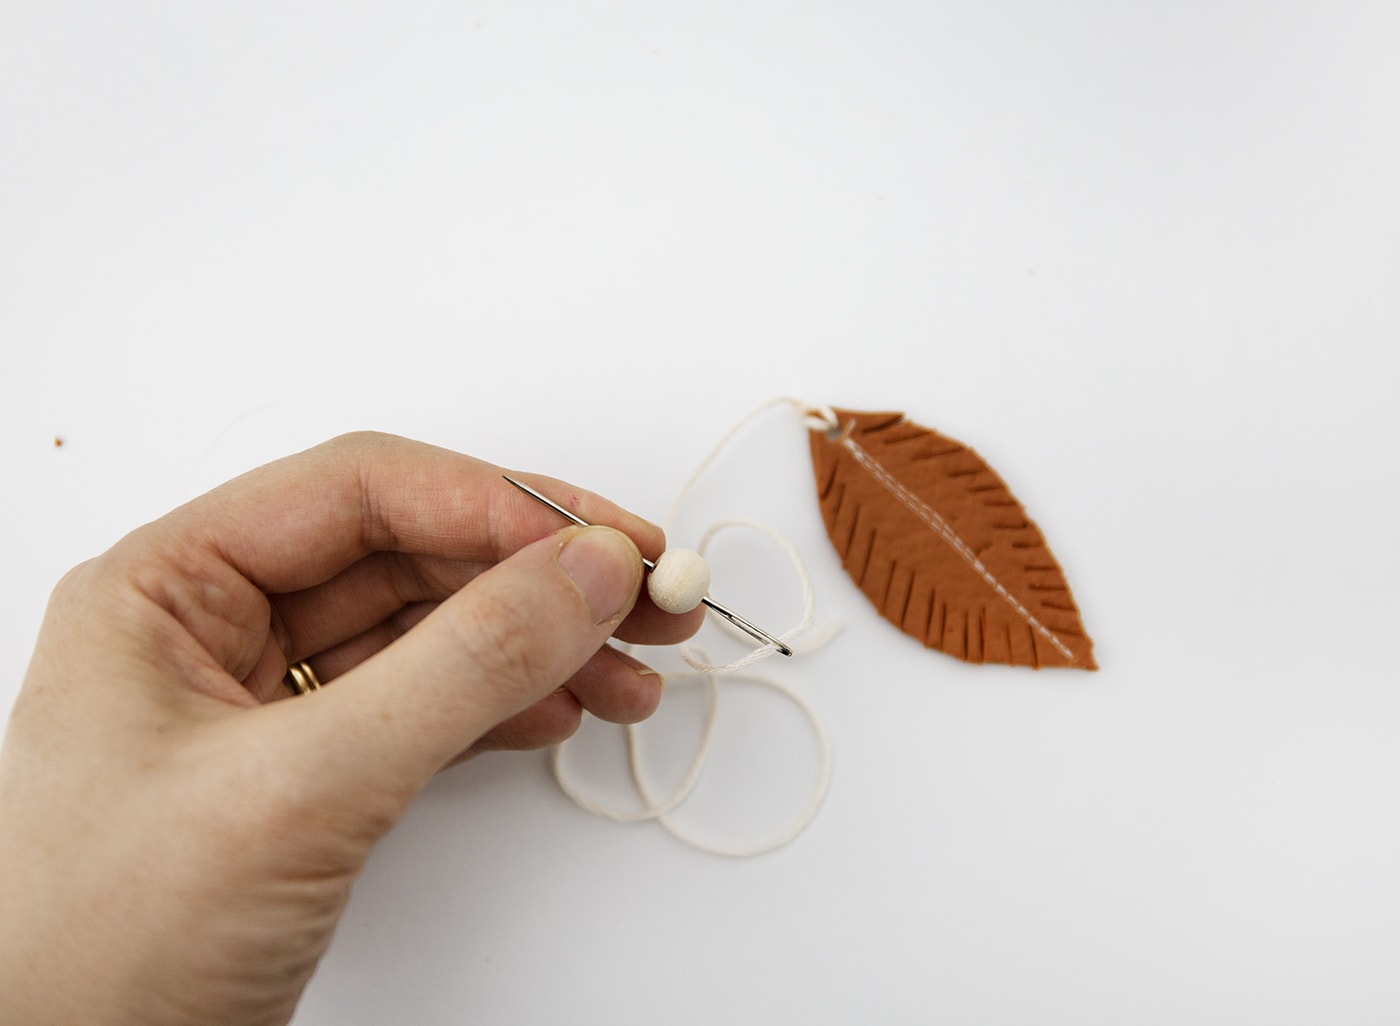
Cut a length of the embroidery thread, fold in half and use that end to come from the back of the feather, through the hole. Then take the other side through the loop you’ve created to pull tight. This will mean it hangs evenly. Then double knot the two strands above the feather and cut one thread up to the knot so you’r left with a single thread for hanging.
Thread this onto an embroidery needly to push through the centre of the wooden beads. This makes the process of threading them on much easier! Add varying amounts and sizes of bead to each feather. Now you’re ready to hang them on the stick. Alternate colour and size, with differing lengths for a layered look. Simply wrap around the stick once, tie a double knot and trim the excess.
I love how the leather-effect so easily fools! It’s a cheaper and easier to use alternative which in this case can create a whimsical, unique wall hanging for your home.
The post appeared first on .


