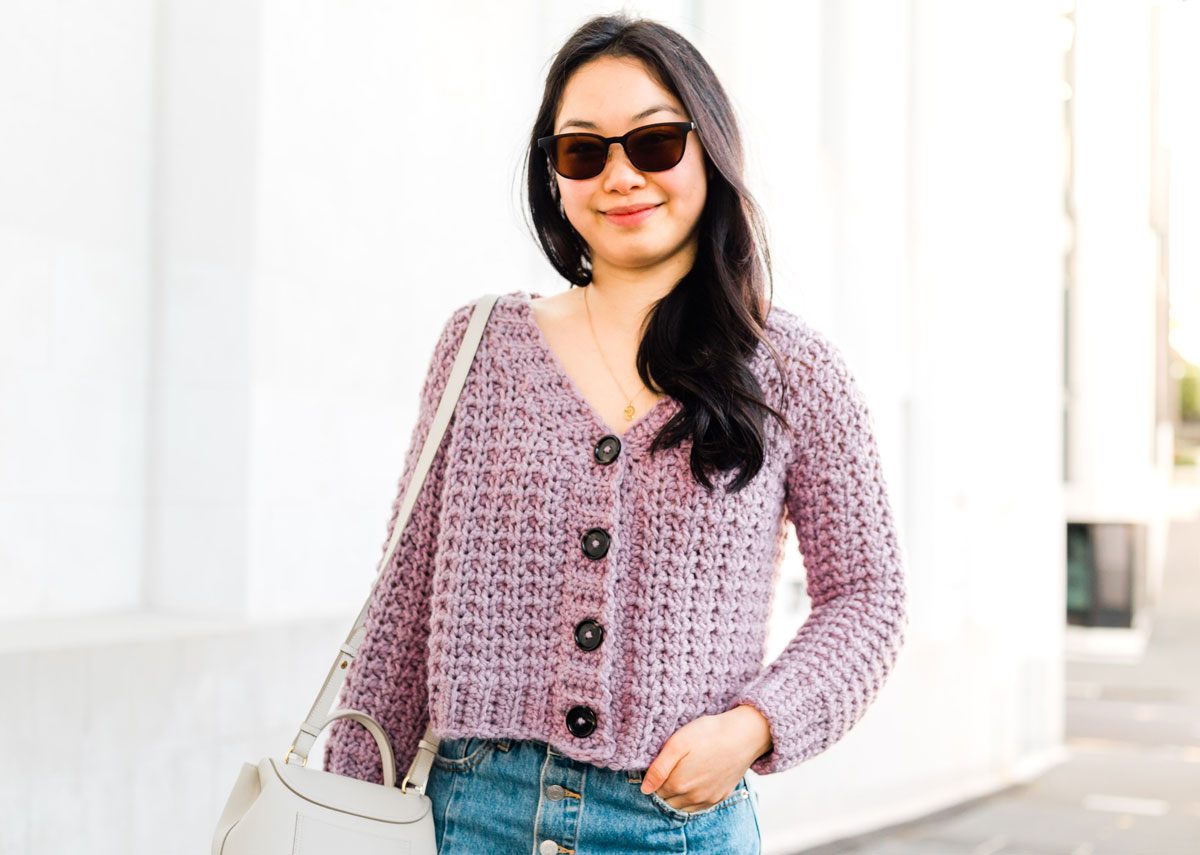
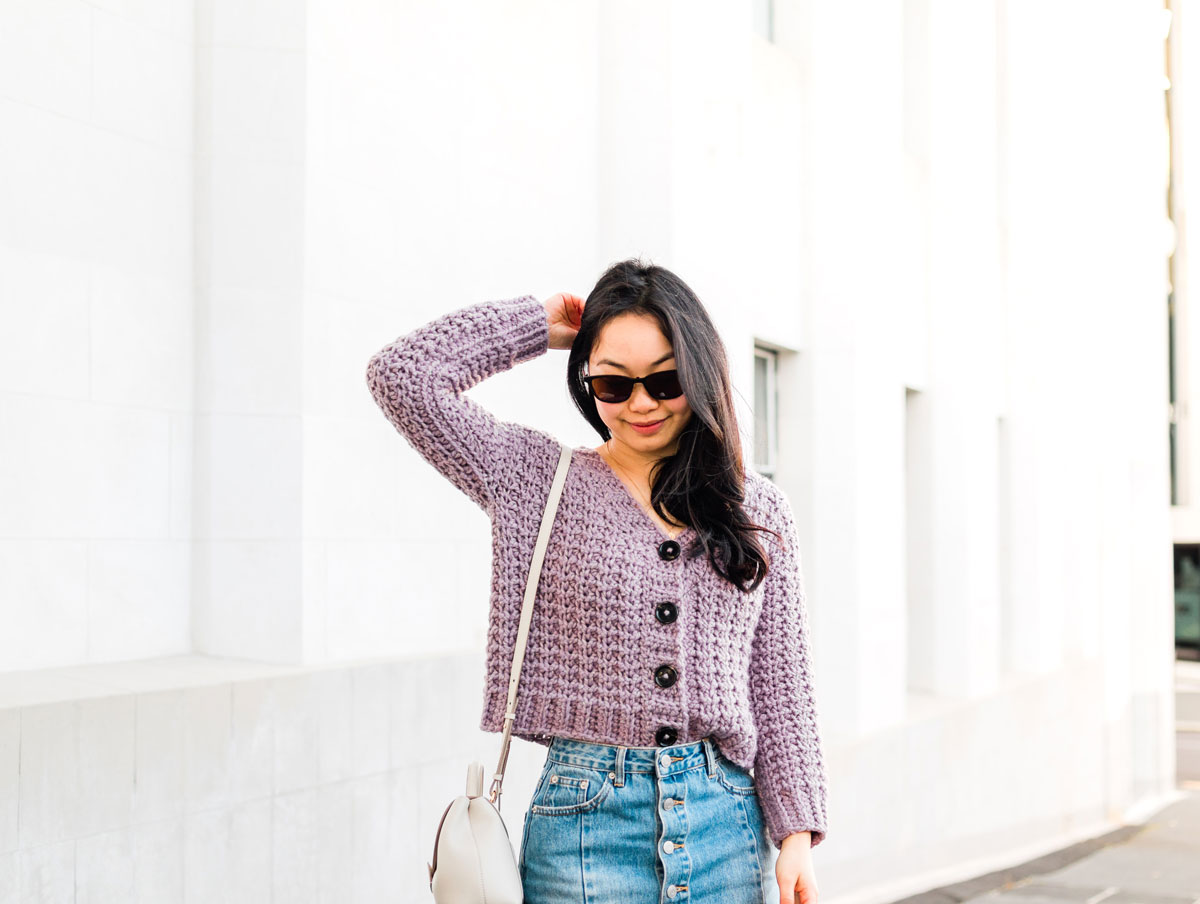
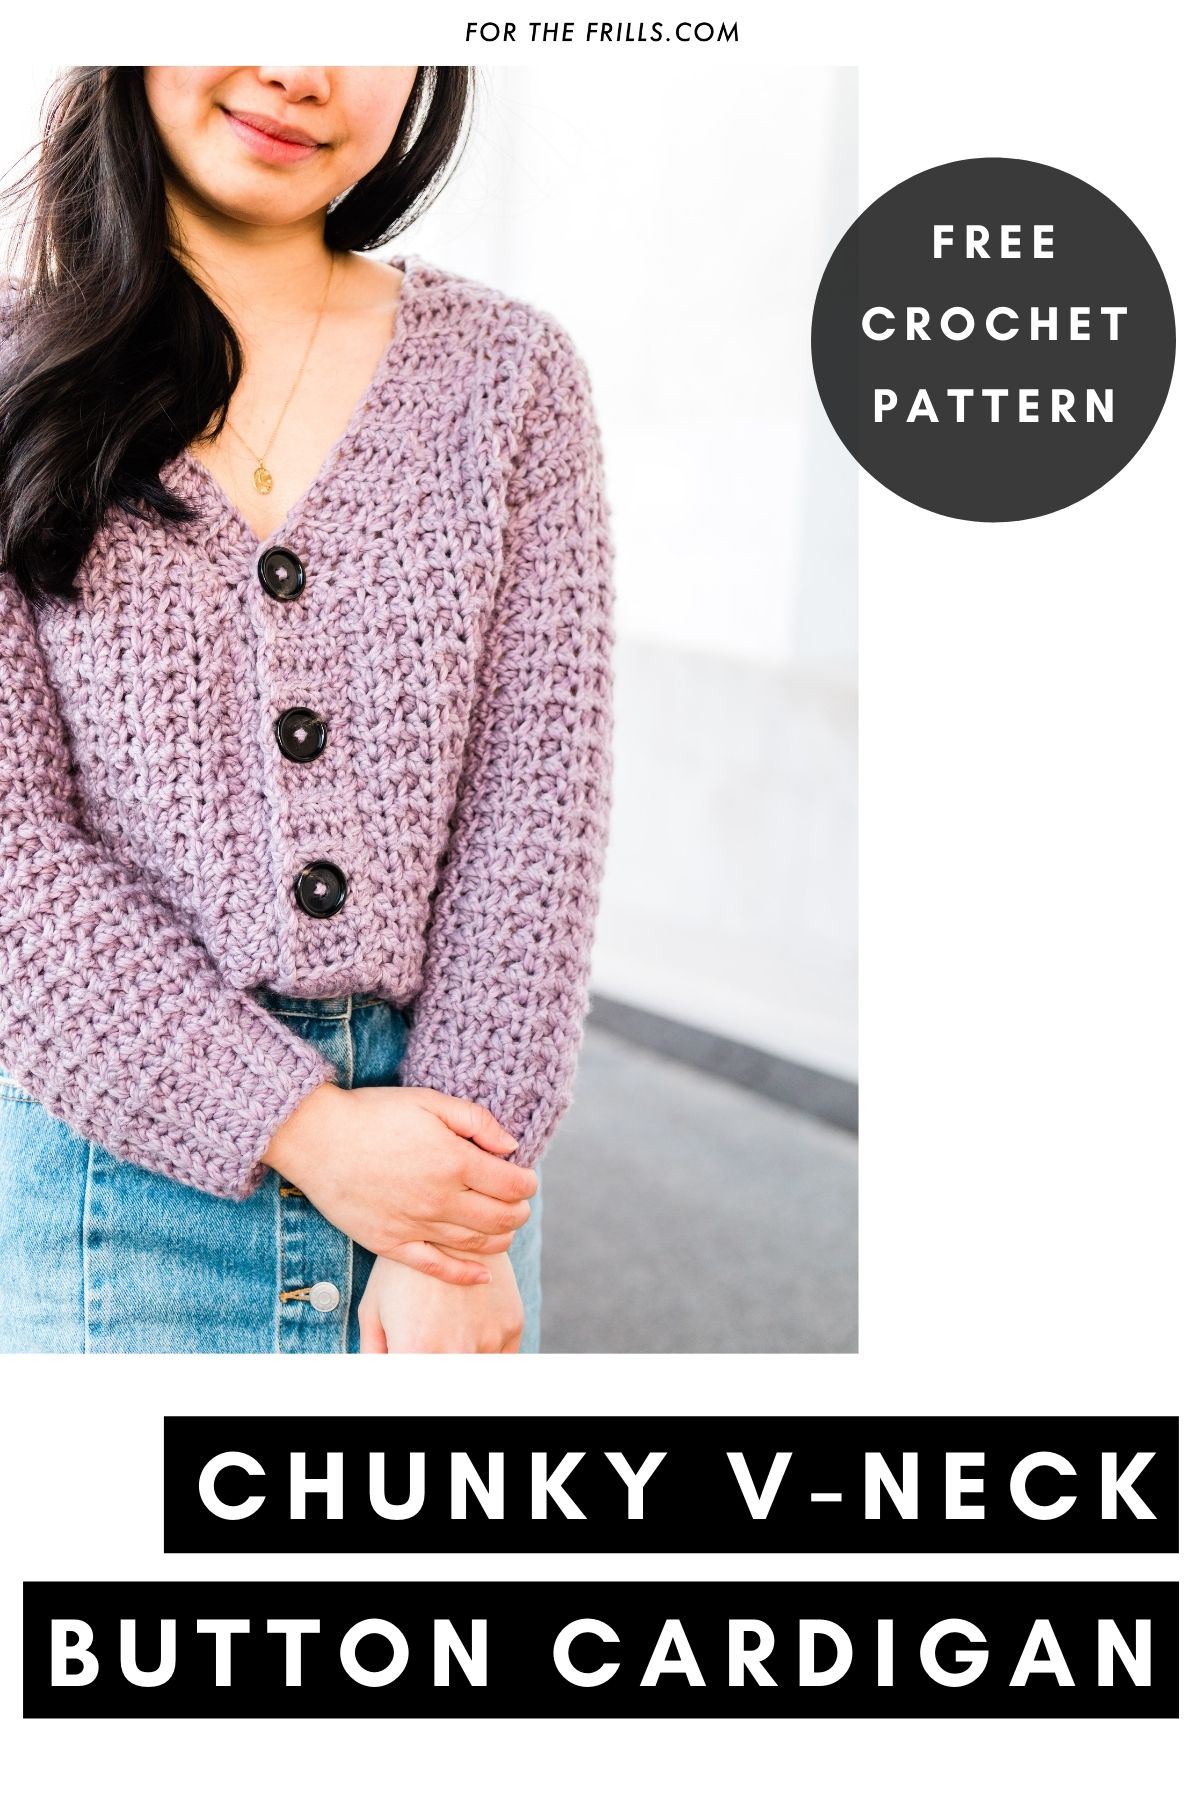
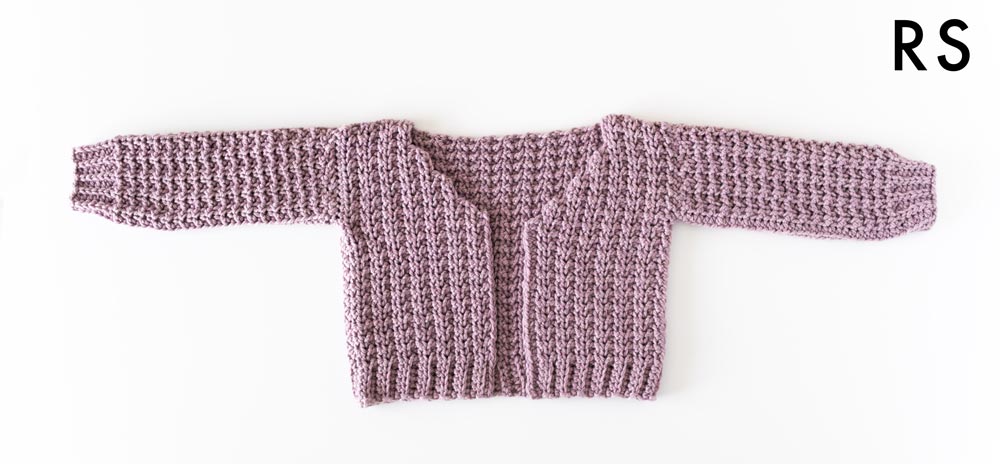
Perfect for day or night, the Twilight Cardigan is a modern take on a fall staple – the button-down cardigan! Simple stitches and chunky yarn combine to make a textured v-neck cardigan that will keep you warm from the crisp autumn winds!
Scroll down for this free crochet cardigan pattern and step-by-step video tutorial, or purchase the !
This post may contain affiliate links, view our for details.
Thank you to for providing the yarn for this free crochet cardigan pattern! As always all thoughts and opinions are 100% my own ?

Chunky, cozy and textured – what more could you want from a crochet cardigan? Add in buttons and you’ve got my dream sweater! It’s been over a year since my first button project (Check out the for a lightweight v-neck cardi!) and I thought it was time for another button cardi, they’re just so incredibly versatile!
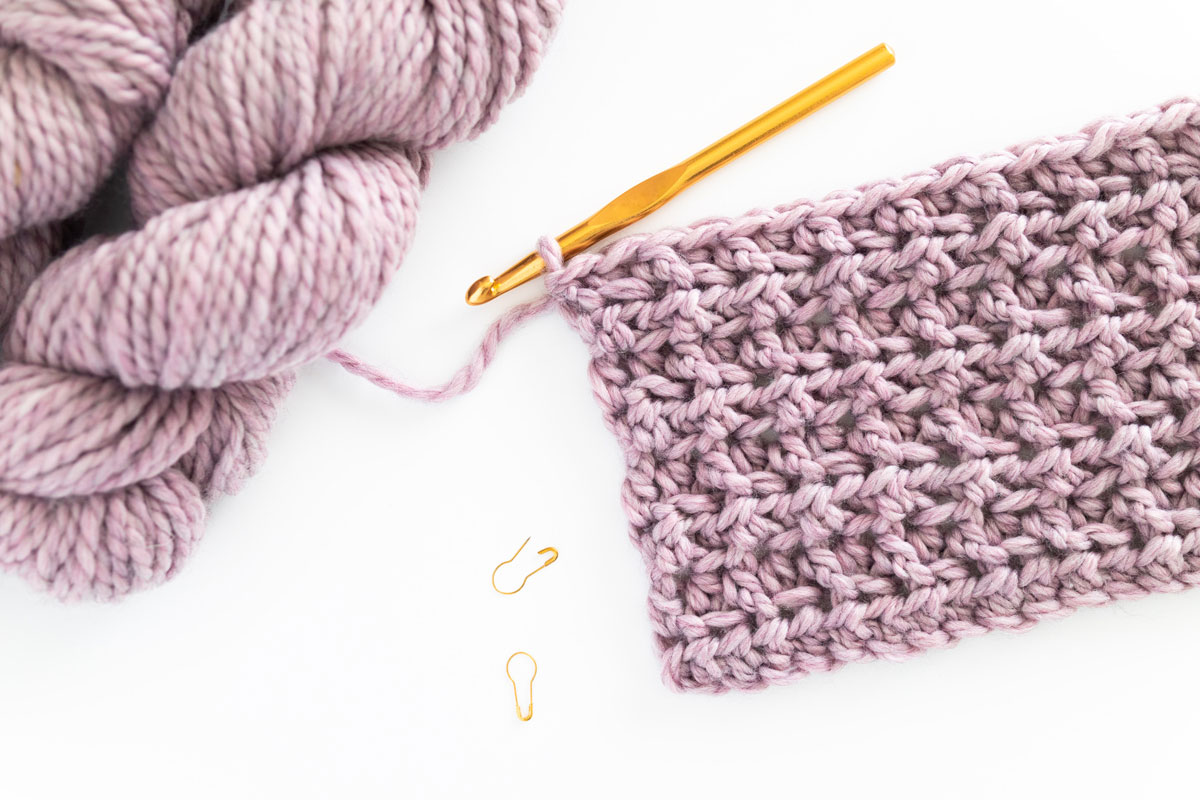
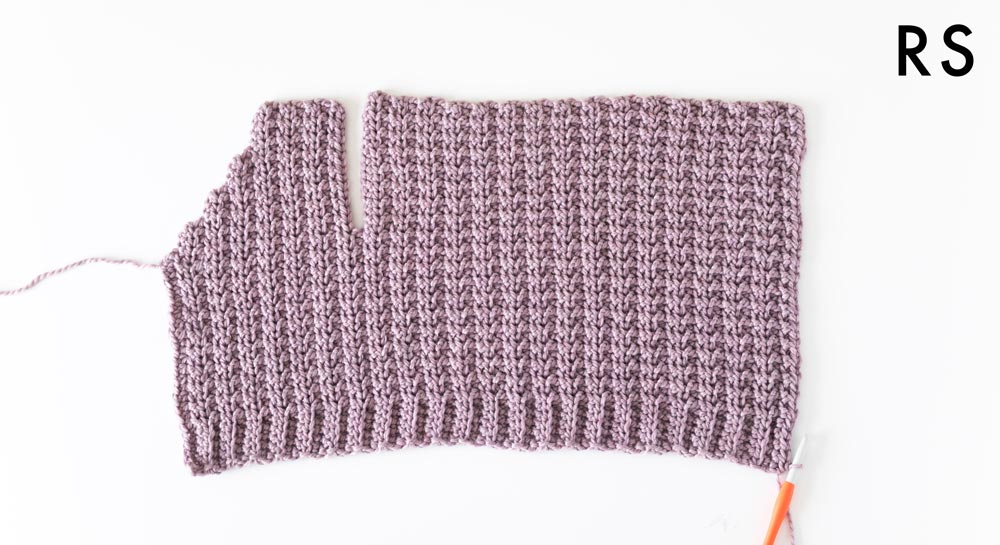
The majority of the Twilight Cardi is worked in front loop and back loop half double crochets which gives this incredible almost waffle-like texture without extra bulk of the traditional waffle stitch! I discovered this stitch combo through trial and error but please let me know if it has an official name ?
Crocheting this cardi is a breeze just make sure you can clearly ‘spot’ your front and back loops! The most important tip is to rotate your work so that the tops of your stitches (the ‘v’ shapes) are facing you. Remember, that the strand of yarn closet to you is the front loop and the one furthest away is the back loop.
Working into the front and back loops as opposed to both strands at the same time is really one of the best techniques to create garments that are comfortable and wearable. Drape is the key to have that certain ‘je ne sais quoi’ to get your projects looking handmade but modern.
(Some other patterns that use this technique are the , and !)

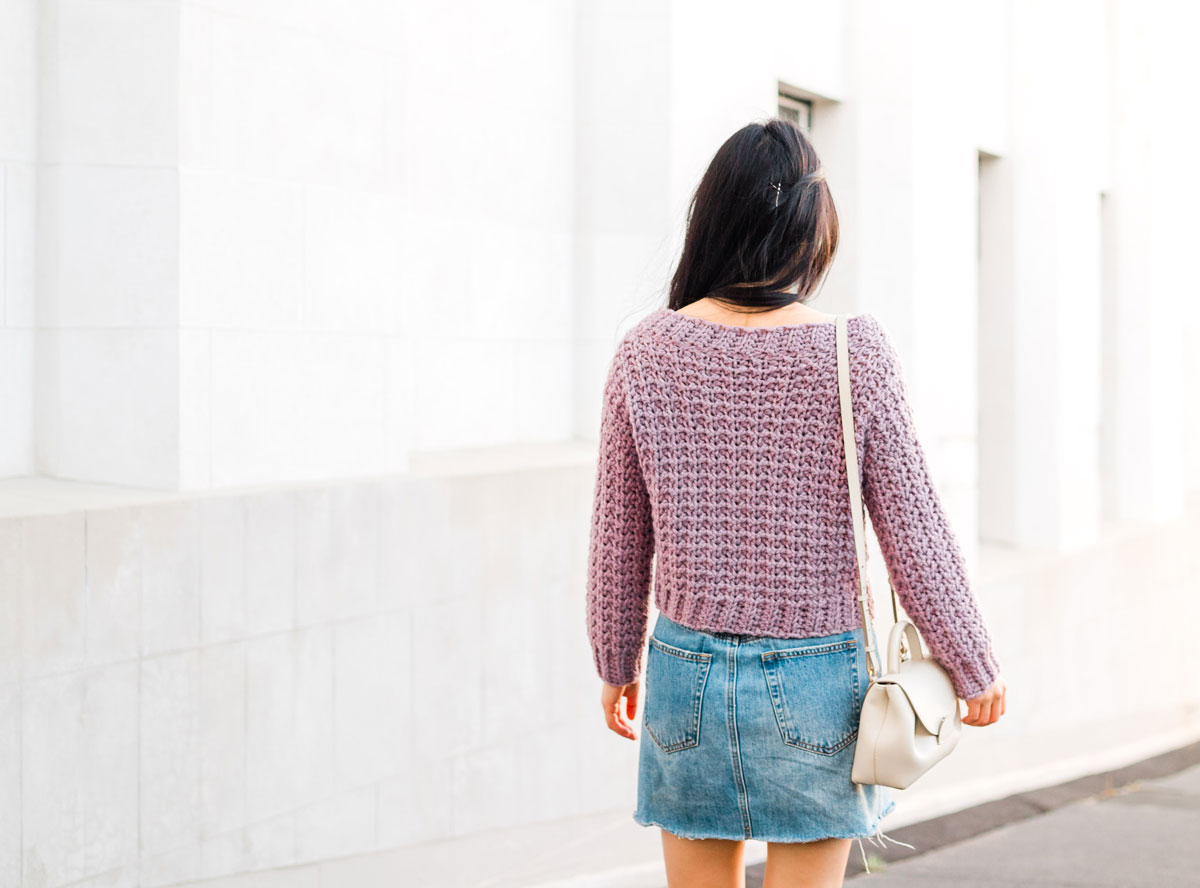
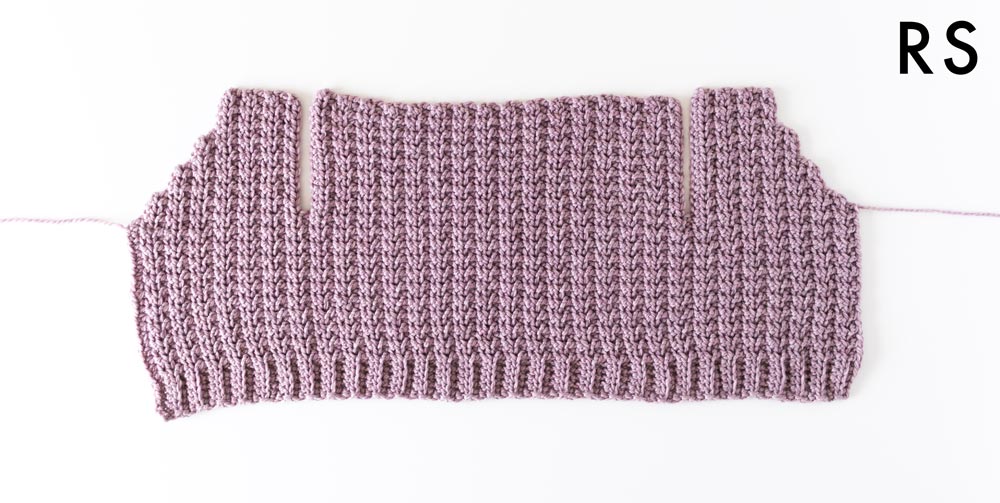
The construction of this v-neck cardi is very simple as the body is worked entirely in one piece – including the hemline ribbing! The Twilight Cardigan is worked lengthways which means that our foundation runs the length of the cardigan instead of side to side. The best thing about this construction is that you don’t need to fasten off at all during the body portion which means less ends to weave in yay!
The sleeves are also worked lengthways and then we’ll crochet the neckline button hole ribbing separately and sew it into place. The reason why I like to crochet neckline ribbing in a different piece is simple – gauge! I find that when crochet ribbing separately and then sewing it on after results in ribbing that stays flat.
Often when crocheting the ribbing directly onto a garment it can be difficult to get the gauge to perfectly match. Crocheting directly onto the main piece works well with blankets, beanies or even hemlines. However, since necklines tend to have curves – a round neck or sloping edges – a v-neck, the weight of the cardi pulls down on the opening which can cause the neckline to ruffle.
Design Inspiration
I’ve been dreaming of a waffle cardigan since I first started designing – which was over 2 years ago in 2019! It’s crazy how time flies! However, the thing that held me back time and time again was that crochet waffle stitch is very bulky and stiff. I’ve learnt now that if the stitch doesn’t have drape you’ll feel like you’re wearing a cardboard box haha.
I’m constantly swatching different types of yarn and stitch combinations to find options that work well for garments. I happened to try this combo of front and back loop half double crochets and I fell I love with the texture.
At first, I thought of making a long crochet cardigan with pockets (If you’d like a long version let me know!) but since I recently released the I thought it’d be fun to do a quick and chunky project. You’ll be surprised at how quickly this project works up!
Looking for more free crochet patterns?
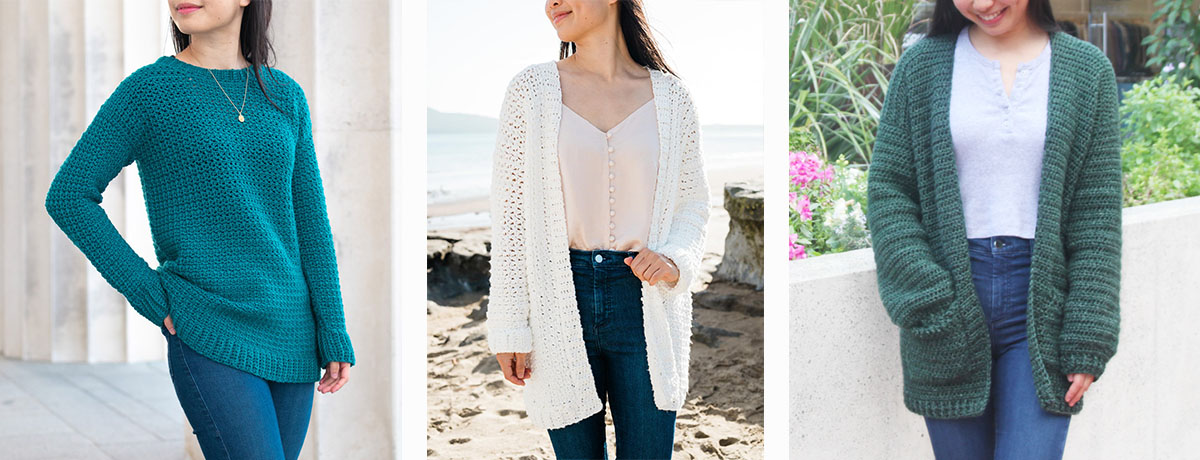
1. / 2. / 3.
Yarn
The Twilight Cardigan uses yarn and I think I’ve discovered a new favourite yarn! is made from a mix 50% merino and 50% nylon creating an incredibly soft and fluffy feeling yarn that also has incredible stitch definition. Although the yardage per 100g might seem standard for a bulky yarn there is an incredible light airiness that makes you feel like you’re wearing a marshmallow!
This chunky cropped cardigan is worked up in the shade Magnolia Heather which is lovely dusty lilac with grey undertones. It’s more muted than a traditional pastel purple which makes it so much more wearable in everyday life. comes in 15 different shades and they’re all heathered which means they have softer more muted tones than solid colours.
is a true chunky/bulky yarn so if you’re looking for a more affordable substitute should work well!
Video Tutorial
Pin me for later!
I love to see your finished projects! Use #forthefrills and tag me on Instagram @forthefrills for a chance to be featured
Add the !
Purchase the !
Twilight Cardigan Summary:
A chunky, textured crochet cardigan with a boxy fit, cropped length and v-neck button opening. This pattern uses slip stitches, single crochets, half double crochets in back and front loops to create a waffle like texture.
NOTES:
*Sample is a size small shown on a 5’3” model with a 32” bust.
*The sizing guide follows size XS(S, M, L, XL)(2XL, 3XL, 4XL, 5XL). E.g. “Ch 25(25, 27, 29, 31)(29, 31, 33, 35) means Ch 25 for XS, Ch 25 for Small, Ch 27 for Medium, Ch 29 for Large, Ch 31 for XL, Ch 29 for 2XL, Ch 31 for 3XL, Ch 33 for 4XL and Ch 35 for 5XL.” If there is only one number, it applies to all sizes.
*”HDC 10″ means HDC into the next 10 stitches.
*”2HDC” means place 2 HDC into the same stitch.
*The turning chain, ch 1 does NOT count as a stitch. Otherwise, ch 1 does count as a stitch.
*Total stitches are indicated between < >.
*This pattern uses US crochet terms.
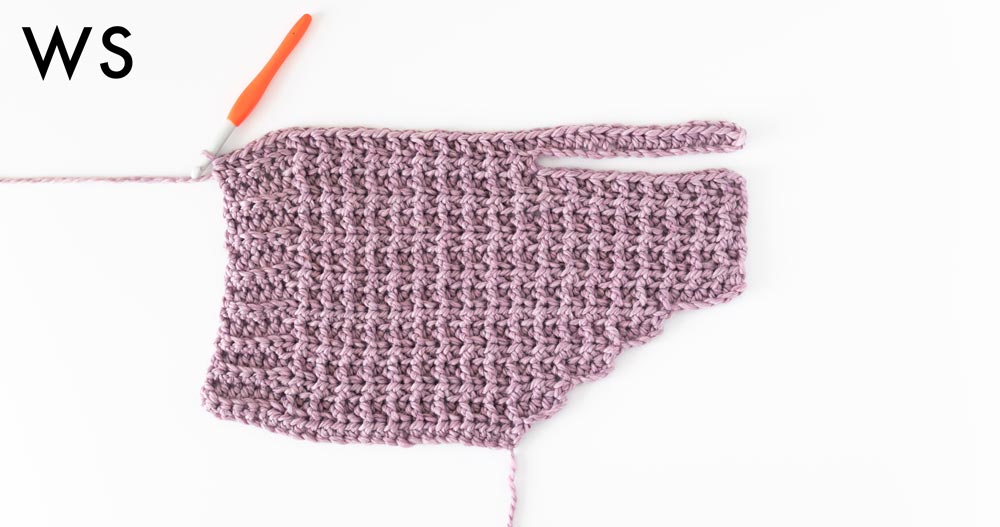
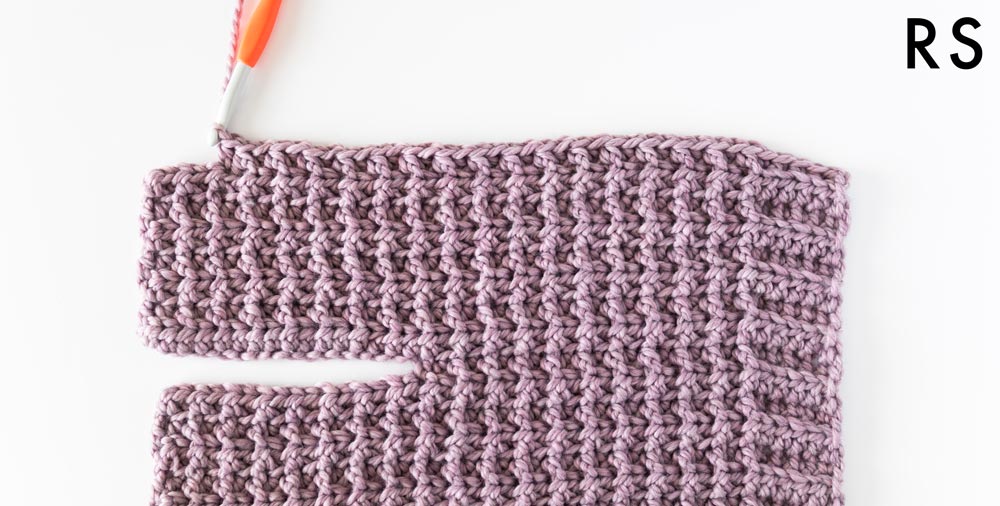
*The body is worked entirely in one piece beginning with crocheting the v-neck increase + first front panel, an opening for the 1st sleeve, the back panel, an opening for the 2nd sleeve and the second front panel + v-neck decrease.
*The sleeves, back and front panels are worked from side to side. The foundation chain runs the length of the sleeve and the length of the sweater from the point of the v-neck to the bottom of the hemline ribbing.
*To make your cardigan shorter/longer, remove/add chains in multiples of 2.
*Add approx. 17(20, 22, 24, 26)(27, 30, 32, 35)g of yarn for every additional 2.5cm / 1” of body length.
*The hemline ribbing is crocheted in one piece with the main body panel. The neckline ribbing is crocheted separately and sewn onto the cardigan.
*For tighter waist ribbing on the body panel, you can replace all BLO SCs with BLO sl sts and SCs with sl sts. This will make the waist width approx. 30-40% smaller than the back width.
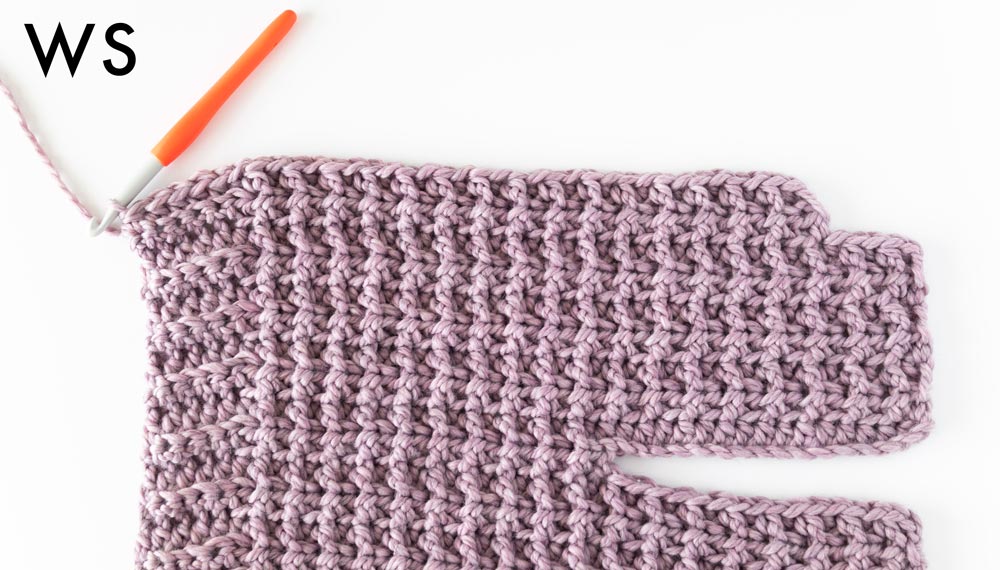
*All pieces are sewn together with the RS on the inside and the WS facing outwards.
LEVEL: Easy+
Materials
Yarn – – Chunky/Bulky (5), 100m/100g, 110yds/3.5oz, 50% Superwash Merino Wool + 50% Nylon, Magnolia Heather
approx. 505(550, 630, 725, 805)(890, 990, 1110, 1360)g
Scissors
4 buttons (3cm / 1.25” diameter)
Stitches & Abbreviations
Ch = Chain
Sl st = Slip Stitch
SC = Single Crochet
HDC = Half Double Crochet
FLO = Front Loop
BLO = Back Loop
St(s) = Stitch(es)
Rep = Repeat
Sk = Skip
RS = Right Side
WS = Wrong Side
Measurements cm:
To fit Bust: 71(81, 91, 101, 112)(122, 132, 142, 152)
Back Width: 42(47, 51, 57, 63)(67, 72, 78, 85)
Armhole: 15(15, 16, 18, 19)(21, 22, 24, 25)
Sleeve length: 38(38, 40, 42, 42)(44, 44, 46, 46)
Length: 40(40, 42, 44, 46)(48, 50, 52, 54)
Measurements inches:
To fit Bust: 28(32, 36, 40, 44)(48, 52, 56, 60)
Back Width: 16.5(18.5, 20, 22.5, 25)(26.5, 28.5, 31, 33.5)
Armhole: 6(6, 6.5, 7, 7.5)(8, 8.5, 9, 9.5)
Sleeve length: 15(15, 16, 16.5, 16.5)(17, 17, 18, 18)
Length: 16(16, 16.5, 17, 18)(19, 19.5, 20.5, 21)
GAUGE: 10cm/4” square = 10 stitches wide x 6.5 rows tall in Textured HDC Stitch Pattern.
Textured HDC Stitch Pattern
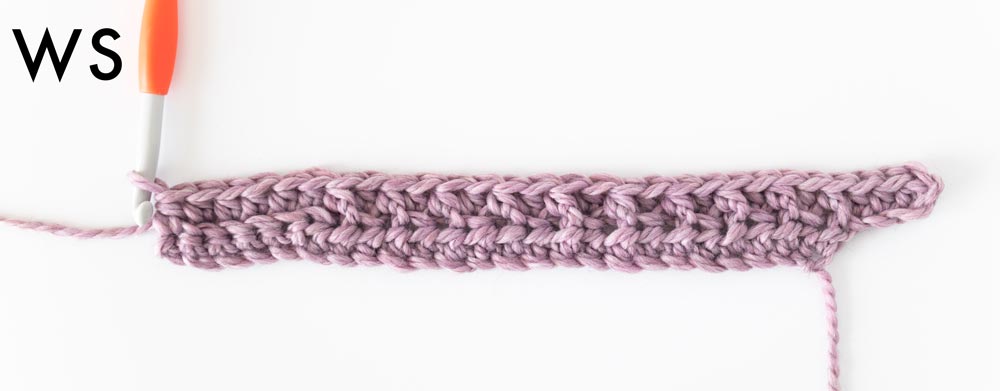
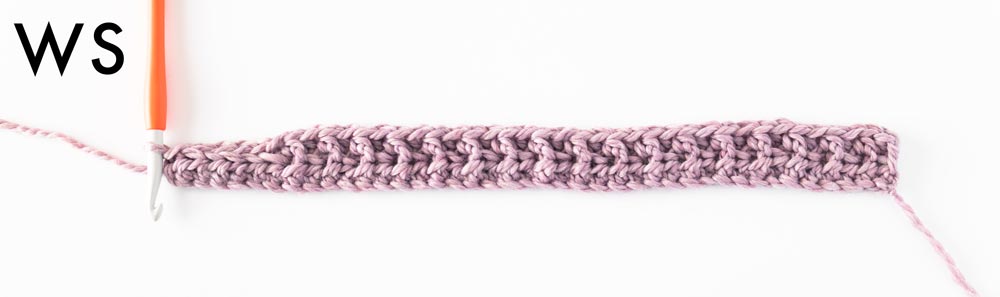
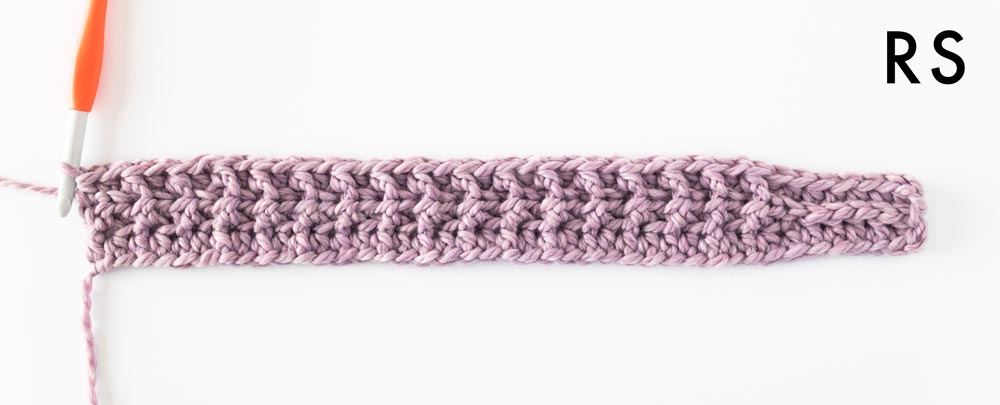
FOUNDATION CHAIN: Ch an even number of stitches.
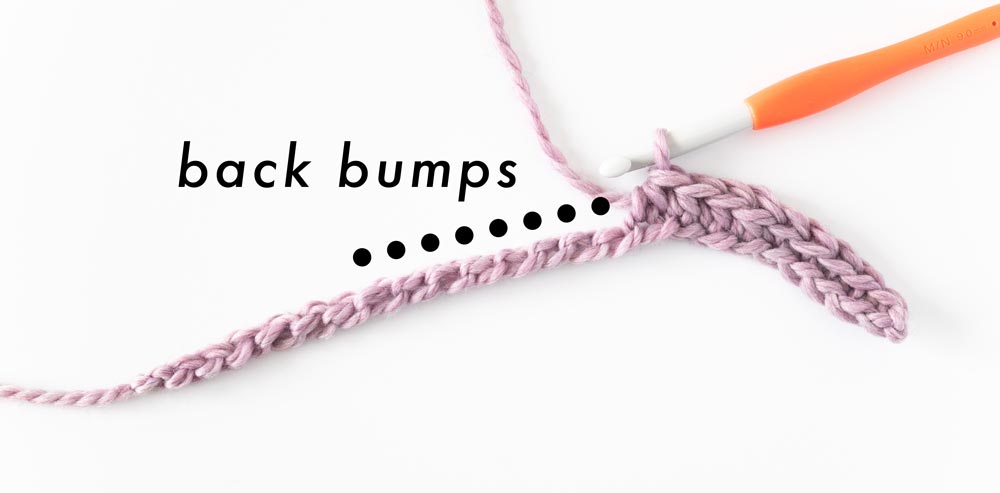
ROW 1: Working into the back bumps of the chs, HDC in 2nd ch from hook, HDC across, turn.
ROW 2: Ch 1, *FLO HDC, BLO HDC; rep from * across, HDC in last st, turn.
ROW 3: Ch 1, *BLO HDC, FLO HDC; rep from * across, HDC in last st, turn.
Repeat ROWS 2 – 3 until you reach your desired length.
Twilight Crochet Cardigan Pattern
Body Panel
First Front Panel
FOUNDATION CHAIN: Ch 25(25, 27, 29, 31)(29, 31, 33, 35).
*Size 2XL is supposed to have 29 chains as it has more increase rows than Size XL (31 chains).
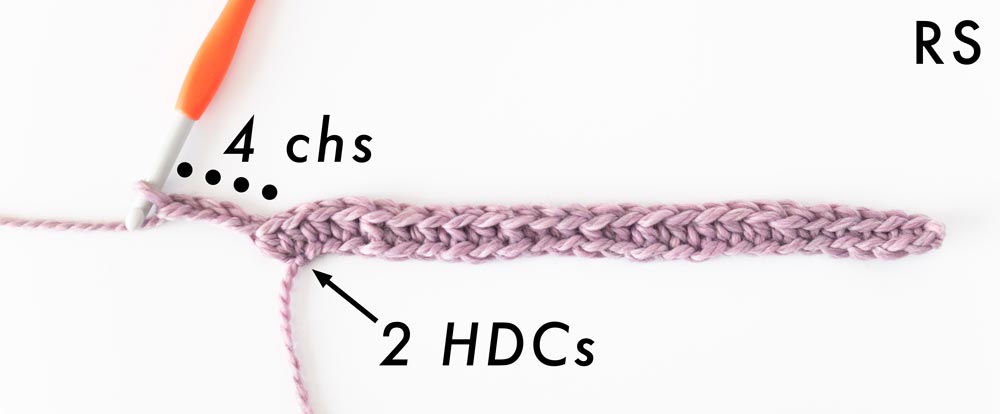
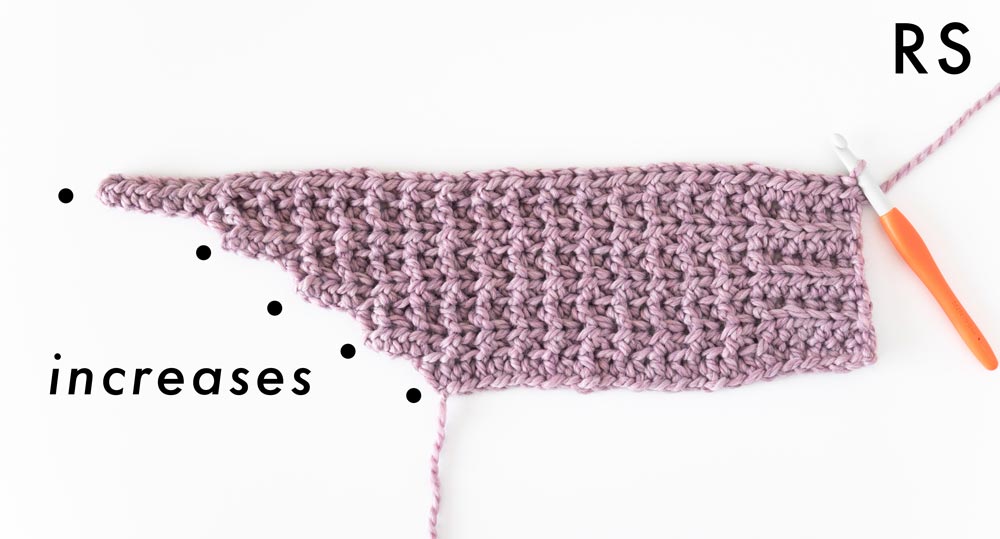
INCREASE ROW 1 (RS): Working into the back bumps of the chs, SC in 2nd ch from hook, SC 4, HDC across, 2HDC in last ch, ch 4, turn.
<25(25, 27, 29, 31)(29, 31, 33, 35)sts + 4 chs>
INCREASE ROW 2: HDC in 2nd ch from hook, HDC 2, *FLO HDC, BLO HDC; rep from * until 5 sts left, BLO HDC 4, HDC in last st, turn.
<28(28, 30, 32, 34)(32, 34, 36, 38)>
INCREASE ROW 3: Ch 1, BLO SC 5, *FLO HDC, BLO HDC; rep from * across, [FLO HDC, HDC] in last st, ch 4, turn.
<29(29, 31, 33, 35)(33, 35, 37, 39) + 4 chs>
INCREASE ROW 4: As Row 2.
<32(32, 34, 36, 38)(36, 38, 40, 42)>
INCREASE ROW 5: As Row 3.
<33(33, 35, 37, 39)(37, 39, 41, 43) + 4 chs)>
INCREASE ROW 6: As Row 2.
<36(36, 38, 40, 42)(40, 42, 44, 46)>
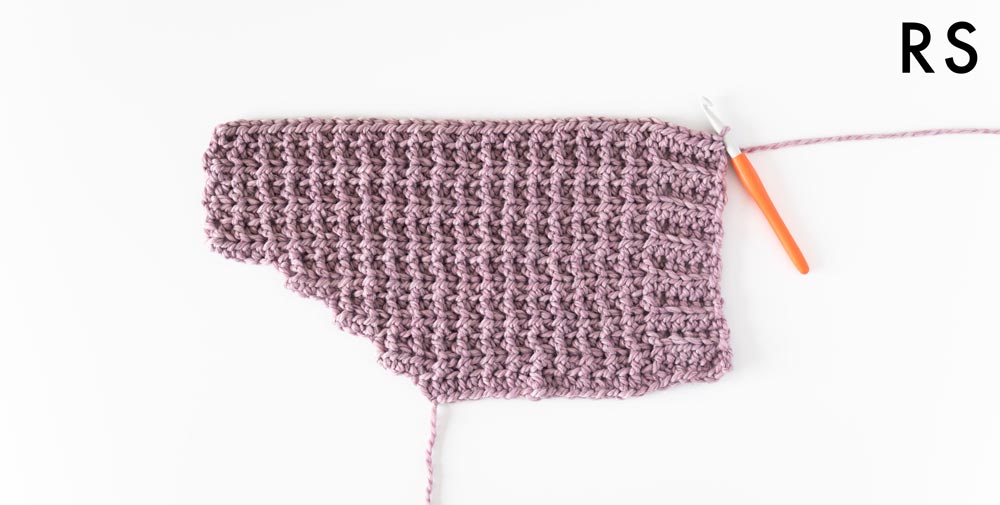
Sizes XS(S, M, L, XL) only
INCREASE ROW 7: Ch 1, BLO SC 5, *FLO HDC, BLO HDC; rep from * across, [FLO HDC, HDC] in last st, ch 6, turn.
<37(37, 39, 41, 43) + 6 chs>
INCREASE ROW 8: HDC in 2nd ch from hook, HDC 4, *FLO HDC, BLO HDC; rep from * until 5 sts left, BLO HDC 4, HDC in last st, turn.
<42(42, 44, 46, 48)>
Do not fasten off! Proceed to ‘BASE BODY PANEL ROWS’.
Sizes (2XL, 3XL, 4XL, 5XL) only
INCREASE ROW 7: As Row 3.
<(41, 43, 45, 47) + 4 chs>
INCREASE ROW 8: As Row 2.
<(44, 46, 48, 50)>
INCREASE ROW 9: Ch 1, BLO SC 5, *FLO HDC, BLO HDC; rep from * across, [FLO HDC, HDC] in last st, ch 6, turn.
<(45, 47, 49, 51)+ 6 chs>
INCREASE ROW 10: HDC in 2nd ch from hook, HDC 4, *FLO HDC, BLO HDC; rep from * until 5 sts left, BLO HDC 4, HDC in last st, turn.
<(50, 52, 54, 56)>
Do not fasten off! Proceed to ‘BASE BODY PANEL ROWS’.
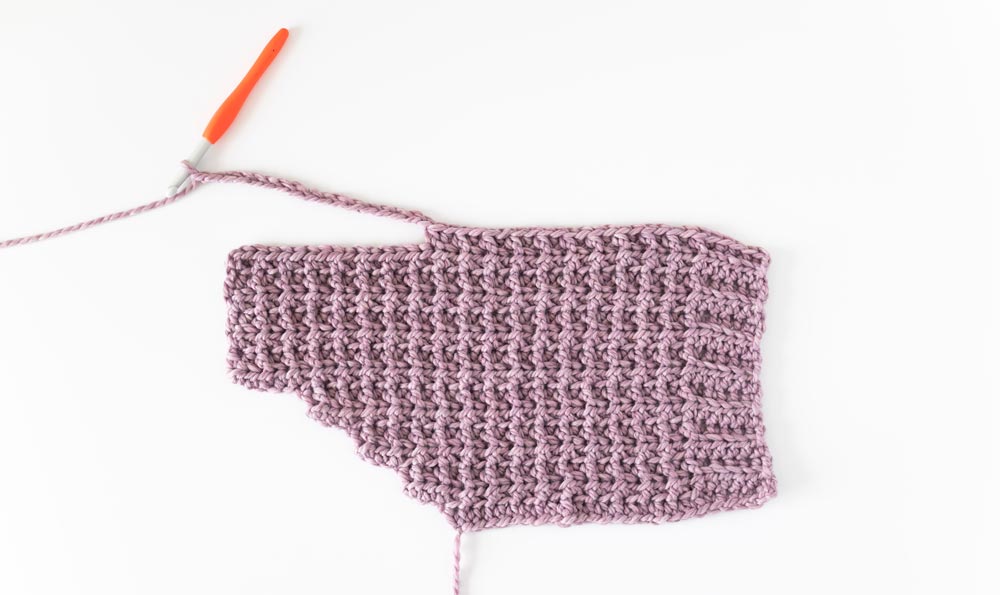
Base Body Panel Rows
BASE BODY ROW 1: Ch 1, BLO SC 5, *FLO HDC, BLO HDC; rep from * across, HDC in last st, turn.
<42(42, 44, 46, 48)(50, 52, 54, 56)>
BASE BODY ROW 2: Ch 1, *BLO HDC, FLO HDC; rep from * until 6 sts left, BLO HDC 5, HDC in last st, turn.
<42(42, 44, 46, 48)(50, 52, 54, 56)>
Repeat BASE BODY ROWS 1 – 2 until ROW 13(15, 17, 19, 21)(21, 23, 25, 27).
We’ve finished the FIRST FRONT PANEL. Do not fasten off! We’ll now crochet the ‘BACK PANEL’.
Back Panel
BACK PANEL ROW 1: Ch 1, BLO SC 5, *FLO HDC, BLO HDC; rep from * until 17(17, 19, 19, 21)(23, 23, 25, 27) sts left, HDC in next st, ch 17(17, 19, 19, 21)(23, 23, 25, 27), turn.
<26(26, 26, 28, 28)(28, 30, 30, 30)sts + 17(17, 19, 19, 21)(23, 23, 25, 27)chs>
*The chs form the 1st sleeve armhole opening.
BACK PANEL ROW 2: Ch 1, HDC in 2nd ch from hook, HDC in each ch, *BLO HDC, FLO HDC; rep from * until 6 sts left, BLO HDC 5, HDC in last st, turn.
<42(42, 44, 46, 48)(50, 52, 54, 56)>
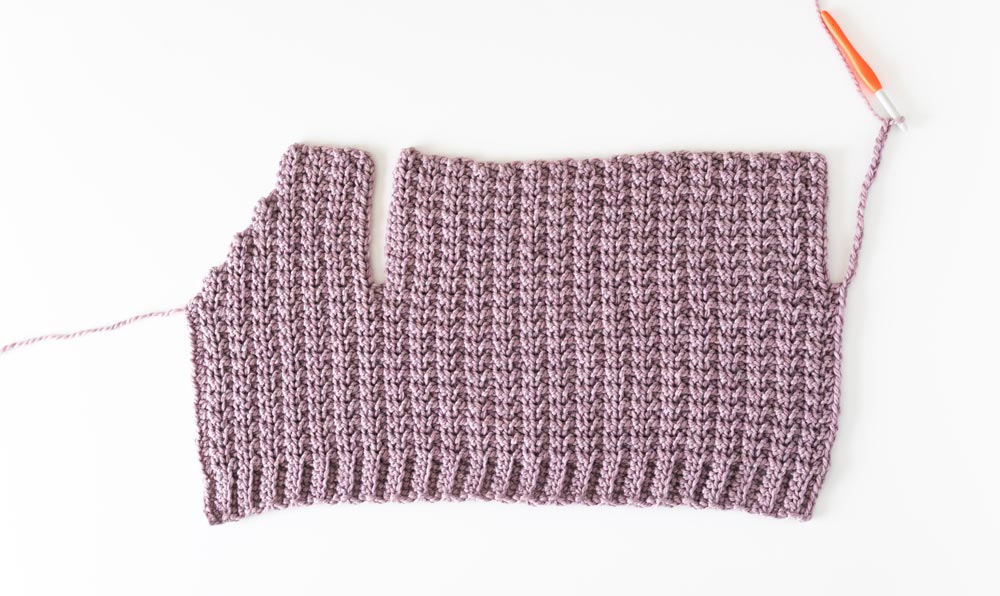
Repeat BASE BODY ROWS 1 – 2 until ROW 27(31, 33, 37, 41)(43, 47, 51, 55).
<42(42, 44, 46, 48)(50, 52, 54, 56)>
Total Rows: <40(46, 50, 56, 62)(64, 70, 76, 82)>
We’ve finished the BACK PANEL. Do not fasten off! We’ll now crochet the ‘SECOND FRONT PANEL’.
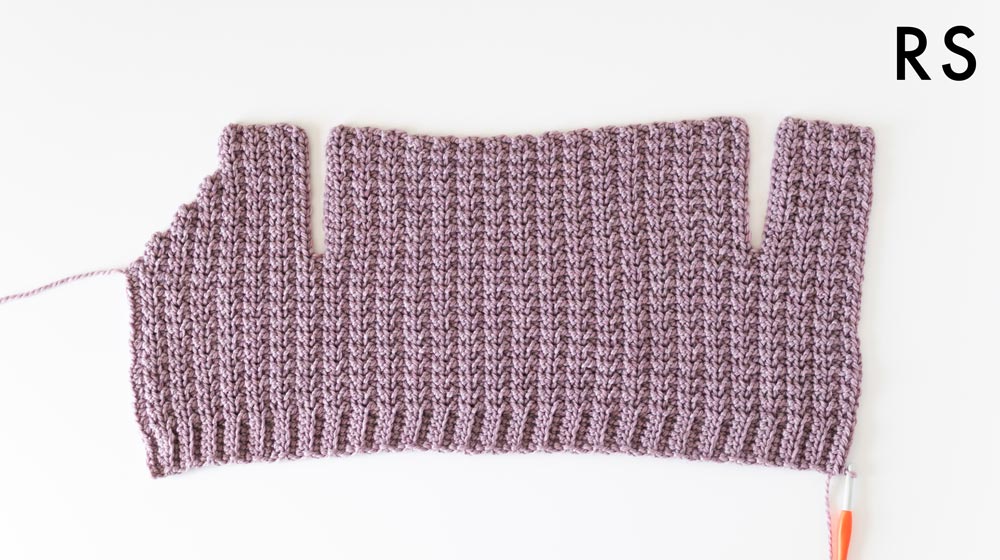
Second Front Panel
ROW 1: As Back Panel Row 1.
*The chs form the 2nd sleeve armhole opening.
ROW 2: As Back Panel Row 2.
Total Rows: <42(48, 52, 58, 64)(66, 72, 78, 84)>
Repeat BASE BODY ROWS 1 – 2 until ROW 6(8, 10, 12, 14)(12, 14, 16, 18).
Total Rows: <46(54, 60, 68, 76)(76, 84, 92, 100)>
DECREASE ROW 1: Ch 1, BLO SC 5, FLO HDC, *BLO HDC, FLO HDC; rep from * until 6 sts left, HDC in next st, turn.
<37(37, 39, 41, 43)(45, 47, 49, 51)>
Total Rows: <47(55, 61, 69, 77)(77, 85, 93, 101)>
DECREASE ROW 2: Ch 1, sk 1st st, *BLO HDC, FLO HDC; rep from * until 6 sts left, BLO HDC 5, HDC in last st, turn.
<36(36, 38, 40, 42)(44, 46, 48, 50)>
Total Rows: <48(56, 62, 70, 78)(78, 86, 94, 102)>
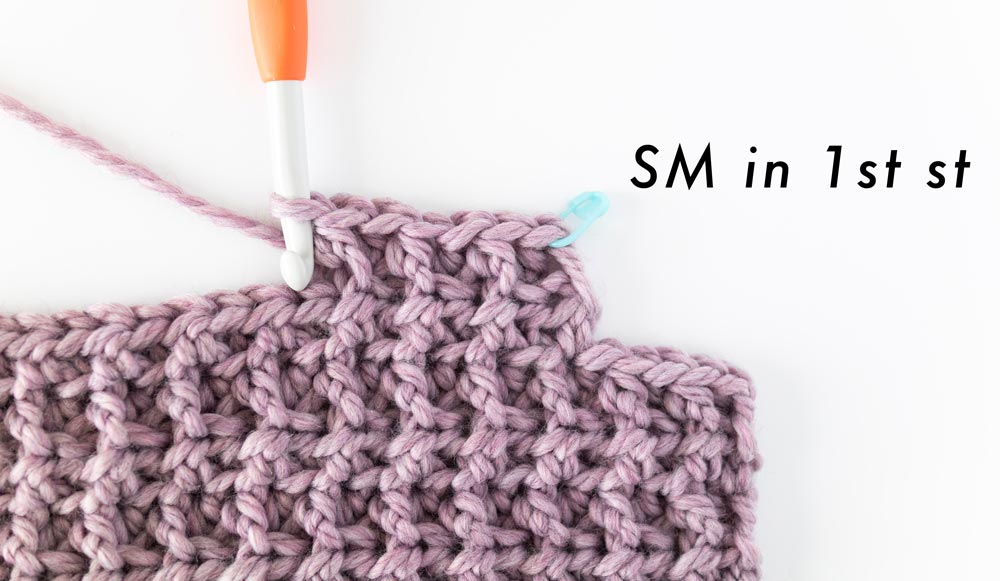
*If you have trouble spotting the beginning/end of the row, place a SM in the 1st BLO HDC to make it easier to spot.
DECREASE ROW 3: Ch 1, BLO SC 5, FLO HDC, *BLO HDC, FLO HDC; rep from * until 4 sts left, HDC in next st, turn.
<33(33, 35, 37, 39)(41, 43, 45, 47)>
DECREASE ROW 4: As Decrease Row 2.
<32(32, 34, 36, 38)(40, 42, 44, 46)>
DECREASE ROW 5: As Decrease Row 3.
<29(29, 31, 33, 35)(37, 39, 41, 43)>
DECREASE ROW 6: As Decrease Row 2.
<28(28, 30, 32, 34)(36, 38, 40, 42)>
DECREASE ROW 7: As Decrease Row 3.
<25(25, 27, 29, 31)(33, 35, 37, 39)>
Total Rows: <53(61, 67, 75, 83)(83, 91, 99, 107)>
Sizes XS(S, M, L, XL) – Fasten off.
Sizes (2XL, 3XL, 4XL, 5XL) only
DECREASE ROW 8: As Decrease Row 2.
<(32, 34, 36, 38)>
Total Rows: <(84, 92, 100, 108)>
DECREASE ROW 9: As Decrease Row 3.
<(29, 31, 33, 35)>
Total Rows: <(85, 93, 101, 109)>
Fasten off.
Sleeves
(make 2)
FOUNDATION CHAIN: Ch 41(41, 43, 45, 45)(47, 47, 49, 49).
ROW 1 (RS): Working into the back bumps of the chs, HDC in 2nd ch from hook, HDC in each ch across, turn.
<40(40, 42, 44, 44, 46, 46, 48, 48)>
ROW 2: Ch 1, *BLO HDC, FLO HDC; rep from *until 6 sts left, BLO sl st 5, sl st in last st, turn.
<40(40, 42, 44, 44, 46, 46, 48, 48)>
ROW 3: Ch 1, BLO HDC 7, *FLO HDC, BLO HDC; rep from * across, HDC in last st, turn.
<40(40, 42, 44, 44, 46, 46, 48, 48)>
Repeat ROWS 2 – 3 until ROW 19(19, 21, 23, 25)(27, 29, 31, 33).

Fasten off.
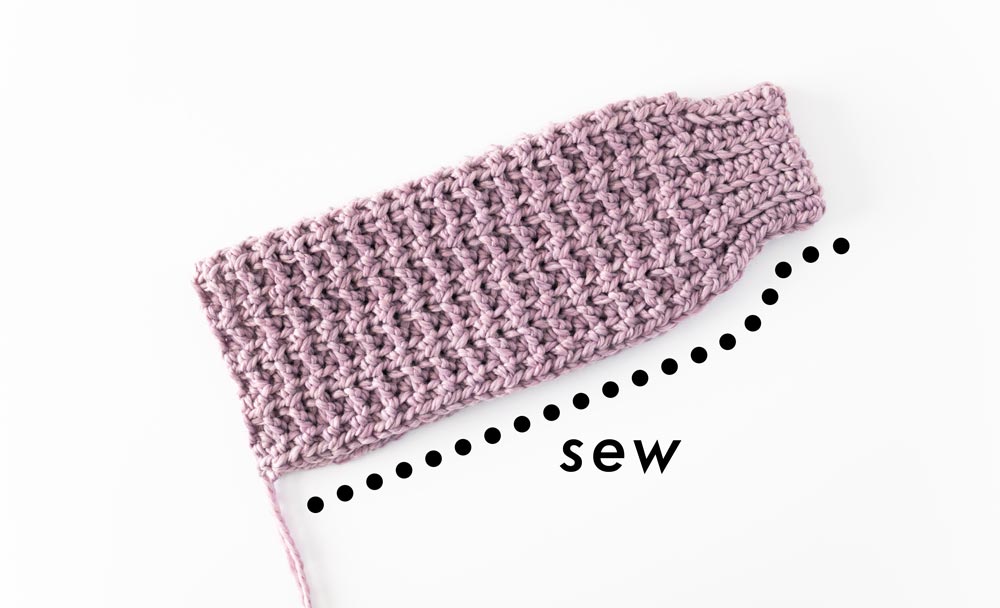
Fold sleeve in half lengthways. Whip stitch the edges of the sleeve together.
Assembly
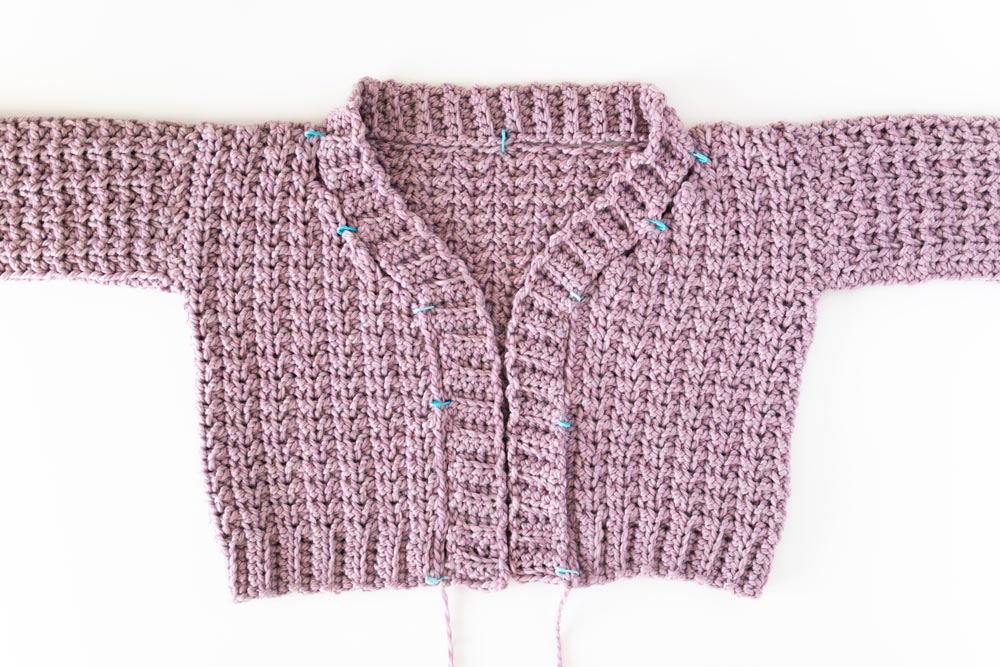
Lay front panels on top of the back panel.
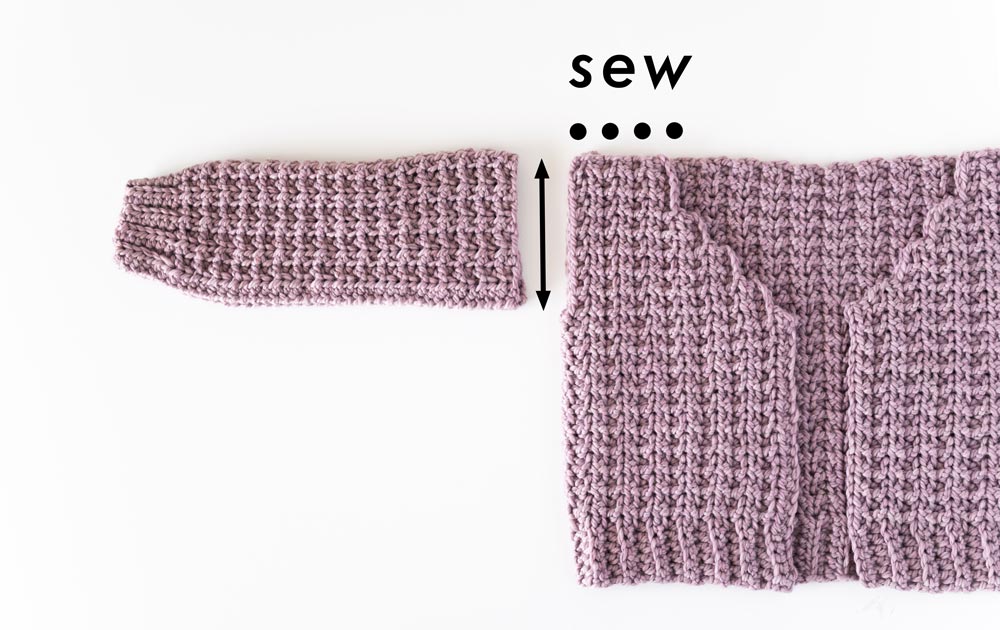
Whip stitch shoulder seams together.
Whip stitch top of sleeves to arm holes.
Neckline Ribbing
With the RS facing you, space out the 4 buttons evenly along the opening edge of the neckline.
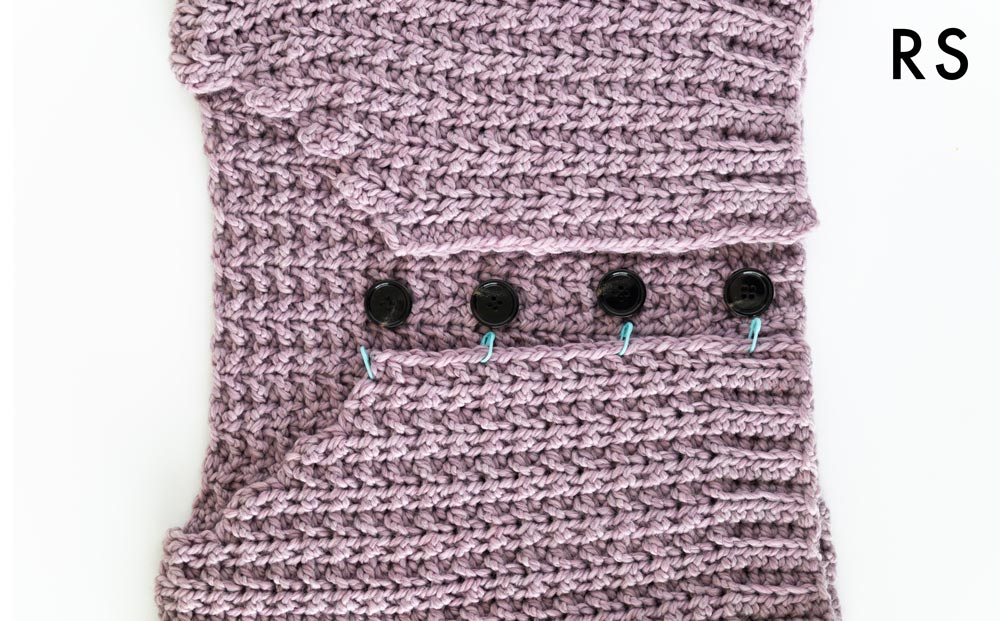
Line up a SM with the bottom of each button and place SM in corresponding st.
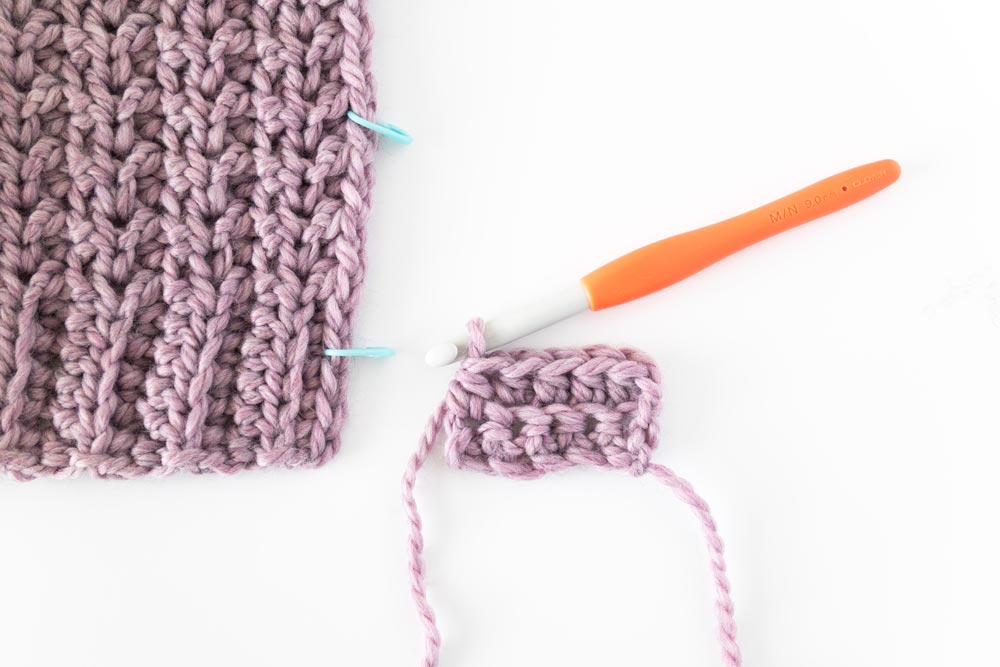
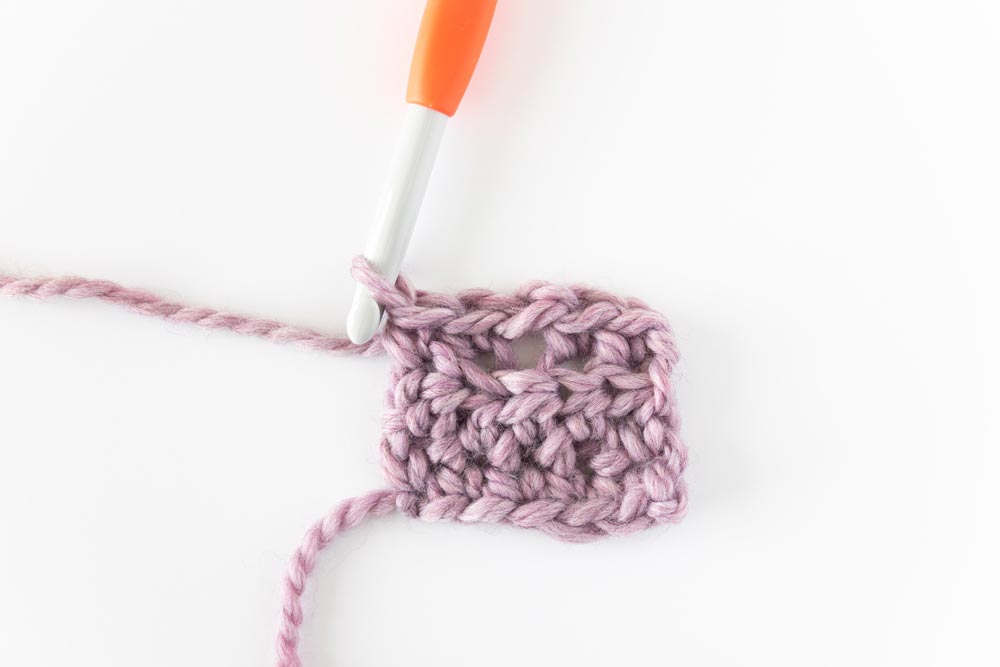
FOUNDATION CHAIN: Ch 6.
ROW 1: Working into the back bumps of the chs, SC in 2nd ch from hook, SC in each ch across, turn.
<5>
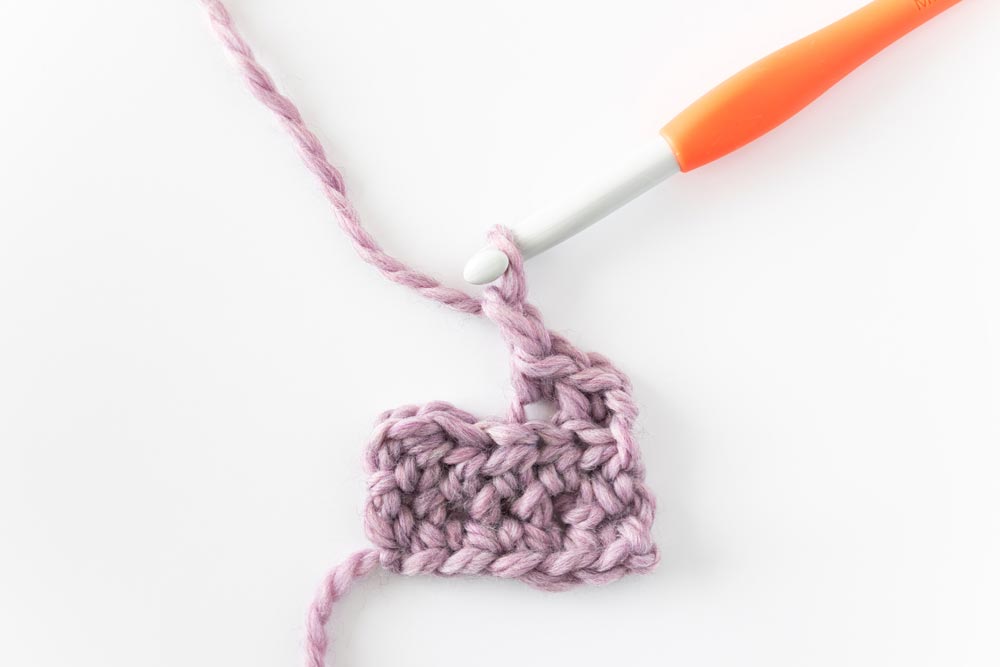
ROW 2: Ch 1, BLO HDC 4, HDC in last st, turn.
ROW 3: Ch 1, BLO SC 4, SC in last st, turn.
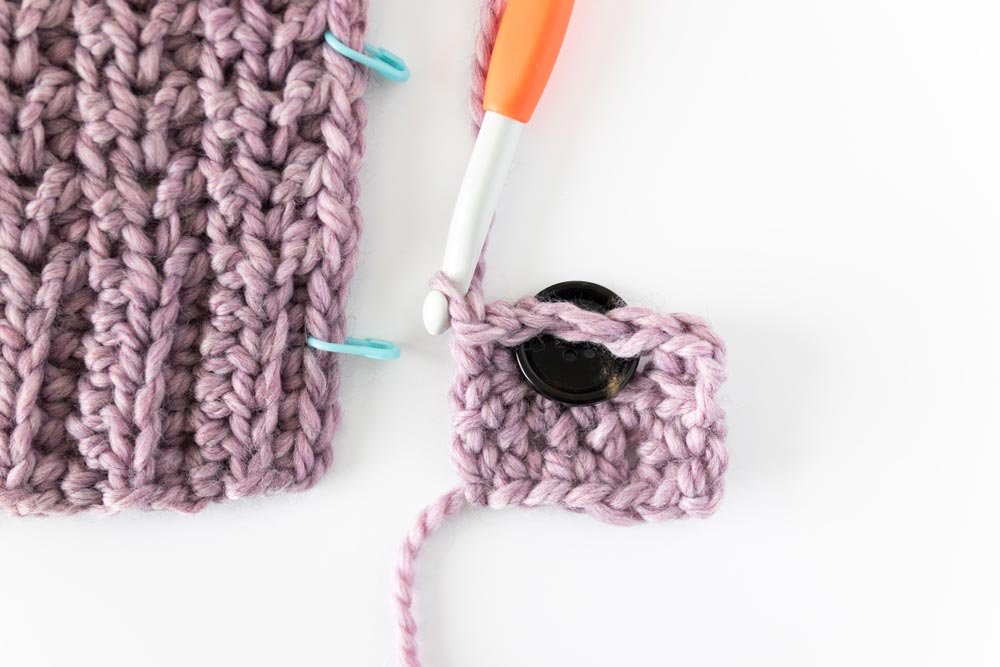
Repeat ROWS 2 – 3 until the height of the ribbing reaches the 1st SM.
*A SC row always follows an HDC row and vice versa.
e.g. If you’ve just crocheted a row of HDCs repeat the SC BUTTONHOLE ROW.
If you’ve just crocheted a row of SCs repeat the HDC BUTTONHOLE ROW.
SC BUTTONHOLE ROW: Ch 1, BLO SC 2, ch 1, sk 1 st, BLO SC, SC in last st, turn.
HDC BUTTONHOLE ROW: Ch 1, BLO HDC 2, ch 1, sk 1 st, BLO HDC, HDC in last st, turn.
*Make sure your buttons fit in the button holes. If the hole is too small, enlarge the gap by *ch 2, sk 2 sts*.
Continue to alternate between ROWS 2 – 3 until the height of ribbing reaches the next SM, then repeat a BUTTONHOLE row.
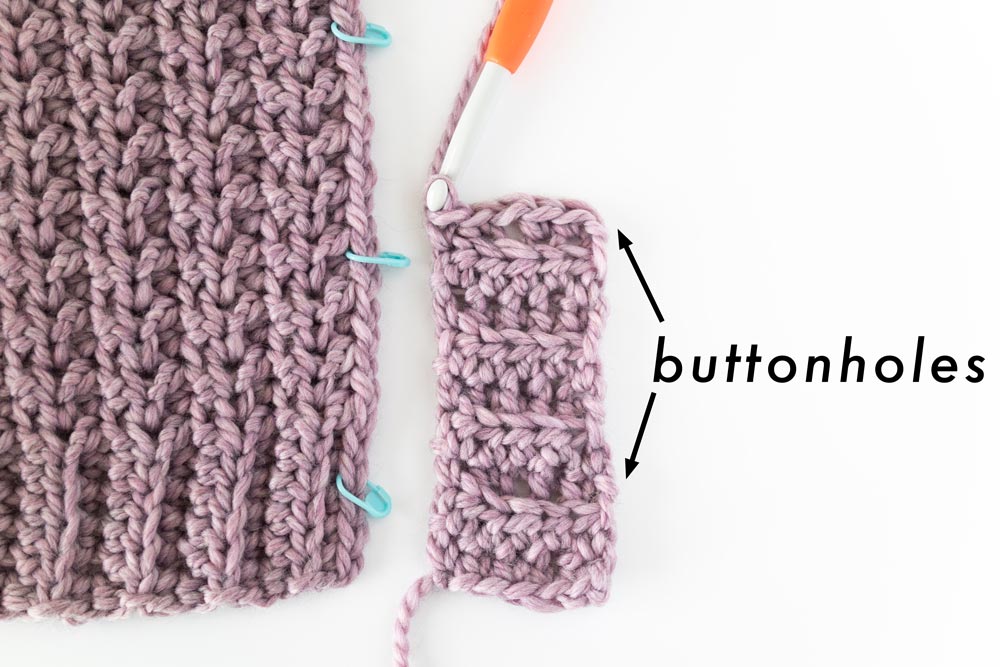
Once you’ve crocheted all 4 buttonholes, continue to alternate between ROWS 2 – 3 until the ribbing measures the length of the entire neckline.
Fasten off.
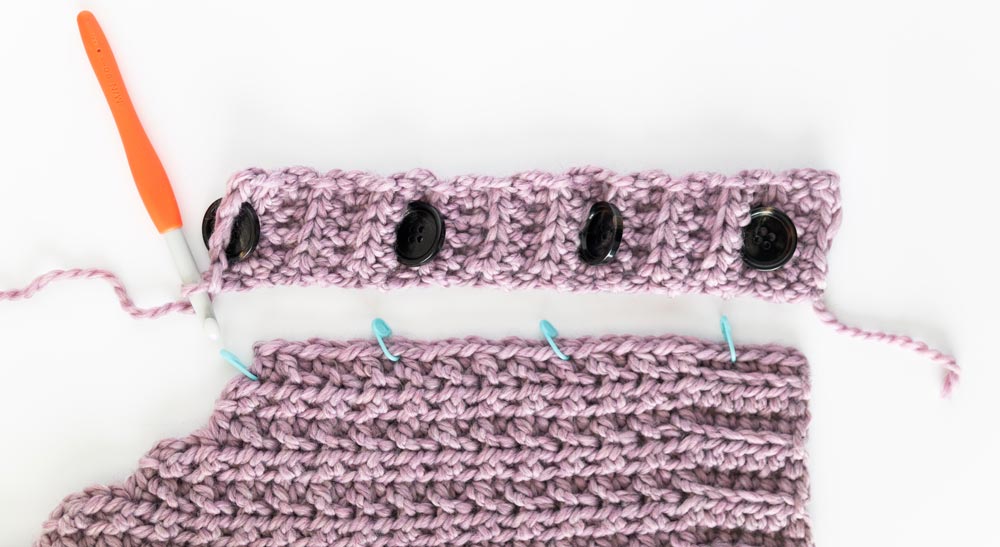
Pin ribbing along neckline and whip stitch ribbing to neckline.
Pin ribbing along neckline and whip stitch ribbing to neckline. Along the v-neck increase and decreases, take care to sew over the corners/bumps.
*After you’ve sewn over the corners they should resemble small ‘bumps’.
*The bumps will not be visible when wearing the cardigan nor should you be able to feel them.
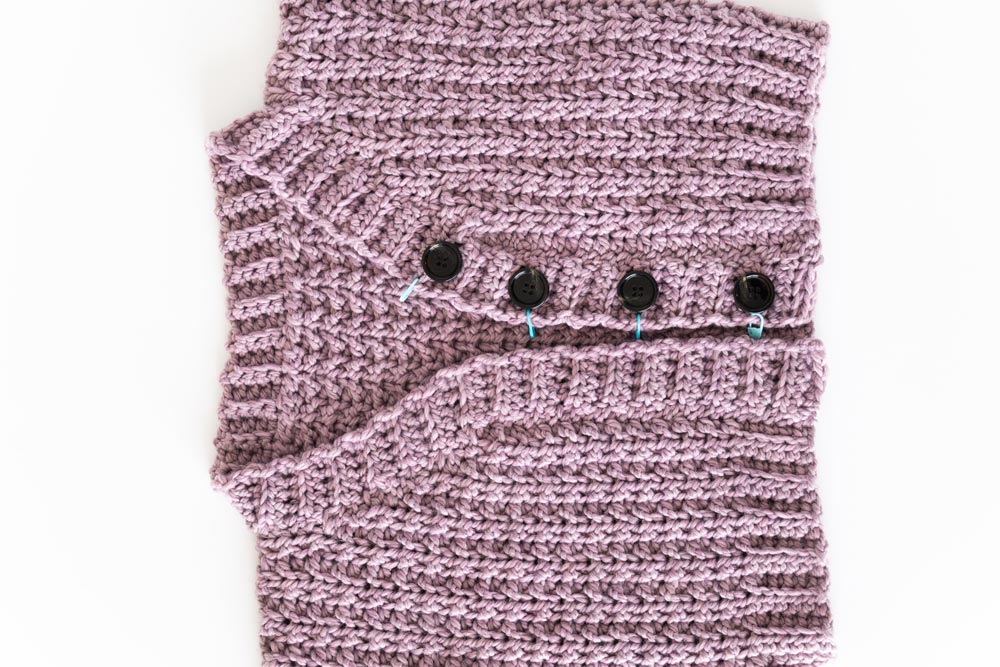
Sew buttons on the other side of the neckline opening, taking care to match buttons to button holes.
*You can use SMs to mark the button placement.
*If the neckline is ruffling – you’ve placed the button too close together and if the neckline is pulling/puckering – you’ve placed the buttons too far apart.
Finishing
Weave in all of your ends. Steam block your cardigan.
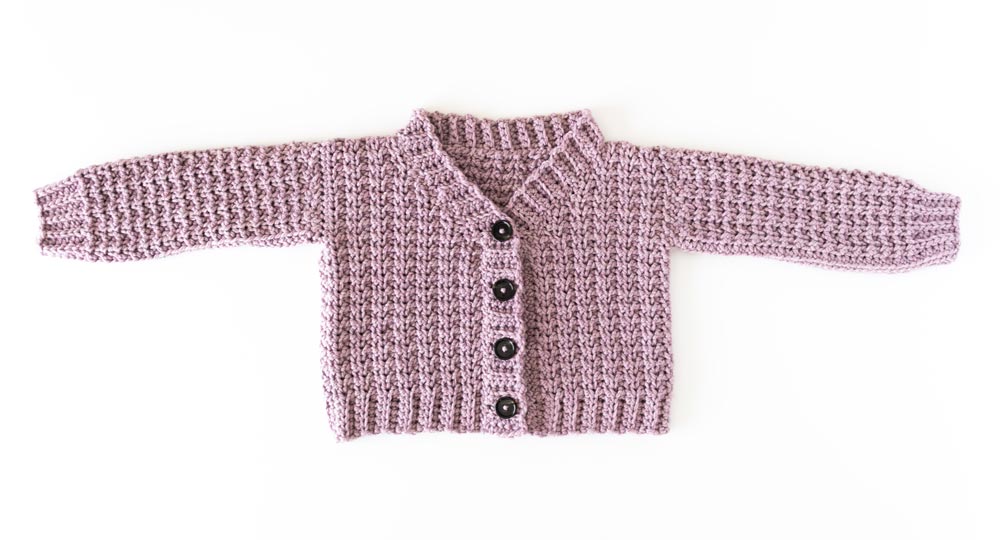
Voilà! You’ve finished your Chunky Button Cardigan ?
The post appeared first on .


