This post is sponsored by Sony Pictures, but the embroidery, photographs, words, and opinions are my own. Thanks for supporting the brands that support Brown Paper Bag!
Did you grow up obsessing over the story of by Louisa May Alcott? Many of us have a fond association with the novel and its characters; we see ourselves in the March sisters! It’s no wonder that when Greta Gerwig released her take on Little Women, the movie was an instant hit. I love how fresh her version feels yet is faithful to its 19th-century source material; it’s definitely a film you can watch time and again.
One thing I found inspirational about Little Women was its message of empowerment towards women despite taking place during the Civil War. Jo, in particular, has some great quotes that are worth remembering.
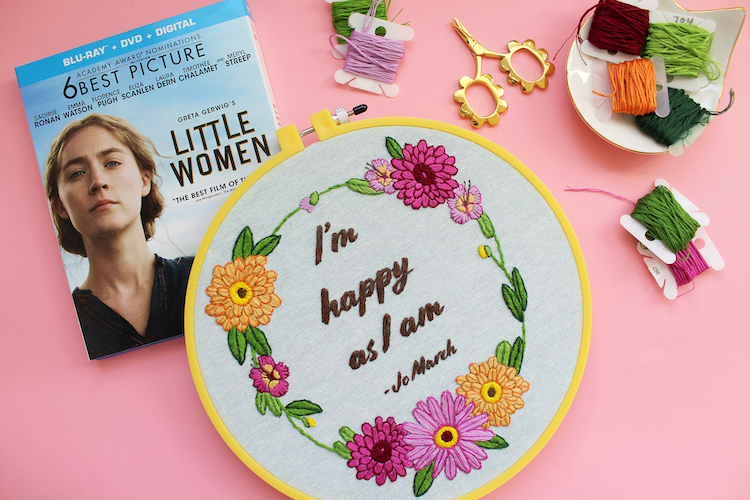
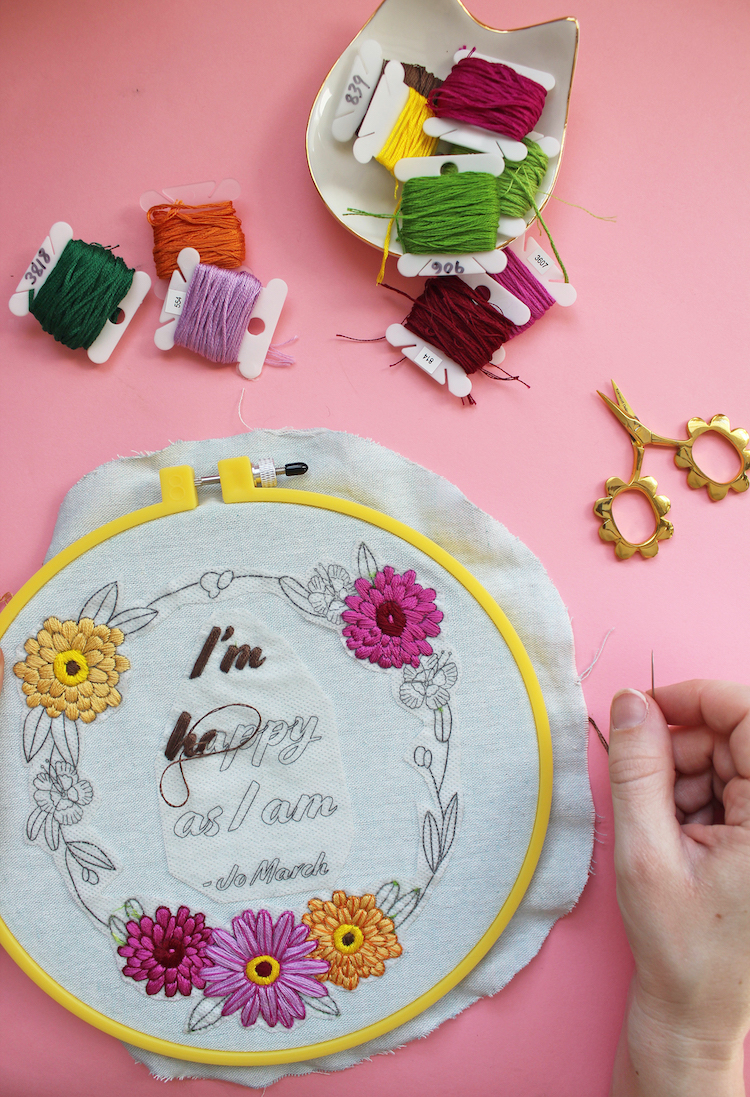
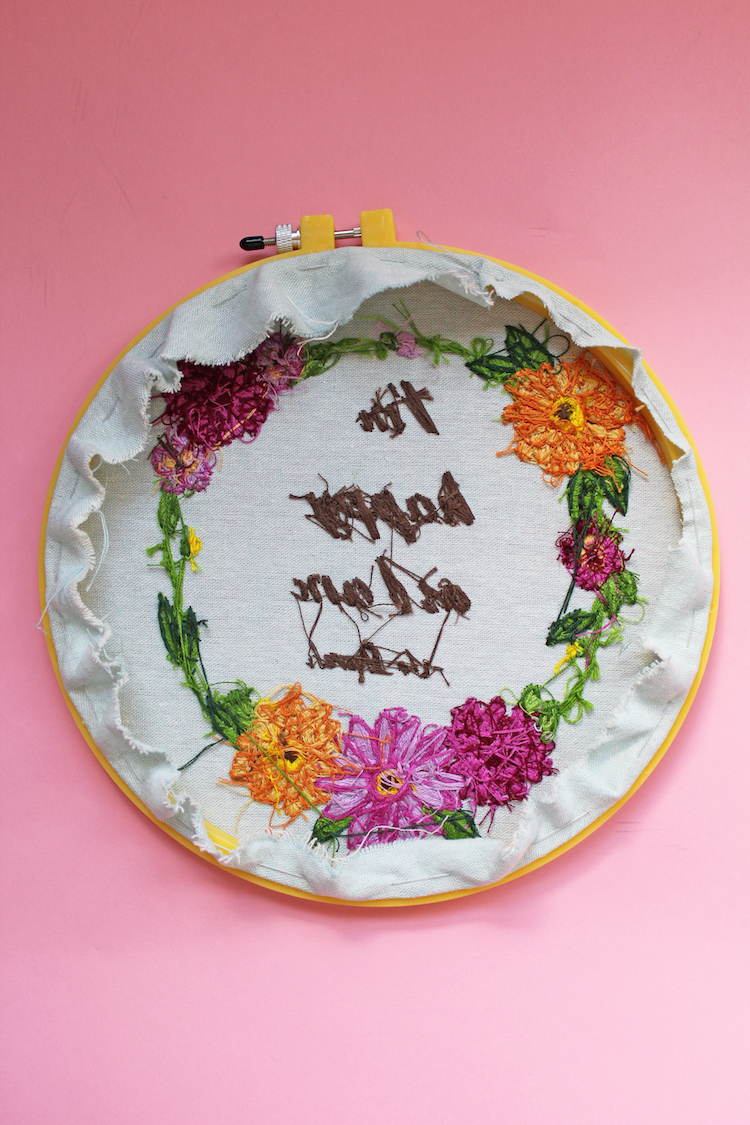
I’ve created a way you can celebrate Jo’s bold personality through one of my favorite crafts—embroidery. Just in time for the DVD and Blu-ray release of Little Women (available now!) is a free downloadable pattern featuring a line from Jo: “I’m happy as I am.” It’s a sentiment that we should all strive for—to be content in who we are. I designed it with multiple viewings of the film in mind! Scroll down for the complete guide to completing this pattern.
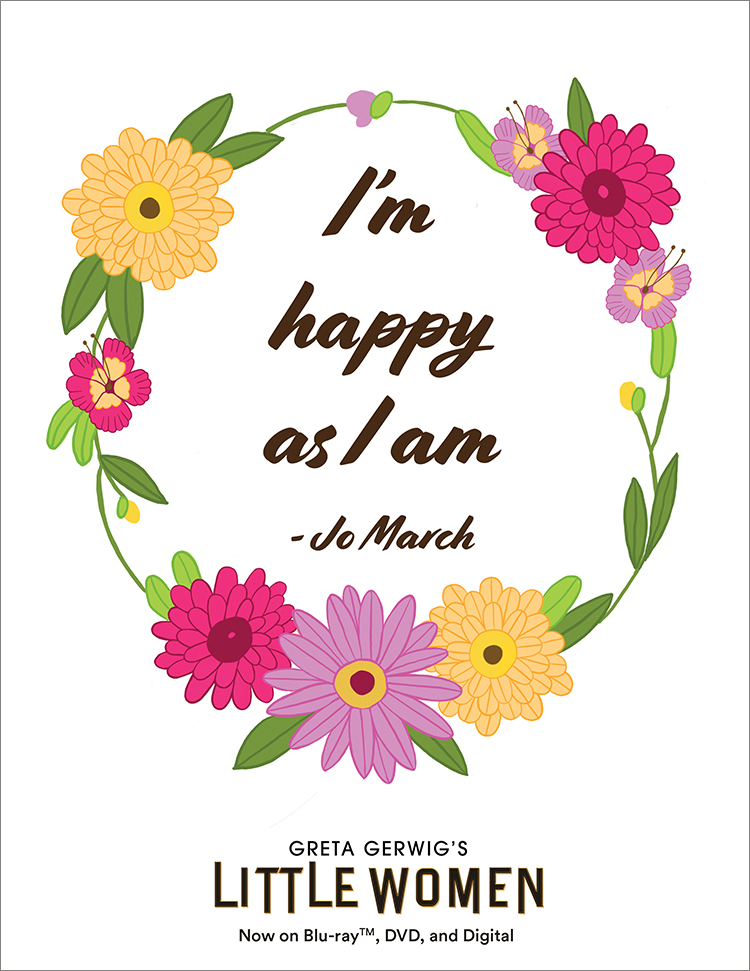
Is stitching not your thing? That’s cool, too—the pattern includes a downloadable 8.5” x 11” print that is ready for framing.

Embroider Your Own “I’m Happy as I Am” Pattern
The pattern I created is one that is simple enough for beginning stitchers with some complexity that more experienced embroiderers will enjoy.
Supplies You’ll Need:
- An eight-inch embroidery hoop or larger
- A needle (try something on the smaller side, like size five or six)
- DMC thread colors (listed in pattern)
- “Stick and Stitch” stabilizer transfer paper (optional)
Stitches You Need to Know
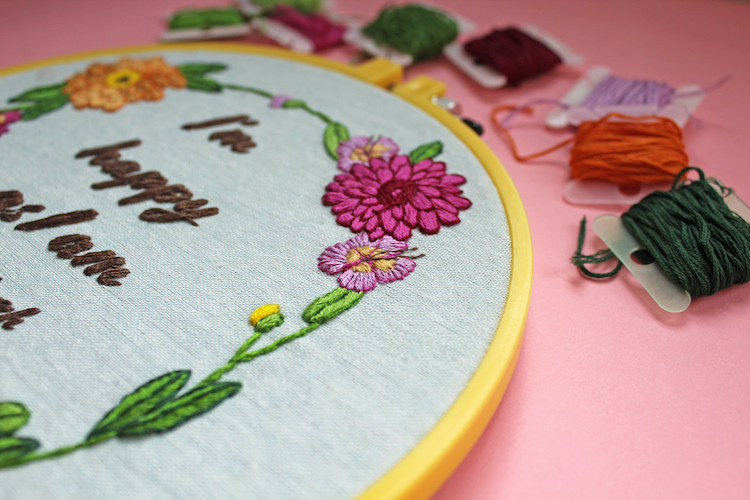
The floral pattern and quote use just two basic stitches: the satin stitch and the backstitch. All “fill” stitches (everything BUT outlines) will be done using the satin stitch. (This is most of the design.) All of the outlines (including the larger wreath outline) will be done using the backstitch.
Here’s how to do the satin stitch:
To make the satin stitch, you’ll bring the needle up through your fabric at the starting point. Then insert it at a point that’s opposite from your original entry and pull the needle through the fabric again.
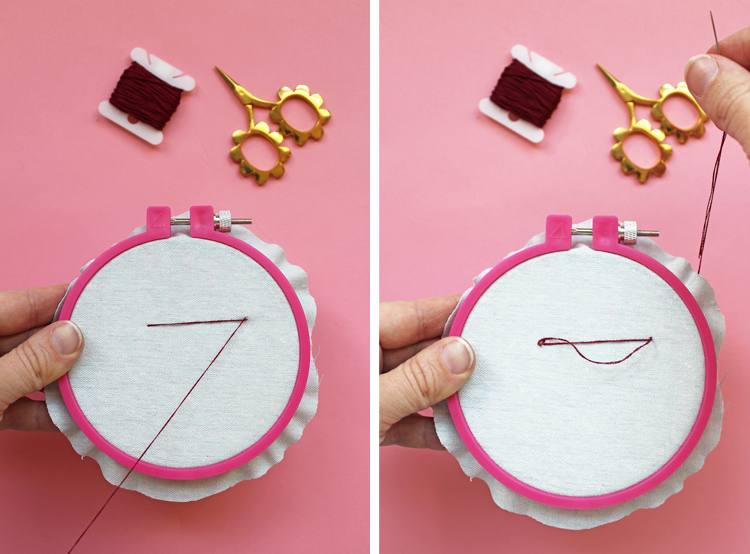
Once you’ve completed that step, return back to where you started and bring the needle up next to the hole that you just made.
Here’s how to make the backstitch:
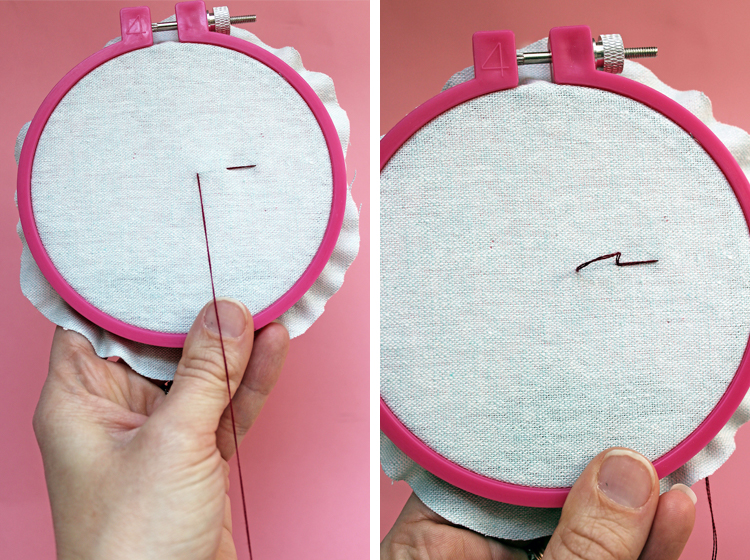
The backstitch is just that—a stitch that you work backward. (Aren’t stitch names helpful?) Start by bringing your needle up through your fabric and then go one stitch length forward, bringing it through your fabric on the backside. At this point, while on the backside, take your needle one stitch length forward and bring it up through the fabric again. You will have a stitch-length-sized space between your first stitch and the new one you just made.
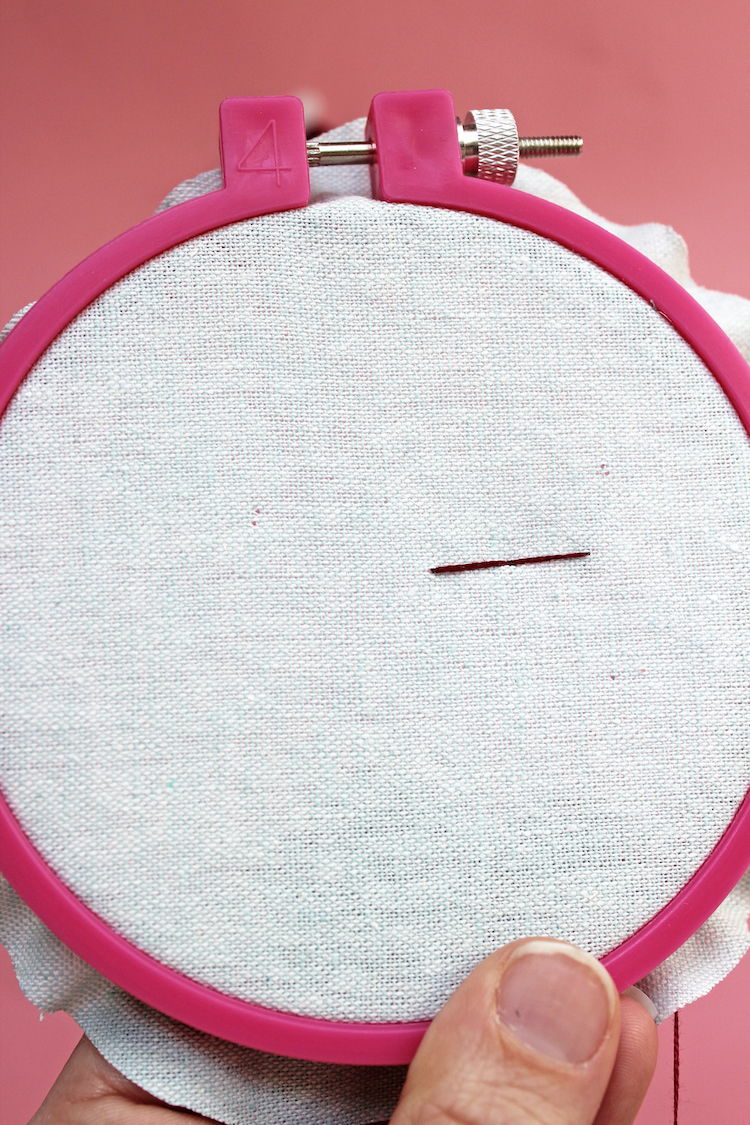
Your needle and thread should be on the right side of the fabric now. Take that stitch backward to meet the point where your first stitch ended. Then, repeat the process.
Tip — For smaller, curved outlines, it’s best to make your stitches very small so that they create a smooth edge. If your stitches are too wide, the outlined shape will look angular and even a bit jagged.
Thread Colors
The pattern lists the DMC colors that you will need to successfully complete the design, and the threads are available in your local craft store or online. The skeins are assigned numbers and are visible on the labels. Look for those numbers when selecting your thread.
Tip — Each DMC thread comprises six separate strands. Use no more than two strands in your needle when stitching this pattern. For finer outlining, use one strand of thread.
Fabric to Sew On
Opt for natural fibers when sewing your design, such as cotton or linen. I wouldn’t go for anything synthetic or stretchy or something that has a loose weave.
Don’t be afraid to use color! I found that the light blue went really well with the hues in the pattern.
How to Transfer the Pattern onto Fabric
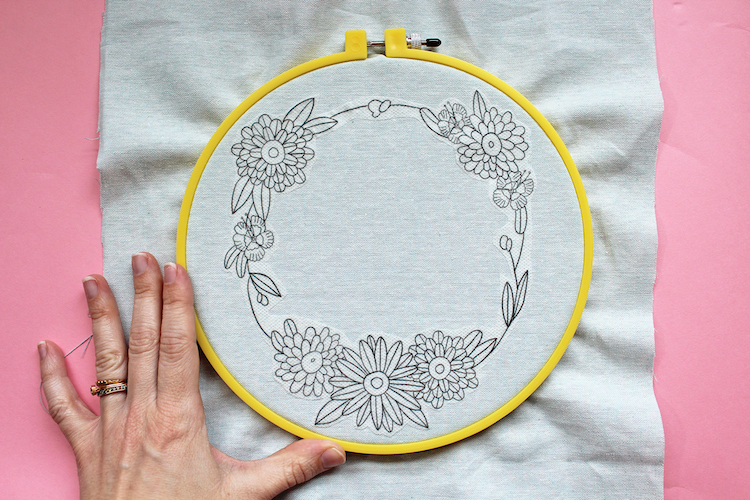
There are a couple of ways you can transfer this design onto fabric. Regardless of what you choose, you’ll need to print the black and white outline design. When printing, use the “actual size” on your printer setting.
Print and trace — With this approach, you’ll print the design at the desired size and then place it under your fabric to trace using a pen, pencil, or water-soluble pen. (I recommend a water-soluble marking pen.) Depending on your fabric, you might need a lightbox to ensure you can see the design for tracing. If you don’t have a lightbox, a sunny window works, too.
Print, stick, and stitch — This is my favorite method because you don’t have to trace anything (pictured above). Using a printer and stick and stitch stabilizer paper, print your design at the desired size. Once printed, cut around the design leaving a quarter to half-inch edge around it. (I would separate the flower crown from the text and place them separately.) Then, adhere it to your fabric. That’s it! You’ll then start stitching, and once you’re done, wash away the stabilizer using warm water.
Getting Started on the “I’m Happy as I Am” Pattern
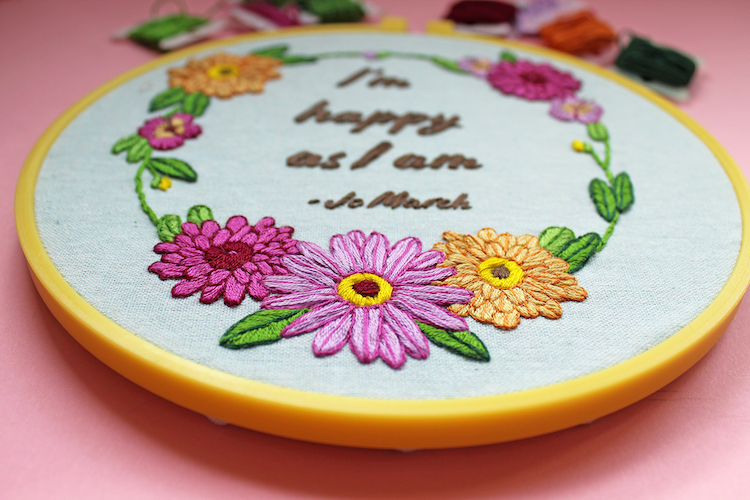
Once you’ve got your supplies and have transferred the pattern onto fabric, it’s time to start stitching. With this pattern, I tackled the large blooms first, then the text, and finally the small flowers and leaves. Remember, the outlining (with the backstitch) is best left for the end (or at least until you’re done filling in the design elements with the satin stitch).
How to Finish the Edge of Your Embroidery Hoop
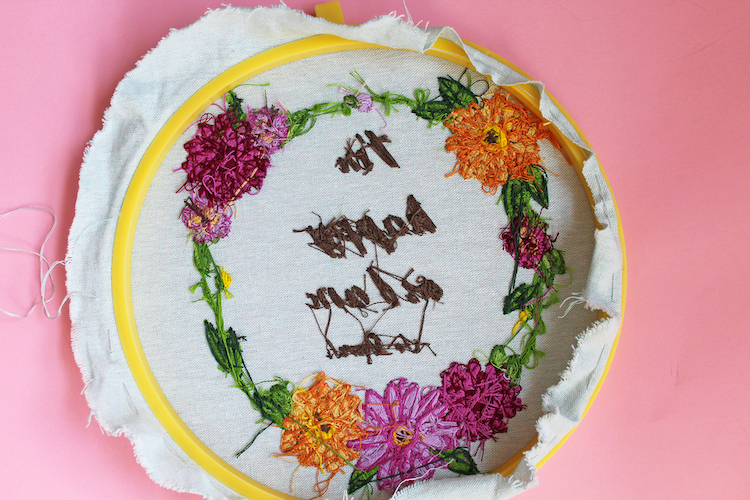
As you put the finishing touches on your embroidery, you’ll want to make sure that you secure the fabric around your hoop. While you’re working on the embroidery, it’s fine that you’ve got excess fabric hanging from the side. But to properly display your handiwork, you’re going to want to hide the fraying edges.
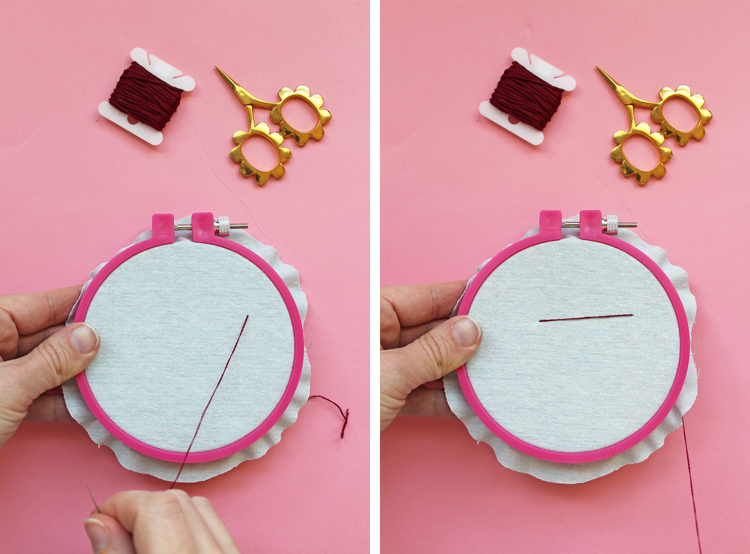
Don’t cut your fabric to the edge of your hoop—that will make your material fray and unravel. Instead, take the excess fabric and cinch it using a quick running stitch.
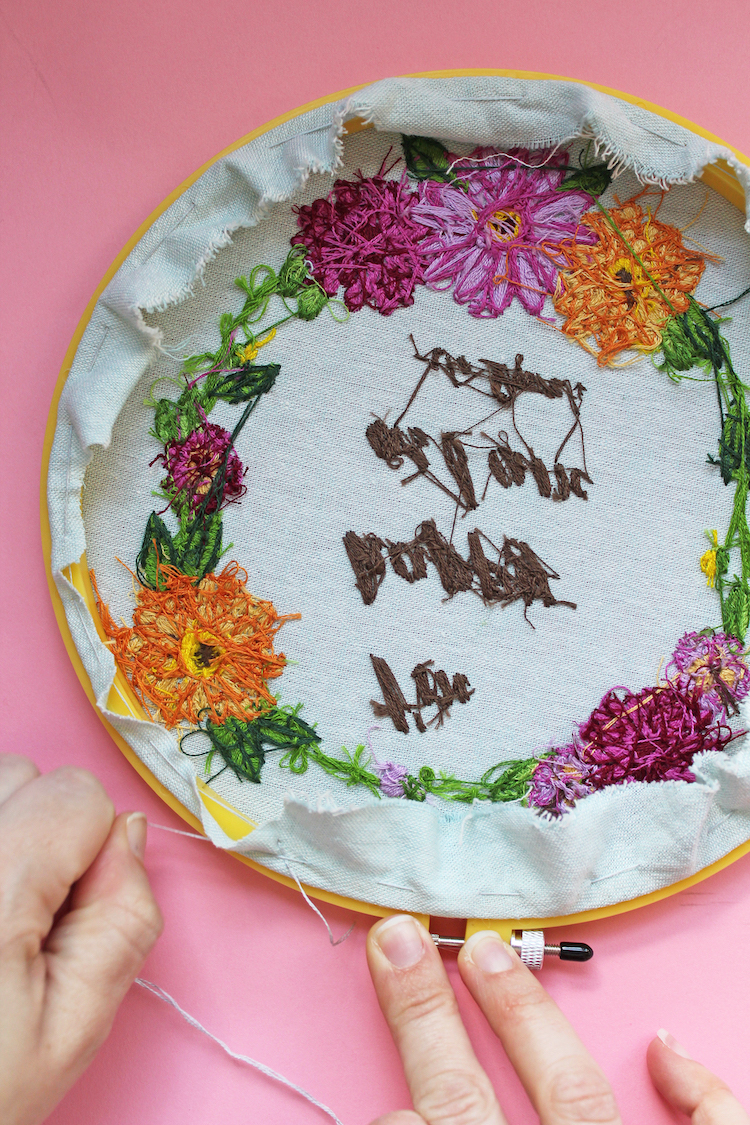
To begin, flip over your finished piece. Find some DMC thread that is similarly colored to your fabric. Cut a piece of string that is at least the circumference of your hoop. Then, make a loose running stitch about a quarter inch away from your hoop. Do not pull the string too tight (yet). The stitches can be wide, but don’t make them too wide—otherwise, the fabric won’t cinch properly.
Once you’ve sewn around the hoop—and before you tie the knot—pull hard on your thread. This will gather the fabric towards the center of your hoop. It’s a secure approach, and when you flip over your hoop, you won’t see the edge of the material. Your hoop will look clean and professional!
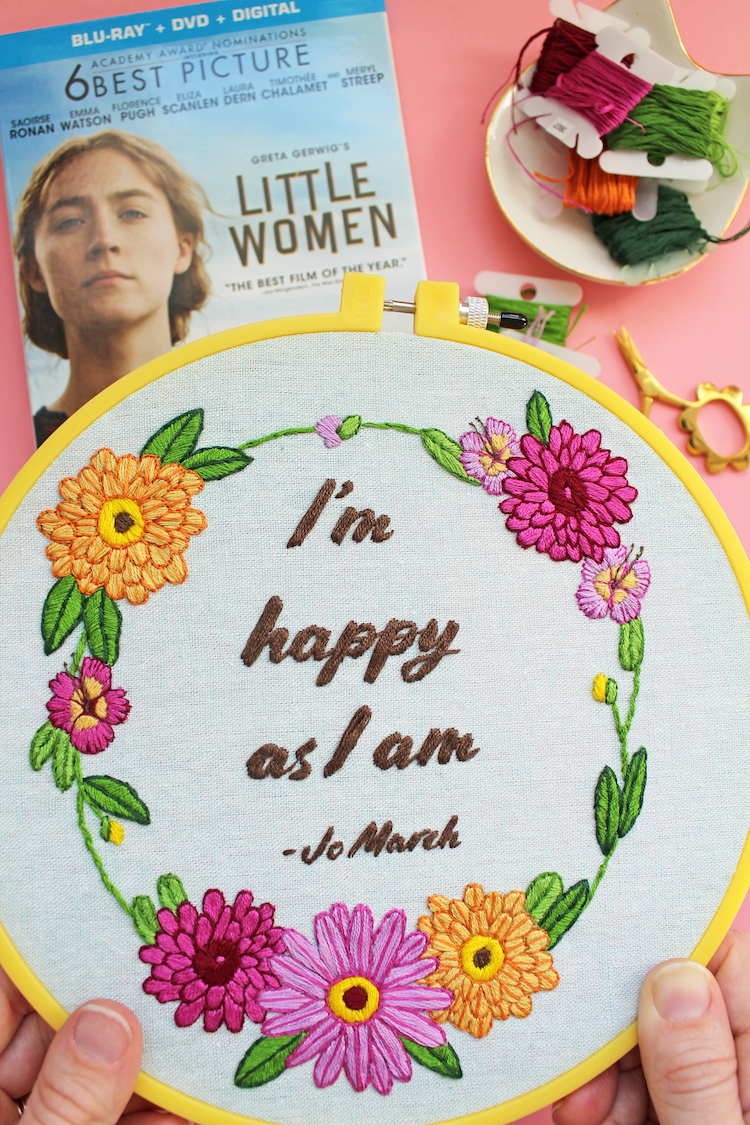
Display your hoop among your favorite books (like Little Women!), or install a small sawtooth hanger on the back of the frame and affix it to your wall. If you opt for hanging, be sure that you put it in a place that will lift your spirits when you see it.
The post appeared first on .


